umask Command in Linux
The Linux umask command is more than just a numeric parameter it's the foundation upon which file creation permissions are built. We will explore how umask subtracts bits from the default file (0666) and directory (0777) modes, the interplay of bitwise operations and octal arithmetic, and multiple scenarios where different umask settings shine.
Table of Contents
Here is a comprehensive guide to the options available with the umask command −
- Understanding the Linux umask Command
- How to Use umask Command in Linux?
- Detailed Examples and Calculations
- Using umask in Shell Scripts
- Advanced Examples and Best Practices
Understanding the Linux umask Command
In Linux, file and directory permissions are fundamental to system security. Each file and directory has a set of permission bits that determine who can read, write, or execute it. However, whenever a new file or directory is created, it isn't automatically set to a fixed permission; rather, it is determined by two factors −
- The default mode provided by the system call (or by a program)
- The process's umask (user file-creation mode mask)
Linux File Permission Basics
Before getting into umask specifics, let's refresh how Linux file permissions work. Most Linux filesystems use three sets of permissions −
- User (owner) − The file's owner
- Group − A set of users belonging to a common group
- Others (world) − Everyone else
Each of these classes has up to three permission bits −
- Read (4)
- Write (2)
- Execute (1)
For example, a file with permissions rw-r--r-- (often represented numerically as 644) means −
- User − read (4) + write (2) = 6
- Group − read (4) = 4
- Others − read (4) = 4
For directories, the permission bits have additional meanings (e.g., "execute" allows traversal into the directory).
How to Use umask Command in Linux?
To see your current umask value, simply type −
umask

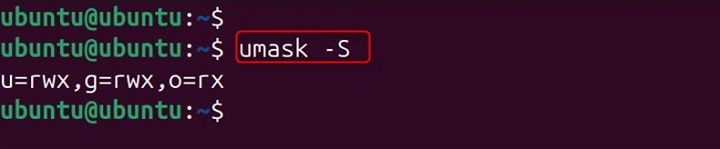
This outputs the current umask as an octal number (in our example, 0022). If you want to see your umask in a symbolic format, many shells support the -S option −
umask -S
Changing the umask Value
You can change the umask value for your current shell session simply by providing a new octal value. For example, to restrict file permissions further, you might set a umask of 077 −
umask 077

This is especially useful when handling sensitive files, as it ensures that only the owner has access.
Detailed Examples and Calculations
Let’s dive into several concrete examples to visualize what happens when different umask values are used.
The Default umask (0022)
umask 0022

This umask is common on many Linux distributions for non-shared user environments.
A Secure umask (077)
umask 077

This umask is ideal for personal scripts or sensitive data directories where you want to restrict access solely to the file owner.
Collaborative Work Environment (002)
umask 002

This setting is popular in workgroup scenarios where users sharing the same group need to collaborate—allowing group members write access while still protecting the file from world access.
Custom umask Values (027)
umask 027

This configuration strikes a balance between usability and security in environments where you trust group members but want to completely lock out others.
Using umask in Shell Scripts
One of the most common uses of umask is in shell scripts. Changing the umask at the beginning of your script ensures that any files or directories created during the script execution have the desired permissions.
For example, consider the following script −
#!/bin/
# Set a secure umask for temporary files
umask 077
#Create a sensitive file and a directory
touch secure_data.txt
mkdir secure_folder
#Show the permissions
ls -l secure_data.txt secure_folder
Remember that the umask setting in a script only affects the process and its children. Once the script exits, the parent shell’s umask remains unchanged.
User-Specific Configuration
- ~/.rc or ~/.profile − You can add the umask command to your personal shell configuration files. For instance, adding −
umask 027

Setting the umask permanently allows you to enforce a consistent security posture, tailored to your needs, without having to repeatedly type a command.
Advanced Examples and Best Practices
Let’s explore some more advanced scenarios and tips for using umask effectively.
Scenario 1: Collaborative Environment on a Shared Project
In a scenario where a project involves multiple users who are part of the same group, you might use a umask of 002 to allow group write access. This permits files created by one user to be modified by other group members.
umask 002

- Files − New files will have permissions 0666 & ~0002 = 0664 (rw-rw-r--).
- Directories − New directories will have permissions 0777 & ~0002 = 0775 (rwxrwxr-x).
This means that if Alice creates a file, Bob and other group members can also edit it, making collaboration smoother.
Scenario 2: Security First
In high-security environments, or when dealing with sensitive data, a restrictive umask of 077 is advisable −
umask 077

This setup ensures no other user on the system can read, write, or execute the files and directories, thereby reducing the risk of inadvertent data exposure.
Scenario 3: Temporary Changes within a Script
Sometimes you may want to temporarily change the umask in a script and then revert it back to the original value. You can do this by saving the original umask and then restoring it later −
#!/bin/
#Save the current umask
original_umask=$(umask)
echo "Original umask: $original_umask"

# Set a more restrictive umask for this part of the script
umask 077
touch secret.txt
mkdir secret_dir
echo "New file and directory created with a restrictive umask."

# Restore the original umask
umask "$original_umask"
echo "umask restored to original."
This script demonstrates best practices for temporarily imposing stricter permissions during operations that need extra security, then reverting to the standard permissions afterward.
Scenario 4: Multiple umask Values in a Session
In some work environments, you might be switching between tasks that require different default permissions. You can manually change your umask during the session as needed. For example, if you’re about to work on a shared project, you might run −
umask 002

And then, when you return to personal work requiring extra privacy −
umask 077

By knowing how to swiftly adjust the umask, you can tailor your environment to fit a wide range of trust and collaboration requirements.
Conclusion
The Linux umask command may appear simple at first glance, yet it is a powerful tool for controlling the default permissions on files and directories.
Whether you're a developer ensuring that sensitive configuration files are not exposed, an administrator configuring a multi-user system, or a team member in a collaborative environment, a deep understanding of umask allows you to control who can access your files from the moment they're created.
