montage Command in Linux
The montage command is part of the ImageMagick suite, a powerful set of tools for image manipulation. montage allows you to create a composite image by combining multiple images into a single image. This tutorial will cover the installation, usage, and examples of montage commands on a Linux system.
Table of Contents
Here is a comprehensive guide to the options available with the montage command −
Understanding montage Command
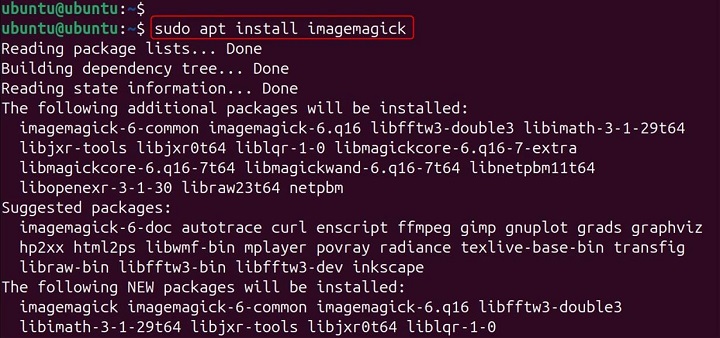
Before using montage, you need to have ImageMagick installed on your Linux system. If it's not already installed, you can install it using your package manager.
For Debian-based systems (e.g., Ubuntu)
sudo apt update
sudo apt install imagemagick
For Red Hat-based systems (e.g., CentOS)
sudo yum install imagemagick
Verify installation
which montage

Examples of montage Command in Linux
The montage command is used to create a composite image from multiple input images. The basic syntax for using montage is as follows −
montage [options] input_files output_file
Creating a Simple Montage
To create a simple montage of images, you can specify the input images and the output file.
montage image1.jpg image2.jpg image3.jpg output.jpg

This command creates a composite image output.jpg from the input images image1.jpg, image2.jpg, and image3.jpg.
Specifying the Tile Layout
You can specify the layout of the tiles in the montage using the -tile option. The format is NxM, where N is the number of columns and M is the number of rows.
montage -tile 2x2 image1.jpg image2.jpg image3.jpg image4.jpg output.jpg

This command creates a 2x2 grid of images in the composite image output.jpg.
Setting the Geometry of Tiles
You can set the geometry of the tiles using the -geometry option. This option allows you to specify the size and spacing of the tiles.
montage -tile 2x2 -geometry 100x100+10+10 image1.jpg image2.jpg image3.jpg image4.jpg output.jpg

This command creates a 2x2 grid of images with each tile sized 100x100 pixels and 10 pixels of spacing between the tiles.
Adding a Border to Tiles
You can add a border to each tile using the -border option. This option allows you to specify the width of the border.
montage -tile 2x2 -geometry 100x100+10+10 -border 5 image1.jpg image2.jpg image3.jpg image4.jpg output.jpg

This command creates a 2x2 grid of images with each tile sized 100x100 pixels, 10 pixels of spacing, and a 5-pixel border around each tile.
Setting the Background Color
You can set the background color of the montage using the -background option.
montage -tile 2x2 -geometry 100x100+10+10 -background blue image1.jpg image2.jpg image3.jpg image4.jpg output.jpg

This command creates a 2x2 grid of images with a blue background.
Adding a Label to Tiles
You can add a label to each tile using the -label option. This option allows you to specify a label for each input image.
montage -tile 2x2 -geometry 100x100+10+10 -label "Image 1" image1.jpg -label "Image 2" image2.jpg -label "Image 3" image3.jpg -label "Image 4" image4.jpg output.jpg

This command creates a 2x2 grid of images with labels for each tile.
Creating a Montage with Different Image Formats
You can create a montage with images of different formats. montage supports various image formats such as JPEG, PNG, GIF, and more.
montage image1.jpg image2.png image3.gif output.jpg

This command creates a composite image output.jpg from the input images image1.jpg, image2.png, and image3.gif.
Creating a Montage with a Custom Font
You can specify a custom font for the labels using the -font option.
montage -tile 2x2 -geometry 100x100+10+10 -label "Image 1" -font Arial image1.jpg -label "Image 2" -font Arial image2.jpg -label "Image 3" -font Arial image3.jpg -label "Image 4" -font Arial image4.jpg output.jpg

This command creates a 2x2 grid of images with labels in the Arial font.
Creating a Montage with a Custom Font Size
You can specify a custom font size for the labels using the -pointsize option.
montage -tile 2x2 -geometry 100x100+10+10 -label "Image 1" -pointsize 20 image1.jpg -label "Image 2" -pointsize 20 image2.jpg -label "Image 3" -pointsize 20 image3.jpg -label "Image 4" -pointsize 20 image4.jpg output.jpg

This command creates a 2x2 grid of images with labels in a font size of 20 points.
Creating a Montage with a Custom Tile Border Color
You can specify a custom color for the tile borders using the -bordercolor option.
montage -tile 2x2 -geometry 100x100+10+10 -border 5 -bordercolor red image1.jpg image2.jpg image3.jpg image4.jpg output.jpg

This command creates a 2x2 grid of images with a 5-pixel red border around each tile.
Creating a Montage with a Custom Frame
You can add a custom frame to the montage using the -frame option.
montage -tile 2x2 -geometry 100x100+10+10 -frame 10 image1.jpg image2.jpg image3.jpg image4.jpg output.jpg

This command creates a 2x2 grid of images with a 10-pixel frame around the montage.
Creating a Montage with a Custom Shadow
You can add a shadow to the montage using the -shadow option.
montage -tile 2x2 -geometry 100x100+10+10 -shadow image1.jpg image2.jpg image3.jpg image4.jpg output.jpg

This command creates a 2x2 grid of images with a shadow effect.
Creating a Montage with a Custom Tile Border Style
You can specify a custom style for the tile borders using the -borderstyle option.
montage -tile 2x2 -geometry 100x100+10+10 -border 5 -borderstyle dashed image1.jpg image2.jpg image3.jpg image4.jpg output.jpg

This command creates a 2x2 grid of images with a 5-pixel dashed border around each tile.
Creating a Montage with a Custom Tile Border Width
You can specify a custom width for the tile borders using the -borderwidth option.
montage -tile 2x2 -geometry 100x100+10+10 -border 5 -borderwidth 2 image1.jpg image2.jpg image3.jpg image4.jpg output.jpg

This command creates a 2x2 grid of images with a 5-pixel border and a border width of 2 pixels around each tile.
Conclusion
The montage command is highly versatile and can be used to create photo collages, contact sheets, and other composite images with ease. You can specify various options to customize the layout, size, and appearance of the composite image. For example, you can use the -tile option to define the number of rows and columns, the -geometry option to set the size and spacing of the tiles, and the -background option to set the background color. Additionally, you can add labels to each image using the -label option and apply borders with the -border option.
