tiff2ps Command in Linux
The tiff2ps is a command-line tool that converts TIFF (Tagged Image File Format) images into PostScript (PS) or Encapsulated PostScript (EPS) files. It makes the TIFF files ready for printers, typesetters, or PostScript editing tools.
Table of Contents
Here is a comprehensive guide to the options available with the tiff2ps command −
- Installation of tiff2ps Command
- Syntax of the tiff2ps Command
- Options for the tiff2ps Command
- Examples of tiff2ps Command in Linux
Installation of tiff2ps Command
The tiff2ps command is part of the libtiff-tools package in Linux. Make sure the package is installed before using the command. To install it on Ubuntu, Kali Linux, Raspberry Pi OS, Debian, and other Debian-based distributions, use the following command −
sudo apt install libtiff-tools
To install it on Arch Linux, use the command below −
sudo pacman -S libtiff
To install libtiff-tools on Fedora, use the following command −
sudo dnf install libtiff-tools
To verify the installation of the tiff2ps command, check its binary using the which command −
which tiff2ps

Syntax of the tiff2ps Command
The syntax of the tiff2ps command in Linux is as follows −
tiff2ps [options] input.tiff...
In the above syntax, the [options] field is used to control how the conversion happens, like resizing, page fitting, and making EPS instead of PS. The input.tiff... is used to specify one or more TIFF files that will be converted.
Options for the tiff2ps Command
The options for the Linux tiff2ps command are listed below −
| Option | Description |
|---|---|
| -1 | Generate PostScript Level 1 (default). |
| -2 | Generate PostScript Level 2. |
| -3 | Generate PostScript Level 3; uses /flateDecode filter for ZIP-compressed TIFFs. |
| -a | Output all IFDs (pages) from the input file. |
| -b # | Set bottom margin (in inches). |
| -c | Center image if -w and -h are specified. |
| -d # | Set the initial TIFF directory by directory number (starting at 0). |
| -e | Generate Encapsulated PostScript (implies -z). |
| -h # | Set the vertical size of the printed area (in inches). |
| -H # | Set maximum image height (in inches); splits larger images across pages. |
| -W # | Set maximum image width (in inches); splits larger images across pages. |
| -I # | Enable (non-zero) or disable (zero) pixel interpolation (default: enabled). |
| -L # | Set overlap size for split images (in inches); used with -H or -W. |
| -l # | Set left margin (in inches). |
| -m | Use the imagemask operator for 1-bit images if possible. |
| -M size | Set memory allocation size. |
| -o # | Set initial TIFF directory by file offset (for thumbnails, etc.). |
| -O file | Write PostScript to a file instead of standard output |
| -p | Force generation of standard (non-Encapsulated) PostScript. |
| -r 90|180|270|auto | Rotate image counterclockwise by degrees or automatically fit paper size. |
| -s | Output a single IFD (page) from the input file. |
| -t name | Set the postscript document title. Otherwise, the filename is used. |
| -w | Set the horizontal size of the printed area (in inches). |
| -x | Override resolution units to centimeters. |
| -y | Override resolution units to inches. |
| -z | Suppress scaling adjustment for dead zones when generating PostScript Level 2. |
Examples of tiff2ps Command in Linux
This section explores how to use the tiff2ps command in Linux with examples −
Converting a TIFF to a PostScript File
To convert a TIFF file to a PostScript (PS) file, use the tiff2ps command followed by the TIFF file −
tiff2ps sample.tiff
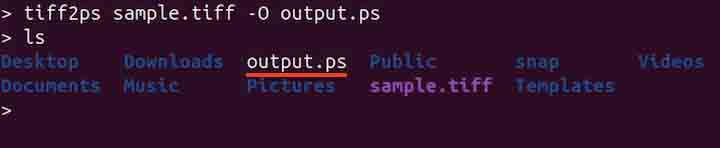
By default, the tiff2ps command produces output to the standard output. To save it to a file, use the -O option −
tiff2ps sample.tiff -O output.ps
Converting a TIFF to an Encapsulated PostScript File
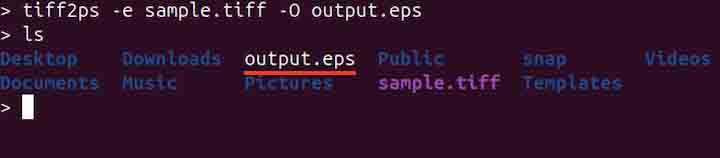
To convert a TIFF file to an encapsulated PostScript (EPS) file, use the -e option −
tiff2ps -e sample.tiff -O output.eps
Converting a Multipage TIFF File to PostScript (PS)
To convert all pages of a multi-page TIFF file to a PostScript (PS) file, use the -a option −
tiff2ps -a sample.tiff -O output.ps
The resulting PostScript file will contain each page from the TIFF, one after the other, within the same document. This means that multiple pages from the TIFF will be concatenated into a single PostScript file, with each page preserved in its original format.
Selecting a Specific Page from a Multipage TIFF for Conversion
To select a specific page from a multi-page TIFF file, use the -d option followed by the page number −
tiff2ps -d 2 sample.tiff -O output.ps
Fitting Image to a Page Size
To fit an image to a page size, use the -w and -h options −
tiff2ps -p -w 8.5 -h 11 sample.tiff -O output.ps

In the above command, width and height are specified in inches. The -p option forces the output to be normal PostScript (not EPS), treating the image as a full, printable page with margins and paper size, ready for direct printing without EPS restrictions.
Placing an Image in the Center of the Page
To place the TIFF image in the center of the page while converting to a PostScript file, use the -c option −
tiff2ps -p -c -w 8.5 -h 11 sample.tiff -O output.ps
The above command centers the image on a letter-sized page.
Rotating Image Automatically to Best Fit the Page
To auto-rotate the image to best fit the page while conversion, use the -r followed by the auto keyword −
tiff2ps -p -r auto -w 8.5 -h 11 sample.tiff -O output.ps
To rotate the image by 90 degrees, use the following command −
tiff2ps -p -r 90 -w 8.5 -h 11 sample.tiff -O output.ps
Setting the PostScript Title
To set the title of a PostScript file, use the -t option −
tiff2ps -t "Sample Document" sample.tiff -O output.ps
The above command sets the PostScript document title to "Sample Document". Otherwise, the filename (sample.tiff) would be used as the title.
Conclusion
The tiff2ps command is a powerful tool for converting TIFF images into PostScript or Encapsulated PostScript files, making them suitable for printing or editing. With a variety of options, it offers flexibility in terms of output format, image size, orientation, and even multi-page TIFF handling.
