policytool Command in Linux
The policytool command in Linux is a GUI-based tool for reading and writing plain text policies based on user input. It primarily manages the Java security policy files. It comes with the Java Development Kit (JDK) and allows editing policy files that define permissions for Java applications.
Table of Contents
Here is a comprehensive guide to the options available with the policytool command −
- Installation policytool in Linux
- Syntax of policytool Command
- Options of policytool Command
- Examples of policytool Command in Linux
Note: The policytool command was removed in Java 11 due to low usage and a shift toward modern security approaches but can still be used with older versions like Java 8.
Installation policytool in Linux
The policytool command is based on Java. To use it, Java must be installed on Linux. To install it on Ubuntu, Kali Linux, Raspberry Pi OS, Debian, and other Debian-based distributions, use the following command −
sudo apt install openjdk-8-jdk
To install it on RHEL, use −
sudo dnf install java-1.8.0-openjdk-devel
To install OpenJDK on Fedora, use the following command −
sudo dnf install java-1.8.0-openjdk-devel
To verify the Java version, use the following command −
java -version

To confirm whether policytool is installed or not, check its binary using the which command:
which policytool

Syntax of policytool Command
The syntax of the policytool command is as follows −
policytool [-file filename]
In the above syntax, the [-file filename] fields are optional and open a specific Java security policy file in the Policy Tool GUI.
Options of policytool Command
The Linux policytool command supports only one option −
| Option | Description |
|---|---|
| -file filename | Opens a specific Java security policy file in the Policy Tool GUI. |
Examples of policytool Command in Linux
This section explains how to use the policytool command in Linux with examples:
Launching policytool GUI
To open the policytool GUI, execute the following command −
policytool
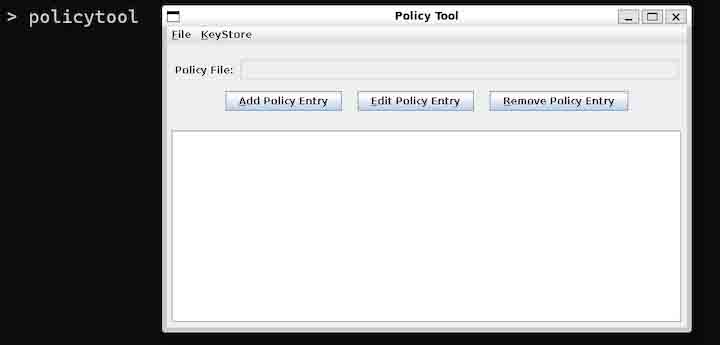
Using the GUI, an existing policy file can be opened or a new file can be created.
Opening an Existing Policy File
To open an existing policy file, use the -file option −
policytool -file /etc/java-8-openjdk/security/java.policy
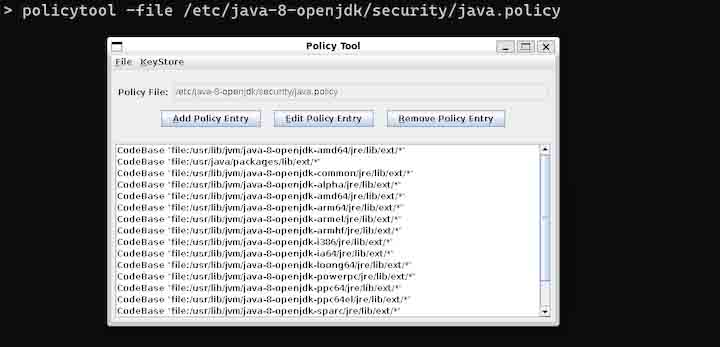
The location of the policy file may vary, use the following command to find the java.policy file:
sudo find / -name java.policy 2>/dev/null
Similarly, to open the user-specific policy file, use the following command −
policytool -file /path/to/policy/file
Adding a Policy Entry
To add a policy entry, open the GUI −
policytool
Click Add Policy Entry −
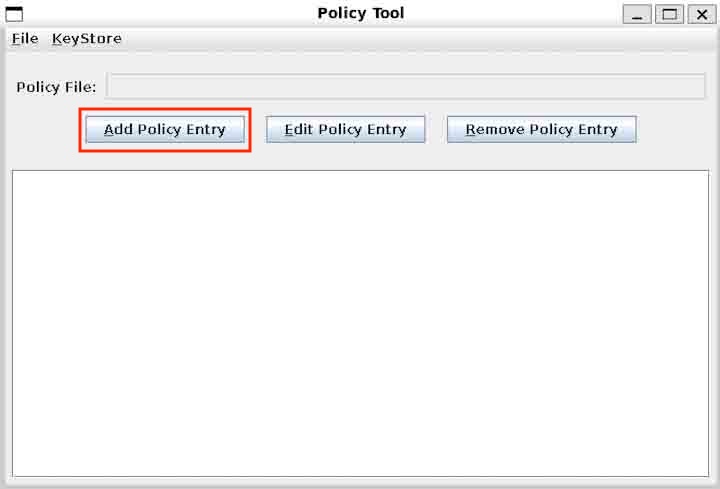
A new window will appear as shown in the following image −
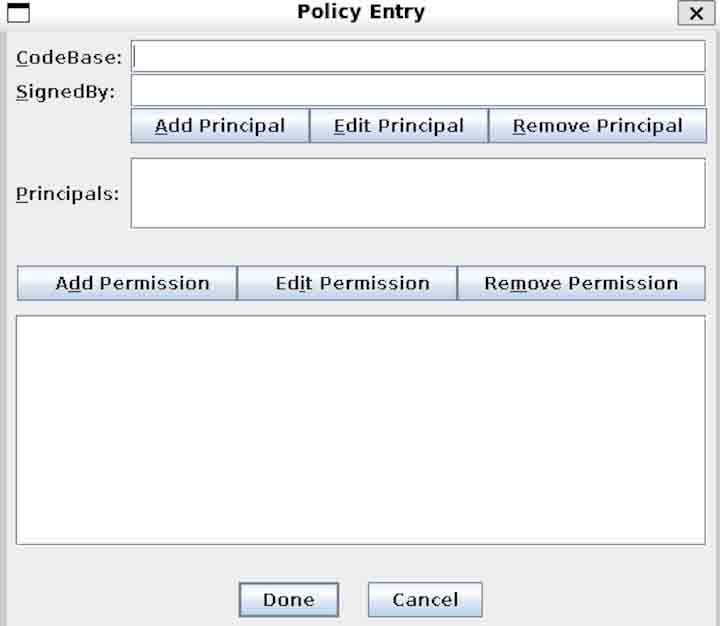
In the CodeBase field, specify the URL or path of the code to which the policy applies. If applicable, enter the SignedBy alias corresponding to the signer's certificate.
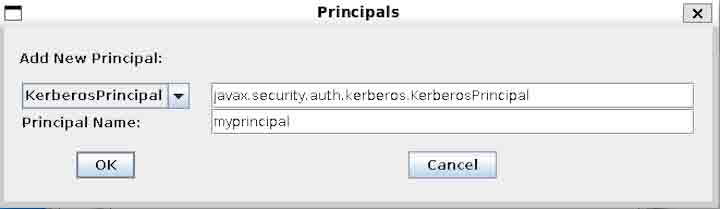
Select the Principal Class from the drop-down menu, select the Principal Name, and then click OK.
Within the Policy Entry window, click the Add Permission button, and the following window will appear −
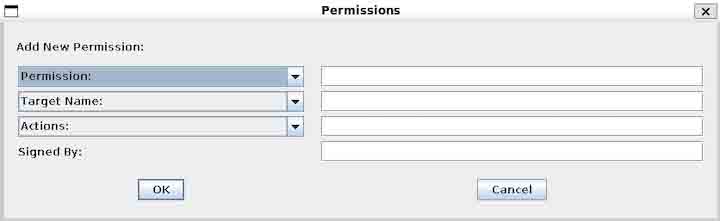
Select the desired Permission type, Target Name, and the Actions permitted (read/write) from the drop-down menu. Click OK to add the permission.
After configuring the necessary entries and permissions, save the policy file from the File > Save As option. Lastly, choose a location and filename, then click Save.
Conclusion
The policytool command in Linux provides a graphical interface for managing Java security policy files, allowing policies to be edited, created, and saved. It is part of the Java Development Kit (JDK) and requires Java to be installed on the system. The command supports opening specific policy files through the -file option. Using the GUI, policy entries can be added, edited, and removed.
