mysqltest Command in Linux
When working with databases, it's crucial to understand how well your MySQL server can handle different tasks. The mysqltest command is a useful tool for this purpose. It allows you to run tests and see how your database performs. By simulating different situations, mysqltest helps you understand how your database deals with various loads and queries. This information is valuable for optimizing your database and ensuring it runs smoothly under pressure.
Table of Contents
Here is a comprehensive guide to the options available with the mysqltest command −
- Installing mysqltest Command
- Syntax of mysqltest Command
- mysqltest Command Options
- Examples of mysqltest Command in Linux
Installing mysqltest Command
The mysqltest command is not typically preinstalled on most Linux distributions. To leverage this tool for testing MySQL databases, you need to install it manually. Here are the steps for different Linux systems −
For Debian-based systems (e.g., Ubuntu)
sudo apt install mysql-client
If the above command fails, try −
sudo apt install mariadb-client
For openSUSE
sudo zypper install mysql-client
Alternatively, use −
sudo zypper install mariadb-client
Syntax of mysqltest Command
The general syntax for the mysqltest command is −
mysqltest [options]
Where −
- [options] − Various parameters to tailor the testing process.
mysqltest Command Options
Below are some commonly used options with the mysqltest command −
| Option | Description |
|---|---|
| -?, --help | Show help information and exit. |
| -b, --basedir=name | Set the base directory for tests. |
| --character-sets-dir=name | Specify the directory for character set files. |
| -C, --compress | Enable the compressed server/client protocol. |
| --continue-on-error | Continue running tests even if an error occurs. Useful for testing storage engines and syntax errors. |
| --cursor-protocol | Use cursors for prepared statements. |
| -D, --database=name | Select the database to use. |
| -#, --debug[=#] | This is a non-debug version. Catch this and exit. |
| --debug-check | Check memory and open file usage at exit. |
| --debug-info | Print debug information at exit. |
| -h, --host=name | Connect to the specified host. |
| --prologue=name | Include SQL commands before each test case. |
| --logdir=name | Set the directory for log files. |
| --mark-progress | Set the maximum number of connection attempts to the server. |
| --max-connections=# | Specify the maximum number of open connections to the server. |
| -p, --password[=name] | Provide the password for connecting to the server. |
| --protocol=name | Define the connection protocol (tcp, socket, pipe). |
| -P, --port=# | Specify the port number for the connection or 0 for default (3306). |
| --ps-protocol | Use the prepared-statement protocol for communication. |
| --non-blocking-api | Utilize the non-blocking client API for communication. |
| -s, --quiet | Suppress all normal output. |
| -r, --record | Save the output of the test file to a result file. |
| -R, --result-file=name | Read/store results from/in the specified file. |
| --result-format-version=# | Define the version of the result file format to use. |
| -A, --server-arg=name | Send option values to the embedded server as a parameter. |
| -F, --server-file=name | Read embedded server arguments from the specified file. |
| -s, --silent | Suppress all normal output. Synonym for --quiet. |
| -T, --sleep=# | Always sleep for the specified number of seconds on sleep commands. |
| -S, --socket=name | Define the socket file to use for the connection. |
Examples of mysqltest Command in Linux
Let's explore a few practical examples of Linux mysqltest command −
- Basic Query Execution
- Testing with a Specific Host
- Detailed Output for Debugging
- Testing Using a Specific Socket
- Running Tests with Multiple Connections
Before running the examples, make sure you have created the .sql files. This ensures that your queries are structured correctly and can be executed without errors.
For example, for creating a select_users.sql file, use −
nano select_users.sql
Then paste the following SQL query into the file −
SELECT * FROM users;
In the same way, you can create other .sql files according to your needs. Simply replace users with the relevant table name and query.
Basic Query Execution
To perform a basic test using mysqltest, you can run a simple query on your database −
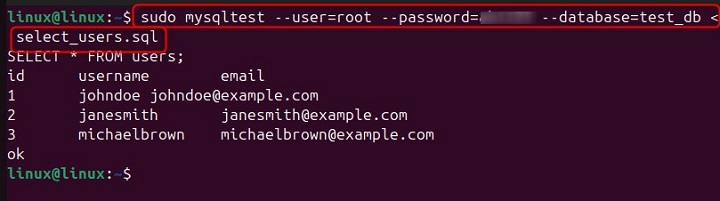
sudo mysql --user=root --password=your_password --database=test_db < select_users.sql
This command connects to the test_db database as the root user and runs a SELECT query on the users table.
Testing with a Specific Host
If you want to test the performance of a query on a specific host, you can specify the host using the --host option −
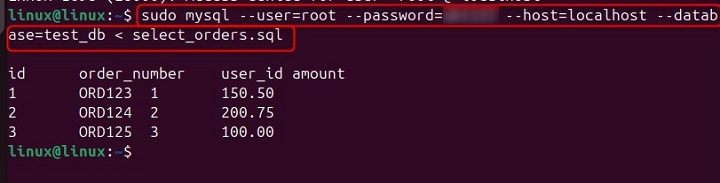
sudo mysql --user=root --password=your_password --host=localhost --database=test_db < select_orders.sql
This command connects to the test_db database on the localhost host and runs a SELECT query on the orders table.
Detailed Output for Debugging
When you need more information about the test execution, you can use the --verbose option to get detailed output −
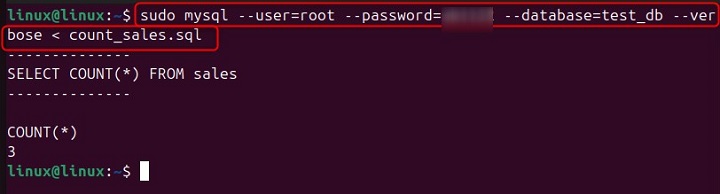
sudo mysql --user=root --password=your_password --database=test_db
   --verbose < count_sales.sql
This command runs a COUNT query on the sales table and provides detailed output during execution.
Testing Using a Specific Socket
To connect using a specific socket file, you can use the --socket option −
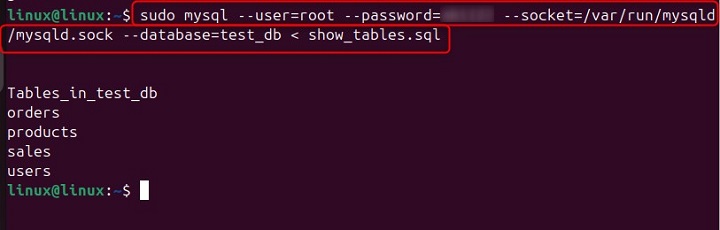
sudo mysql --user=root --password=your_password --socket=/var/run/mysqld/mysqld.sock
   --database=test_db < show_tables.sql
This command connects to the test_db database using the specified socket file and runs a SHOW TABLES query.
Conclusion
The mysqltest command is a versatile and powerful tool that enables you to thoroughly test and optimize your MySQL databases. By simulating different scenarios and loads, mysqltest provides valuable insights into your database's performance and stability. Mastering this command will help ensure your databases run efficiently and can handle varying levels of traffic and queries with ease.
