import Command in Linux
The import command in Linux captures a screenshot on an X server and saves it in the home directory. It can capture an entire screen, a single window, or a specified area.
The import program is part of the ImageMagick suite of tools.
ImageMagick is a powerful software suite for creating, editing, and converting bitmap images. It supports a wide range of formats and provides tools for tasks such as resizing, cropping, drawing, and applying effects to images
Table of Contents
Here is a comprehensive guide to the options available with the import command −
- Prerequisites for import Command
- Syntax of import Command
- import Command Options
- Examples of import Command in Linux
Note − Many Linux distributions are adopting the Wayland display server due to its better performance compared to X11. The latest version of Ubuntu has made the transition to Wayland as well. Note that Ubuntu includes both display servers, allowing a switch to X11 if required. To switch to the X11 window system, log out, select the X11 option from the display server choices, and then log in again.
Prerequisites for import Command
By default, the import command may not be available on Linux. For verification, use the following command −
import -version
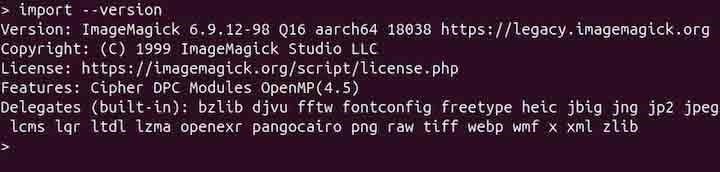
If the above command shows a version, the import command is installed. If it does not show the version, install it using the instructions below.
The import command is a part of the imagemagick suite. To install the imagemagick on Ubuntu, Kali Linux, Raspberry Pi OS, Debian, and Debian-based distributions, use the command given below −
sudo apt install imagemagick
To install it on Arch Linux, use −
sudo pacman -S imagemagick6
Note − Before using the import command, ensure the Linux system is using the X server. To verify, execute the following command −
echo $XDG_SESSION_TYPE
If it displays x11 the system is using X Windows system.

If it displays wayland, then your system is using Wayland.

If it shows wayland, then switch it to X11.
Syntax of import Command
The syntax of the Linux import command is as follows −
import [options] [filename]
The [options] field is used to specify various options to change the command's behavior. The [filename] is used to specify the name of the file by which the file will be saved.
import Command Options
The options of the import command are listed below −
| Options | Description |
|---|---|
| -adjoin | Join images into a single multi-image file |
| -channel type | Apply the option to select image channels |
| -colorspace type | Alternate image colorspace |
| -comment string | Annotate the image with a comment |
| -compress type | Type of pixel compression when writing the image |
| -define format:options | Define one or more image format options |
| -density geometry | Horizontal and vertical density of the image |
| -depth value | To set image depth |
| -descend | Obtain image by descending window hierarchy |
| -display server | X Server to contact |
| -dispose method | Layer disposal method |
| -dither method | Apply error diffusion to the image |
| -delay value | Display the next image after pausing |
| -encipher filename | Convert plain pixels to cipher pixels |
| -endian type | Endianness (MSB or LSB) of the image |
| -encoding type | Text encoding type |
| -format "string" | Output formatted image characteristics |
| -frame | Include window manager frame |
| -gravity direction | Which direction to gravitate towards |
| -identify | Identify the format and characteristics of the image |
| -interlace type | None, Line, Plane, or Partition |
| -interpolate method | Pixel color interpolation method |
| -label string | Assign a label to an image |
| -monitor | Monitor progress |
| -page geometry | Size and location of an image canvas |
| -pause value | Seconds delay between snapshots |
| -pointsize value | Font point size |
| -quality value | JPEG/MIFF/PNG compression level |
| -quiet | Suppress all warning messages |
| -regard-warnings | Pay attention to warning messages |
| -sampling-factor geometry | Horizontal and vertical sampling factor |
| -screen | Select image from root window |
| -seed value | Seed a new sequence of pseudo-random numbers |
| -set property value | Set an image property |
| -silent | Operate silently, i.e., don't ring any bells |
| -snaps value | Number of screen snapshots |
| -support factor | Resize support: > 1.0 is blurry, < 1.0 is sharp |
| -treedepth value | Specify color tree depth |
| -verbose | Display detailed information about the image |
| -virtual-pixel method | Constant, Edge, Mirror, or Tile |
| -window id/name | Select the window with this ID or name |
| -debug events | Display copious debugging information |
| -log format | Format of debugging information |
| -list type | Print a list of supported option arguments |
| -version | Display command version information |
There are image operations options as well −
| Options | Description |
|---|---|
| -annotate geometry text | Annotate the image with text |
| -border | Include image borders in the output image |
| -colors value | Preferred number of colors in the image |
| -crop geometry | Preferred size and location of the cropped image |
| -geometry geometry | Preferred size or location of the image |
| -help | Display command options with details |
| -monochrome | Transform the image to black and white |
| -negate | Replace every pixel with its complementary color |
| -repage geometry | Size and location of an image canvas |
| -quantize colorspace | Reduce colors in this colorspace |
| -resize geometry | Resize the image |
| -rotate degrees | Apply Paeth rotation to the image |
| -strip | Strip image of all profiles and comments |
| -thumbnail geometry | Create a thumbnail of the image |
| -transparent color | Make this color transparent within the image |
| -trim | Trim image edges |
Examples of import Command in Linux
This section demonstrates the usage of import command in Linux with examples −
Capturing the Window or Specific Area
To capture the window or area, use the import command with the filename −
import snapshot.png

After executing the command, the cursor will be changed to select an area of the screen or window: just click in the specific window or select the area. The file will be saved by the name of snapshot.png in the home directory.
Capturing the Specific Window by Name
To capture the specific window, use the -window option with window ID and file name. For example, if the home window is open, then specify Home as the window name −
import -window "Home" snapshot.png

Capturing the Specific Window by ID
To capture the specific window, use the -window option with window ID and file name. To get the window ID, use the following command in the terminal −
xwininfo
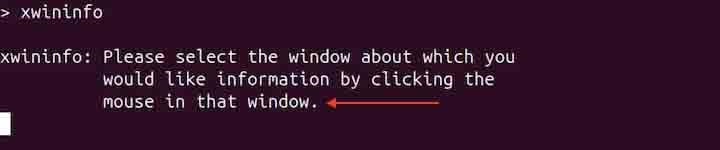
Then click on an opened window, and the ID will be displayed.

Now, use the import command to capture the window −
import -window 0x2200004 snapshot.png

Capturing a Specific Area
To capture a specific area, use the crop option with the geometry. The geometry argument includes width and height in pixels and the starting x and y coordinates of the screen.
import -crop 700x480+100+100 snapshot.png
After running the above command, the cursor will change; click on the desired window or drag to select the area to be captured. The 700x480 is pixel area, and +100+100 are coordinates.
Capturing with a Delay
To capture screenshots with a delay, use the -pause option with the number of seconds of delay. For example, to add a delay of five seconds, use the import command in the following way −
import -pause 5 snapshot.png
The cursor will change to select a window or area in this case as well.
Capturing with a Specific Quality
To capture the screenshot with a specific quality, use the -quality option with the percentage of quality. It is handy to save the image with JPEG compression.
import -quality 60% snapshot.jpg
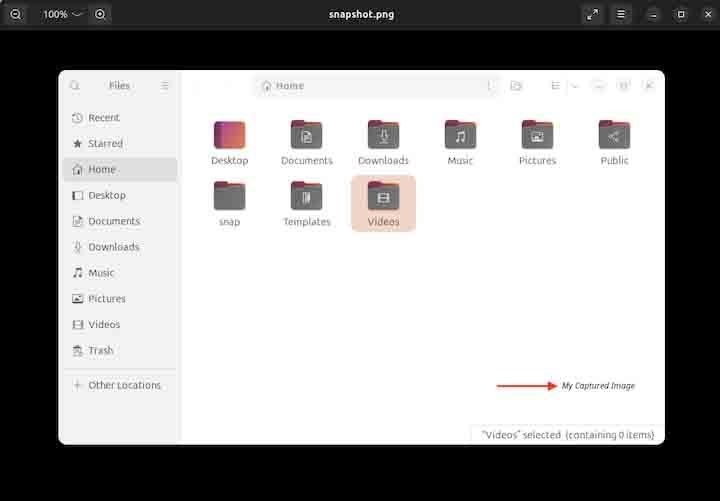
Capturing and Annotating the Image
To capture and add text on it at a specific location, use the -annotate option with the annotation string. For example, to add annotation at location +10+10 coordinates, use the import command in the following way −
import -annotate +800+500 "My Captured Image" snapshot.png
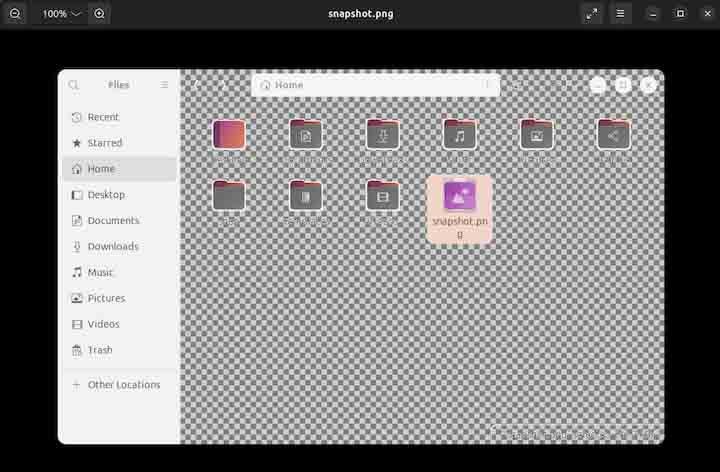
Capturing with Transparency
To capture with a specific transparency, use the -transparent option with the color name. For example, to remove all the pixels of white color, use the import command in the following manner −
import -transparent white snapshot.png
Capturing the Thumbnail
To capture the screen and create a thumbnail of a specific size, use the -thumbnail option −
import -thumbnail 100x100 snapshot.png
Capturing and Resizing
To capture and resize the image, use the -resize option. For example, to capture an entire screen and resize it to 1280x720, use the following command −
import -resize 1280x720 snapshot.png
Conclusion
The import command in Linux captures screenshots on an X server and saves them in the home directory. It can capture the entire screen, a single window, or a specified area. As a part of the ImageMagick suite, it allows for extensive image manipulation, including resizing, cropping, and applying effects.
This tutorial covered the prerequisites, syntax, options, and examples for using the import command in Linux. Before using it, ensure the command is installed and that the system is running the X server.
