GPG Command in Linux
GPG is a command-line utility in Linux that enhances data security. The term GPG stands for GNU Privacy Guard. It is commonly used for secure communication and data storage. With GPG, you can encrypt or decrypt data, and create digital signatures.
In Linux, encryption converts plain text into unreadable ciphertext, while decryption restores it to its original form. In this tutorial, well walk you through basic to advanced use cases of the GPG command in Linux.
Table of Contents
Here is a comprehensive guide to the options available with the GPG command −
- What is GPG Command?
- Syntax of GPG Command
- Options GPG Command
- Key Concepts of GPG Command
- Examples of GPG Command in Linux
- Alternatives of GPG Command
What is GPG Command?
GPG is a powerful command-line tool in Linux that allows us to improve data security by encrypting and decrypting data, as well as creating digital signatures.
Syntax of GPG Command
To use this command in Linux, you must follow the below-mentioned syntax −
gpg [options] [fileName]
Here, gpg is the command used to invoke GNU Privacy Guard. options represent the flags that modify the command's behavior, such as -e for encryption. fileName represents the file you want to encrypt, decrypt, or sign.
Options GPG Command
The table below shows the flags that we can use with the GPG command to perform different functionalities −
| Option | Description |
|---|---|
| -c | This option uses symmetric encryption to encrypt a file. |
| -d | It decrypts the specified file. |
| --gen-key | It creates a new key pair. |
| --import | It loads keys into your keyring. |
| --export | It saves a key to a file. |
| --list-keys | It displays the public keys stored in your keyring. |
| --list-secret-keys | It shows the private keys in your keyring. |
| --delete-key | It removes a public key from your keyring. |
| --delete-secret-key | It removes a private key from your keyring. |
| --sign | It generates a digital signature for a file. |
| --verify | It is used to check the validity of a digital signature. |
| --armor | It outputs keys in ASCII format. |
| -r | It encrypts a file for a specific user. |
Key Concepts of GPG Command
GPG is essential for understanding encryption, decryption, digital signatures, and key management. Encryption converts readable text into unreadable ciphertext, which can only be decrypted back to readable form using the correct key. For instance, encrypting and decrypting a message with GPG turns "Hello, Welcome to tutorialspoint" into encrypted text and back. Digital signatures verify both the source and integrity of data.
Creating and verifying a digital signature with GPG ensures that the message has not been tampered with. Key management involves handling the creation and distribution of public and private keys. Generating and listing keys with GPG is fundamental for secure communication. Understanding these concepts is crucial for the effective use of GPG and securing your data.
Examples of GPG Command in Linux
The GPG command in Linux provides a wide range of features. We'll simplify its usage by covering three key areas: encrypting data, decrypting data, and handling keys.
- How to Encrypt Data Using GPG Command?
- How to Decrypt Data Using GPG Command?
- How to Generate a Key Pair with the GPG Command?
- How to Encrypt Data for a Specific User?
- How to Create and Verify Digital Signatures Using the GPG Command?
- How to Import and Export Keys Using the GPG Command?
How to Encrypt Data Using GPG Command?
In the following example, we run the gpg command with the -c option to encrypt the specified file −
gpg -c originalFile.txt
As soon as you hit the ENTER key, youll be asked to provide the passphrase −
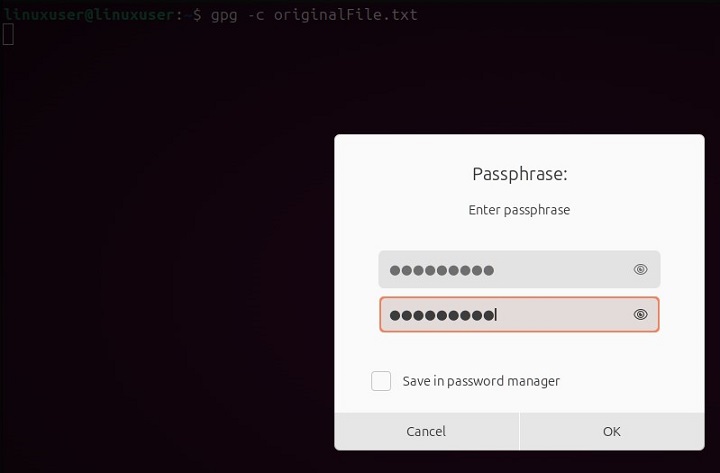
On successful encryption, a new encrypted file with the .gpg extension will be created.
Note − Remember the passphrase for later use, as you will need it when decrypting the specified file.
How to Decrypt Data Using GPG Command?
You can run the gpg command with the -d option to decrypt the encrypted data, as shown in the following example −
gpg -d originalFile.txt.gpg
When we execute this command, it prompts us to provide the passphrase we specified during encryption −
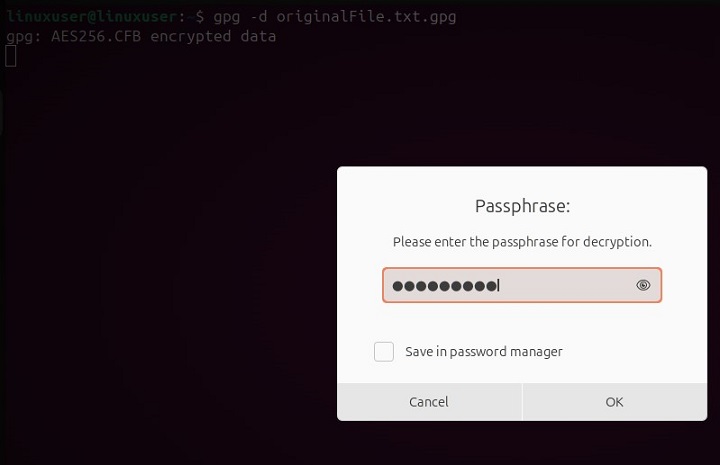
If you provide the correct passphrase, the following output appears on the console −

How to Generate a Key Pair with the GPG Command?
We can run the gpg command followed by a --gen-key flag to generate a key pair. This key pair includes a public key for encryption and a private key for decryption. Heres a simple example −
gpg --generate-key
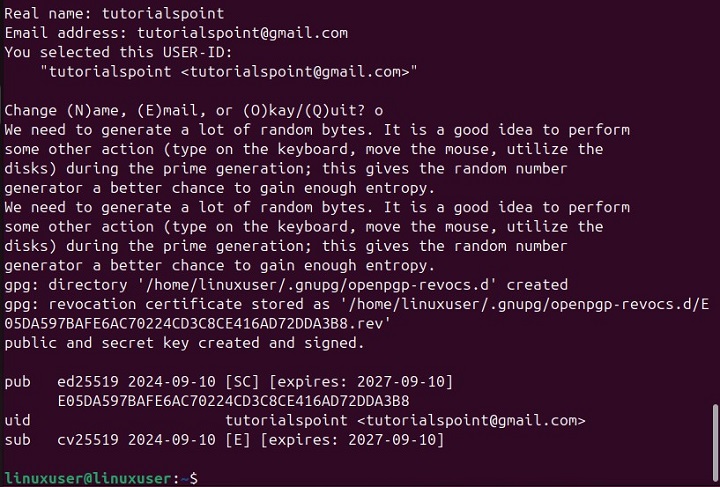
This command will ask you to specify a name and an email address. After this, it will prompt you to enter a passphrase −
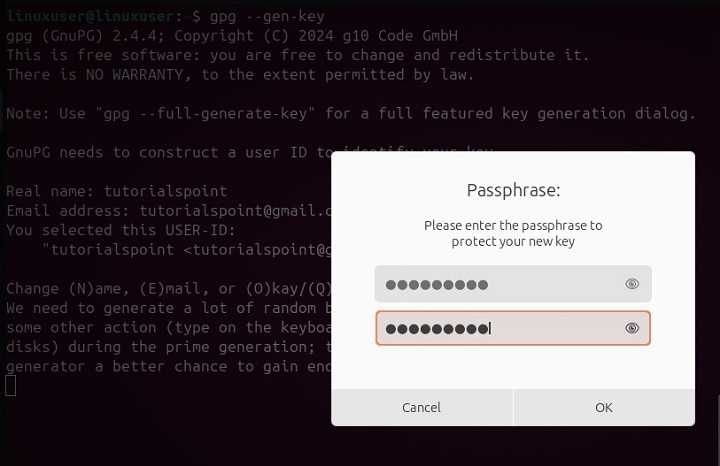
After specifying the passphrase, youll see the output something like this −
How to Encrypt Data for a Specific User?
We can use the GPG Command to encrypt a file for a specific user. For this purpose, we must use the -r flag followed by the user name, as shown below −
gpg -r 'userName' -e originalFile.txt
This command will encrypt the data of the originalFile.txt file for the userName.
How to Create and Verify Digital Signatures Using the GPG Command?
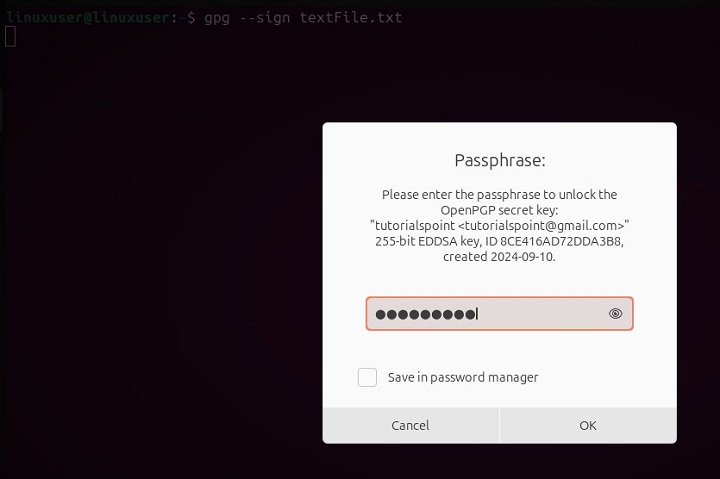
Digital signatures offer a method to ensure both the authenticity and integrity of data. You can use the gpg command with the --sign option to create a digital signature for the specified file −
gpg --sign originalFile.txt
Specify the passphrase to unlock the OpenPGP secret key −
After this, you can execute the gpg command with the --verify option to confirm the signature creation −

The output confirms that a valid signature has been created.
How to Import and Export Keys Using the GPG Command?
You can run the gpg command with the --armor and --export options to export your public key in an ASCII-armored format. This format is well-suited for email transmission. Here, is a simple code example −
gpg --armor --export 'Joseph' > joseph-key.asc
This key can be imported by any other user. For this purpose, they must run the gpg command with the import option, as shown in the following example −
gpg --import joseph-key.asc
In the above code, we use the --import option to add the key from the joseph-key.asc file into the user's keyring.
Alternatives of GPG Command
Apart from the GPG command, Linux supports some other command line tools for data encryption and digital signatures. These tools involve OpenSSL and ccrypt.
- OpenSSL has many features but can be complicated for beginners.
- Ccrypt is easier to use but only handles file encryption and doesnt support digital signatures.
You can choose a tool that best fits your needs and security requirements.
Conclusion
The GPG command in Linux is a useful tool for enhancing data security through encryption, decryption, and digital signatures. By understanding its core functions and options, such as key management and data encryption, users can effectively secure their communications and data.
Additionally, while GPG offers extensive features, tools like OpenSSL and ccrypt also provide viable alternatives for encryption and digital signatures, each with its own strengths and complexities. Choosing the right tool depends on your specific security needs and proficiency.
