- Selenium - Home
- Selenium - Overview
- Selenium - Components
- Selenium - Automation Testing
- Selenium - Environment Setup
- Selenium - Remote Control
- Selenium - IDE Introduction
- Selenium - Features
- Selenium - Limitations
- Selenium - Installation
- Selenium - Creating Tests
- Selenium - Creating Script
- Selenium - Control Flow
- Selenium - Store Variables
- Selenium - Alerts & Popups
- Selenium - Selenese Commands
- Selenium - Actions Commands
- Selenium - Accessors Commands
- Selenium - Assertions Commands
- Selenium - Assert/Verify Methods
- Selenium - Locating Strategies
- Selenium - Script Debugging
- Selenium - Verification Points
- Selenium - Pattern Matching
- Selenium - JSON Data File
- Selenium - Browser Execution
- Selenium - User Extensions
- Selenium - Code Export
- Selenium - Emitting Code
- Selenium - JavaScript Functions
- Selenium - Plugins
- Selenium WebDriver Tutorial
- Selenium - Introduction
- Selenium WebDriver vs RC
- Selenium - Installation
- Selenium - First Test Script
- Selenium - Driver Sessions
- Selenium - Browser Options
- Selenium - Chrome Options
- Selenium - Edge Options
- Selenium - Firefox Options
- Selenium - Safari Options
- Selenium - Double Click
- Selenium - Right Click
- HTML Report in Python
- Handling Edit Boxes
- Selenium - Single Elements
- Selenium - Multiple Elements
- Selenium Web Elements
- Selenium - File Upload
- Selenium - Locator Strategies
- Selenium - Relative Locators
- Selenium - Finders
- Selenium - Find All Links
- Selenium - User Interactions
- Selenium - WebElement Commands
- Selenium - Browser Interactions
- Selenium - Browser Commands
- Selenium - Browser Navigation
- Selenium - Alerts & Popups
- Selenium - Handling Forms
- Selenium - Windows and Tabs
- Selenium - Handling Links
- Selenium - Input Boxes
- Selenium - Radio Button
- Selenium - Checkboxes
- Selenium - Dropdown Box
- Selenium - Handling IFrames
- Selenium - Handling Cookies
- Selenium - Date Time Picker
- Selenium - Dynamic Web Tables
- Selenium - Actions Class
- Selenium - Action Class
- Selenium - Keyboard Events
- Selenium - Key Up/Down
- Selenium - Copy and Paste
- Selenium - Handle Special Keys
- Selenium - Mouse Events
- Selenium - Drag and Drop
- Selenium - Pen Events
- Selenium - Scroll Operations
- Selenium - Waiting Strategies
- Selenium - Explicit/Implicit Wait
- Selenium - Support Features
- Selenium - Multi Select
- Selenium - Wait Support
- Selenium - Select Support
- Selenium - Color Support
- Selenium - ThreadGuard
- Selenium - Errors & Logging
- Selenium - Exception Handling
- Selenium - Miscellaneous
- Selenium - Handling Ajax Calls
- Selenium - JSON Data File
- Selenium - CSV Data File
- Selenium - Excel Data File
- Selenium - Cross Browser Testing
- Selenium - Multi Browser Testing
- Selenium - Multi Windows Testing
- Selenium - JavaScript Executor
- Selenium - Headless Execution
- Selenium - Capture Screenshots
- Selenium - Capture Videos
- Selenium - Page Object Model
- Selenium - Page Factory
- Selenium - Record & Playback
- Selenium - Frameworks
- Selenium - Browsing Context
- Selenium - DevTools
- Selenium Grid Tutorial
- Selenium - Overview
- Selenium - Architecture
- Selenium - Components
- Selenium - Configuration
- Selenium - Create Test Script
- Selenium - Test Execution
- Selenium - Endpoints
- Selenium - Customizing a Node
- Selenium Reporting Tools
- Selenium - Reporting Tools
- Selenium - TestNG
- Selenium - JUnit
- Selenium - Allure
- Selenium & Other Technologies
- Selenium - Java Tutorial
- Selenium - Python Tutorial
- Selenium - C# Tutorial
- Selenium - Javascript Tutorial
- Selenium - Kotlin Tutorial
- Selenium - Ruby Tutorial
- Selenium - Maven & Jenkins
- Selenium - LogExpert Logging
- Selenium - Log4j Logging
- Selenium - Robot Framework
- Selenium - Github Tutorial
- Selenium - IntelliJ
- Selenium - XPath
- Selenium Miscellaneous Concepts
- Selenium - IE Driver
- Selenium - Automation Frameworks
- Selenium - Keyword Driven Framework
- Selenium - Data Driven Framework
- Selenium - Hybrid Driven Framework
- Selenium - SSL Certificate Error
- Selenium - Alternatives
- Selenium Useful Resources
- Selenium - Questions & Answers
- Selenium - Quick Guide
- Selenium - Useful Resources
- Selenium - Automation Practice
- Selenium - Discussion
Selenium with Maven & Jenkins Tutorial
Selenium tests written with the help of Maven can be integrated with Jenkins so that tests can be triggered directly from the continuous integration tools like Jenkins, rather than relying only on local execution from an editor.
What is Maven?
Maven is a project management and comprehension tool that provides developers a complete build lifecycle framework. Development team can automate the project's build infrastructure in almost no time as Maven uses a standard directory layout and a default build lifecycle.
In the case of multiple development teams, Maven can set-up the way to work as per standards in a very short time. As most of the project setups are simple and reusable, Maven makes the developer easy while creating reports, checks, build and testing automation setups.
To get more information on the Maven, please refer to the link − Maven.
What is Jenkins?
Jenkins is a powerful application that allows continuous integration and continuous delivery of projects, regardless of the platform you are working on. It is a free source that can handle any kind of build or continuous integration. We can integrate Jenkins with a number of testing and deployment technologies.
Jenkins is a continuous integration tool which is open source and used extensively for building and testing products. It is very helpful from the developers point of view since changes can be incorporated easily to the projects.
In Jenkins the continuous integration is achieved with the help of plugins. While Maven is to be integrated with Jenkins, it can be achieved with the help of Maven specific plugins in Jenkins.
As Maven is integrated with Jenkins using the plugins, it makes it possible to automate the complete build process. Once the plugins are installed, there are certain configurations and settings that should be done to complete the Maven and Jenkins integration. There can be any number of Maven jobs running on the Jenkins server. This also helps to build any Selenium tests built on java available in Git repositories.
To get more information on the Jenkins, please refer to the link − Jenkins.
How to Integrate Maven & Jenkin?
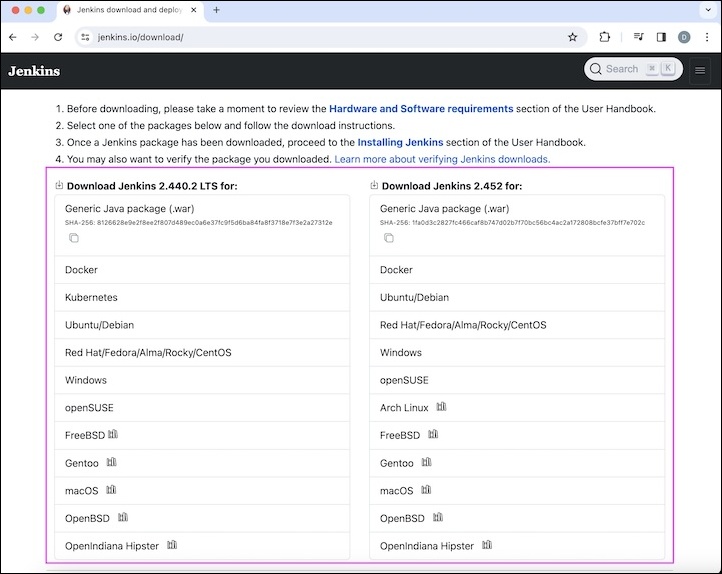
Step 1 − Navigate to the link and download the Jenkins war file − https://www.jenkins.io/download/.
Step 2 − Based on the platform, click and download the Generic Java Package(.war file) for Jenkins. Jenkins can be used on multiple platforms like Windows, Mac, Ubuntu, and so on.
Step 3 − For MacOS, click on the macOS link, and run the command: brew install jenkins.
Step 4 − Run the command: brew services start jenkins to begin the Jenkins service.
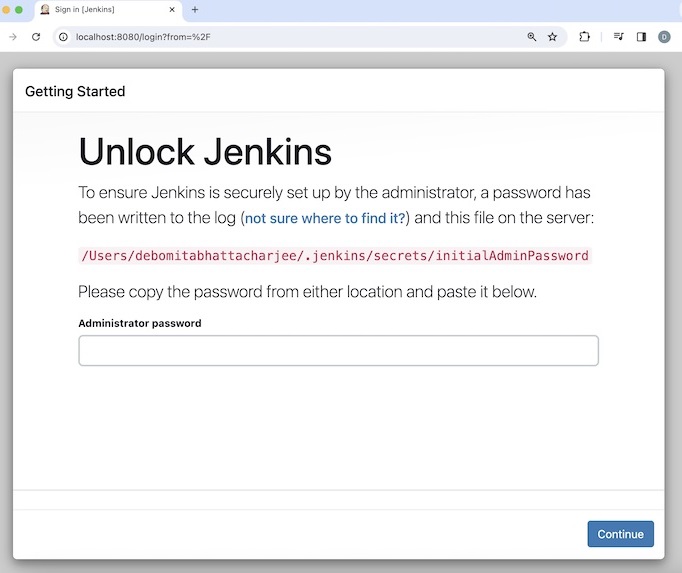
Step 5 − Run the below command −
sudo cat /Users/$(whoami)/.jenkins/secrets/initialAdminPassword.
This command shall give the initial admin password.
Step 6 − The Jenkins by default runs on the 8080 port. Open a new browser and enter: localhost:8080. The Jenkins home page should be displayed and enter the password obtained in Step5 and then click on the Continue button.
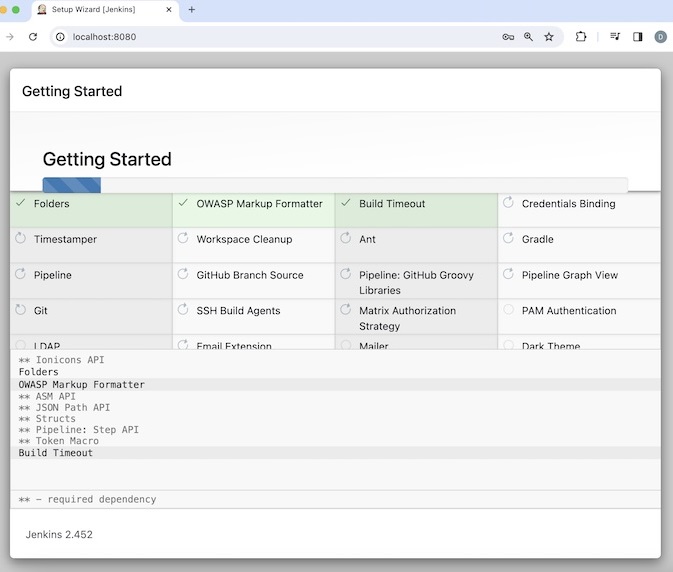
Step 7 − Click on the Install suggested Plugins and all the suggested plugins will start installing.
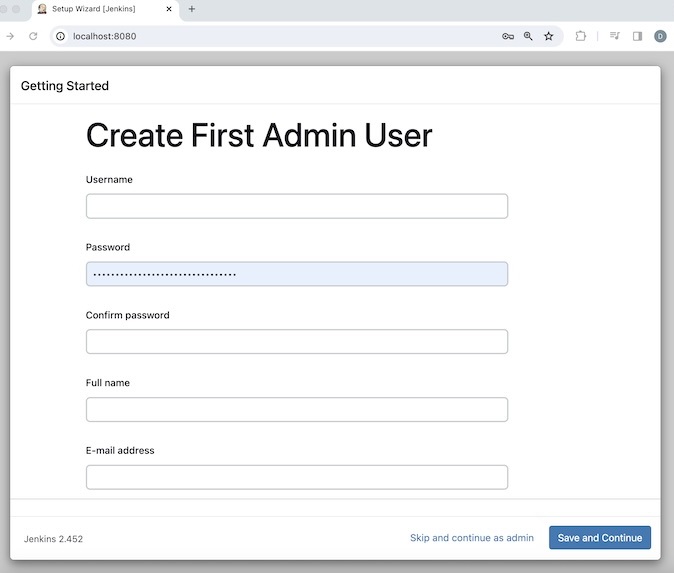
Step 8 − Once all the suggested plugins are installed, create a First Admin User with all the details. Then click on the Save and Continue button.
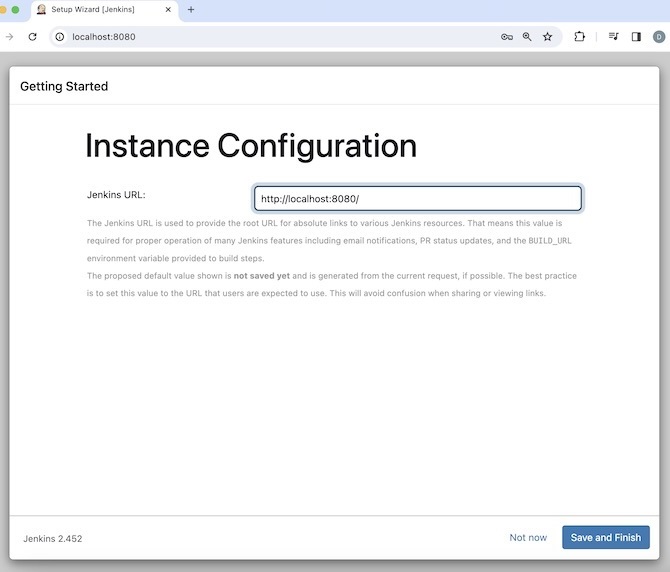
Step 9 − Instance Configuration page should come. Click on the Save and Continue button.
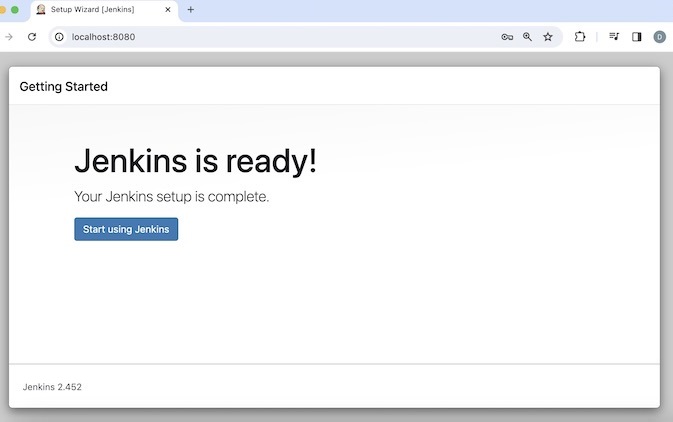
Step 10 − Jenkins is now successfully installed with the message Jenkins is ready!. Click on Start using Jenkins.
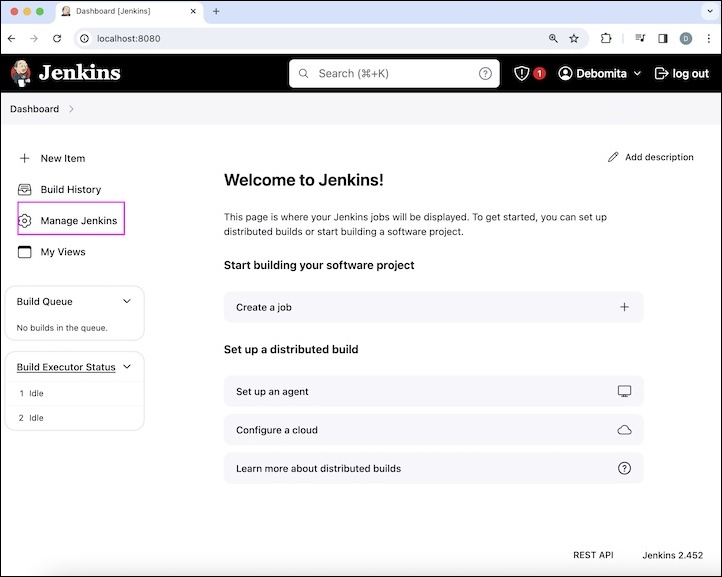
Step 11 − Click on the Manage Jenkins link available on the Jenkins Home Page.
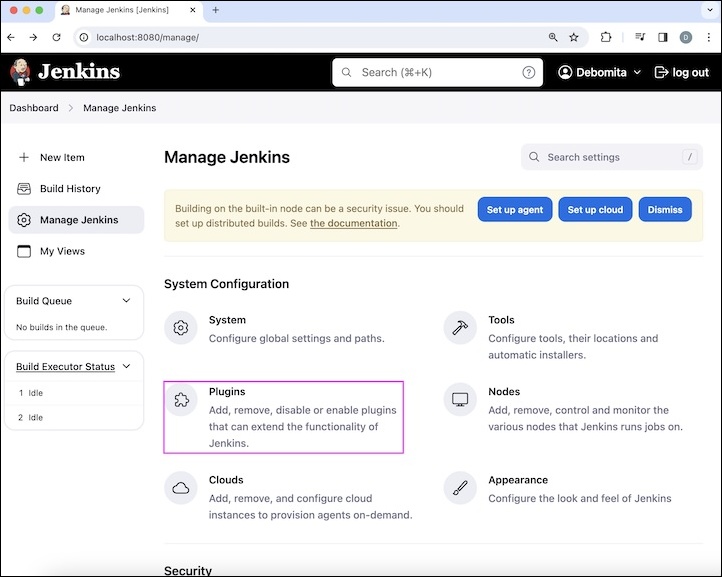
Step 12 − Click on the Plugins link.
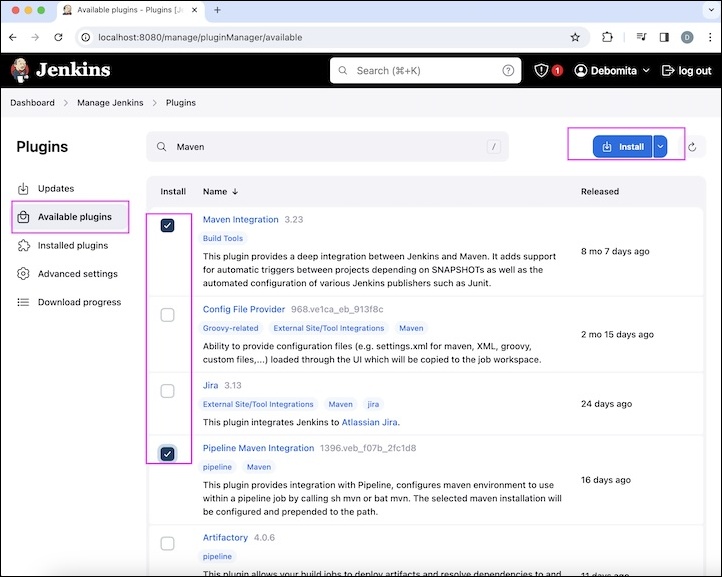
Step 13 − Click on the Available Plugins, then enter Maven in the Search box. All the available Maven plugins should be displayed for selection. After selection of all the Maven related plugins, click on the Install button.
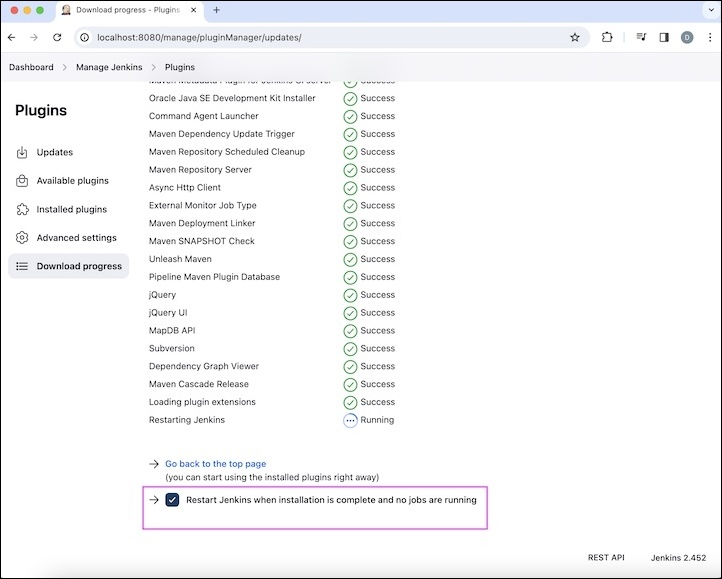
Step 14 − Once all the plugins are installed successfully, click on the Restart Jenkins when installation is complete and no jobs are running checkbox.
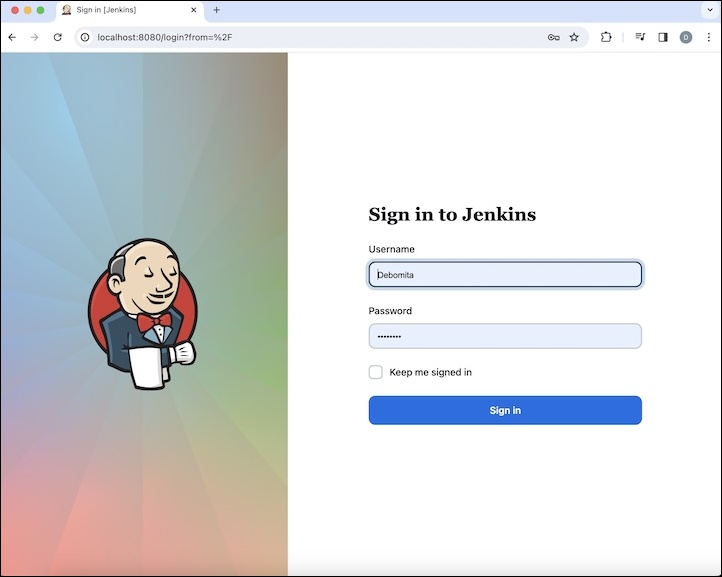
Step 15 − Login in to Jenkins with the credentials again.
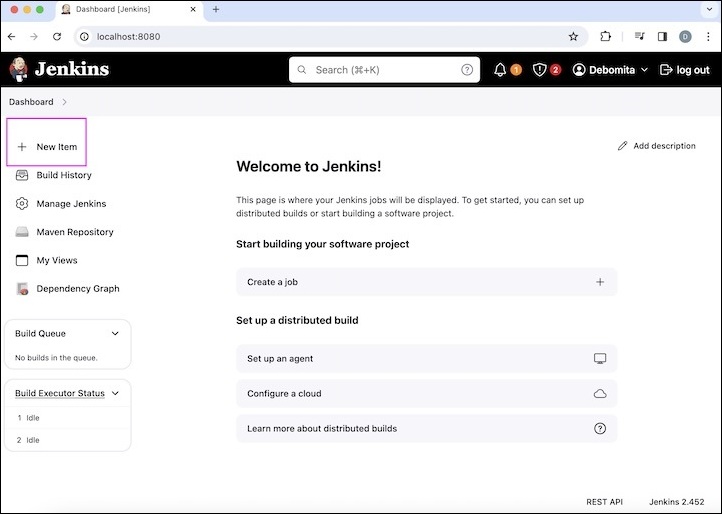
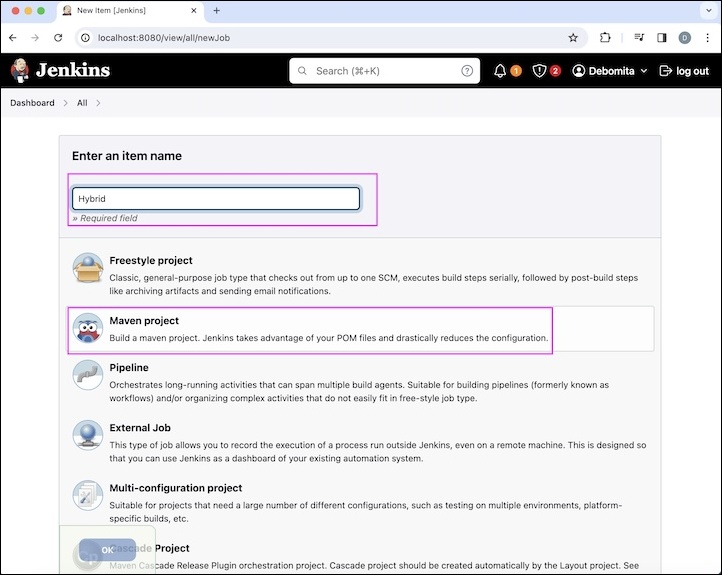
Step 16 − Click on the New Item on the Jenkins home page.
Step 17 − Input a project name, say Hybrid under the Enter an Item name label, then click on the option Maven Project.
Step 18 − Enter some description under the Description field within the General Tab.
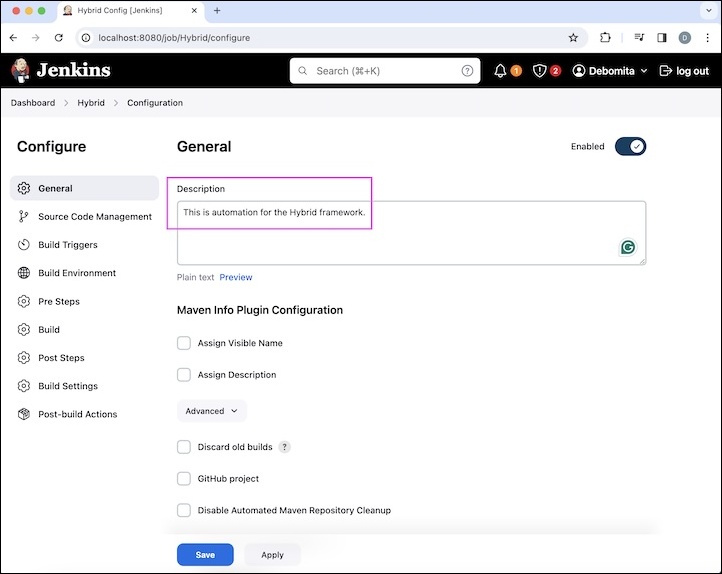
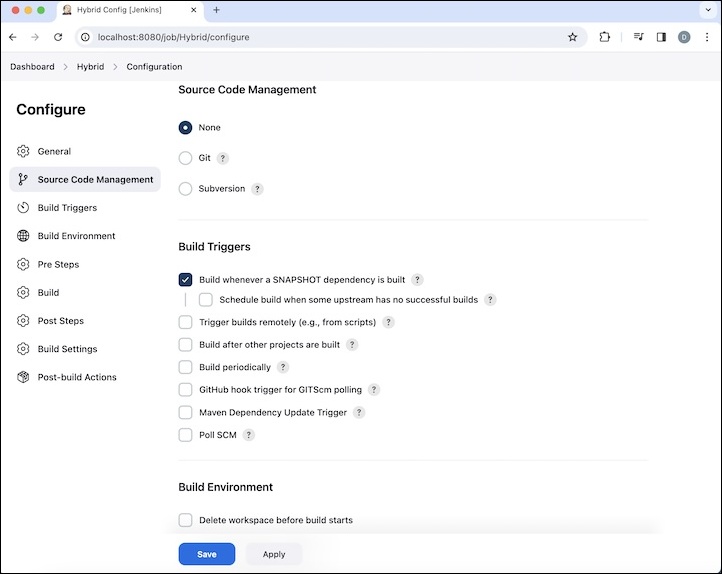
Step 19 − Select None for the Source Code Management.
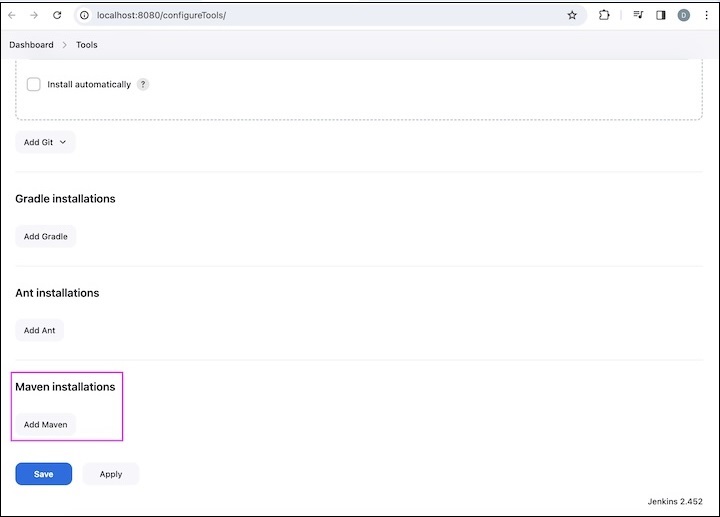
Step 20 − Move to the Build section and click on the tool configuration link.
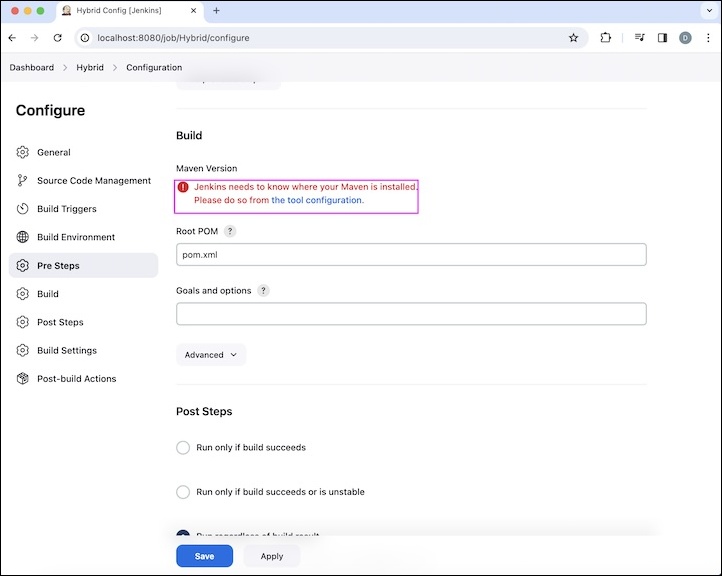
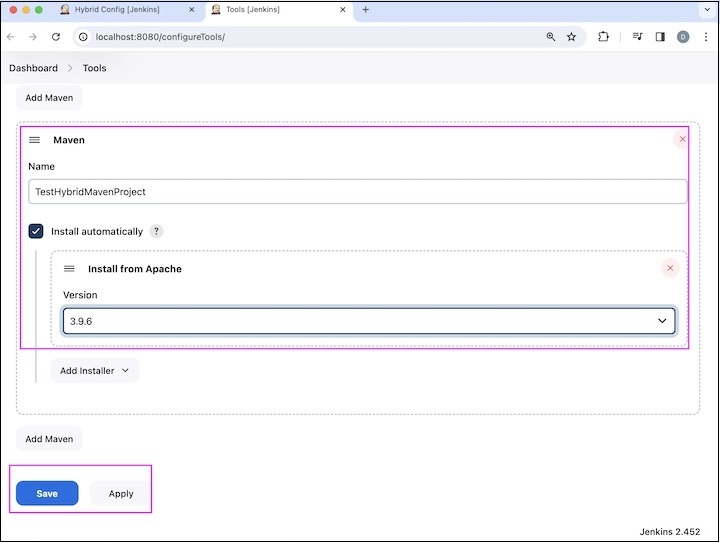
Step 21 − Move to the Maven installations section, and then click on the Add Maven button.
Step 22 − Enter a name under Name and select the latest version Maven from the dropdown. Then click on the Apply and Save buttons.
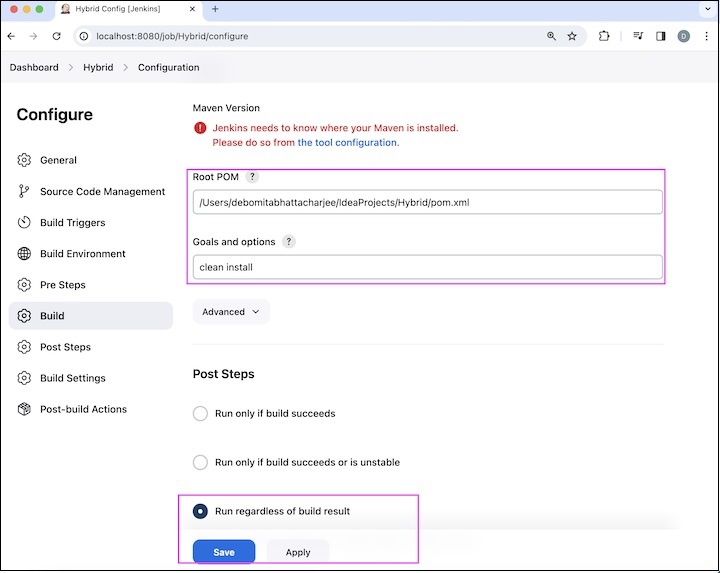
Step 23 − Enter the path of the pom.xml of the Maven project under the Root POM field and enter clean install under the Goals and options. Then select the option Run regardless of build result. Finally, click on the Apply and Save buttons.
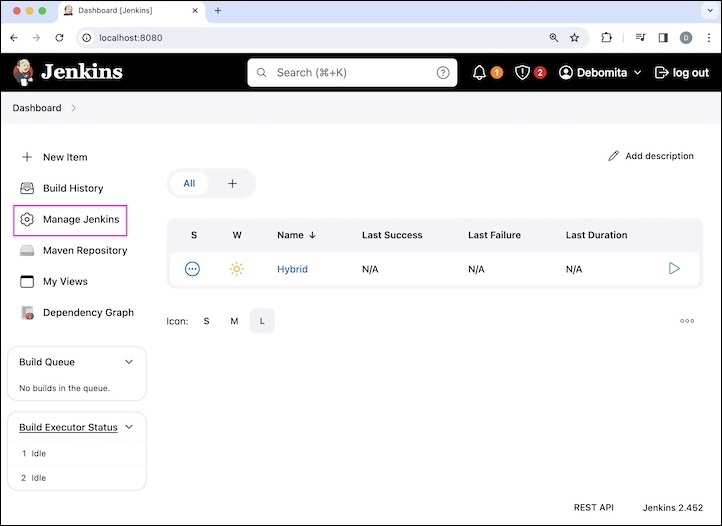
Step 24 − Move to the Jenkins Dashboard and click on the Manage Jenkins link.
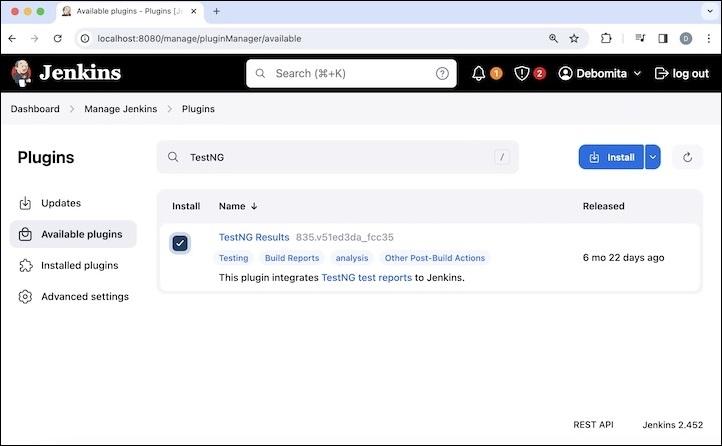
Step 25 − Navigate to the Plugins section and install the TestNG Results plugin. Restart the Jenkins once installation is complete.
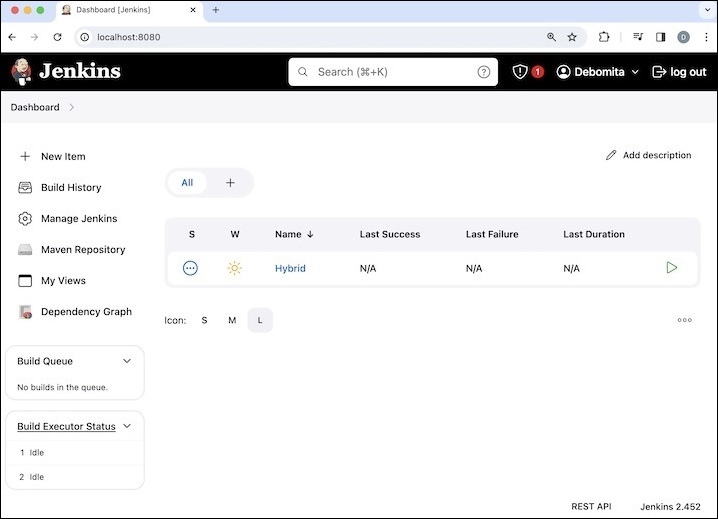
Step 26 − In the Jenkins Dashboard, click on the project - Hybrid created before.
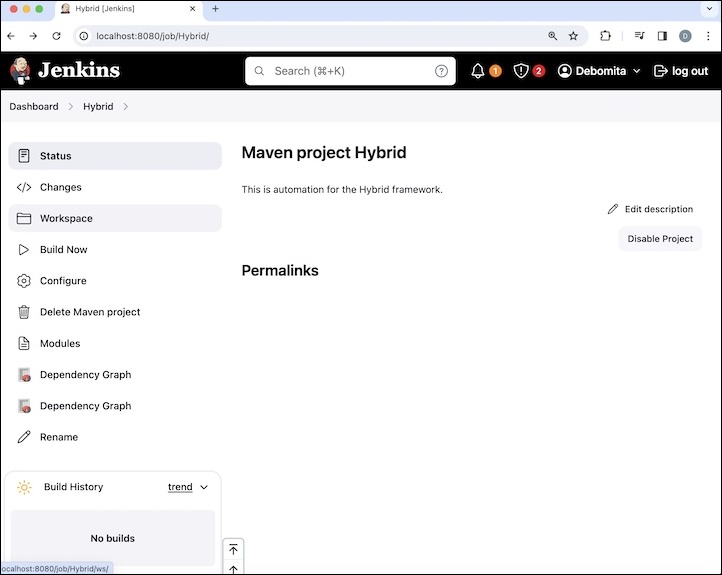
Step 27 − Click on the Configure link at the left.
Step 28 − Move to the Post-build Actions section.
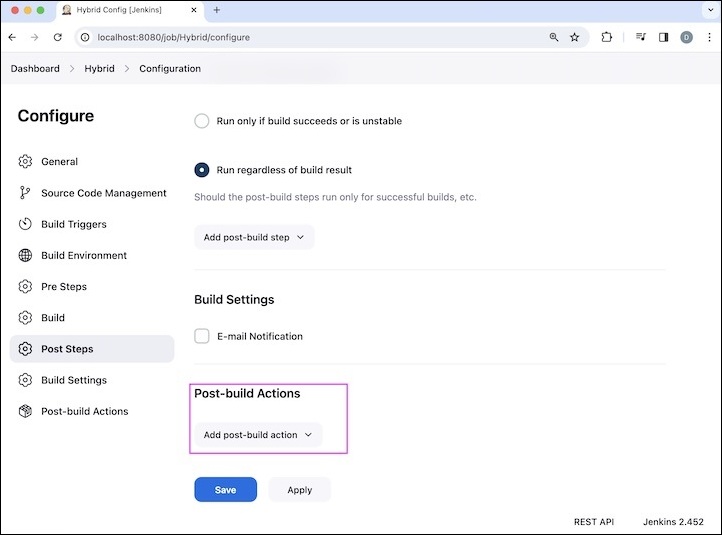
Step 29 − Publish TestNG results should be available in the dropdown.
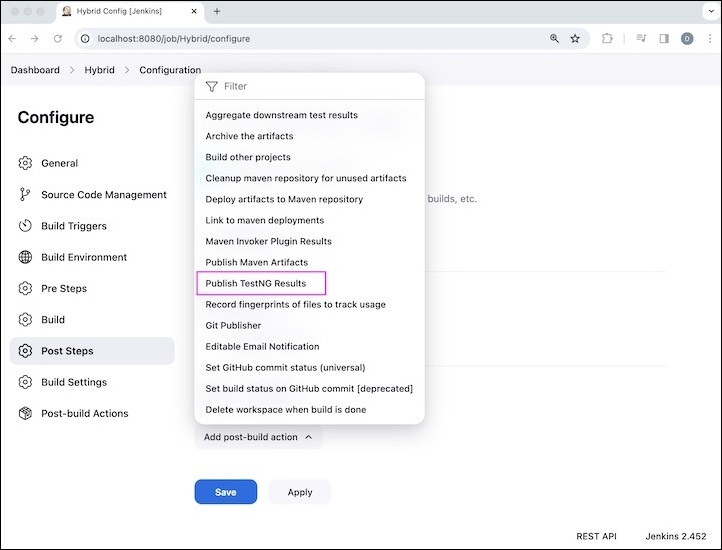
Step 30 − Select the option Publish TestNG results and click on the Apply and Save buttons.
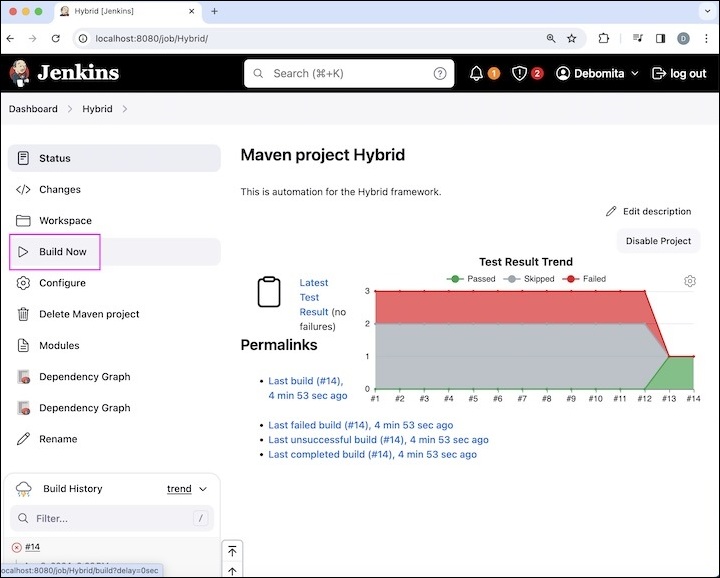
Step 31 − Click on the Build Now link, to run the test from Jenkins.
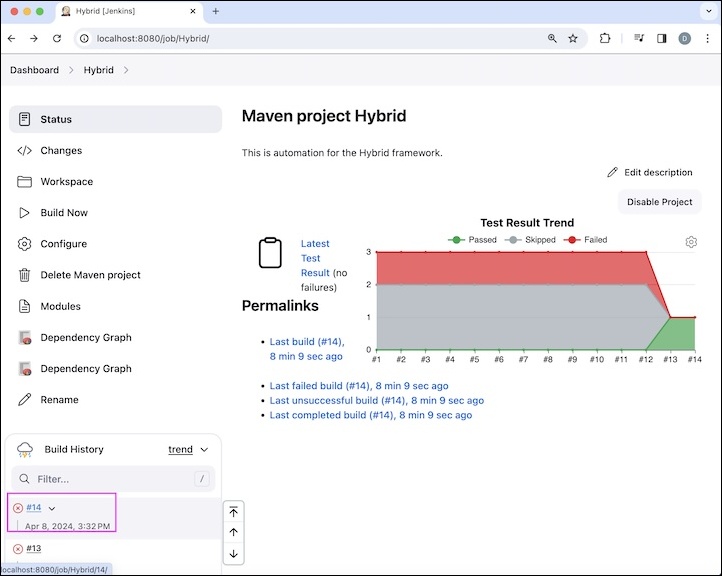
Step 32 − Click on any build number under the Build History.
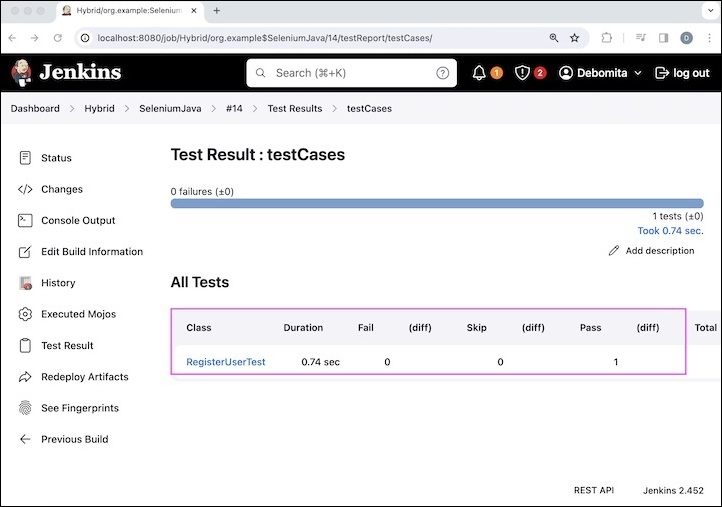
Step 33 − Click on Test Result to the left.
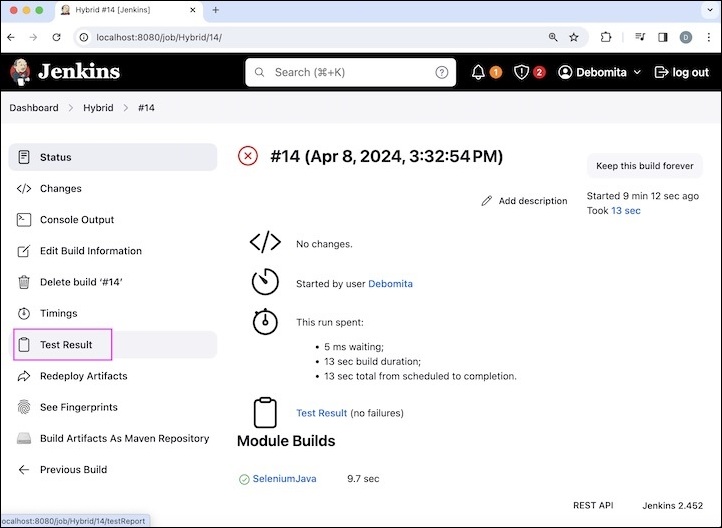
Step 34 − The class name along with the total number of passed, failed, and skipped test cases, and test duration captured in the test result.
This concludes our comprehensive take on the tutorial on Selenium - Maven & Jenkins. Weve started with describing what is Maven, what is the use of Jenkins, how to integrate Maven and Jenkins in Selenium.
This equips you with in-depth knowledge of the Selenium - Maven & Jenkins. It is wise to keep practicing what youve learned and exploring others relevant to Selenium to deepen your understanding and expand your horizons.
