
- Selenium - Home
- Selenium - Overview
- Selenium - Components
- Selenium - Automation Testing
- Selenium - Environment Setup
- Selenium - Remote Control
- Selenium - IDE Introduction
- Selenium - Features
- Selenium - Limitations
- Selenium - Installation
- Selenium - Creating Tests
- Selenium - Creating Script
- Selenium - Control Flow
- Selenium - Store Variables
- Selenium - Alerts & Popups
- Selenium - Selenese Commands
- Selenium - Actions Commands
- Selenium - Accessors Commands
- Selenium - Assertions Commands
- Selenium - Assert/Verify Methods
- Selenium - Locating Strategies
- Selenium - Script Debugging
- Selenium - Verification Points
- Selenium - Pattern Matching
- Selenium - JSON Data File
- Selenium - Browser Execution
- Selenium - User Extensions
- Selenium - Code Export
- Selenium - Emitting Code
- Selenium - JavaScript Functions
- Selenium - Plugins
- Selenium WebDriver Tutorial
- Selenium - Introduction
- Selenium WebDriver vs RC
- Selenium - Installation
- Selenium - First Test Script
- Selenium - Driver Sessions
- Selenium - Browser Options
- Selenium - Chrome Options
- Selenium - Edge Options
- Selenium - Firefox Options
- Selenium - Safari Options
- Selenium - Double Click
- Selenium - Right Click
- HTML Report in Python
- Handling Edit Boxes
- Selenium - Single Elements
- Selenium - Multiple Elements
- Selenium Web Elements
- Selenium - File Upload
- Selenium - Locator Strategies
- Selenium - Relative Locators
- Selenium - Finders
- Selenium - Find All Links
- Selenium - User Interactions
- Selenium - WebElement Commands
- Selenium - Browser Interactions
- Selenium - Browser Commands
- Selenium - Browser Navigation
- Selenium - Alerts & Popups
- Selenium - Handling Forms
- Selenium - Windows and Tabs
- Selenium - Handling Links
- Selenium - Input Boxes
- Selenium - Radio Button
- Selenium - Checkboxes
- Selenium - Dropdown Box
- Selenium - Handling IFrames
- Selenium - Handling Cookies
- Selenium - Date Time Picker
- Selenium - Dynamic Web Tables
- Selenium - Actions Class
- Selenium - Action Class
- Selenium - Keyboard Events
- Selenium - Key Up/Down
- Selenium - Copy and Paste
- Selenium - Handle Special Keys
- Selenium - Mouse Events
- Selenium - Drag and Drop
- Selenium - Pen Events
- Selenium - Scroll Operations
- Selenium - Waiting Strategies
- Selenium - Explicit/Implicit Wait
- Selenium - Support Features
- Selenium - Multi Select
- Selenium - Wait Support
- Selenium - Select Support
- Selenium - Color Support
- Selenium - ThreadGuard
- Selenium - Errors & Logging
- Selenium - Exception Handling
- Selenium - Miscellaneous
- Selenium - Handling Ajax Calls
- Selenium - JSON Data File
- Selenium - CSV Data File
- Selenium - Excel Data File
- Selenium - Cross Browser Testing
- Selenium - Multi Browser Testing
- Selenium - Multi Windows Testing
- Selenium - JavaScript Executor
- Selenium - Headless Execution
- Selenium - Capture Screenshots
- Selenium - Capture Videos
- Selenium - Page Object Model
- Selenium - Page Factory
- Selenium - Record & Playback
- Selenium - Frameworks
- Selenium - Browsing Context
- Selenium - DevTools
- Selenium Grid Tutorial
- Selenium - Overview
- Selenium - Architecture
- Selenium - Components
- Selenium - Configuration
- Selenium - Create Test Script
- Selenium - Test Execution
- Selenium - Endpoints
- Selenium - Customizing a Node
- Selenium Reporting Tools
- Selenium - Reporting Tools
- Selenium - TestNG
- Selenium - JUnit
- Selenium - Allure
- Selenium & Other Technologies
- Selenium - Java Tutorial
- Selenium - Python Tutorial
- Selenium - C# Tutorial
- Selenium - Javascript Tutorial
- Selenium - Kotlin Tutorial
- Selenium - Ruby Tutorial
- Selenium - Maven & Jenkins
- Selenium - LogExpert Logging
- Selenium - Log4j Logging
- Selenium - Robot Framework
- Selenium - Github Tutorial
- Selenium - IntelliJ
- Selenium - XPath
- Selenium Miscellaneous Concepts
- Selenium - IE Driver
- Selenium - Automation Frameworks
- Selenium - Keyword Driven Framework
- Selenium - Data Driven Framework
- Selenium - Hybrid Driven Framework
- Selenium - SSL Certificate Error
- Selenium - Alternatives
Selenium IDE - Installation
Selenium Integrated Development Environment(IDE) installation is available from the Chrome and Firefox store. As a precondition for Selenium Integrated Development Environment installation, we would need the browsers Chrome and Firefox installed in the local machine.
To complete the installation of Selenium Integrated Development Environment in Chrome let us follow the below steps −
Install Chrome Extension for Selenium IDE
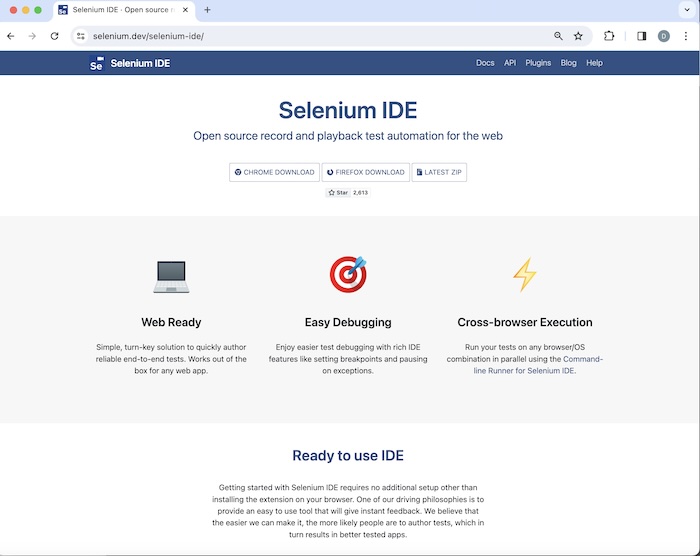
Step 1 − Navigate to the link below and select the CHROME DOWNLOAD tab.
https://www.selenium.dev/selenium-ide/.
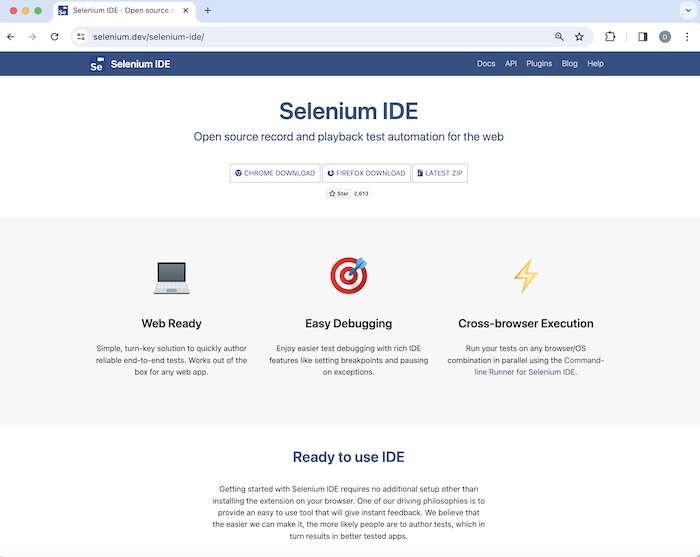
Step 2 − We would be navigated to the Chrome web store, Extensions page for Selenium Integrated Development Environment. Then we would click on Add to Chrome.
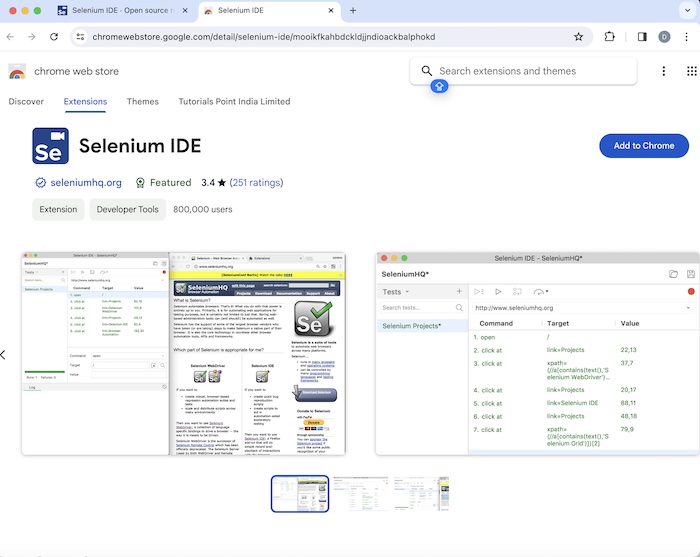
Step 3 − Click on Add extension button on the pop-up.
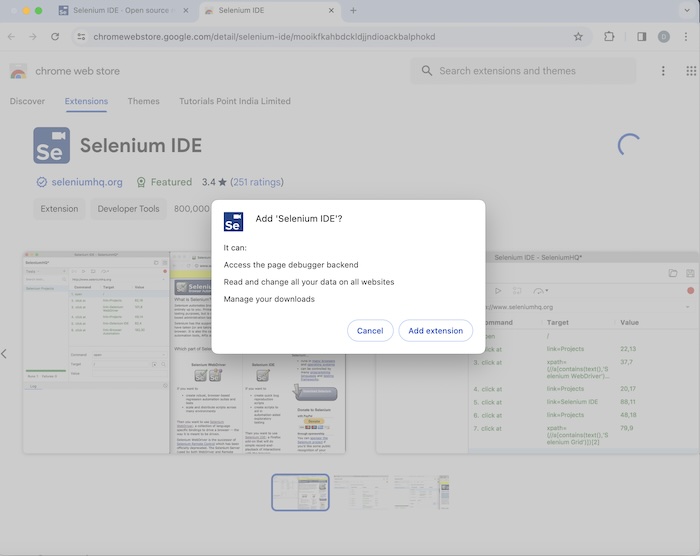
Step 4 − Selenium Integrated Development Environment should be installed successfully after which we would be able to launch it.
Step 5 − It is recommended that we restart the browser after Step4. Then the Selenium Integrated Development Environment icon would appear on the right upper corner of the Chrome browser, we would need to click it in order to launch.
Launch Selenium IDE in Chrome
In the above image, we can see, after the Selenium Integrated Development Environment was launched from the Chrome plugin, a welcome message should be displayed along with the version of the tool. Here, the version installed is 3.17.2.
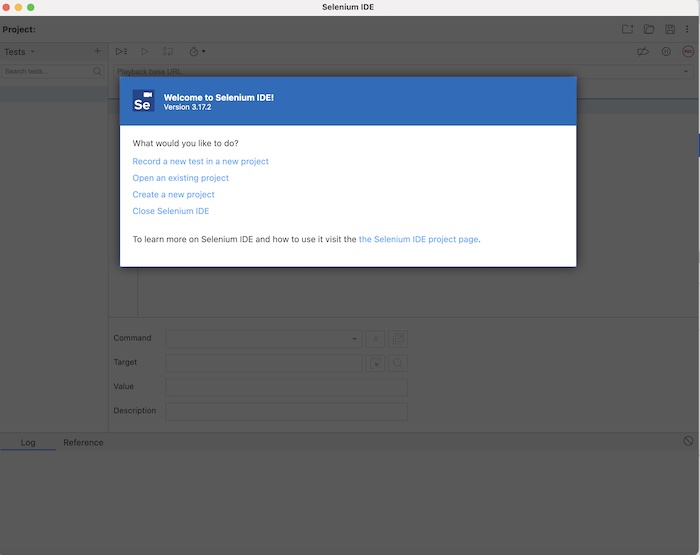
Along with this, it gives us the option to select what we would like to do with the tool, like Record a new test in a new project, Open an existing project, Create a new project, and Close it.
Also, a link with the text - the Selenium IDE project page is provided, which on clicking would land us to the Selenium Integrated Development Environment documentation page.
https://www.selenium.dev/selenium-ide/
Install Firefox Extension for Selenium IDE
Step 1 − Navigate to the link below and select the FIREFOX DOWNLOAD tab.
https://www.selenium.dev/selenium-ide/.
Step 2 − We would be navigated to the Firefox web store, Extensions page for Selenium Integrated Development Environment. Then we would click on Add to Firefox.
Step 3 − A pop-up window would appear. We would need to click on the Add button on the pop-up.
Step 4 − Selenium Integrated Development Environment should be installed successfully after which we would be able to launch it.
Step 5 − It is recommended that we restart the browser after Step 4. Then Selenium Integrated Development Environment icon would appear on the right upper corner of the Firefox browser, we would need to click it in order to launch.
Launch Selenium IDE in Firefox
In the above image, we can see, after the Selenium Integrated Development Environment was launched from the Firefox plugin, a welcome message should be displayed along with the version of the tool. Here, the version installed is 3.17.2.
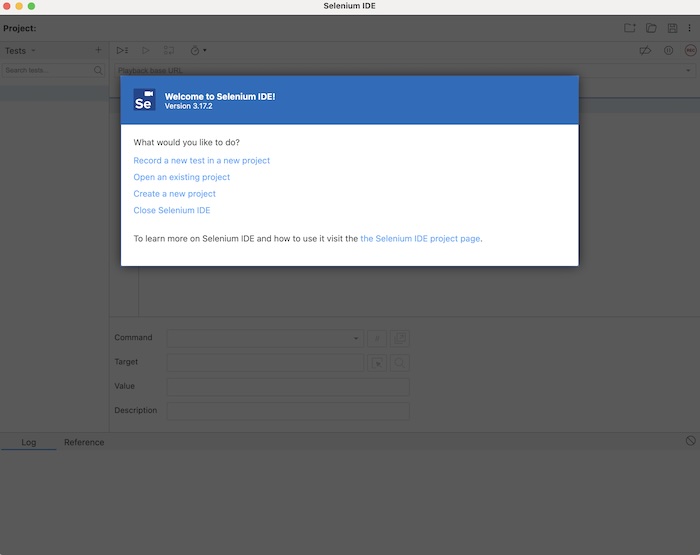
Along with this, it gives us the option to select what we would like to do with the tool, like Record a new test in a new project, Open an existing project, Create a new project, and Close it.
Also, a link with the text - the Selenium IDE project page is provided, which on clicking would land us to the Selenium Integrated Development Environment documentation page.
https://www.selenium.dev/selenium-ide/
Thus, we see that installation of Selenium Integrated Development Environment is a very simple process, and it does not require any particular software to do the Selenium Integrated Development Environment set up in a local machine.