- Selenium - Home
- Selenium - Overview
- Selenium - Components
- Selenium - Automation Testing
- Selenium - Environment Setup
- Selenium - Remote Control
- Selenium - IDE Introduction
- Selenium - Features
- Selenium - Limitations
- Selenium - Installation
- Selenium - Creating Tests
- Selenium - Creating Script
- Selenium - Control Flow
- Selenium - Store Variables
- Selenium - Alerts & Popups
- Selenium - Selenese Commands
- Selenium - Actions Commands
- Selenium - Accessors Commands
- Selenium - Assertions Commands
- Selenium - Assert/Verify Methods
- Selenium - Locating Strategies
- Selenium - Script Debugging
- Selenium - Verification Points
- Selenium - Pattern Matching
- Selenium - JSON Data File
- Selenium - Browser Execution
- Selenium - User Extensions
- Selenium - Code Export
- Selenium - Emitting Code
- Selenium - JavaScript Functions
- Selenium - Plugins
- Selenium WebDriver Tutorial
- Selenium - Introduction
- Selenium WebDriver vs RC
- Selenium - Installation
- Selenium - First Test Script
- Selenium - Driver Sessions
- Selenium - Browser Options
- Selenium - Chrome Options
- Selenium - Edge Options
- Selenium - Firefox Options
- Selenium - Safari Options
- Selenium - Double Click
- Selenium - Right Click
- HTML Report in Python
- Handling Edit Boxes
- Selenium - Single Elements
- Selenium - Multiple Elements
- Selenium Web Elements
- Selenium - File Upload
- Selenium - Locator Strategies
- Selenium - Relative Locators
- Selenium - Finders
- Selenium - Find All Links
- Selenium - User Interactions
- Selenium - WebElement Commands
- Selenium - Browser Interactions
- Selenium - Browser Commands
- Selenium - Browser Navigation
- Selenium - Alerts & Popups
- Selenium - Handling Forms
- Selenium - Windows and Tabs
- Selenium - Handling Links
- Selenium - Input Boxes
- Selenium - Radio Button
- Selenium - Checkboxes
- Selenium - Dropdown Box
- Selenium - Handling IFrames
- Selenium - Handling Cookies
- Selenium - Date Time Picker
- Selenium - Dynamic Web Tables
- Selenium - Actions Class
- Selenium - Action Class
- Selenium - Keyboard Events
- Selenium - Key Up/Down
- Selenium - Copy and Paste
- Selenium - Handle Special Keys
- Selenium - Mouse Events
- Selenium - Drag and Drop
- Selenium - Pen Events
- Selenium - Scroll Operations
- Selenium - Waiting Strategies
- Selenium - Explicit/Implicit Wait
- Selenium - Support Features
- Selenium - Multi Select
- Selenium - Wait Support
- Selenium - Select Support
- Selenium - Color Support
- Selenium - ThreadGuard
- Selenium - Errors & Logging
- Selenium - Exception Handling
- Selenium - Miscellaneous
- Selenium - Handling Ajax Calls
- Selenium - JSON Data File
- Selenium - CSV Data File
- Selenium - Excel Data File
- Selenium - Cross Browser Testing
- Selenium - Multi Browser Testing
- Selenium - Multi Windows Testing
- Selenium - JavaScript Executor
- Selenium - Headless Execution
- Selenium - Capture Screenshots
- Selenium - Capture Videos
- Selenium - Page Object Model
- Selenium - Page Factory
- Selenium - Record & Playback
- Selenium - Frameworks
- Selenium - Browsing Context
- Selenium - DevTools
- Selenium Grid Tutorial
- Selenium - Overview
- Selenium - Architecture
- Selenium - Components
- Selenium - Configuration
- Selenium - Create Test Script
- Selenium - Test Execution
- Selenium - Endpoints
- Selenium - Customizing a Node
- Selenium Reporting Tools
- Selenium - Reporting Tools
- Selenium - TestNG
- Selenium - JUnit
- Selenium - Allure
- Selenium & Other Technologies
- Selenium - Java Tutorial
- Selenium - Python Tutorial
- Selenium - C# Tutorial
- Selenium - Javascript Tutorial
- Selenium - Kotlin Tutorial
- Selenium - Ruby Tutorial
- Selenium - Maven & Jenkins
- Selenium - LogExpert Logging
- Selenium - Log4j Logging
- Selenium - Robot Framework
- Selenium - Github Tutorial
- Selenium - IntelliJ
- Selenium - XPath
- Selenium Miscellaneous Concepts
- Selenium - IE Driver
- Selenium - Automation Frameworks
- Selenium - Keyword Driven Framework
- Selenium - Data Driven Framework
- Selenium - Hybrid Driven Framework
- Selenium - SSL Certificate Error
- Selenium - Alternatives
- Selenium Useful Resources
- Selenium - Questions & Answers
- Selenium - Quick Guide
- Selenium - Useful Resources
- Selenium - Automation Practice
- Selenium - Discussion
Selenium - Data Driven using Excel
While designing a test, parameterizing the tests is inevitable. We will make use of Apache POI - Excel JAR's to achieve the same. It helps us read and write into Excel.
Download JAR
Step 1 − Navigate to the URL - https://poi.apache.org/download.html and download the ZIP format.
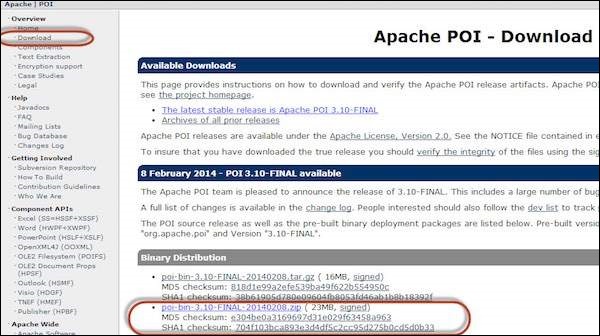
Step 2 − Click on the Mirror Link to download the JAR's.

Step 3 − Unzip the contents to a folder.
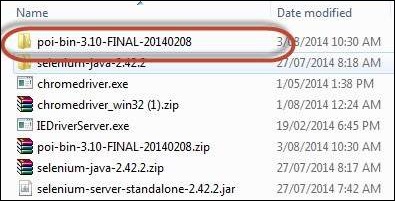
Step 4 − Unzipped contents would be displayed as shown below.
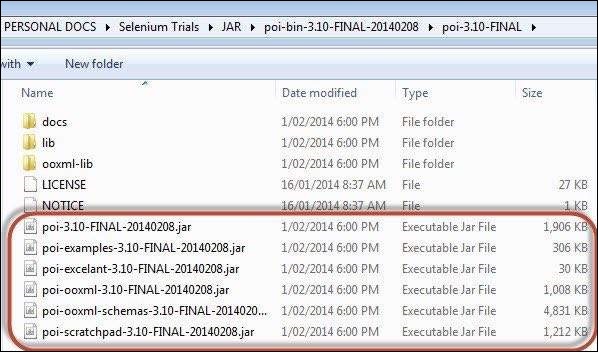
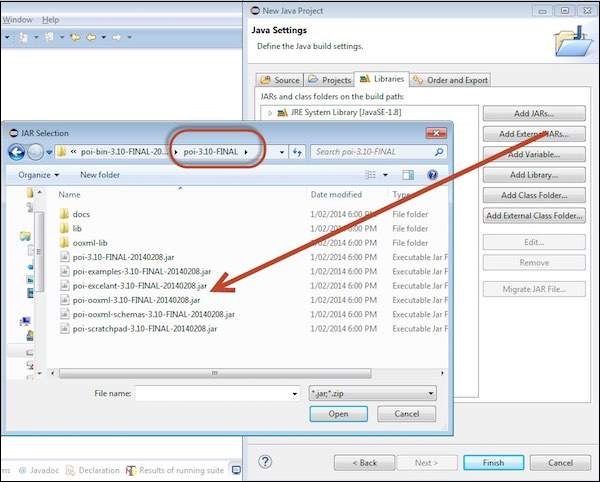
Step 5 − Now create a new project and add all the 'External JARs' under 'poi-3.10.FINAL' folder.
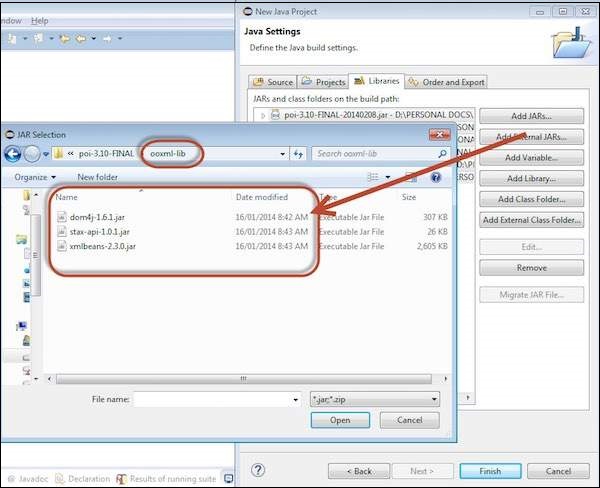
Step 6 − Now add all the 'External JARs' under the 'ooxml-lib' folder.
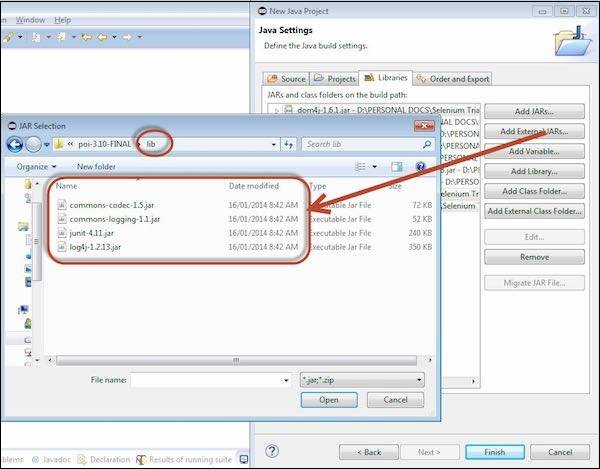
Step 7 − Now add all the 'External JARs' under the 'lib' folder.
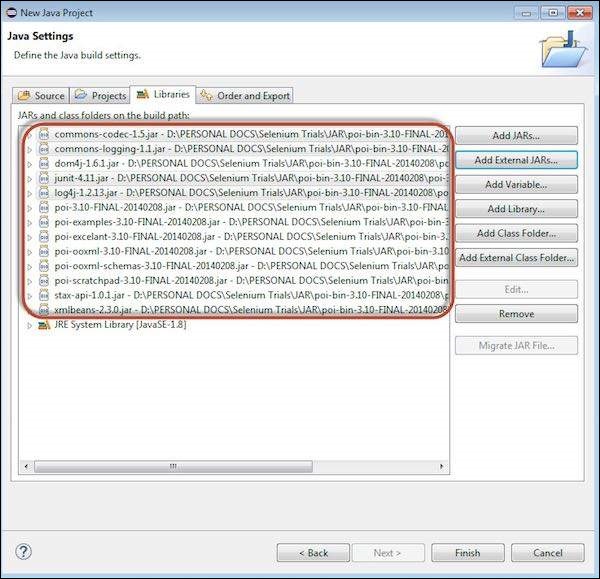
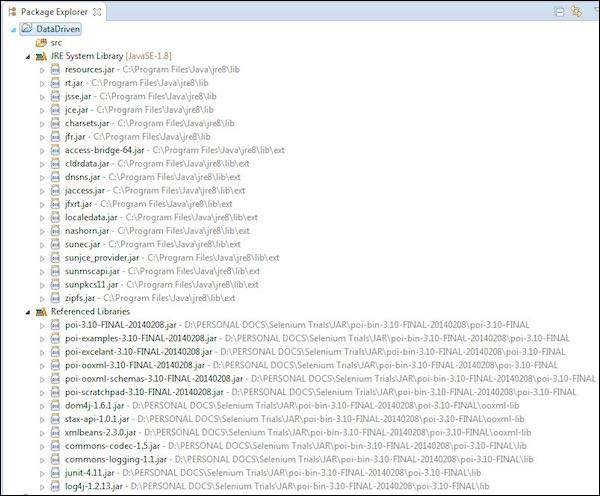
Step 8 − The Added JAR is displayed as shown below.
Step 9 − The Package Explorer is displayed as shown below. Apart from that, add 'WebDriver' related JAR's
Parameterization
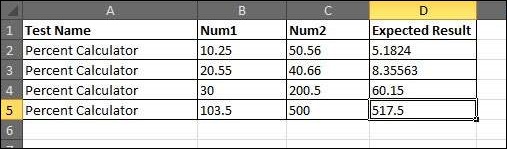
For demonstration, we will parameterize the percent calculator test.
Step 1 − We will parameterize all the inputs required for percent calculator using Excel. The designed Excel is shown below.
Step 2 − Execute all the percent calculator functions for all the specified parameters.
Step 3 − Let us create generic methods to access the Excel file using the imported JARs. These methods help us get a particular cell data or to set a particular cell data, etc.
import java.io.*;
import org.apache.poi.xssf.usermodel.*;

public class ExcelUtils {
   private XSSFSheet ExcelWSheet;
   private XSSFWorkbook ExcelWBook;

   //Constructor to connect to the Excel with sheetname and Path
   public Excelutils(String Path, String SheetName) throws Exception {

      try {
         // Open the Excel file
         FileInputStream ExcelFile = new FileInputStream(Path);

         // Access the required test data sheet
         ExcelWBook = new XSSFWorkbook(ExcelFile);
         ExcelWSheet = ExcelWBook.getSheet(SheetName);
      } catch (Exception e) {
         throw (e);
      }
   }

   //This method is to set the rowcount of the excel.
   public int excel_get_rows() throws Exception {

      try {
         return ExcelWSheet.getPhysicalNumberOfRows();
      } catch (Exception e) {
         throw (e);
      }
   }

   //This method to get the data and get the value as strings.
   public String getCellDataasstring(int RowNum, int ColNum) throws Exception {

      try {
         String CellData =
            ExcelWSheet.getRow(RowNum).getCell(ColNum).getStringCellValue();
         System.out.println("The value of CellData " + CellData);
         return CellData;
      } catch (Exception e) {
         return "Errors in Getting Cell Data";
      }
   }

   //This method to get the data and get the value as number.
   public double getCellDataasnumber(int RowNum, int ColNum) throws Exception {

      try {
         double CellData =
            ExcelWSheet.getRow(RowNum).getCell(ColNum).getNumericCellValue();
         System.out.println("The value of CellData " + CellData);
         return CellData;
      } catch (Exception e) {
         return 000.00;
      }
   }
}
Step 4 − Now add a main method which will access the Excel methods that we have developed.
public class xldemo {

   public static void main(String[] args) throws Exception {
      ExcelUtils  dd = new ExcelUtils ("C:\\Book1.xlsx","Sheet1");
      System.out.println("The Row count is " + dd.excel_get_rows());

      dd.getCellDataasnumber(1, 1);
      dd.getCellDataasnumber(1, 2);
      dd.getCellDataasnumber(1, 3);
      dd.getCellDataasnumber(2, 1);
      dd.getCellDataasnumber(2, 2);
      dd.getCellDataasnumber(2, 3);
      dd.getCellDataasnumber(3, 1);
      dd.getCellDataasnumber(3, 2);
      dd.getCellDataasnumber(3, 3);
   }

}
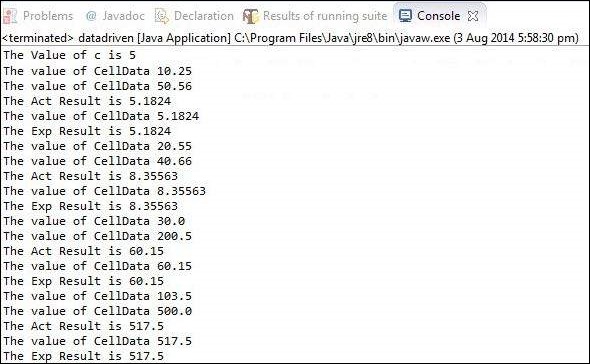
Output
Upon Executing the script, the output is displayed in the console as shown below.