
- JavaFX Tutorial
- JavaFX - Home
- JavaFX - Overview
- JavaFX Installation and Architecture
- JavaFX - Environment
- JavaFX - Installation Using Netbeans
- JavaFX - Installation Using Eclipse
- JavaFX - Installation using Visual Studio Code
- JavaFX - Architecture
- JavaFX - Application
- JavaFX 2D Shapes
- JavaFX - 2D Shapes
- JavaFX - Drawing a Line
- JavaFX - Drawing a Rectangle
- JavaFX - Drawing a Rounded Rectangle
- JavaFX - Drawing a Circle
- JavaFX - Drawing an Ellipse
- JavaFX - Drawing a Polygon
- JavaFX - Drawing a Polyline
- JavaFX - Drawing a Cubic Curve
- JavaFX - Drawing a Quad Curve
- JavaFX - Drawing an Arc
- JavaFX - Drawing an SVGPath
- JavaFX Properties of 2D Objects
- JavaFX - Stroke Type Property
- JavaFX - Stroke Width Property
- JavaFX - Stroke Fill Property
- JavaFX - Stroke Property
- JavaFX - Stroke Line Join Property
- JavaFX - Stroke Miter Limit Property
- JavaFX - Stroke Line Cap Property
- JavaFX - Smooth Property
- Operations on 2D Objects
- JavaFX - 2D Shapes Operations
- JavaFX - Union Operation
- JavaFX - Intersection Operation
- JavaFX - Subtraction Operation
- JavaFX Path Objects
- JavaFX - Path Objects
- JavaFX - LineTo Path Object
- JavaFX - HLineTo Path Object
- JavaFX - VLineTo Path Object
- JavaFX - QuadCurveTo Path Object
- JavaFX - CubicCurveTo Path Object
- JavaFX - ArcTo Path Object
- JavaFX Color and Texture
- JavaFX - Colors
- JavaFX - Linear Gradient Pattern
- JavaFX - Radial Gradient Pattern
- JavaFX Text
- JavaFX - Text
- JavaFX Effects
- JavaFX - Effects
- JavaFX - Color Adjust Effect
- JavaFX - Color input Effect
- JavaFX - Image Input Effect
- JavaFX - Blend Effect
- JavaFX - Bloom Effect
- JavaFX - Glow Effect
- JavaFX - Box Blur Effect
- JavaFX - GaussianBlur Effect
- JavaFX - MotionBlur Effect
- JavaFX - Reflection Effect
- JavaFX - SepiaTone Effect
- JavaFX - Shadow Effect
- JavaFX - DropShadow Effect
- JavaFX - InnerShadow Effect
- JavaFX - Lighting Effect
- JavaFX - Light.Distant Effect
- JavaFX - Light.Spot Effect
- JavaFX - Point.Spot Effect
- JavaFX - DisplacementMap
- JavaFX - PerspectiveTransform
- JavaFX Transformations
- JavaFX - Transformations
- JavaFX - Rotation Transformation
- JavaFX - Scaling Transformation
- JavaFX - Translation Transformation
- JavaFX - Shearing Transformation
- JavaFX Animations
- JavaFX - Animations
- JavaFX - Rotate Transition
- JavaFX - Scale Transition
- JavaFX - Translate Transition
- JavaFX - Fade Transition
- JavaFX - Fill Transition
- JavaFX - Stroke Transition
- JavaFX - Sequential Transition
- JavaFX - Parallel Transition
- JavaFX - Pause Transition
- JavaFX - Path Transition
- JavaFX Images
- JavaFX - Images
- JavaFX 3D Shapes
- JavaFX - 3D Shapes
- JavaFX - Creating a Box
- JavaFX - Creating a Cylinder
- JavaFX - Creating a Sphere
- Properties of 3D Objects
- JavaFX - Cull Face Property
- JavaFX - Drawing Modes Property
- JavaFX - Material Property
- JavaFX Event Handling
- JavaFX - Event Handling
- JavaFX - Using Convenience Methods
- JavaFX - Event Filters
- JavaFX - Event Handlers
- JavaFX UI Controls
- JavaFX - UI Controls
- JavaFX - ListView
- JavaFX - Accordion
- JavaFX - ButtonBar
- JavaFX - ChoiceBox
- JavaFX - HTMLEditor
- JavaFX - MenuBar
- JavaFX - Pagination
- JavaFX - ProgressIndicator
- JavaFX - ScrollPane
- JavaFX - Separator
- JavaFX - Slider
- JavaFX - Spinner
- JavaFX - SplitPane
- JavaFX - TableView
- JavaFX - TabPane
- JavaFX - ToolBar
- JavaFX - TreeView
- JavaFX - Label
- JavaFX - CheckBox
- JavaFX - RadioButton
- JavaFX - TextField
- JavaFX - PasswordField
- JavaFX - FileChooser
- JavaFX - Hyperlink
- JavaFX - Tooltip
- JavaFX - Alert
- JavaFX - DatePicker
- JavaFX - TextArea
- JavaFX Charts
- JavaFX - Charts
- JavaFX - Creating Pie Chart
- JavaFX - Creating Line Chart
- JavaFX - Creating Area Chart
- JavaFX - Creating Bar Chart
- JavaFX - Creating Bubble Chart
- JavaFX - Creating Scatter Chart
- JavaFX - Creating Stacked Area Chart
- JavaFX - Creating Stacked Bar Chart
- JavaFX Layout Panes
- JavaFX - Layout Panes
- JavaFX - HBox Layout
- JavaFX - VBox Layout
- JavaFX - BorderPane Layout
- JavaFX - StackPane Layout
- JavaFX - TextFlow Layout
- JavaFX - AnchorPane Layout
- JavaFX - TilePane Layout
- JavaFX - GridPane Layout
- JavaFX - FlowPane Layout
- JavaFX CSS
- JavaFX - CSS
- Media with JavaFX
- JavaFX - Playing Video
- JavaFX Useful Resources
- JavaFX - Quick Guide
- JavaFX - Useful Resources
- JavaFX - Discussion
JavaFX - Environment
From Java8 onwards, the JDK (Java Development Kit) includes JavaFX library in it. Therefore, to run JavaFX applications, you simply need to install Java8 or later version in your system.
The latest version of JDK, as of today, is 20.0.1. So, this tutorial will work with JavaFX versions supported by JDK20.
In addition to it, IDE’s like Eclipse and NetBeans provide support for JavaFX. This chapter teaches you how to set the environment to run JavaFX Applications locally.
Installing Java20
First of all, you will have to verify whether there is Java Installed in your system or not by opening the command prompt and typing the command “Java” in it.
If you haven’t installed Java in your system, the command prompt displays the message shown in the following screenshot.

You can install Java by following the steps given below.
Step 1 − Visit the JavaSE Downloads Page, click on the JDK Download button as highlighted in the following screenshot
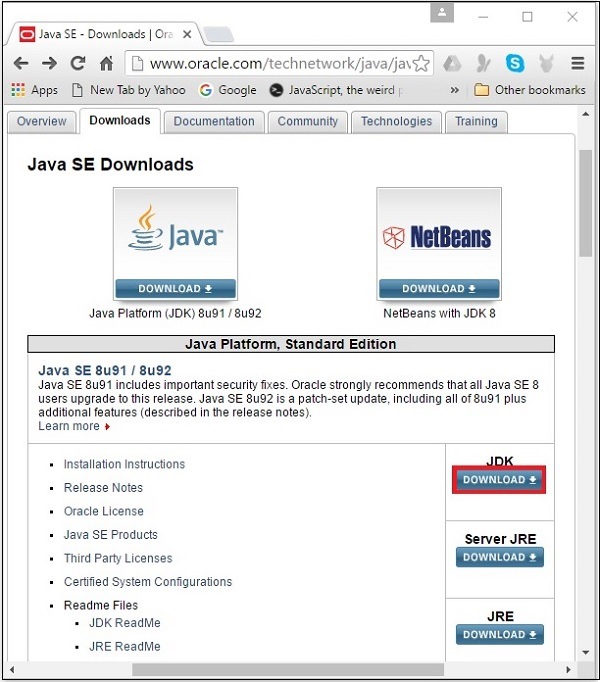
Step 2 − On clicking the highlighted link, the Java20 Development Kit suitable for Windows 64-bit Operating System will be downloaded onto your system.
Step 3 − Run the downloaded binary executable file to start the installation of JDK20.
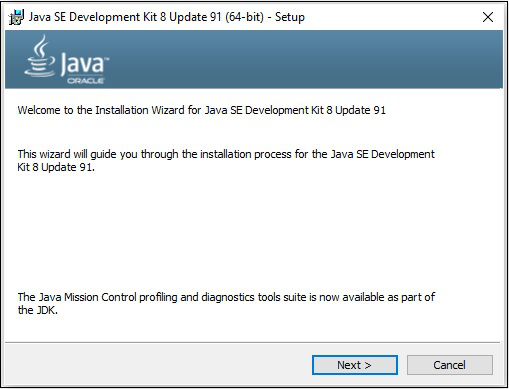
Step 4 − Change the installation directory if needed, else keep the default ones and proceed further.
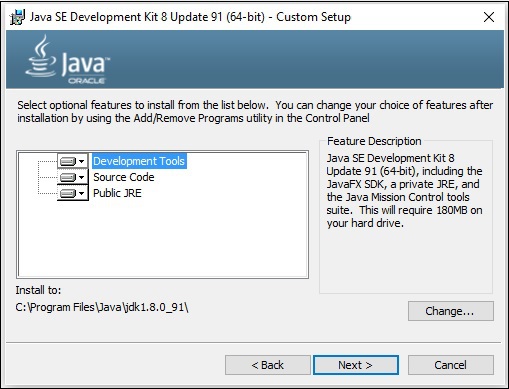
Step 5 − On selecting the destination folder and clicking Next, the JavaFX installation process starts displaying the progress bar.
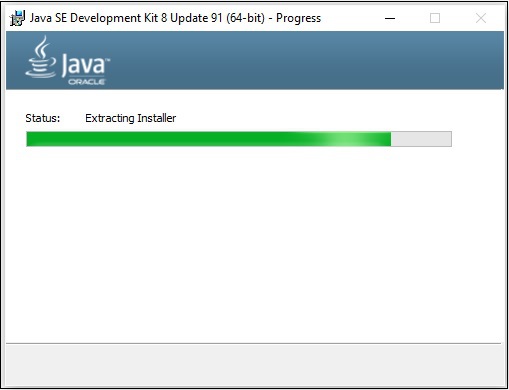
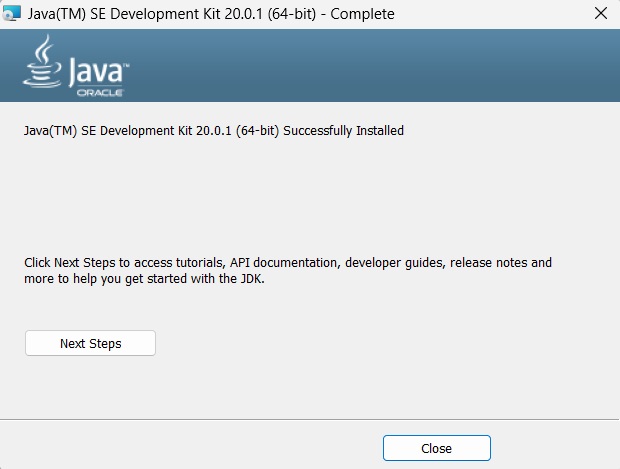
Step 6 − Finish the installation process by clicking the Close button as shown in the following screenshot.
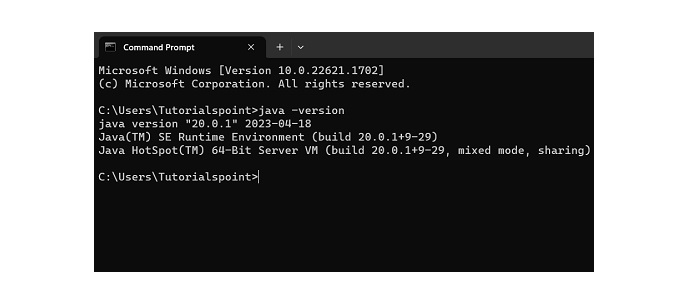
Step 7 − To verify if the installation is done properly, go to the command prompt and execute the 'java -version' command as shown below −
Setting up the Path for Windows
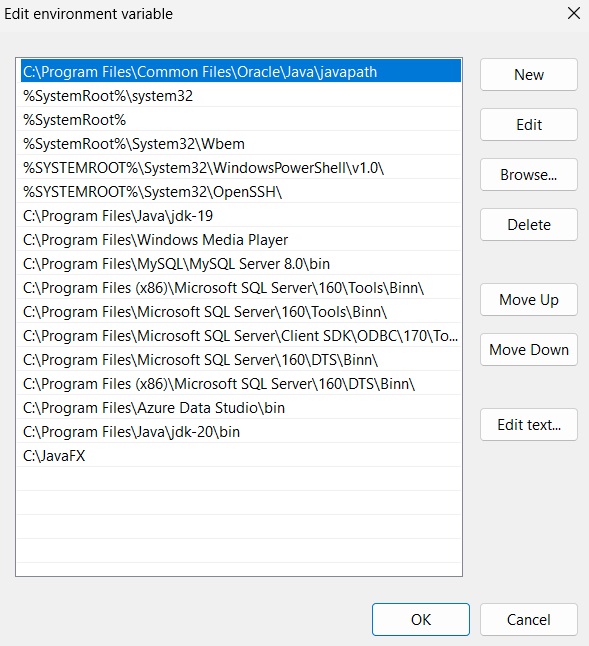
After installing Java, you need to set the path variables. Assume that you have installed Java in C:\Program Files\java\jdk-20 directory.
Now you can follow the steps that are given below −
Right-click on 'My Computer/This PC' and select 'Properties'.
Then, select 'Advanced System Settings'.
Click on the 'Environment Variables' button under the 'Advanced' tab.
Now, alter the 'Path' variable so that it also contains the path to the Java executable. For Example, if the path is currently set to 'C:\WINDOWS\SYSTEM32', then change your path to read 'C:\WINDOWS\SYSTEM32; C:\Program Files\java\jdk-20\bin'.
Also, create a new system variable by clicking 'New' under System variables as shown below.
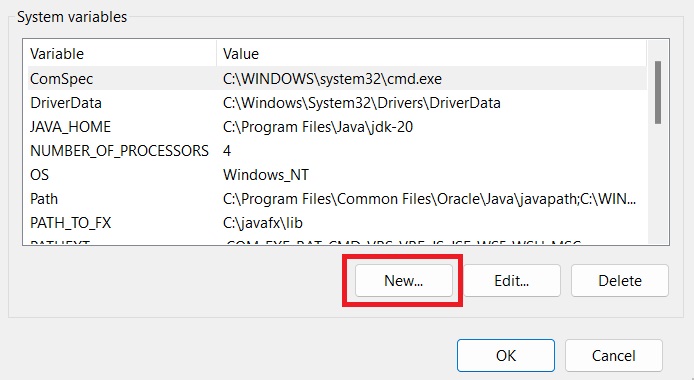
Name the new variable as "JAVA_HOME" and point it to the JDK installation directory.

Installing JavaFX SDK
Now, you have to install the JavaFX SDK to access the command-line tools and technologies to develop application content.
In order to use the JavaFX SDK to run a program, follow the steps given below −
Step 1 − Download an appropriate JavaFX runtime for your operating system (here, we are downloading JavaFX 20) from the JavaFX - Gluon page.
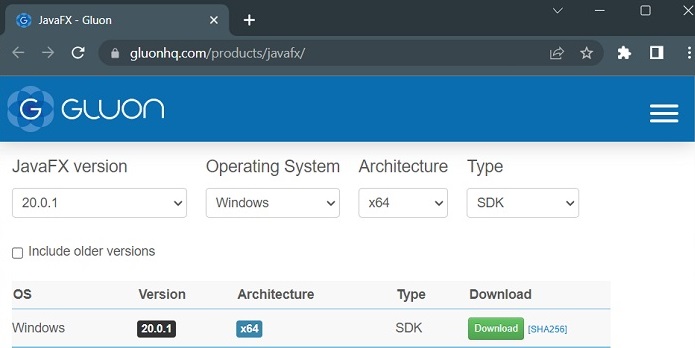
Step 2 − A .zip folder will be downloaded containing tools required to develop content for applications. Unzip this folder to any desired location (say, "C:/JavaFX").
Step 3 − Now, right-click on 'My Computer/This PC' and select 'Properties'. Then, select 'Advanced System Settings'. Click on the 'Environment Variables' button under the 'Advanced' tab. Create a new environment variable and name it "PATH_TO_FX" pointing to the lib directory of the JavaFX runtime.

This will now allow you to compile and run JavaFX applications from the command line using the downloaded JavaFX runtime.
To Continue Learning Please Login