- JavaFX Tutorial
- JavaFX - Home
- JavaFX - Overview
- JavaFX Installation and Architecture
- JavaFX - Installation Using Netbeans
- JavaFX - Installation Using Eclipse
- JavaFX - Installation using Visual Studio Code
- JavaFX - Architecture
- JavaFX - Application
- JavaFX 2D Shapes
- JavaFX - 2D Shapes
- JavaFX - Drawing a Line
- JavaFX - Drawing a Rectangle
- JavaFX - Drawing a Rounded Rectangle
- JavaFX - Drawing a Circle
- JavaFX - Drawing an Ellipse
- JavaFX - Drawing a Polygon
- JavaFX - Drawing a Polyline
- JavaFX - Drawing a Cubic Curve
- JavaFX - Drawing a Quad Curve
- JavaFX - Drawing an Arc
- JavaFX - Drawing an SVGPath
- JavaFX Properties of 2D Objects
- JavaFX - Stroke Type Property
- JavaFX - Stroke Width Property
- JavaFX - Stroke Fill Property
- JavaFX - Stroke Property
- JavaFX - Stroke Line Join Property
- JavaFX - Stroke Miter Limit Property
- JavaFX - Stroke Line Cap Property
- JavaFX - Smooth Property
- Operations on 2D Objects
- JavaFX - 2D Shapes Operations
- JavaFX - Union Operation
- JavaFX - Intersection Operation
- JavaFX - Subtraction Operation
- JavaFX Color and Texture
- JavaFX - Colors
- JavaFX Text
- JavaFX - Text
- JavaFX Effects
- JavaFX - Effects
- JavaFX Transformations
- JavaFX - Transformations
- JavaFX Animations
- JavaFX - Animations
- JavaFX Images
- JavaFX - Images
- JavaFX 3D Shapes
- JavaFX - 3D Shapes
- JavaFX - Creating a Box
- JavaFX - Creating a Cylinder
- JavaFX - Creating a Sphere
- Properties of 3D Objects
- JavaFX - Cull Face Property
- JavaFX - Drawing Modes Property
- JavaFX - Material Property
- JavaFX Event Handling
- JavaFX - Event Handling
- JavaFX - Using Convenience Methods
- JavaFX - Event Filters
- JavaFX - Event Handlers
- JavaFX UI Controls
- JavaFX - UI Controls
- JavaFX - ListView
- JavaFX - Accordion
- JavaFX - ButtonBar
- JavaFX - ChoiceBox
- JavaFX - HTMLEditor
- JavaFX - MenuBar
- JavaFX - Pagination
- JavaFX - ProgressIndicator
- JavaFX - ScrollPane
- JavaFX - Separator
- JavaFX - Slider
- JavaFX - Spinner
- JavaFX - SplitPane
- JavaFX - TableView
- JavaFX - TabPane
- JavaFX - ToolBar
- JavaFX - TreeView
- JavaFX - Label
- JavaFX - CheckBox
- JavaFX - RadioButton
- JavaFX - TextField
- JavaFX - PasswordField
- JavaFX - FileChooser
- JavaFX - Hyperlink
- JavaFX - Tooltip
- JavaFX - Alert
- JavaFX - DatePicker
- JavaFX - TextArea
- JavaFX Charts
- JavaFX - Charts
- JavaFX - Creating Pie Chart
- JavaFX - Creating Line Chart
- JavaFX - Creating Area Chart
- JavaFX - Creating Bar Chart
- JavaFX - Creating Bubble Chart
- JavaFX - Creating Scatter Chart
- JavaFX - Creating Stacked Area Chart
- JavaFX - Creating Stacked Bar Chart
- JavaFX Layout Panes
- JavaFX - Layout Panes
- JavaFX - HBox Layout
- JavaFX - VBox Layout
- JavaFX - BorderPane Layout
- JavaFX - StackPane Layout
- JavaFX - TextFlow Layout
- JavaFX - AnchorPane Layout
- JavaFX - TilePane Layout
- JavaFX - GridPane Layout
- JavaFX - FlowPane Layout
- JavaFX CSS
- JavaFX - CSS
- Media with JavaFX
- JavaFX - Playing Video
- JavaFX Useful Resources
- JavaFX - Quick Guide
- JavaFX - Useful Resources
- JavaFX - Discussion
JavaFX - Quick Guide
JavaFX - Overview
Rich Internet Applications are those web applications which provide similar features and experience as that of desktop applications. They offer a better visual experience when compared to the normal web applications to the users. These applications are delivered as browser plug-ins or as a virtual machine and are used to transform traditional static applications into more enhanced, fluid, animated and engaging applications.
Unlike traditional desktop applications, RIA’s don’t require to have any additional software to run. As an alternative, you should install software such as ActiveX, Java, Flash, depending on the Application.
In an RIA, the graphical presentation is handled on the client side, as it has a plugin that provides support for rich graphics. In a nutshell, data manipulation in an RIA is carried out on the server side, while related object manipulation is carried out on the client side.
We have three main technologies using which we can develop an RIA. These include the following −
- Adobe Flash
- Microsoft Silverlight
- JavaFX
Adobe Flash
This software platform is developed by Adobe Systems and is used in creating Rich Internet Applications. Along with these, you can also build other Applications such as Vector, Animation, Browser Games, Desktop Applications, Mobile Applications and Games, etc.
This is the most commonly used platform for developing and executing RIA’s with a desktop browser penetration rate of 96%.
Microsoft Silverlight
Just like Adobe flash, Microsoft Silverlight is also a software application framework for developing as well as executing Rich Internet Applications. Initially this framework was used for streaming media. The present versions support multimedia, graphics, and animation as well.
This platform is rarely used with a desktop browser penetration rate of 66%.
JavaFX
JavaFX is a Java library using which you can develop Rich Internet Applications. By using Java technology, these applications have a browser penetration rate of 76%.
What is JavaFX?
JavaFX is a Java library used to build Rich Internet Applications. The applications written using this library can run consistently across multiple platforms. The applications developed using JavaFX can run on various devices such as Desktop Computers, Mobile Phones, TVs, Tablets, etc.
To develop GUI Applications using Java programming language, the programmers rely on libraries such as Advanced Windowing Toolkit and Swing. After the advent of JavaFX, these Java programmers can now develop GUI applications effectively with rich content.
Need for JavaFX
To develop Client Side Applications with rich features, the programmers used to depend on various libraries to add features such as Media, UI controls, Web, 2D and 3D, etc. JavaFX includes all these features in a single library. In addition to these, the developers can also access the existing features of a Java library such as Swing.
JavaFX provides a rich set of graphics and media API’s and it leverages the modern Graphical Processing Unit through hardware accelerated graphics. JavaFX also provides interfaces using which developers can combine graphics animation and UI control.
One can use JavaFX with JVM based technologies such as Java, Groovy and JRuby. If developers opt for JavaFX, there is no need to learn additional technologies, as prior knowledge of any of the above-mentioned technologies will be good enough to develop RIA’s using JavaFX.
Features of JavaFX
Following are some of the important features of JavaFX −
Written in Java − The JavaFX library is written in Java and is available for the languages that can be executed on a JVM, which include − Java, Groovy and JRuby. These JavaFX applications are also platform independent.
FXML − JavaFX features a language known as FXML, which is a HTML like declarative markup language. The sole purpose of this language is to define a user Interface.
Scene Builder − JavaFX provides an application named Scene Builder. On integrating this application in IDE’s such as Eclipse and NetBeans, the users can access a drag and drop design interface, which is used to develop FXML applications (just like Swing Drag & Drop and DreamWeaver Applications).
Swing Interoperability − In a JavaFX application, you can embed Swing content using the Swing Node class. Similarly, you can update the existing Swing applications with JavaFX features like embedded web content and rich graphics media.
Built-in UI controls − JavaFX library caters UI controls using which we can develop a full-featured application.
CSS like Styling − JavaFX provides a CSS like styling. By using this, you can improve the design of your application with a simple knowledge of CSS.
Canvas and Printing API − JavaFX provides Canvas, an immediate mode style of rendering API. Within the package javafx.scene.canvas it holds a set of classes for canvas, using which we can draw directly within an area of the JavaFX scene. JavaFX also provides classes for Printing purposes in the package javafx.print.
Rich set of API’s − JavaFX library provides a rich set of API’s to develop GUI applications, 2D and 3D graphics, etc. This set of API’s also includes capabilities of Java platform. Therefore, using this API, you can access the features of Java languages such as Generics, Annotations, Multithreading, and Lambda Expressions. The traditional Java Collections library was enhanced and concepts like observable lists and maps were included in it. Using these, the users can observe the changes in the data models.
Integrated Graphics library − JavaFX provides classes for 2d and 3d graphics.
Graphics pipeline − JavaFX supports graphics based on the Hardware-accelerated graphics pipeline known as Prism. When used with a supported Graphic Card or GPU it offers smooth graphics. In case the system does not support graphic card then prism defaults to the software rendering stack.
History of JavaFX
JavaFX was originally developed by Chris Oliver, when he was working for a company named See Beyond Technology Corporation, which was later acquired by Sun Microsystems in the year 2005.
The following points give us more information of this project −
Initially this project was named as F3 (Form Follows Functions) and it was developed with an intention to provide richer interfaces for developing GUI Applications.
Sun Microsystems acquired the See Beyond company in June 2005, it adapted the F3 project as JavaFX.
In the year 2007, JavaFX was announced officially at Java One, a world wide web conference which is held yearly.
In the year 2008, Net Beans integrated with JavaFX was available. In the same year, the Java Standard Development Kit for JavaFX 1.0 was released.
In the year 2009, Oracle Corporation acquired Sun Microsystems and in the same year the next version of JavaFX (1.2) was released as well.
In the year 2010, JavaFX 1.3 came out and in the year 2011 JavaFX 2.0 was released.
The latest version, JavaFX8, was released as an integral part of Java on 18th of March 2014.
JavaFX - Environment
From Java8 onwards, the JDK (Java Development Kit) includes JavaFX library in it. Therefore, to run JavaFX applications, you simply need to install Java8 or later version in your system.
In addition to it, IDE’s like Eclipse and NetBeans provide support for JavaFX. This chapter teaches you how to set the environment to run JavaFX Applications in various ways.
Installing Java8
First of all, you will have to verify whether there is Java Installed in your system or not by opening the command prompt and typing the command “Java” in it.
If you haven’t installed Java in your system, the command prompt displays the message shown in the following screenshot.
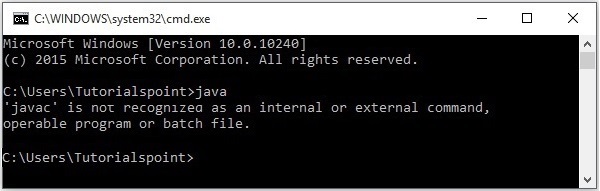
Then install Java by following the steps given below.
Step 1 − Visit the JavaSE Downloads Page, click on the JDK Download button as highlighted in the following screenshot

Step 2 − On clicking the Download button, you will be redirected to the Java SE Development Kit 8 Downloads page. This page provides you links of JDK for various platforms.
Accept the license agreement and download the required software by clicking on its respective link.
For example, if you are working on a windows 64-bit Operating System then you need to download the JDK version highlighted in the following screenshot.
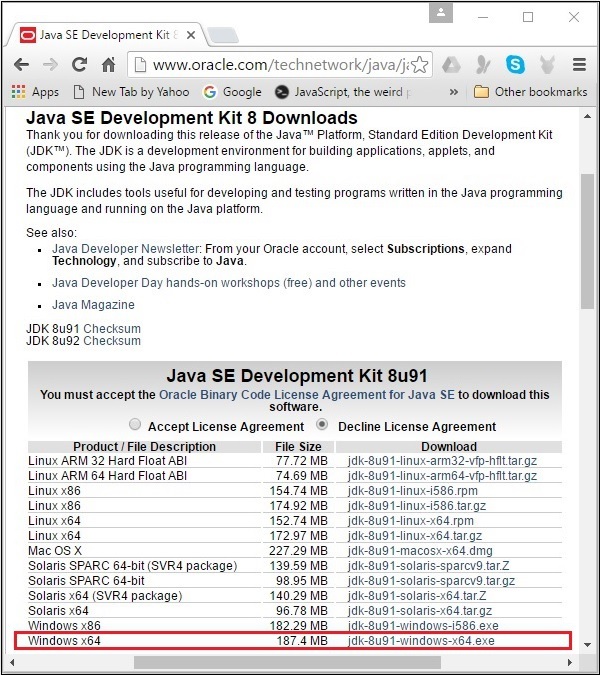
On clicking the highlighted link, the Java8 Development Kit suitable for Windows 64-bit Operating System will be downloaded onto your system.
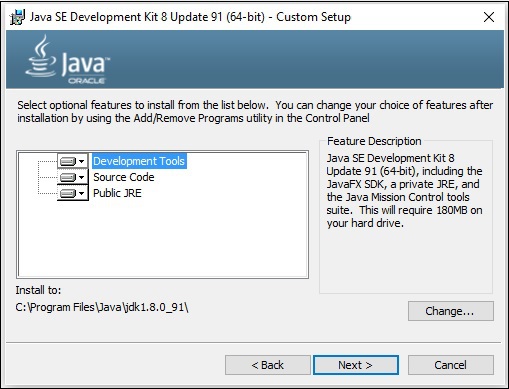
Step 3 − Run the downloaded binary executable file to start the installation of JDK8.

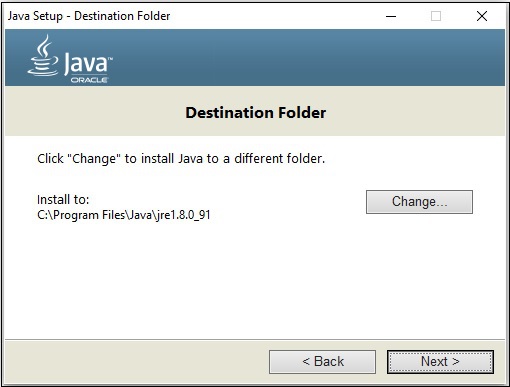
Step 4 − Choose the Installation Directory.
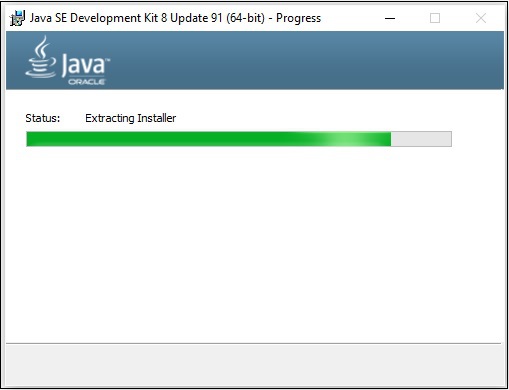
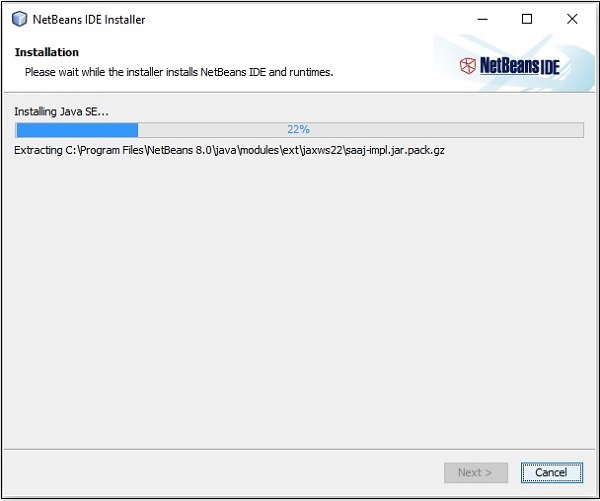
Step 5 − On selecting the destination folder and clicking Next, the JavaFX installation process starts displaying the progress bar as shown in the following screenshot.
Step 6 − Change the installation directory if needed, else keep the default ones and proceed further.
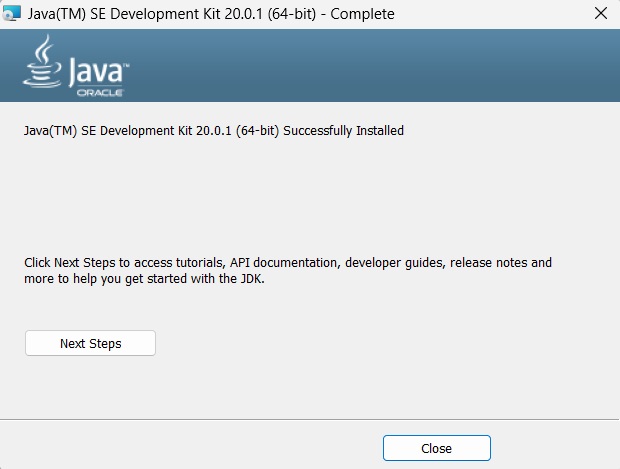
Step 7 − Finish the installation process by clicking the Close button as shown in the following screenshot.
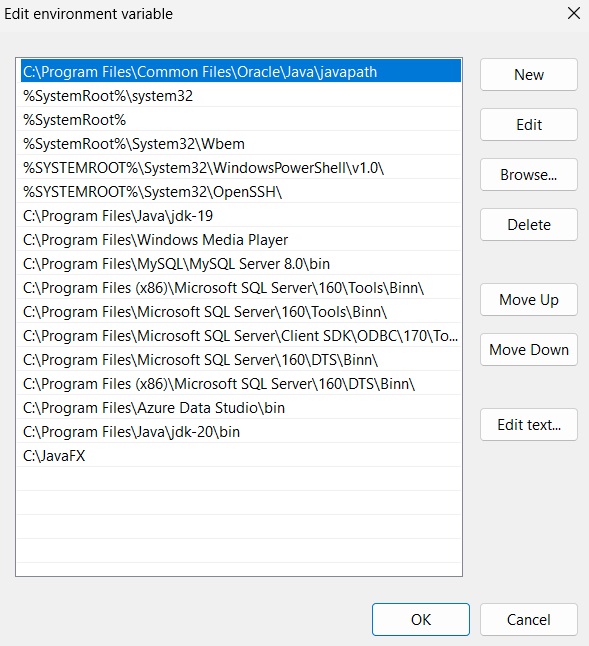
Setting up the Path for Windows
After installing Java, you need to set the path variables. Assume that you have installed Java in C:\Program Files\java\jdk1.8.0_91directory.
Now you can follow the steps that are given below −
Right-click on 'My Computer' and select 'Properties'.
Click on the 'Environment Variables' button under the 'Advanced' tab.
Now, alter the 'Path' variable so that it also contains the path to the Java executable. For Example, if the path is currently set to 'C:\WINDOWS\SYSTEM32', then change your path to read 'C:\WINDOWS\SYSTEM32; C:\Program Files\java\ jdk1.8.0_91\bin'.
Setting NetBeans Environment of JavaFX
NetBeans8 provides inbuilt support for JavaFX. On installing this, you can create a JavaFX application without any additional plugins or JAR files. To set up the NetBeans environment, you will need to follow the steps that are given below.
Step 1 − Visit the NetBeans website NetBeans website and click the Download button in order to download the NetBeans software.

Step 2 − On clicking Download, you will get to the Downloads page of the NetBeans software, which provides NetBeans bundles for various Java applications. Download the NetBeans software for JavaSE as shown in the following screenshot.

Step 3 − On clicking this button, a file named netbeans-8.0-windows.exe will be downloaded onto your system. Run this file in order to install it. On running this file, a NetBeans installer will start as shown in the following screenshot.
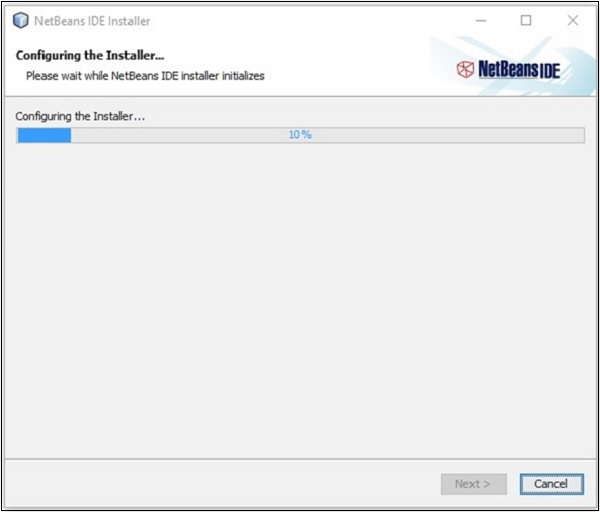
After completion of the configuration, you will see the Welcome Page of the installer.
Step 4 − Click the Next button and proceed with the installation.

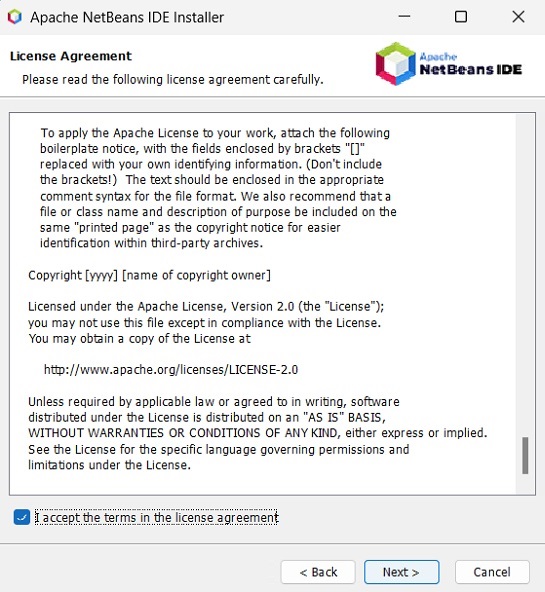
Step 5 − The next window holds the NETBEANS IDE 8.0 license agreement. Read it carefully and accept the agreement by checking the checkbox at “I accept the terms in the license agreement” and then click the Next button.
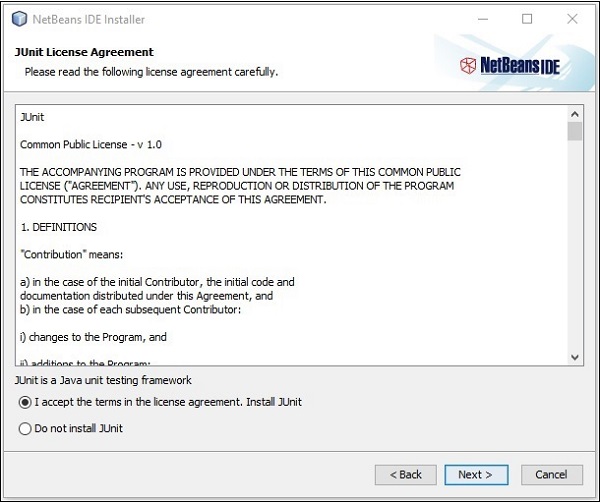
Step 6 − In the next window, you will encounter the license agreement for Junit, accept it by selecting the radio button at “I accept the terms in the license agreement, Install JUnit” and click on Next.
Step 7 − Choose the destination directory where you need the Netbeans 8.0 to be installed. Furthermore, you can also browse through the directory where Java Development Kit is installed in your system and click on the Next button.

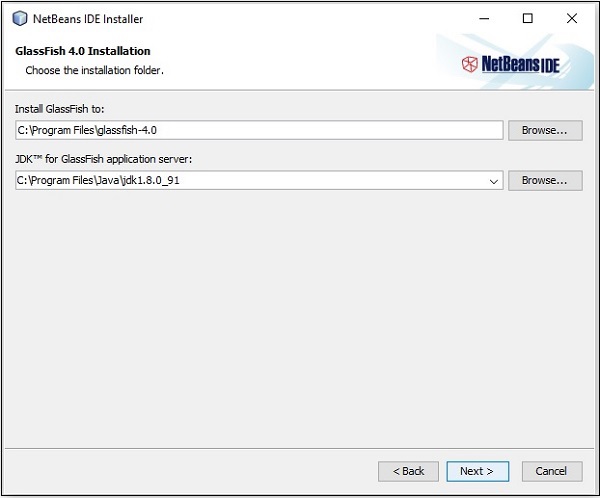
Step 8 − Similarly, choose the destination directory for Glassfish Server installation. Browse through the Java Development Kit directory (now for Glassfish Reference) and then click Next.
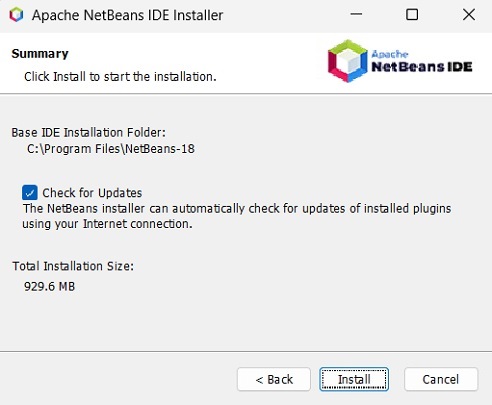
Step 9 − Check the Check for Updates box for automatic updates and click the Install button to start the installation.
Step 10 − This step starts the installation of NetBeans IDE 8.0 and it may take a while.
Step 11 − Once the process is complete, click the Finish button to finish the installation.
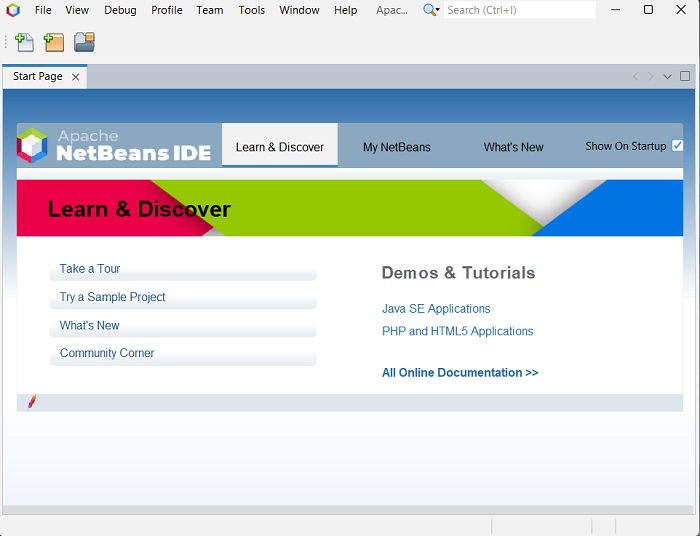
Step 12 − Once you launch the NetBeans IDE, you will see the start page as shown in the following screenshot.
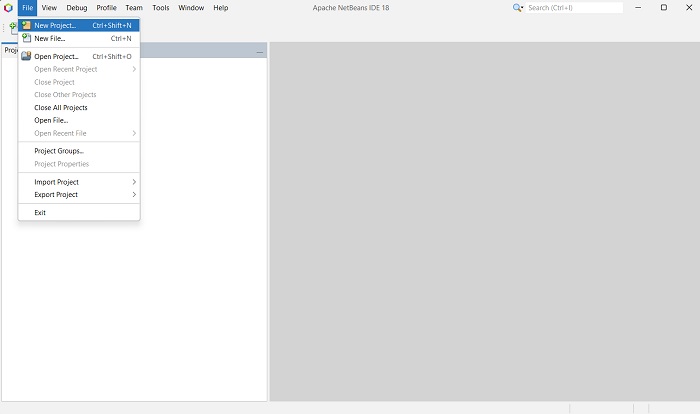
Step 13 − In the file menu, select New Project… to open the New project wizard as shown in the following screenshot.
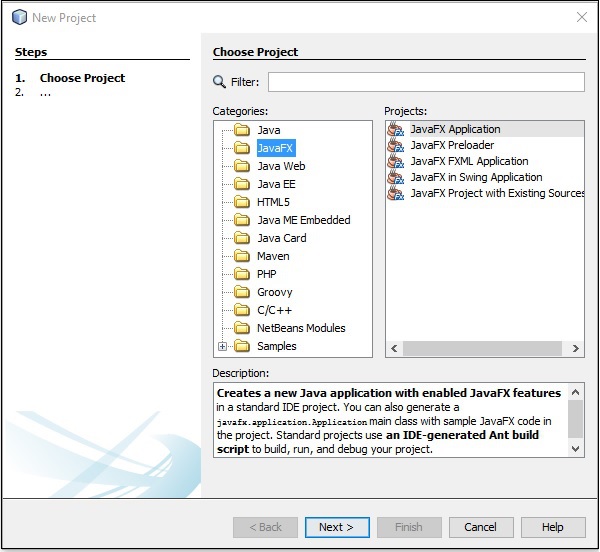
Step 14 − In the New Project wizard, select JavaFX and click on Next. It starts creating a new JavaFX Application for you.
Step 15 − Select the name of the project and location of the project in the NewJavaFX Application window and then click Finish. It creates a sample application with the given name.
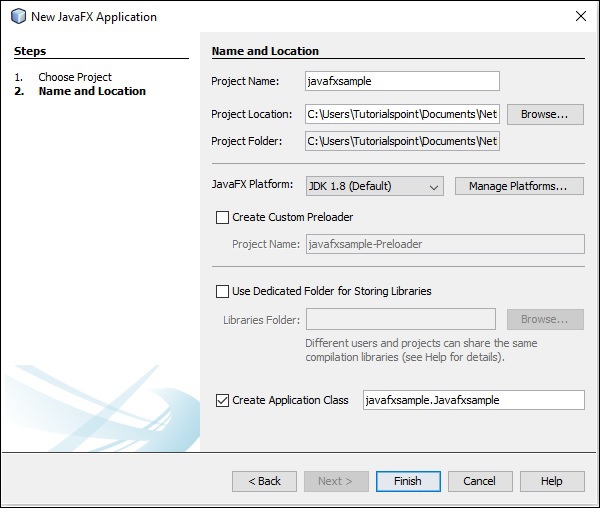
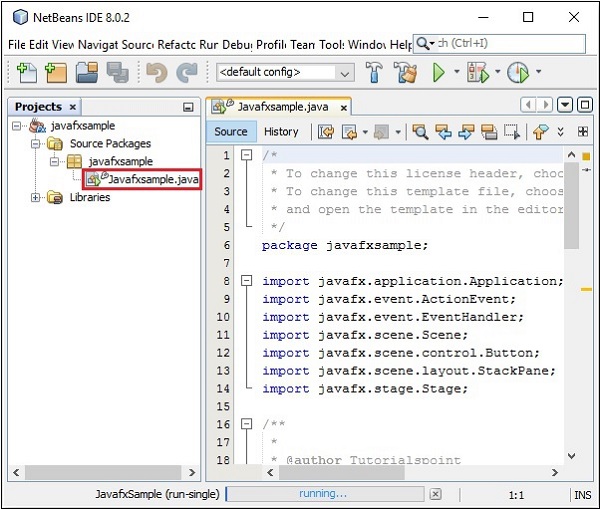
In this instance, an application with a name javafxsample is created. Within this application, the NetBeans IDE will generate a Java program with the name Javafxsample.java. As shown in the following screenshot, this program will be created inside NetBeans Source Packages → javafxsample.
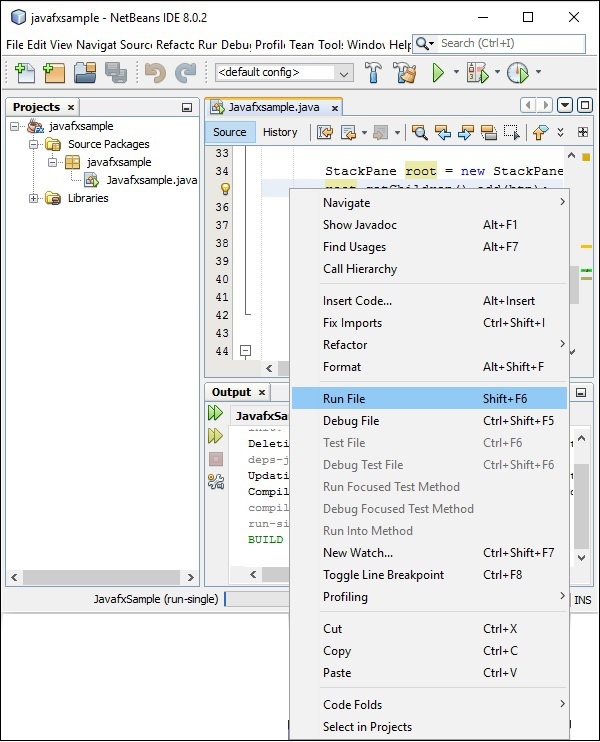
Step 16 − Right-click on the file and select Run File to run this code as shown in the following screenshot.
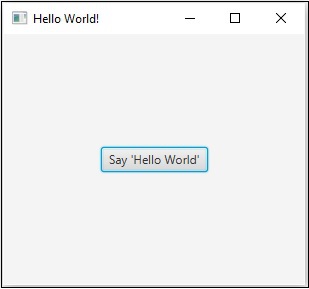
This automatically created program contains the code which generates a simple JavaFX window having a button with the label Say ‘Hello World’ in it. Every time you click on this button, the string Hello World will be displayed on the console as shown below.
Installing JavaFX in Eclipse
A plugin named e(fx)clipse is also available in JavaFX. You can use the following steps to set JavaFX in Eclipse. First of all, make sure that you have Eclipse in your system. If not, download and install Eclipse in your system.
Once Eclipse is installed, follow the steps given below to install e(fx)clipse in your system.
Step 1 − Open Eclipse in the Help menu and select Install New Software… option as shown below.
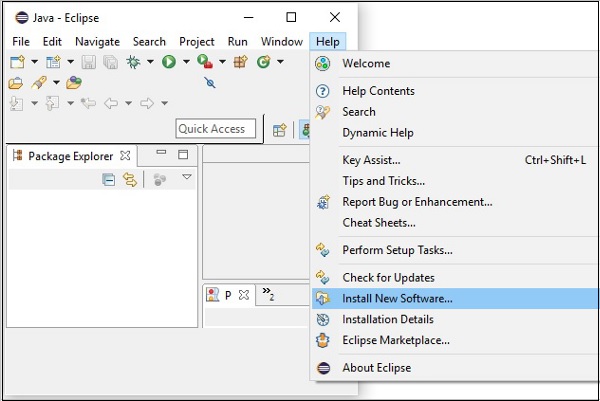
Upon clicking, it will display the Available Software window, as shown in the following screenshot.
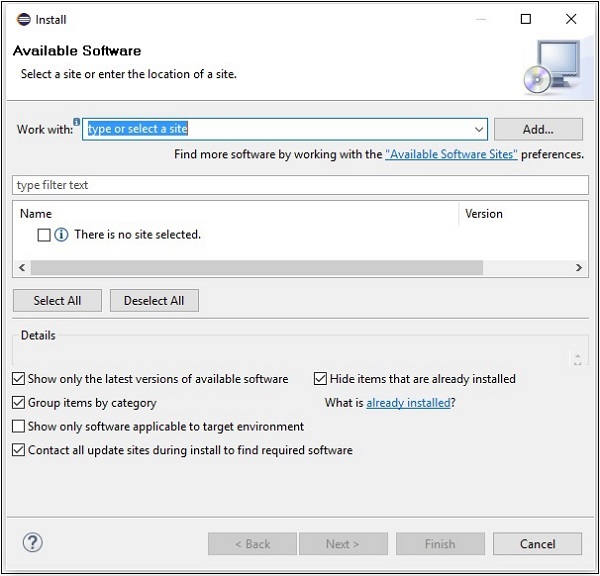
In the text box Work with of this window, you need to provide the link of the plugin for the required software.
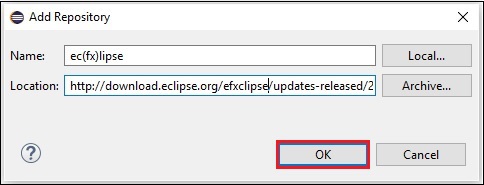
Step 2 − Click the Add… button. Provide the name of the plugin as e(fx)clipse. Next, Provide the following link as a location. http://download.eclipse.org/efxclipse/updates-released/2.3.0/site/
Step 3 − After specifying the name and location of the plugin, click the OK button, as highlighted in the following screenshot.
Step 4 − Soon after you add the plugin, you will find two checkboxes for e(fx)clipse – install and e(fx)clipse – single components. Check both these checkboxes and click the Add… button as shown in the following screenshot.
clipse_single_components.jpg)
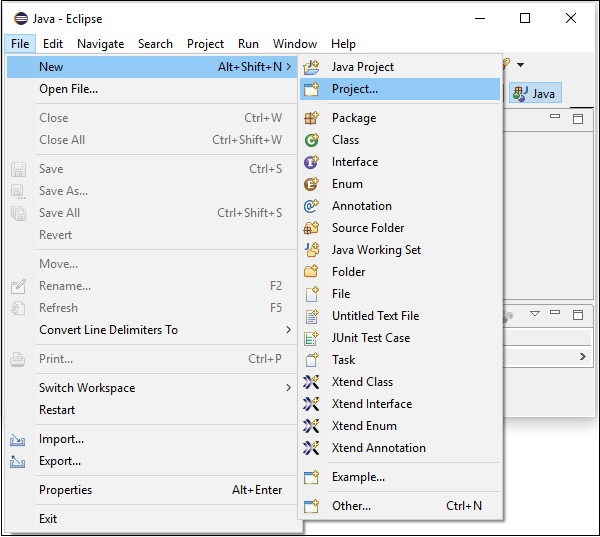
Step 5 − Next, open your Eclipse IDE. Click the File menu and select Project as shown in the following screenshot.
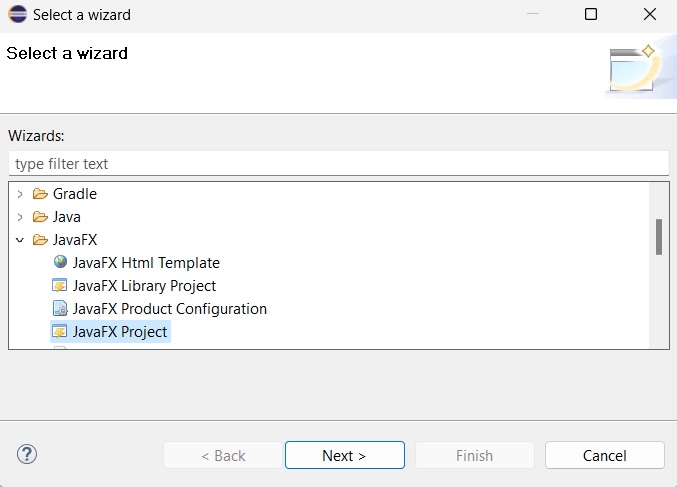
Step 6 − Then, you will get a window where you can see a list of wizards provided by Eclipse to create a project. Expand the JavaFX wizard, select JavaFX Project and click the Next button as shown in the following screenshot.
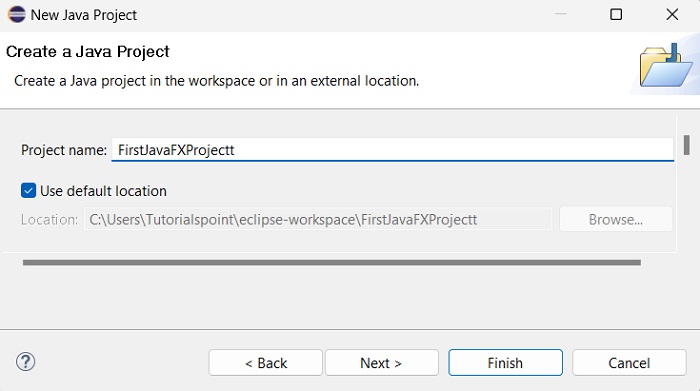
Step 7 − On clicking Next, a New Project Wizard opens. Here, you can type the required project name and click Finish.
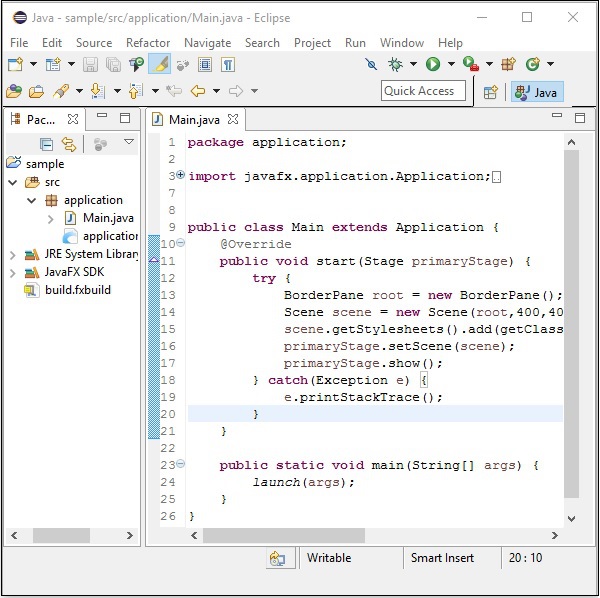
Step 8 − On clicking Finish, an application is created with the given name (sample). In the sub-package named application, a program with the name Main.java is generated as shown below.
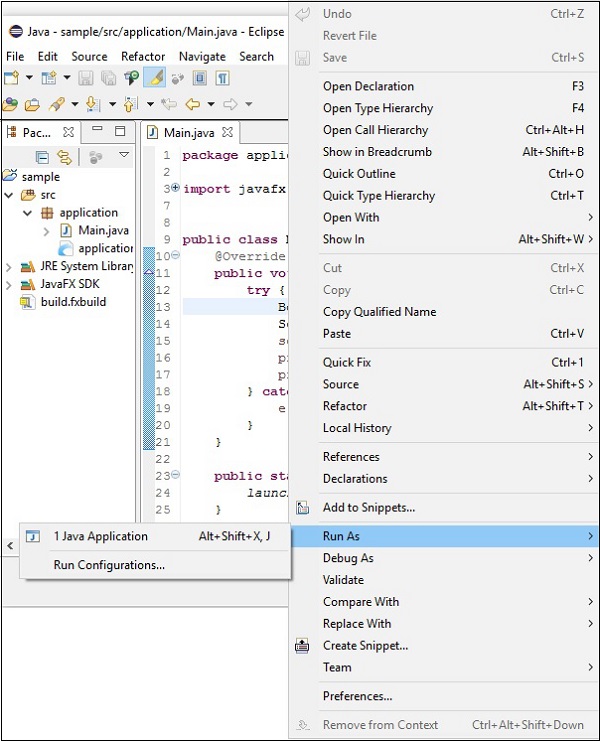
Step 9 − This automatically generated program contains the code to generate an empty JavaFX window. Right-click on this file, select Run As → Java Application as shown in the following screenshot.
On executing this application, it gives you an empty JavaFX window as shown below.
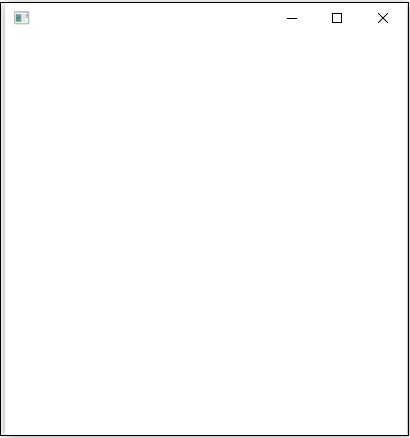
Note − We will discuss more about the code in the later chapters.
JavaFX - Architecture
JavaFX provides a complete API with a rich set of classes and interfaces to build GUI applications with rich graphics. The important packages of this API are −
javafx.animation − Contains classes to add transition based animations such as fill, fade, rotate, scale and translation, to the JavaFX nodes.
javafx.application − Contains a set of classes responsible for the JavaFX application life cycle.
javafx.css − Contains classes to add CSS–like styling to JavaFX GUI applications.
javafx.event − Contains classes and interfaces to deliver and handle JavaFX events.
javafx.geometry − Contains classes to define 2D objects and perform operations on them.
javafx.stage − This package holds the top level container classes for JavaFX application.
javafx.scene − This package provides classes and interfaces to support the scene graph. In addition, it also provides sub-packages such as canvas, chart, control, effect, image, input, layout, media, paint, shape, text, transform, web, etc. There are several components that support this rich API of JavaFX.
The following illustration shows the architecture of JavaFX API. Here you can see the components that support JavaFX API.
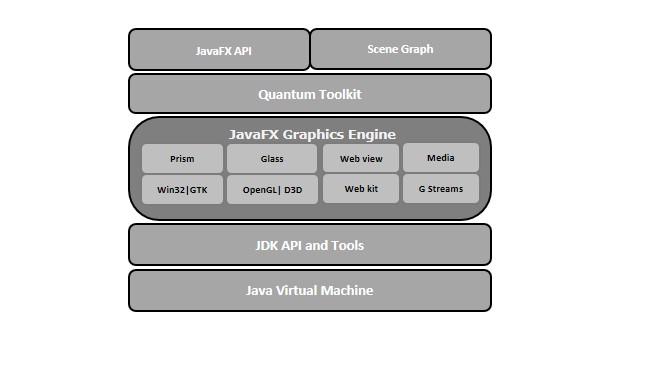
Scene Graph
In JavaFX, the GUI Applications were coded using a Scene Graph. A Scene Graph is the starting point of the construction of the GUI Application. It holds the (GUI) application primitives that are termed as nodes.
A node is a visual/graphical object and it may include −
Geometrical (Graphical) objects − (2D and 3D) such as circle, rectangle, polygon, etc.
UI controls − such as Button, Checkbox, Choice box, Text Area, etc.
Containers − (layout panes) such as Border Pane, Grid Pane, Flow Pane, etc.
Media elements − such as audio, video and image objects.
In general, a collection of nodes makes a scene graph. All these nodes are arranged in a hierarchical order as shown below.
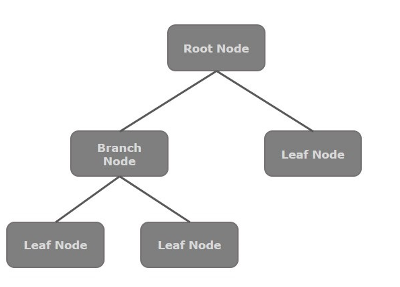
Each node in the scene graph has a single parent, and the node which does not contain any parents is known as the root node.
In the same way, every node has one or more children, and the node without children is termed as leaf node; a node with children is termed as a branch node.
A node instance can be added to a scene graph only once. The nodes of a scene graph can have Effects, Opacity, Transforms, Event Handlers, Event Handlers, Application Specific States.
Prism
Prism is a high performance hardware–accelerated graphical pipeline that is used to render the graphics in JavaFX. It can render both 2-D and 3-D graphics.
To render graphics, a Prism uses −
- DirectX 9 on Windows XP and Vista.
- DirectX 11 on Windows 7.
- OpenGL on Mac and Linux, Embedded Systems.
In case the hardware support for graphics on the system is not sufficient, then Prism uses the software render path to process the graphics.
When used with a supported Graphic Card or GPU, it offers smoother graphics. Just in case the system does not support a graphic card, then Prism defaults to the software rendering stack (either of the above two).
GWT (Glass Windowing Toolkit)
As the name suggests, GWT provides services to manage Windows, Timers, Surfaces and Event Queues. GWT connects the JavaFX Platform to the Native Operating System.
Quantum Toolkit
It is an abstraction over the low-level components of Prism, Glass, Media Engine, and Web Engine. It ties Prism and GWT together and makes them available to JavaFX.
WebView
Using JavaFX, you can also embed HTML content in to a scene graph. WebView is the component of JavaFX which is used to process this content. It uses a technology called Web Kit, which is an internal open-source web browser engine. This component supports different web technologies like HTML5, CSS, JavaScript, DOM and SVG.
Using WebView, you can −
- Render HTML content from local or remote URL.
- Support history and provide Back and Forward navigation.
- Reload the content.
- Apply effects to the web component.
- Edit the HTML content.
- Execute JavaScript commands.
- Handle events.
In general, using WebView, you can control web content from Java.
Media Engine
The JavaFX media engine is based on an open-source engine known as a Streamer. This media engine supports the playback of video and audio content.
The JavaFX media engine provides support for audio for the following file formats −
| Audio |
|
|---|---|
| Video |
|
The package javafx.scene.media contains the classes and interfaces to provide media functionality in JavaFX. It is provided in the form of three components, which are −
Media Object − This represents a media file
Media Player − To play media content.
Media View − To display media.
JavaFX - Application
In this chapter, we will discuss the structure of a JavaFX application in detail and also learn to create a JavaFX application with an example.
JavaFX Application Structure
In general, a JavaFX application will have three major components namely Stage, Scene and Nodes as shown in the following diagram.
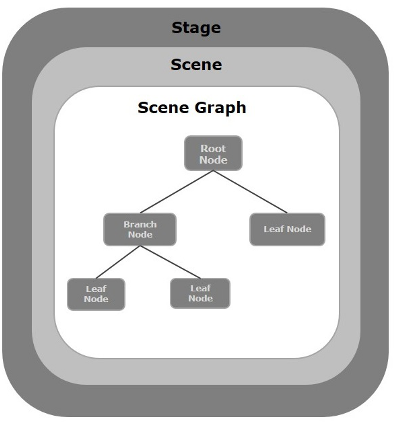
Stage
A stage (a window) contains all the objects of a JavaFX application. It is represented by Stage class of the package javafx.stage. The primary stage is created by the platform itself. The created stage object is passed as an argument to the start() method of the Application class (explained in the next section).
A stage has two parameters determining its position namely Width and Height. It is divided as Content Area and Decorations (Title Bar and Borders).
There are five types of stages available −
- Decorated
- Undecorated
- Transparent
- Unified
- Utility
You have to call the show() method to display the contents of a stage.
Scene
A scene represents the physical contents of a JavaFX application. It contains all the contents of a scene graph. The class Scene of the package javafx.scene represents the scene object. At an instance, the scene object is added to only one stage.
You can create a scene by instantiating the Scene Class. You can opt for the size of the scene by passing its dimensions (height and width) along with the root node to its constructor.
Scene Graph and Nodes
A scene graph is a tree-like data structure (hierarchical) representing the contents of a scene. In contrast, a node is a visual/graphical object of a scene graph.
A node may include −
Geometrical (Graphical) objects (2D and 3D) such as − Circle, Rectangle, Polygon, etc.
UI Controls such as − Button, Checkbox, Choice Box, Text Area, etc.
Containers (Layout Panes) such as Border Pane, Grid Pane, Flow Pane, etc.
Media elements such as Audio, Video and Image Objects.
The Node Class of the package javafx.scene represents a node in JavaFX, this class is the super class of all the nodes.
As discussed earlier a node is of three types −
Root Node − The first Scene Graph is known as the Root node.
Branch Node/Parent Node − The node with child nodes are known as branch/parent nodes. The abstract class named Parent of the package javafx.scene is the base class of all the parent nodes, and those parent nodes will be of the following types −
Group − A group node is a collective node that contains a list of children nodes. Whenever the group node is rendered, all its child nodes are rendered in order. Any transformation, effect state applied on the group will be applied to all the child nodes.
Region − It is the base class of all the JavaFX Node based UI Controls, such as Chart, Pane and Control.
WebView − This node manages the web engine and displays its contents.
Leaf Node − The node without child nodes is known as the leaf node. For example, Rectangle, Ellipse, Box, ImageView, MediaView are examples of leaf nodes.
It is mandatory to pass the root node to the scene graph. If the Group is passed as root, all the nodes will be clipped to the scene and any alteration in the size of the scene will not affect the layout of the scene.
Creating a JavaFX Application
To create a JavaFX application, you need to instantiate the Application class and implement its abstract method start(). In this method, we will write the code for the JavaFX Application.
Application Class
The Application class of the package javafx.application is the entry point of the application in JavaFX. To create a JavaFX application, you need to inherit this class and implement its abstract method start(). In this method, you need to write the entire code for the JavaFX graphics
In the main method, you have to launch the application using the launch() method. This method internally calls the start() method of the Application class as shown in the following program.
public class JavafxSample extends Application {
   @Override
   public void start(Stage primaryStage) throws Exception {
      /*
      Code for JavaFX application.
      (Stage, scene, scene graph)
      */
   }
   public static void main(String args[]){
      launch(args);
   }
}
Within the start() method, in order to create a typical JavaFX application, you need to follow the steps given below −
Prepare a scene graph with the required nodes.
Prepare a Scene with the required dimensions and add the scene graph (root node of the scene graph) to it.
Prepare a stage and add the scene to the stage and display the contents of the stage.
Preparing the Scene Graph
As per your application, you need to prepare a scene graph with required nodes. Since the root node is the first node, you need to create a root node. As a root node, you can choose from the Group, Region or WebView.
Group − A Group node is represented by the class named Group which belongs to the package javafx.scene, you can create a Group node by instantiating this class as shown below.
Group root = new Group();
The getChildren() method of the Group class gives you an object of the ObservableList class which holds the nodes. We can retrieve this object and add nodes to it as shown below.
//Retrieving the observable list object
ObservableList list = root.getChildren();

//Setting the text object as a node
list.add(NodeObject);
We can also add Node objects to the group, just by passing them to the Group class and to its constructor at the time of instantiation, as shown below.
Group root = new Group(NodeObject);
Region − It is the Base class of all the JavaFX Node-based UI Controls, such as −
Chart − This class is the base class of all the charts and it belongs to the package javafx.scene.chart.
This class has two sub classes, which are − PieChart and XYChart. These two in turn have subclasses such as AreaChart, BarChart, BubbleChart, etc. used to draw different types of XY-Plane Charts in JavaFX.
You can use these classes to embed charts in your application.
Pane − A Pane is the base class of all the layout panes such as AnchorPane, BorderPane, DialogPane, etc. This class belong to a package that is called as − javafx.scene.layout.
You can use these classes to insert predefined layouts in your application.
Control − It is the base class of the User Interface controls such as Accordion, ButtonBar, ChoiceBox, ComboBoxBase, HTMLEditor, etc. This class belongs to the package javafx.scene.control.
You can use these classes to insert various UI elements in your application.
In a Group, you can instantiate any of the above-mentioned classes and use them as root nodes, as shown in the following program.
//Creating a Stack Pane
StackPane pane = new StackPane();

//Adding text area to the pane
ObservableList list = pane.getChildren();
list.add(NodeObject);
WebView − This node manages the web engine and displays its contents.
Following is a diagram representing the node class hierarchy of JavaFX.

Preparing the Scene
A JavaFX scene is represented by the Scene class of the package javafx.scene. You can create a Scene by instantiating this class as shown in the following cod block.
While instantiating, it is mandatory to pass the root object to the constructor of the scene class.
Scene scene = new Scene(root);
You can also pass two parameters of double type representing the height and width of the scene as shown below.
Scene scene = new Scene(root, 600, 300);
Preparing the Stage
This is the container of any JavaFX application and it provides a window for the application. It is represented by the Stage class of the package javafx.stage. An object of this class is passed as a parameter of the start() method of the Application class.
Using this object, you can perform various operations on the stage. Primarily you can perform the following −
Set the title for the stage using the method setTitle().
Attach the scene object to the stage using the setScene() method.
Display the contents of the scene using the show() method as shown below.
//Setting the title to Stage.
primaryStage.setTitle("Sample application");

//Setting the scene to Stage
primaryStage.setScene(scene);

//Displaying the stage
primaryStage.show();
Lifecycle of JavaFX Application
The JavaFX Application class has three life cycle methods, which are −
start() − The entry point method where the JavaFX graphics code is to be written.
stop() − An empty method which can be overridden, here you can write the logic to stop the application.
init() − An empty method which can be overridden, but you cannot create stage or scene in this method.
In addition to these, it provides a static method named launch() to launch JavaFX application.
Since the launch() method is static, you need to call it from a static context (main generally). Whenever a JavaFX application is launched, the following actions will be carried out (in the same order).
An instance of the application class is created.
Init() method is called.
The start() method is called.
The launcher waits for the application to finish and calls the stop() method.
Terminating the JavaFX Application
When the last window of the application is closed, the JavaFX application is terminated implicitly. You can turn this behavior off by passing the Boolean value “False” to the static method setImplicitExit() (should be called from a static context).
You can terminate a JavaFX application explicitly using the methods Platform.exit() or System.exit(int).
Example 1 – Creating an Empty Window
This section teaches you how to create a JavaFX sample application which displays an empty window. Following are the steps −
Step 1: Creating a Class
Create a Java class and inherit the Application class of the package javafx.application and implement the start() method of this class as follows.
public class JavafxSample extends Application {
   @Override
   public void start(Stage primaryStage) throws Exception {
   }
}
Step 2: Creating a Group Object
In the start() method creates a group object by instantiating the class named Group, which belongs to the package javafx.scene, as follows.
Group root = new Group();
Step 3: Creating a Scene Object
Create a Scene by instantiating the class named Scene which belongs to the package javafx.scene. To this class, pass the Group object (root), created in the previous step.
In addition to the root object, you can also pass two double parameters representing height and width of the screen along with the object of the Group class as follows.
Scene scene = new Scene(root,600, 300);
Step 4: Setting the Title of the Stage
You can set the title to the stage using the setTitle() method of the Stage class. The primaryStage is a Stage object which is passed to the start method of the scene class, as a parameter.
Using the primaryStage object, set the title of the scene as Sample Application as shown below.
primaryStage.setTitle("Sample Application");
Step 5: Adding Scene to the Stage
You can add a Scene object to the stage using the method setScene() of the class named Stage. Add the Scene object prepared in the previous steps using this method as shown below.
primaryStage.setScene(scene);
Step 6: Displaying the Contents of the Stage
Display the contents of the scene using the method named show() of the Stage class as follows.
primaryStage.show();
Step 7: Launching the Application
Launch the JavaFX application by calling the static method launch() of the Application class from the main method as follows.
public static void main(String args[]){
   launch(args);
}
Example
The following program generates an empty JavaFX window. Save this code in a file with the name JavafxSample.java
import javafx.application.Application;
import javafx.scene.Group;
import javafx.scene.Scene;
import javafx.scene.paint.Color;
import javafx.stage.Stage;
public class JavafxSample extends Application {
@Override
public void start(Stage primaryStage) throws Exception {
//creating a Group object
Group group = new Group();
//Creating a Scene by passing the group object, height and width
Scene scene = new Scene(group ,600, 300);
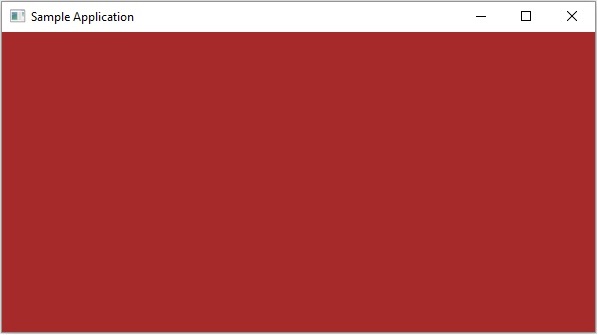
//setting color to the scene
scene.setFill(Color.BROWN);
//Setting the title to Stage.
primaryStage.setTitle("Sample Application");
//Adding the scene to Stage
primaryStage.setScene(scene);
//Displaying the contents of the stage
primaryStage.show();
}
public static void main(String args[]){
launch(args);
}
}
Compile and execute the saved java file from the command prompt using the following commands.
javac JavafxSample.java
java JavafxSample
On executing, the above program generates a JavaFX window as shown below.
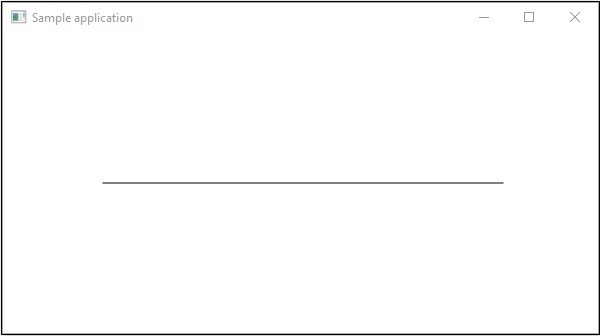
Example 2 – Drawing a Straight Line
In the previous example, we have seen how to create an empty stage, now in this example let us try to draw a straight line using the JavaFX library.
Following are the steps −
Step 1: Creating a Class
Create a Java class and inherit the Application class of the package javafx.application and implement the start() method of this class as follows.
public class DrawingLine extends Application {
   @Override
   public void start(Stage primaryStage) throws Exception {
   }
}
Step 2: Creating a Line
You can create a line in JavaFX by instantiating the class named Line which belongs to a package javafx.scene.shape, instantiate this class as follows.
//Creating a line object
Line line = new Line();
Step 3: Setting Properties to the Line
Specify the coordinates to draw the line on an X-Y plane by setting the properties startX, startY, endX and endY, using their respective setter methods as shown in the following code block.
line.setStartX(100.0);
line.setStartY(150.0);
line.setEndX(500.0);
line.setEndY(150.0);
Step 4: Creating a Group Object
In the start() method create a group object by instantiating the class named Group, which belongs to the package javafx.scene.
Pass the Line (node) object, created in the previous step, as a parameter to the constructor of the Group class, in order to add it to the group as follows −
Group root = new Group(line);
Step 5: Creating a Scene Object
Create a Scene by instantiating the class named Scene which belongs to the package javafx.scene. To this class, pass the Group object (root) that was created in the previous step.
In addition to the root object, you can also pass two double parameters representing height and width of the screen along with the object of the Group class as follows.
Scene scene = new Scene(group ,600, 300);
Step 6: Setting the Title of the Stage
You can set the title to the stage using the setTitle() method of the Stage class. The primaryStage is a Stage object which is passed to the start method of the scene class, as a parameter.
Using the primaryStage object, set the title of the scene as Sample Application as follows.
primaryStage.setTitle("Sample Application");
Step 7: Adding Scene to the Stage
You can add a Scene object to the stage using the method setScene() of the class named Stage. Add the Scene object prepared in the previous steps using this method as follows.
primaryStage.setScene(scene);
Step 8: Displaying the Contents of the Stage
Display the contents of the scene using the method named show() of the Stage class as follows.
primaryStage.show();
Step 9: Launching the Application
Launch the JavaFX application by calling the static method launch() of the Application class from the main method as follows.
public static void main(String args[]){
   launch(args);
}
Example
The following program shows how to generate a straight line using JavaFX. Save this code in a file with the name JavafxSample.java.
import javafx.application.Application;
import javafx.scene.Group;
import javafx.scene.Scene;
import javafx.scene.shape.Line;
import javafx.stage.Stage;

public class DrawingLine extends Application{
   @Override
   public void start(Stage stage) {
      //Creating a line object
      Line line = new Line();

      //Setting the properties to a line
      line.setStartX(100.0);
      line.setStartY(150.0);
      line.setEndX(500.0);
      line.setEndY(150.0);

      //Creating a Group
      Group root = new Group(line);

      //Creating a Scene
      Scene scene = new Scene(root, 600, 300);

      //Setting title to the scene
      stage.setTitle("Sample application");

      //Adding the scene to the stage
      stage.setScene(scene);

      //Displaying the contents of a scene
      stage.show();
   }
   public static void main(String args[]){
      launch(args);
   }
}
Compile and execute the saved java file from the command prompt using the following commands.
javac DrawingLine.java
java DrawingLine
On executing, the above program generates a JavaFX window displaying a straight line as shown below.
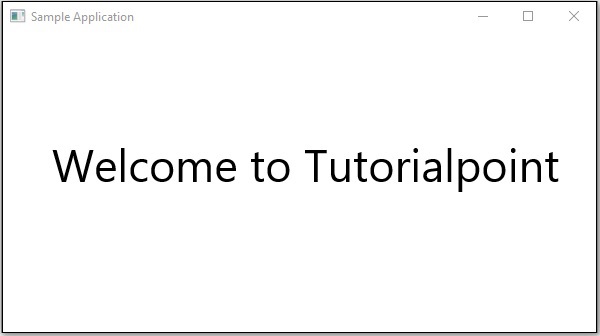
Example 3 – Displaying Text
We can also embed text in JavaFX scene. This example shows how to embed text in JavaFX.
Following are the steps −
Step 1: Creating a Class
Create a Java Class and inherit the Application class of the package javafx.application and implement the start() method of this class as follows.
public class DrawingLine extends Application {
   @Override
   public void start(Stage primaryStage) throws Exception {
   }
}
Step 2: Embedding Text
You can embed text into a JavaFX scene by instantiating the class named Text which belongs to a package javafx.scene.shape, instantiate this class.
You can instantiate this class by passing text to be embedded, in String format Or, you can create text object using the default constructor as shown below.
//Creating a Text object
Text text = new Text();
Step 3: Setting the Font
You can set font to the text using the setFont() method of the Text class. This method accepts a font object as parameters. Set the font of the given text to 45 as shown below.
//Setting font to the text
text.setFont(new Font(45));
Step 4: Setting the Position of the Text
You can set the position of the text on the X-Y plane by setting the X,Y coordinates using the respective setter methods setX() and setY() as follows.
//setting the position of the text
text.setX(50);
text.setY(150);
Step 5: Setting the text to be added
You can set the text to be added using the setText() method of the Text class. This method accepts a string parameter representing the text to be added.
text.setText("Welcome to Tutorialspoint");
Step 6: Creating a Group Object
In the start() method, create a group object by instantiating the class named Group, which belongs to the package javafx.scene.
Pass the Text (node) object, created in the previous step, as a parameter to the constructor of the Group class, in order to add it to the group as follows −
Group root = new Group(text)
Step 7: Creating a Scene Object
Create a Scene by instantiating the class named Scene which belongs to the package javafx.scene. To this class, pass the Group object (root), created in the previous step.
In addition to the root object, you can also pass two double parameters representing height and width of the screen along with the object of the Group class as follows.
Scene scene = new Scene(group ,600, 300);
Step 8: Setting the Title of the Stage
You can set the title to the stage using the setTitle() method of the Stage class. The primaryStage is a Stage object which is passed to the start method of the scene class, as a parameter.
Using the primaryStage object, set the title of the scene as Sample Application as shown below.
primaryStage.setTitle("Sample Application");
Step 9: Adding Scene to the Stage
You can add a Scene object to the stage using the method setScene() of the class named Stage. Add the Scene object prepared in the previous steps using this method as follows.
primaryStage.setScene(scene);
Step 10: Displaying the Contents of the Stage
Display the contents of the scene using the method named show() of the Stage class as follows.
primaryStage.show();
Step 11: Launching the Application
Launch the JavaFX application by calling the static method launch() of the Application class from the main method as follows.
public static void main(String args[]){
   launch(args);
}
Example
Following is the program to display text using JavaFX. Save this code in a file with name DisplayingText.java.
import javafx.application.Application;
import javafx.collections.ObservableList;
import javafx.scene.Group;
import javafx.scene.Scene;
import javafx.stage.Stage;
import javafx.scene.text.Font;
import javafx.scene.text.Text;

public class DisplayingText extends Application {
   @Override
   public void start(Stage stage) {
      //Creating a Text object
      Text text = new Text();

      //Setting font to the text
      text.setFont(new Font(45));

      //setting the position of the text
      text.setX(50);
      text.setY(150);

      //Setting the text to be added.
      text.setText("Welcome to Tutorialspoint");

      //Creating a Group object
      Group root = new Group();

      //Retrieving the observable list object
      ObservableList list = root.getChildren();

      //Setting the text object as a node to the group object
      list.add(text);

      //Creating a scene object
      Scene scene = new Scene(root, 600, 300);

      //Setting title to the Stage
      stage.setTitle("Sample Application");

      //Adding scene to the stage
      stage.setScene(scene);

      //Displaying the contents of the stage
      stage.show();
   }
   public static void main(String args[]){
      launch(args);
   }
}
Compile and execute the saved java file from the command prompt using the following commands.
javac DisplayingText.java
java DisplayingText
On executing, the above program generates a JavaFX window displaying text as shown below.
JavaFX - 2D Shapes
In the previous chapter, we have seen the basic application of JavaFX, where we learnt how to create an empty window and how to draw a line on an XY plane of JavaFX. In addition to the line, we can also draw several other 2D shapes.
2D Shape
In general, a 2D shape is a geometrical figure that can be drawn on the XY plane, these include Line, Rectangle, Circle, etc.
Using the JavaFX library, you can draw −
Predefined shapes such as Line, Rectangle, Circle, Ellipse, Polygon, Polyline, Cubic Curve, Quad Curve, Arc.
Path elements such as MoveTO Path Element, Line, Horizontal Line, Vertical Line, Cubic Curve, Quadratic Curve, Arc.
In addition to these, you can also draw a 2D shape by parsing SVG path.
Each of the above mentioned 2D shape is represented by a class and all these classes belongs to the package javafx.scene.shape. The class named Shape is the base class of all the 2-Dimensional shapes in JavaFX.
Creating a 2D Shape
To create a chart, you need to −
- Instantiate the respective class of the required shape.
- Set the properties of the shape.
- Add the shape object to the group.
Instantiating the Respective Class
To create a 2 Dimensional shape, first of all you need to instantiate its respective class.
For example, if you want to create a line you need to instantiate the class named Line as follows −
Line line = new Line();
Setting the Properties of the Shape
After instantiating the class, you need to set the properties for the shape using the setter methods.
For example, to draw a line you need to pass its x and y coordinates of the start point and end point of the line. You can specify these values using their respective setter methods as follows −
//Setting the Properties of the Line
line.setStartX(150.0f);
line.setStartY(140.0f);
line.setEndX(450.0f);
line.setEndY(140.0f);
Adding the Shape Object to the Group
Finally, you need to add the object of the shape to the group by passing it as a parameter of the constructor as shown below.
//Creating a Group object
Group root = new Group(line);
The following table gives you the list of various shapes (classes) provided by JavaFX.
| S.No | Shape & Description |
|---|---|
| 1 |
Line
A line is a geometrical structure joining two point. The Line class of the package javafx.scene.shape represents a line in the XY plane. |
| 2 |
Rectangle
In general, a rectangle is a four-sided polygon that has two pairs of parallel and concurrent sides with all interior angles as right angles. In JavaFX, a Rectangle is represented by a class named Rectangle. This class belongs to the package javafx.scene.shape. |
| 3 |
Rounded Rectangle
In JavaFX, you can draw a rectangle either with sharp edges or with arched edges and The one with arched edges is known as a rounded rectangle. |
| 4 |
Circle
A circle is a line forming a closed loop, every point on which is a fixed distance from a centre point. In JavaFX, a circle is represented by a class named Circle. This class belongs to the package javafx.scene.shape. |
| 5 |
Ellipse
An ellipse is defined by two points, each called a focus. If any point on the ellipse is taken, the sum of the distances to the focus points is constant. The size of the ellipse is determined by the sum of these two distances. In JavaFX, an ellipse is represented by a class named Ellipse. This class belongs to the package javafx.scene.shape. |
| 6 |
Polygon
A closed shape formed by a number of coplanar line segments connected end to end. In JavaFX, a polygon is represented by a class named Polygon. This class belongs to the package javafx.scene.shape. |
| 7 |
Polyline
A polyline is same a polygon except that a polyline is not closed in the end. Or, continuous line composed of one or more line segments. In JavaFX, a Polyline is represented by a class named Polygon. This class belongs to the package javafx.scene.shape. |
| 8 |
Cubic Curve
A cubic curve is a Bezier parametric curve in the XY plane is a curve of degree 3. In JavaFX, a Cubic Curve is represented by a class named CubicCurve. This class belongs to the package javafx.scene.shape. |
| 9 |
QuadCurve
A quadratic curve is a Bezier parametric curve in the XY plane is a curve of degree 2. In JavaFX, a QuadCurve is represented by a class named QuadCurve. This class belongs to the package javafx.scene.shape. |
| 10 |
Arc
An arc is part of a curve. In JavaFX, an arc is represented by a class named Arc. This class belongs to the package − javafx.scene.shape. Types Of ArcIn addition to this we can draw three types of arc's Open, Chord, Round. |
| 11 |
SVGPath
In JavaFX, we can construct images by parsing SVG paths. Such shapes are represented by the class named SVGPath. This class belongs to the package javafx.scene.shape. This class has a property named content of String datatype. This represents the SVG Path encoded string, from which the image should be drawn.. |
Drawing More Shapes Through Path Class
In the previous section, we have seen how to draw some simple predefined shapes by instantiating classes and setting respective parameters.
But, just these predefined shapes are not sufficient to build complexer shapes other than the primitives provided by the javafx.shape package.
For example, if you want to draw a graphical element as shown in the following diagram, you cannot rely on those simple shapes.
The Path Class
To draw such complex structures JavaFX provides a class named Path. This class represents the geometrical outline of a shape.
It is attached to an observable list which holds various Path Elements such as moveTo, LineTo, HlineTo, VlineTo, ArcTo, QuadCurveTo, CubicCurveTo.
On instantiating, this class constructs a path based on the given path elements.
You can pass the path elements to this class while instantiating it as follows−
Path myshape = new Path(pathElement1, pathElement2, pathElement3);
Or, you can get the observable list and add all the path elements using addAll() method as follows −
Path myshape = new Path();
myshape.getElements().addAll(pathElement1, pathElement2, pathElement3);
You can also add elements individually using the add() method as −
Path myshape = new Path();
myshape.getElements().add(pathElement1);
The Move to Path Element
The Path Element MoveTo is used to move the current position of the path to a specified point. It is generally used to set the starting point of a shape drawn using the path elements.
It is represented by a class named LineTo of the package javafx.scene.shape. It has 2 properties of the double datatype namely −
X − The x coordinate of the point to which a line is to be drawn from the current position.
Y − The y coordinate of the point to which a line is to be drawn from the current position.
You can create a move to path element by instantiating the MoveTo class and passing the x, y coordinates of the new point as follows −
MoveTo moveTo = new MoveTo(x, y);
If you don’t pass any values to the constructor, then the new point will be set to (0,0).
You can also set values to the x, y coordinate, using their respective setter methods as follows −
setX(value);
setY(value);
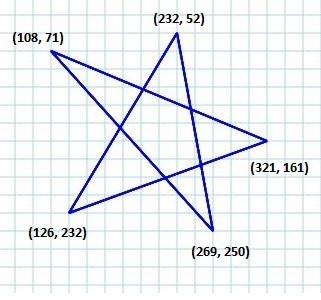
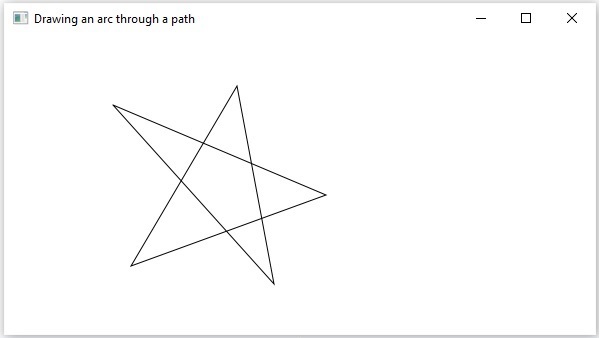
Example – Drawing a Complex Path
In this example, we will show how to draw the following shape using the Path, MoveTo and Line classes.

Save this code in a file with the name ComplexShape.java.
import javafx.application.Application;
import javafx.scene.Group;
import javafx.scene.Scene;
import javafx.stage.Stage;
import javafx.scene.shape.LineTo;
import javafx.scene.shape.MoveTo;
import javafx.scene.shape.Path;

public class ComplexShape extends Application {
   @Override
   public void start(Stage stage) {
      //Creating a Path
      Path path = new Path();

      //Moving to the starting point
      MoveTo moveTo = new MoveTo(108, 71);

      //Creating 1st line
      LineTo line1 = new LineTo(321, 161);

      //Creating 2nd line
      LineTo line2 = new LineTo(126,232);

      //Creating 3rd line
      LineTo line3 = new LineTo(232,52);

      //Creating 4th line
      LineTo line4 = new LineTo(269, 250);

      //Creating 4th line
      LineTo line5 = new LineTo(108, 71);

      //Adding all the elements to the path
      path.getElements().add(moveTo);
      path.getElements().addAll(line1, line2, line3, line4, line5);

      //Creating a Group object
      Group root = new Group(path);

      //Creating a scene object
      Scene scene = new Scene(root, 600, 300);

      //Setting title to the Stage
      stage.setTitle("Drawing an arc through a path");

      //Adding scene to the stage
      stage.setScene(scene);

      //Displaying the contents of the stage
      stage.show();
   }
   public static void main(String args[]){
      launch(args);
   }
}
Compile and execute the saved java file from the command prompt using the following commands.
javac ComplexShape.java
java ComplexShape
On executing, the above program generates a JavaFX window displaying an arc, which is drawn from the current position to the specified point as shown below.
Following are the various path elements (classes) provided by JavaFX. These classes exist in the package javafx.shape. All these classes inherit the class PathElement.
| S.No | Shape & Description |
|---|---|
| 1 |
LineTo
The path element line is used to draw a straight line to a point in the specified coordinates from the current position. It is represented by a class named LineTo. This class belongs to the package javafx.scene.shape. |
| 2 |
HlineTo
The path element HLineTo is used to draw a horizontal line to a point in the specified coordinates from the current position. It is represented by a class named HLineTo. This class belongs to the package javafx.scene.shape. |
| 3 |
VLineTo
The path element vertical line is used to draw a vertical line to a point in the specified coordinates from the current position. It is represented by a class named VLineTo. This class belongs to the package javafx.scene.shape. |
| 4 |
QuadCurveTo
The path element quadratic curve is used to draw a quadratic curve to a point in the specified coordinates from the current position. It is represented by a class named QuadraticCurveTo. This class belongs to the package javafx.scene.shape. |
| 5 |
CubicCurveTo
The path element cubic curve is used to draw a cubic curve to a point in the specified coordinates from the current position. It is represented by a class named CubicCurveTo. This class belongs to the package javafx.scene.shape. |
| 6 |
ArcTo
The path element Arc is used to draw an arc to a point in the specified coordinates from the current position. It is represented by a class named ArcTo. This class belongs to the package javafx.scene.shape. |
Properties of 2D Objects
For all the 2-Dimensional objects, you can set various properties like fill, stroke, StrokeType, etc. The following section discusses various properties of 2D objects.
Operations on 2D Objects
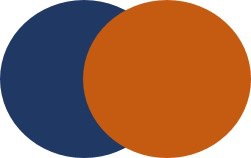
If we add more than one shape to a group, the first shape is overlapped by the second one as shown below.
In addition to the transformations (rotate, scale, translate, etc.), transitions (animations), you can also perform three operations on 2D objects namely – Union, Subtraction and Intersection.
| S.No | Operation & Description |
|---|---|
| 1 |
Union Operation
This operation takes two or more shapes as inputs and returns the area occupied by them. |
| 2 |
Intersection Operation
This operation takes two or more shapes as inputs and returns the intersection area between them. |
| 3 |
Subtraction Operation
This operation takes two or more shapes as an input. Then, it returns the area of the first shape excluding the area overlapped by the second one. |
JavaFX - Text
Just like various shapes, you can also create a text node in JavaFX. The text node is represented by the class named Text, which belongs to the package javafx.scene.text.
This class contains several properties to create text in JavaFX and modify its appearance. This class also inherits the Shape class which belongs to the package javafx.scene.shape.
Therefore, in addition to the properties of the text like font, alignment, line spacing, text, etc. It also inherits the basic shape node properties such as strokeFill, stroke, strokeWidth, strokeType, etc.
Creating a Text Node
Since the class Text of the package javafx.scene.text represents the text node in JavaFX, you can create a text by instantiating this class as follows −
Text text = new Text();
The class Text contains a property named text of string type, which represents the text that is to be created.
After instantiating the Text class, you need to set value to this property using the setText() method as shown below.
String text = "Hello how are you"
Text.setText(text);
You can also set the position (origin) of the text by specifying the values to the properties x and y using their respective setter methods namely setX() and setY() as shown in the following code block −
text.setX(50);
text.setY(50);
Example
The following program is an example demonstrating how to create a text node in JavaFX. Save this code in a file with name TextExample.java.
import javafx.application.Application;
import javafx.scene.Group;
import javafx.scene.Scene;
import javafx.stage.Stage;
import javafx.scene.text.Text;

public class TextExample extends Application {
   @Override
   public void start(Stage stage) {
      //Creating a Text object
      Text text = new Text();

      //Setting the text to be added.
      text.setText("Hello how are you");

      //setting the position of the text
      text.setX(50);
      text.setY(50);

      //Creating a Group object
      Group root = new Group(text);

      //Creating a scene object
      Scene scene = new Scene(root, 600, 300);

      //Setting title to the Stage
      stage.setTitle("Sample Application");

      //Adding scene to the stage
      stage.setScene(scene);

      //Displaying the contents of the stage
      stage.show();
   }
   public static void main(String args[]){
      launch(args);
   }
}
Compile and execute the saved java file from the command prompt using the following commands.
javac TextExample.java
java TextExample
On executing, the above program generates a JavaFX window displaying the specified text as follows −

Position and Font of the Text
By default, the text created by text class is of the font…, size…, and black in color.
You can change the font size and color of the text using the setFont() method. This method accepts an object of the Font class.
The class named Font of the package javafx.scene.text is used to define the font for the text. This class contains a static method named font().
This method accepts four parameters namely −
family − This is of a String type and represents the family of the font that we want to apply to the text.
weight − This property represents the weight of the font. It accepts 9 values, which are − FontWeight.BLACK, FontWeight.BOLD, FontWeight.EXTRA_BOLD, FontWeight.EXTRA_LIGHT, LIGHT, MEDIUM, NORMAL, SEMI_BOLD, THIN.
posture − This property represents the font posture (regular or italic). It accepts two values FontPosture.REGULAR and FontPosture.ITALIC.
size − This property is of type double and it represents the size of the font.
You can set font to the text by using the following method −
text.setFont(Font.font("verdana", FontWeight.BOLD, FontPosture.REGULAR, 20));
Example
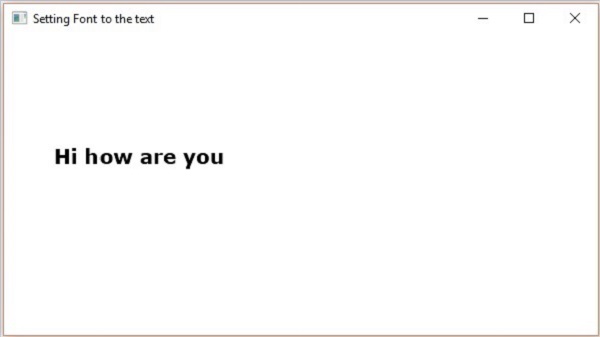
The following program is an example demonstrating how to set font of the text node in JavaFX. In here, we are setting the font to Verdana, weight to bold, posture to regular and size to 20.
Save this code in a file with the name TextFontExample.java.
import javafx.application.Application;
import javafx.scene.Group;
import javafx.scene.Scene;
import javafx.stage.Stage;
import javafx.scene.text.Font;
import javafx.scene.text.FontPosture;
import javafx.scene.text.FontWeight;
import javafx.scene.text.Text;

public class TextFontExample extends Application {
   @Override
   public void start(Stage stage) {
      //Creating a Text object
      Text text = new Text();

      //Setting font to the text
      text.setFont(Font.font("verdana", FontWeight.BOLD, FontPosture.REGULAR, 20));

      //setting the position of the text
      text.setX(50);
      text.setY(130);

      //Setting the text to be added.
      text.setText("Hi how are you");

      //Creating a Group object
      Group root = new Group(text);

      //Creating a scene object
      Scene scene = new Scene(root, 600, 300);

      //Setting title to the Stage
      stage.setTitle("Setting Font to the text");

      //Adding scene to the stage
      stage.setScene(scene);

      //Displaying the contents of the stage
      stage.show();
   }
   public static void main(String args[]){
      launch(args);
   }
}
Compile and execute the saved java file from the command prompt using the following commands.
javac TextFontExample.java
java TextFontExample
On executing, the above program generates a JavaFX window displaying the text with the specified font as follows −
Stroke and Color
The Text class also inherits the class Shape of the package. Therefore, you can use javafx.scene.shape with which you can set the stroke and color to the text node too.
You can set the color to the text using the setFill() method of the shape (inherited) class as follows −
text.setFill(Color.BEIGE);
Similarly, you can set the stroke color of the text using the method setStroke(). While the width of the stroke can be set using the method setStrokeWidth() as follows −
//Setting the color
text.setFill(Color.BROWN);

//Setting the Stroke
text.setStrokeWidth(2);

//Setting the stroke color
text.setStroke(Color.BLUE);
Example
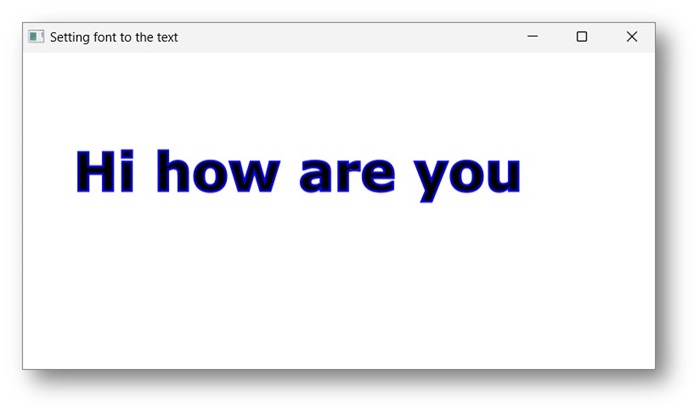
The following program is an example that demonstrates how to set the color, strokeWidth and strokeColor, of the text node. In this code, we are setting stroke color to – blue, text color to – brown and the stroke width to – 2.
Save this code in a file with the name StrokeExample.java.
import javafx.application.Application;
import javafx.scene.Group;
import javafx.scene.Scene;
import javafx.scene.paint.Color;
import javafx.stage.Stage;
import javafx.scene.text.Font;
import javafx.scene.text.FontPosture;
import javafx.scene.text.FontWeight;
import javafx.scene.text.Text;

public class StrokeExample extends Application {
   @Override
   public void start(Stage stage) {
      //Creating a Text object
      Text text = new Text();

      //Setting font to the text
      text.setFont(Font.font("verdana", FontWeight.BOLD, FontPosture.REGULAR, 50));

      //setting the position of the text
      text.setX(50);
      text.setY(130);

      //Setting the color
      text.setFill(Color.BROWN);

      //Setting the Stroke
      text.setStrokeWidth(2);

      // Setting the stroke color
      text.setStroke(Color.BLUE);

      //Setting the text to be added.
      text.setText("Hi how are you");

      //Creating a Group object
      Group root = new Group(text);

      //Creating a scene object
      Scene scene = new Scene(root, 600, 300);

      //Setting title to the Stage
      stage.setTitle("Setting font to the text");

      //Adding scene to the stage
      stage.setScene(scene);

      //Displaying the contents of the stage
      stage.show();
   }
   public static void main(String args[]){
      launch(args);
   }
}
Compile and execute the saved java file from the command prompt using the following commands.
javac StrokeExample.java
java StrokeExample
On executing, the above program generates a JavaFX window displaying the text with the specified stroke and color attributes as follows −
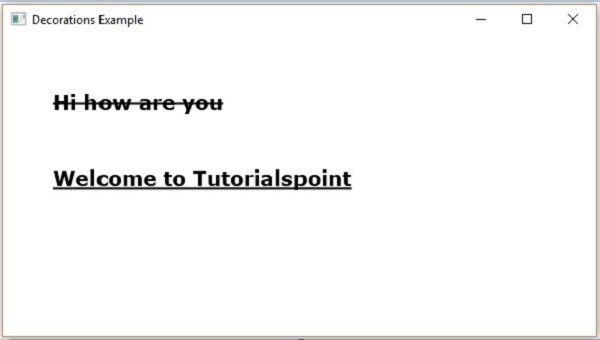
Applying Decorations to Text
You can also apply decorations such as strike through; in which case a line is passed through the text. You can underline a text using the methods of the Text class.
You can strike through the text using the method setStrikethrough(). This accepts a Boolean value, pass the value true to this method to strike through the text as shown in the following code box −
//Striking through the text
text1.setStrikethrough(true);
In the same way, you can underline a text by passing the value true to the method setUnderLine() as follows −
//underlining the text
text2.setUnderline(true);
Example
The following program is an example demonstrating how to apply decorations such as underline or strike through to a text. Save this code in a file with the name DecorationsExample.java.
import javafx.application.Application;
import javafx.scene.Group;
import javafx.scene.Scene;
import javafx.stage.Stage;
import javafx.scene.text.Font;
import javafx.scene.text.FontPosture;
import javafx.scene.text.FontWeight;
import javafx.scene.text.Text;

public class DecorationsExample extends Application {
   @Override
   public void start(Stage stage) {
      //Creating a Text_Example object
      Text text1 = new Text("Hi how are you");

      //Setting font to the text
      text1.setFont(Font.font("verdana", FontWeight.BOLD, FontPosture.REGULAR, 20));

      //setting the position of the text
      text1.setX(50);
      text1.setY(75);

      //Striking through the text
      text1.setStrikethrough(true);

      //Creating a Text_Example object
      Text text2 = new Text("Welcome to Tutorialspoint");

      //Setting font to the text
      text2.setFont(Font.font("verdana", FontWeight.BOLD, FontPosture.REGULAR, 20));

      //setting the position of the text
      text2.setX(50);
      text2.setY(150);

      //underlining the text
      text2.setUnderline(true);

      //Creating a Group object
      Group root = new Group(text1, text2);

      //Creating a scene object
      Scene scene = new Scene(root, 600, 300);

      //Setting title to the Stage
      stage.setTitle("Decorations Example");

      //Adding scene to the stage
      stage.setScene(scene);

      //Displaying the contents of the stage
      stage.show();
   }
   public static void main(String args[]){
      launch(args);
   }
}
Compile and execute the saved Java file from the command prompt using the following commands.
javac DecorationsExample.java
java DecorationsExample
On executing, the above program generates a JavaFX window as shown below −
JavaFX - Effects
An effect is any action that enhances the appearance of the graphics. In JavaFX, an effect is an algorithm that is applied on nodes to enhance their appearance visually. The effect property of the Node class is used to specify the effect.
In JavaFX, you can set various effects to a node such as bloom, blur and glow. Each of these effects are represented by a class and all these classes are available in a package named javafx.scene.effect.
Applying Effects to a Node
You can apply an effect to a node using the setEffect() method. To this method, you need to pass the object of the effect.
To apply an effect to a node, you need to −
Create the node.
Instantiate the respective class of the effect that is needed to be applied.
Set the properties of the effect.
Apply the effect to the node using the setEffect() method.
Creating the Nodes
First of all, create the nodes in a JavaFX application by instantiating their respective classes.
For example, if you want to apply glow effect to an image in your application. Firstly, you need to create an image node by instantiating the Image class and set its view as shown below.
//Creating an image
Image image = new Image("https://www.tutorialspoint.com/green/images/logo.png");

//Setting the image view
ImageView imageView = new ImageView(image);

//Setting the position of the image
imageView.setX(100);
imageView.setY(70);

//setting the fit height and width of the image view
imageView.setFitHeight(200);
imageView.setFitWidth(400);

//Setting the preserve ratio of the image view
imageView.setPreserveRatio(true);
Instantiating the Respective Class
Instantiate the class representing the effect that is needed to be applied to the created node.
For example − To apply the glow effect, you need to instantiate the Glow class as shown in the following code box −
Glow glow = new Glow();
Setting the Properties of the Effect
After instantiating the class, you need to set the properties for the effect using its setter methods.
For example − To draw a 3-Dimensional box, you need to pass its width, height and depth. You can specify these values using their respective setter methods as shown below −
//setting the level property
glow.setLevel(0.9);
Adding Effect to the Node
Finally, you can apply the required effect to the node using the setEffect() method. For example: To set the glow effect to the image node, you need to pass the object of the Glow class to this method as follows −
imageView.setEffect(glow);
JavaFX Effects − The following table gives you the list of various effects (classes) provided by JavaFX. These classes exist in the package called javafx.scene.effect.
| S.No | Shape and Description |
|---|---|
| 1 | Color Adjust
You can adjust the color of an image by applying the color adjust effect to it. This includes the adjustment of the hue, saturation, brightness and contrast on each pixel The class named ColorAdjust of the package javafx.scene.effect represents the color adjust effect. |
| 2 | Color Input
Color Input Effect gives the same output as drawing a rectangle and filling it with color. Unlike other effects, if this effect is applied to any node, it displays only a rectangular box (not the node). This effect is mostly used to pass as an input for other effects. The class named ColorInput of the package javafx.scene.effect represents the color input effect. |
| 3 | Image Input
Image input effect in JavaFX just embeds an image to the JavaFX screen. Just like Color Input effect (It is used to pass the specified colored rectangular region as input to other effect), Image Input effect is used to pass the specified image as an input to another effect. The class named ImageInput of the package javafx.scene.effect represents the Image Input effect. |
| 4 | Blend
In general, blend means mixture of two or more different things or substances. If we apply this blend effect, it takes the pixels of two different inputs, at the same location and it produces a combined output based on the blend mode. The class named Blend of the package javafx.scene.effect represents the blend effect. |
| 5 | Bloom
On applying bloom effect, pixels in some portions of the node are made to glow. The class named Bloom of the package javafx.scene.effect represents the bloom effect. |
| 6 | Glow
Just like bloom, the Glow effect makes the given input image to glow, this effect makes the bright pixels of the input brighter. The class named Glow of the package javafx.scene.effect represents the glow effect. |
| 7 | Box Blur
On applying this blur effect to a node, it is made unclear. Box blur is a kind of blur effect provided by JavaFX. In this effect, when we apply blur to a node, a simple box filter is used. The class named BoxBlur of the package javafx.scene.effect represents the boxblur effect. |
| 8 | GaussianBlur
Just like Box Blur Gaussian is an effect to blur the nodes in JavaFX. The only difference in the Gaussian Blur effect is that a Gaussian convolution kernel is used to produce a blurring effect. The class named GaussianBlur of the package javafx.scene.effect represents the Gaussian Blur effect. |
| 9 | MotionBlur
Just like Gaussian Effects, Motion Blur is an effect to blur the nodes in JavaFX. It also uses a Gaussian convolution kernel to produce a blurring effect, but the difference is in this effect the Gaussian convolution kernel is used with a specified angle. The class named MotionBlur of the package javafx.scene.effect represents the Motion Blur effect. |
| 10 | Reflection
On applying the reflection effect to a node in JavaFX, a reflection of it is added at the bottom of the node. The class named Reflection of the package javafx.scene.effect represents the reflection effect. |
| 11 |
SepiaTone
On applying the Sepia tone effect to a node in JavaFX (image in general), it is toned with a reddish brown color. The class named SepiaTone of the package javafx.scene.effect represents the sepia tone effect. |
| 12 | Shadow
This effect creates a duplicate of the specified node with blurry edges. The class named Shadow of the package javafx.scene.effect represents the sepia tone effect. |
| 13 | DropShadow
On applying this effect to a node, a shadow will be created behind the specified node. The class named DropShadow of the package javafx.scene.effect represents the drop shadow effect. |
| 14 | InnerShadow
On applying this effect to a node, a shadow will be created inside the edges of the node. The class named InnerShadow of the package javafx.scene.effect represents the inner shadow effect. |
| 15 | Lighting
The lighting effect is used to simulate a light from a light source. There are different kinds of light sources namely point, distant and spot. The class named Lighting of the package javafx.scene.effect represents the lighting effect. |
| 16 | Light.Distant
On applying this effect to a node, a light is simulated on it, as if it is being generated by a distant light source. Distant Light Source − A source which is at a far distance from the node. In here, the light is attenuated in one direction from the source. The class named Light.Distant of the package javafx.scene.effect represents the distant light source. |
| 17 | Light.Spot
On applying this effect to a node, a light is simulated on it, as if it is being generated by a spot light. Spot light Source − The light from this source attenuates in all directions. The intensity of the light depends on the distance of the object from the source. The class named Light.Spot of the package javafx.scene.effect represents the distant light source. |
| 18 | Point.Spot
On applying this effect to a node, a light is simulated on it, as if it is being generated by a point light source. Point Light Source − The light from this source attenuates in all directions from a single point. The intensity of the light depends on the distance of the object from the source. The class named Point.Spot of the package javafx.scene.effect represents the point light. |
JavaFX - Transformations
Transformation means changing some graphics into something else by applying rules. We can have various types of transformations such as Translation, Scaling Up or Down, Rotation, Shearing, etc.
Using JavaFX, you can apply transformations on nodes such as rotation, scaling and translation. All these transformations are represented by various classes and these belong to the package javafx.scene.transform.
| S.No | Transformation & Description |
|---|---|
| 1 | Rotation
In rotation, we rotate the object at a particular angle θ (theta) from its origin. |
| 2 | Scaling
To change the size of an object, scaling transformation is used. |
| 3 | Translation
Moves an object to a different position on the screen. |
| 4 | Shearing
A transformation that slants the shape of an object is called the Shear Transformation. |
Multiple Transformations
You can also apply multiple transformations on nodes in JavaFX. The following program is an example which performs Rotation, Scaling and Translation transformations on a rectangle simultaneously.
Save this code in a file with the name −
MultipleTransformationsExample.java.
import javafx.application.Application;
import javafx.scene.Group;
import javafx.scene.Scene;
import javafx.scene.paint.Color;
import javafx.scene.shape.Rectangle;
import javafx.scene.transform.Rotate;
import javafx.scene.transform.Scale;
import javafx.scene.transform.Translate;
import javafx.stage.Stage;

public class MultipleTransformationsExample extends Application {
   @Override
   public void start(Stage stage) {
      //Drawing a Rectangle
      Rectangle rectangle = new Rectangle(50, 50, 100, 75);

      //Setting the color of the rectangle
      rectangle.setFill(Color.BURLYWOOD);

      //Setting the stroke color of the rectangle
      rectangle.setStroke(Color.BLACK);

      //creating the rotation transformation
      Rotate rotate = new Rotate();

      //Setting the angle for the rotation
      rotate.setAngle(20);

      //Setting pivot points for the rotation
      rotate.setPivotX(150);
      rotate.setPivotY(225);

      //Creating the scale transformation
      Scale scale = new Scale();

      //Setting the dimensions for the transformation
      scale.setX(1.5);
      scale.setY(1.5);

      //Setting the pivot point for the transformation
      scale.setPivotX(300);
      scale.setPivotY(135);

      //Creating the translation transformation
      Translate translate = new Translate();

      //Setting the X,Y,Z coordinates to apply the translation
      translate.setX(250);
      translate.setY(0);
      translate.setZ(0);

      //Adding all the transformations to the rectangle
      rectangle.getTransforms().addAll(rotate, scale, translate);

      //Creating a Group object
      Group root = new Group(rectangle);

      //Creating a scene object
      Scene scene = new Scene(root, 600, 300);

      //Setting title to the Stage
      stage.setTitle("Multiple transformations");

      //Adding scene to the stage
      stage.setScene(scene);

      //Displaying the contents of the stage
      stage.show();
   }
   public static void main(String args[]){
      launch(args);
   }
}
Compile and execute the saved java file from the command prompt using the following commands.
javac MultipleTransformationsExample.java
java MultipleTransformationsExample
On executing, the above program generates a JavaFX window as shown below.
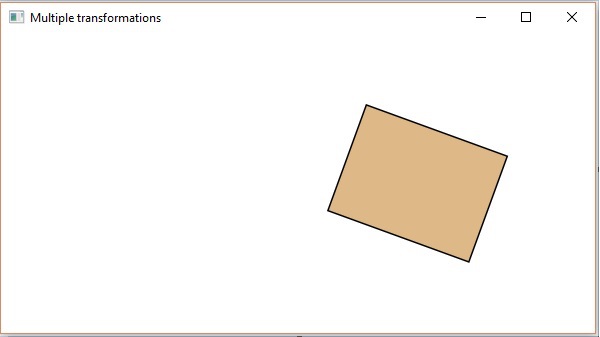
Transformations on 3D Objects
You can also apply transformations on 3D objects. Following is an example which rotates and translates a 3-Dimensional box.
Save this code in a file with the name RotationExample3D.java.
import javafx.application.Application;
import javafx.scene.Group;
import javafx.scene.Scene;
import javafx.scene.shape.Box;
import javafx.scene.transform.Rotate;
import javafx.scene.transform.Translate;
import javafx.stage.Stage;

public class RotationExample3D extends Application {
   @Override
   public void start(Stage stage) {
      //Drawing a Box
      Box box = new Box();

      //Setting the properties of the Box
      box.setWidth(150.0);
      box.setHeight(150.0);
      box.setDepth(150.0);

      //Creating the translation transformation
      Translate translate = new Translate();
      translate.setX(400);
      translate.setY(150);
      translate.setZ(25);

      Rotate rxBox = new Rotate(0, 0, 0, 0, Rotate.X_AXIS);
      Rotate ryBox = new Rotate(0, 0, 0, 0, Rotate.Y_AXIS);
      Rotate rzBox = new Rotate(0, 0, 0, 0, Rotate.Z_AXIS);
      rxBox.setAngle(30);
      ryBox.setAngle(50);
      rzBox.setAngle(30);
      box.getTransforms().addAll(translate,rxBox, ryBox, rzBox);

      //Creating a Group object
      Group root = new Group(box);

      //Creating a scene object
      Scene scene = new Scene(root, 600, 300);

      //Setting title to the Stage
      stage.setTitle("Drawing a cylinder");

      //Adding scene to the stage
      stage.setScene(scene);

      //Displaying the contents of the stage
      stage.show();
   }
   public static void main(String args[]){
      launch(args);
   }
}
Compile and execute the saved java file from the command prompt using the following commands.
javac RotationExample3D.java
java RotationExample3D
On executing, the above program generates a JavaFX window as shown below.
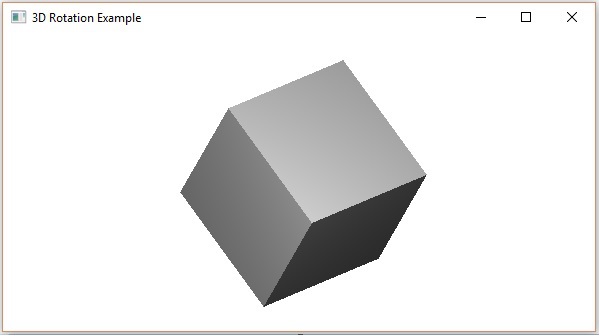
JavaFX - Animations
In general, animating an object implies creating illusion of its motion by rapid display. In JavaFX, a node can be animated by changing its property over time. JavaFX provides a package named javafx.animation. This package contains classes that are used to animate the nodes. Animation is the base class of all these classes.
Using JavaFX, you can apply animations (transitions) such as Fade Transition, Fill Transition, Rotate Transition, Scale Transition, Stroke Transition, Translate Transition, Path Transition, Sequential Transition, Pause Transition, Parallel Transition, etc.
All these transitions are represented by individual classes in the package javafx.animation.
To apply a particular animation to a node, you have to follow the steps given below −
Create a require node using respective class.
Instantiate the respective transition (animation) class that is to be applied
Set the properties of the transition and
Finally play the transition using the play() method of the Animation class.
In this chapter we are going to discuss examples of basic transitions(Rotation, Scaling, Translation).
Rotate Transition
Following is the program which demonstrates Rotate Transition in JavaFX. Save this code in a file with the name RotateTransitionExample.java.
import javafx.animation.RotateTransition;
import javafx.application.Application;
import static javafx.application.Application.launch;
import javafx.scene.Group;
import javafx.scene.Scene;
import javafx.scene.paint.Color;
import javafx.scene.shape.Polygon;
import javafx.stage.Stage;
import javafx.util.Duration;

public class RotateTransitionExample extends Application {
   @Override
   public void start(Stage stage) {
      //Creating a hexagon
      Polygon hexagon = new Polygon();

      //Adding coordinates to the hexagon
      hexagon.getPoints().addAll(new Double[]{
         200.0, 50.0,
         400.0, 50.0,
         450.0, 150.0,
         400.0, 250.0,
         200.0, 250.0,
         150.0, 150.0,
      });
      //Setting the fill color for the hexagon
      hexagon.setFill(Color.BLUE);

      //Creating a rotate transition
      RotateTransition rotateTransition = new RotateTransition();

      //Setting the duration for the transition
      rotateTransition.setDuration(Duration.millis(1000));

      //Setting the node for the transition
      rotateTransition.setNode(hexagon);

      //Setting the angle of the rotation
      rotateTransition.setByAngle(360);

      //Setting the cycle count for the transition
      rotateTransition.setCycleCount(50);

      //Setting auto reverse value to false
      rotateTransition.setAutoReverse(false);

      //Playing the animation
      rotateTransition.play();

      //Creating a Group object
      Group root = new Group(hexagon);

      //Creating a scene object
      Scene scene = new Scene(root, 600, 300);

      //Setting title to the Stage
      stage.setTitle("Rotate transition example ");

      //Adding scene to the stage
      stage.setScene(scene);

      //Displaying the contents of the stage
      stage.show();
   }
   public static void main(String args[]){
      launch(args);
   }
}
Compile and execute the saved java file from the command prompt using the following commands.
javac RotateTransitionExample.java
java RotateTransitionExample
On executing, the above program generates a JavaFX window as shown below.
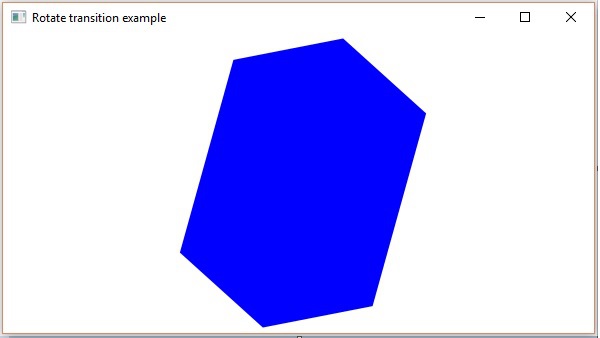
Scale Transition
Following is the program which demonstrates Scale Transition in JavaFX. Save this code in a file with the name ScaleTransitionExample.java.
import javafx.animation.ScaleTransition;
import javafx.application.Application;
import static javafx.application.Application.launch;
import javafx.scene.Group;
import javafx.scene.Scene;
import javafx.scene.paint.Color;
import javafx.scene.shape.Circle;
import javafx.stage.Stage;
import javafx.util.Duration;

public class ScaleTransitionExample extends Application {
   @Override
   public void start(Stage stage) {
      //Drawing a Circle
      Circle circle = new Circle();

      //Setting the position of the circle
      circle.setCenterX(300.0f);
      circle.setCenterY(135.0f);

      //Setting the radius of the circle
      circle.setRadius(50.0f);

      //Setting the color of the circle
      circle.setFill(Color.BROWN);

      //Setting the stroke width of the circle
      circle.setStrokeWidth(20);

      //Creating scale Transition
      ScaleTransition scaleTransition = new ScaleTransition();

      //Setting the duration for the transition
      scaleTransition.setDuration(Duration.millis(1000));

      //Setting the node for the transition
      scaleTransition.setNode(circle);

      //Setting the dimensions for scaling
      scaleTransition.setByY(1.5);
      scaleTransition.setByX(1.5);

      //Setting the cycle count for the translation
      scaleTransition.setCycleCount(50);

      //Setting auto reverse value to true
      scaleTransition.setAutoReverse(false);

      //Playing the animation
      scaleTransition.play();

      //Creating a Group object
      Group root = new Group(circle);

      //Creating a scene object
      Scene scene = new Scene(root, 600, 300);

      //Setting title to the Stage
      stage.setTitle("Scale transition example");

      //Adding scene to the stage
      stage.setScene(scene);

      //Displaying the contents of the stage
      stage.show();
   }
   public static void main(String args[]){
      launch(args);
   }
}
Compile and execute the saved java file from the command prompt using the following commands.
javac ScaleTransitionExample.java
java ScaleTransitionExample
On executing, the above program generates a JavaFX window as shown below.
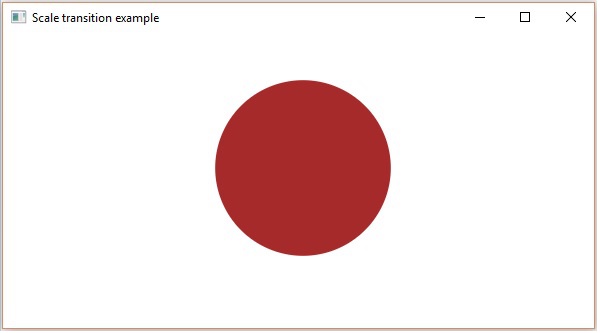
Translate Transition
Following is the program which demonstrates Translate Transition in JavaFX. Save this code in a file with the name TranslateTransitionExample.java.
import javafx.animation.TranslateTransition;
import javafx.application.Application;
import javafx.scene.Group;
import javafx.scene.Scene;
import javafx.scene.paint.Color;
import javafx.scene.shape.Circle;
import javafx.stage.Stage;
import javafx.util.Duration;

public class TranslateTransitionExample extends Application {
   @Override
   public void start(Stage stage) {
      //Drawing a Circle
      Circle circle = new Circle();

      //Setting the position of the circle
      circle.setCenterX(150.0f);
      circle.setCenterY(135.0f);

      //Setting the radius of the circle
      circle.setRadius(100.0f);

      //Setting the color of the circle
      circle.setFill(Color.BROWN);

      //Setting the stroke width of the circle
      circle.setStrokeWidth(20);

      //Creating Translate Transition
      TranslateTransition translateTransition = new TranslateTransition();

      //Setting the duration of the transition
      translateTransition.setDuration(Duration.millis(1000));

      //Setting the node for the transition
      translateTransition.setNode(circle);

      //Setting the value of the transition along the x axis.
      translateTransition.setByX(300);

      //Setting the cycle count for the transition
      translateTransition.setCycleCount(50);

      //Setting auto reverse value to false
      translateTransition.setAutoReverse(false);

      //Playing the animation
      translateTransition.play();

      //Creating a Group object
      Group root = new Group(circle);

      //Creating a scene object
      Scene scene = new Scene(root, 600, 300);

      //Setting title to the Stage
      stage.setTitle("Translate transition example");

      //Adding scene to the stage
      stage.setScene(scene);

      //Displaying the contents of the stage
      stage.show();
   }
   public static void main(String args[]){
      launch(args);
   }
}
Compile and execute the saved java file from the command prompt using the following commands.
javac TranslateTransitionExample.java
java TranslateTransitionExample
On executing, the above program generates a JavaFX window as shown below.
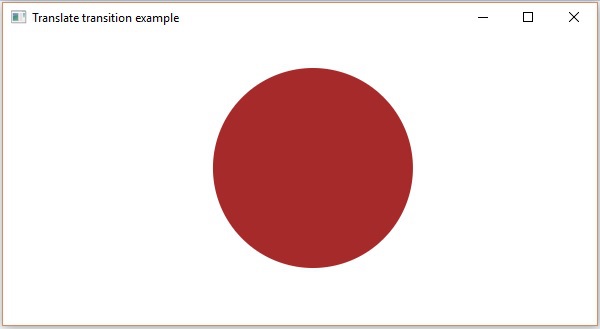
In addition to these, JavaFX provides classes to apply more transitions on nodes. The following are the other kinds of transitions supported by JavaFX.
Transitions that effects the attributes of the nodes Fade, Fill, Stroke
Transition that involve more than one basic transitions Sequential, Parallel, Pause
Transition that translate the object along the specified path Path Transition
JavaFX - Colors
To apply colors to an application, JavaFX provides various classes in the package javafx.scene.paint package. This package contains an abstract class named Paint and it is the base class of all the classes that are used to apply colors.
Using these classes, you can apply colors in the following patterns −
Uniform − In this pattern, color is applied uniformly throughout node.
Image Pattern − This lets you to fill the region of the node with an image pattern.
Gradient − In this pattern, the color applied to the node varies from one point to the other. It has two kinds of gradients namely Linear Gradient and Radial Gradient.
All those node classes to which you can apply color such as Shape, Text (including Scene), have methods named setFill() and setStroke(). These will help to set the color values of the nodes and their strokes respectively.
These methods accept an object of type Paint. Therefore, to create either of these type of images, you need to instantiate these classes and pass the object as a parameter to these methods.
Applying Color to the Nodes
To set uniform color pattern to the nodes, you need to pass an object of the class color to the setFill(), setStroke() methods as follows −
//Setting color to the text
Color color = new Color.BEIGE
text.setFill(color);

//Setting color to the stroke
Color color = new Color.DARKSLATEBLUE
circle.setStroke(color);
In the above code block, we are using the static variables of the color class to create a color object.
In the same way, you can also use the RGB values or HSB standard of coloring or web hash codes of colors as shown below −
//creating color object by passing RGB values
Color c = Color.rgb(0,0,255);

//creating color object by passing HSB values
Color c = Color.hsb(270,1.0,1.0);

//creating color object by passing the hash code for web
Color c = Color.web("0x0000FF",1.0);
Example
Following is an example which demonstrates, how to apply color to the nodes in JavaFX. Here, we are creating a circle and text nodes and applying colors to them.
Save this code in a file with the name ColorExample.java.
import javafx.application.Application;
import javafx.scene.Group;
import javafx.scene.Scene;
import javafx.scene.paint.Color;
import javafx.stage.Stage;
import javafx.scene.shape.Circle;
import javafx.scene.text.Font;
import javafx.scene.text.Text;

public class ColorExample extends Application {
   @Override
   public void start(Stage stage) {
      //Drawing a Circle
      Circle circle = new Circle();

      //Setting the properties of the circle
      circle.setCenterX(300.0f);
      circle.setCenterY(180.0f);
      circle.setRadius(90.0f);

      //Setting color to the circle
      circle.setFill(Color.DARKRED);

      //Setting the stroke width
      circle.setStrokeWidth(3);

      //Setting color to the stroke
      circle.setStroke(Color.DARKSLATEBLUE);

      //Drawing a text
      Text text = new Text("This is a colored circle");

      //Setting the font of the text
      text.setFont(Font.font("Edwardian Script ITC", 50));

      //Setting the position of the text
      text.setX(155);
      text.setY(50);

      //Setting color to the text
      text.setFill(Color.BEIGE);
      text.setStrokeWidth(2);
      text.setStroke(Color.DARKSLATEBLUE);

      //Creating a Group object
      Group root = new Group(circle, text);

      //Creating a scene object
      Scene scene = new Scene(root, 600, 300);

      //Setting title to the Stage
      stage.setTitle("Color Example");

      //Adding scene to the stage
      stage.setScene(scene);

      //Displaying the contents of the stage
      stage.show();
   }
   public static void main(String args[]){
      launch(args);
   }
}
Compile and execute the saved java file from the command prompt using the following commands.
Javac ColorExample.java
java ColorExample
On executing, the above program generates a JavaFX window as follows −
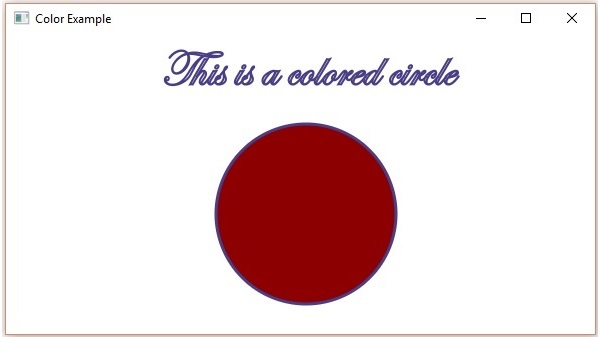
Applying Image Pattern to the Nodes
To apply an image pattern to the nodes, instantiate the ImagePattern class and pass its object to the setFill(), setStroke() methods.
The constructor of this class accepts six parameters namely −
Image − The object of the image using which you want to create the pattern.
x and y − Double variables representing the (x, y) coordinates of origin of the anchor rectangle.
height and width − Double variables representing the height and width of the image that is used to create a pattern.
isProportional − This is a Boolean Variable; on setting this property to true, the start and end locations are set to be proportional.
ImagePattern radialGradient = new ImagePattern(dots, 20, 20, 40, 40, false);
Example
Following is an example which demonstrates how to apply image pattern to the nodes in JavaFX. Here, we are creating a circle and a text node and applying an image pattern to them.
Save this code in a file with name ImagePatternExample.java.
import javafx.application.Application;
import javafx.scene.Group;
import javafx.scene.Scene;
import javafx.scene.image.Image;

import javafx.scene.paint.Color;
import javafx.scene.paint.ImagePattern;
import javafx.scene.paint.Stop;

import javafx.stage.Stage;
import javafx.scene.shape.Circle;
import javafx.scene.text.Font;
import javafx.scene.text.Text;

public class ImagePatternExample extends Application {
   @Override
   public void start(Stage stage) {
      //Drawing a Circle
      Circle circle = new Circle();

      //Setting the properties of the circle
      circle.setCenterX(300.0f);
      circle.setCenterY(180.0f);
      circle.setRadius(90.0f);

      //Drawing a text
      Text text = new Text("This is a colored circle");

      //Setting the font of the text
      text.setFont(Font.font("Edwardian Script ITC", 50));

      //Setting the position of the text
      text.setX(155);
      text.setY(50);

      //Setting the image pattern
      String link = "https://encrypted-tbn1.gstatic.com"
         + "/images?q=tbn:ANd9GcRQub4GvEezKMsiIf67U"
         + "rOxSzQuQ9zl5ysnjRn87VOC8tAdgmAJjcwZ2qM";

      Image image = new Image(link);
      ImagePattern radialGradient = new ImagePattern(image, 20, 20, 40, 40, false);

      //Setting the linear gradient to the circle and text
      circle.setFill(radialGradient);
      text.setFill(radialGradient);

      //Creating a Group object
      Group root = new Group(circle, text);

      //Creating a scene object
      Scene scene = new Scene(root, 600, 300);

      //Setting title to the Stage
      stage.setTitle("Image pattern Example");

      //Adding scene to the stage
      stage.setScene(scene);

      //Displaying the contents of the stage
      stage.show();
   }
   public static void main(String args[]){
      launch(args);
   }
}
Compile and execute the saved java file from the command prompt using the following commands.
Javac ImagePatternExample.java
java ImagePatternExample
On executing, the above program generates a JavaFX window as follows −
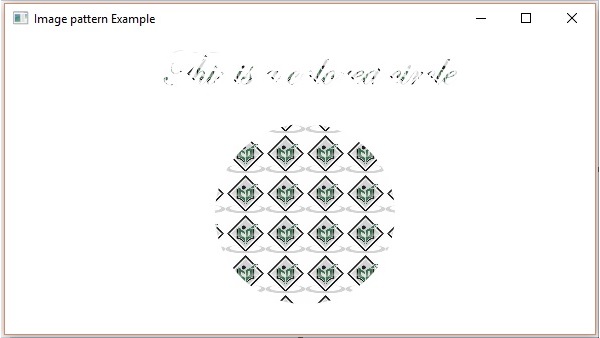
Applying Linear Gradient Pattern
To apply a Linear Gradient Pattern to the nodes, instantiate the LinearGradient class and pass its object to the setFill(), setStroke() methods.
The constructor of this class accepts five parameters namely −
startX, startY − These double properties represent the x and y coordinates of the starting point of the gradient.
endX, endY − These double properties represent the x and y coordinates of the ending point of the gradient.
cycleMethod − This argument defines how the regions outside the color gradient bounds, defined by the starting and ending points, should be filled.
proportional − This is a Boolean Variable; on setting this property to true, the start and end locations are set to a proportion.
Stops − This argument defines the color-stop points along the gradient line.
//Setting the linear gradient
Stop[] stops = new Stop[] {
   new Stop(0, Color.DARKSLATEBLUE),
   new Stop(1, Color.DARKRED)
};
LinearGradient linearGradient =
   new LinearGradient(0, 0, 1, 0, true, CycleMethod.NO_CYCLE, stops);
Example
Following is an example which demonstrates how to apply a gradient pattern to the nodes in JavaFX. Here, we are creating a circle and a text nodes and applying linear gradient pattern to them.
Save this code in a file with name LinearGradientExample.java.
import javafx.application.Application;
import javafx.scene.Group;
import javafx.scene.Scene;

import javafx.scene.paint.Color;
import javafx.scene.paint.CycleMethod;
import javafx.scene.paint.LinearGradient;
import javafx.scene.paint.Stop;

import javafx.stage.Stage;
import javafx.scene.shape.Circle;
import javafx.scene.text.Font;
import javafx.scene.text.Text;

public class LinearGradientExample extends Application {
   @Override
   public void start(Stage stage) {
      //Drawing a Circle
      Circle circle = new Circle();

      //Setting the properties of the circle
      circle.setCenterX(300.0f);
      circle.setCenterY(180.0f);
      circle.setRadius(90.0f);

      //Drawing a text
      Text text = new Text("This is a colored circle");

      //Setting the font of the text
      text.setFont(Font.font("Edwardian Script ITC", 55));

      //Setting the position of the text
      text.setX(140);
      text.setY(50);

      //Setting the linear gradient
      Stop[] stops = new Stop[] {
         new Stop(0, Color.DARKSLATEBLUE),
         new Stop(1, Color.DARKRED)
      };
      LinearGradient linearGradient =
         new LinearGradient(0, 0, 1, 0, true, CycleMethod.NO_CYCLE, stops);

      //Setting the linear gradient to the circle and text
      circle.setFill(linearGradient);
      text.setFill(linearGradient);

      //Creating a Group object
      Group root = new Group(circle, text);

      //Creating a scene object
      Scene scene = new Scene(root, 600, 300);

      //Setting title to the Stage
      stage.setTitle("Linear Gradient Example");

      //Adding scene to the stage
      stage.setScene(scene);

      //Displaying the contents of the stage
      stage.show();
   }
   public static void main(String args[]){
      launch(args);
   }
}
Compile and execute the saved java file from the command prompt using the following commands.
Javac LinearGradientExample.java
java LinearGradientExample
On executing, the above program generates a JavaFX window as follows −
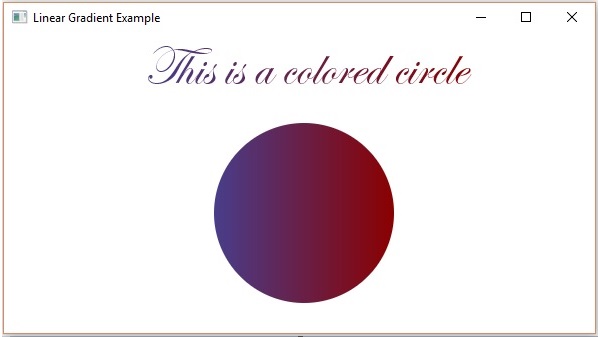
Applying Radial Gradient Pattern
To apply a Radial Gradient Pattern to the nodes, instantiate the GradientPattern class and pass its object to the setFill(), setStroke() methods.
The constructor of this class accepts a few parameters, some of which are −
startX, startY − These double properties represent the x and y coordinates of the starting point of the gradient.
endX, endY − These double properties represent the x and y coordinates of the ending point of the gradient.
cycleMethod − This argument defines how the regions outside the color gradient bounds are defined by the starting and ending points and how they should be filled.
proportional − This is a Boolean Variable; on setting this property to true the start and end locations are set to a proportion.
Stops − This argument defines the color-stop points along the gradient line.
//Setting the radial gradient
Stop[] stops = new Stop[] {
   new Stop(0.0, Color.WHITE),
   new Stop(0.3, Color.RED),
   new Stop(1.0, Color.DARKRED)
};

RadialGradient radialGradient =
   new RadialGradient(0, 0, 300, 178, 60, false, CycleMethod.NO_CYCLE, stops);
Example
Following is an example which demonstrates how to apply a radial gradient pattern to the nodes in JavaFX. Here, we are creating a circle and a text nodes and applying gradient pattern to them.
Save this code in a file with the name RadialGradientExample.java.
import javafx.application.Application;
import javafx.scene.Group;
import javafx.scene.Scene;

import javafx.scene.paint.Color;
import javafx.scene.paint.CycleMethod;
import javafx.scene.paint.RadialGradient;
import javafx.scene.paint.Stop;

import javafx.stage.Stage;
import javafx.scene.shape.Circle;
import javafx.scene.text.Font;
import javafx.scene.text.Text;

public class RadialGradientExample extends Application {
   @Override
   public void start(Stage stage) {
      //Drawing a Circle
      Circle circle = new Circle();

      //Setting the properties of the circle
      circle.setCenterX(300.0f);
      circle.setCenterY(180.0f);
      circle.setRadius(90.0f);

      //Drawing a text
      Text text = new Text("This is a colored circle");

      //Setting the font of the text
      text.setFont(Font.font("Edwardian Script ITC", 50));

      //Setting the position of the text
      text.setX(155);
      text.setY(50);

      //Setting the radial gradient
      Stop[] stops = new Stop[] {
         new Stop(0.0, Color.WHITE),
         new Stop(0.3, Color.RED),
         new Stop(1.0, Color.DARKRED)
      };
      RadialGradient radialGradient =
         new RadialGradient(0, 0, 300, 178, 60, false, CycleMethod.NO_CYCLE, stops);

      //Setting the radial gradient to the circle and text
      circle.setFill(radialGradient);
      text.setFill(radialGradient);

      //Creating a Group object
      Group root = new Group(circle, text);

      //Creating a scene object
      Scene scene = new Scene(root, 600, 300);

      //Setting title to the Stage
      stage.setTitle("Radial Gradient Example");

      //Adding scene to the stage
      stage.setScene(scene);

      //Displaying the contents of the stage
      stage.show();
   }
   public static void main(String args[]) {
      launch(args);
   }
}
Compile and execute the saved java file from the command prompt using the following commands.
Javac RadialGradientExample.java
java RadialGradientExample
On executing, the above program generates a JavaFX window as follows −
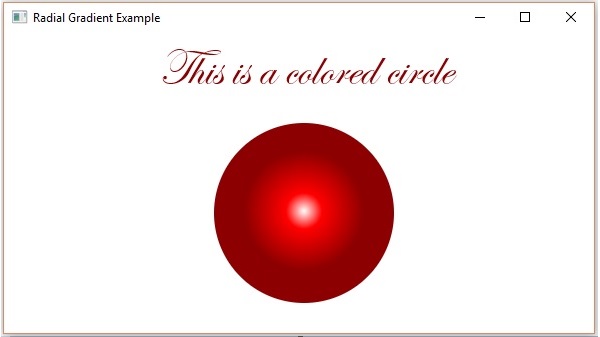
JavaFX - Images
You can load and modify images using the classes provided by JavaFX in the package javafx.scene.image. JavaFX supports the image formats like Bmp, Gif, Jpeg, Png.
This chapter teaches you how to load images in to JavaFX, how to project an image in multiple views and how to alter the pixels of an image.
Loading an Image
You can load an image in JavaFX by instantiating the class named Image of the package javafx.scene.image.
To the constructor of the class, you have to pass either of the following −
An InputStream object of the image to be loaded or,
A string variable holding the URL for the image.
//Passing FileInputStream object as a parameter
FileInputStream inputstream = new FileInputStream("C:\\images\\image.jpg");
Image image = new Image(inputstream);

//Loading image from URL
//Image image = new Image(new FileInputStream("url for the image));
After loading the image, you can set the view for the image by instantiating the ImageView class and passing the image to its constructor as follows −
ImageView imageView = new ImageView(image);
Example
Following is an example which demonstrates how to load an image in JavaFX and set the view.
Save this code in a file with the name ImageExample.java.
import java.io.FileInputStream;
import java.io.FileNotFoundException;
import javafx.application.Application;
import javafx.scene.Group;
import javafx.scene.Scene;
import javafx.scene.image.Image;
import javafx.scene.image.ImageView;
import javafx.stage.Stage;

public class ImageExample extends Application {
   @Override
   public void start(Stage stage) throws FileNotFoundException {
      //Creating an image
      Image image = new Image(new FileInputStream("path of the image"));

      //Setting the image view
      ImageView imageView = new ImageView(image);

      //Setting the position of the image
      imageView.setX(50);
      imageView.setY(25);

      //setting the fit height and width of the image view
      imageView.setFitHeight(455);
      imageView.setFitWidth(500);

      //Setting the preserve ratio of the image view
      imageView.setPreserveRatio(true);

      //Creating a Group object
      Group root = new Group(imageView);

      //Creating a scene object
      Scene scene = new Scene(root, 600, 500);

      //Setting title to the Stage
      stage.setTitle("Loading an image");

      //Adding scene to the stage
      stage.setScene(scene);

      //Displaying the contents of the stage
      stage.show();
   }
   public static void main(String args[]) {
      launch(args);
   }
}
Compile and execute the saved java file from the command prompt using the following commands.
Javac ImageExample.java
java ImageExample
On executing, the above program generates a JavaFX window as follows −
Multiple Views of an Image
You can also set multiple views for an image in the same scene. The following program is an example that demonstrates how to set various views for an image in a scene in JavaFX.
Save this code in a file with the name MultipleViews.java.
import java.io.FileInputStream;
import java.io.FileNotFoundException;
import javafx.application.Application;
import javafx.scene.Group;
import javafx.scene.Scene;
import javafx.scene.image.Image;
import javafx.scene.image.ImageView;
import javafx.stage.Stage;

public class MultipleViews extends Application {
   @Override
   public void start(Stage stage) throws FileNotFoundException {
      //Creating an image
      Image image = new Image(new FileInputStream("file path"));

      //Setting the image view 1
      ImageView imageView1 = new ImageView(image);

      //Setting the position of the image
      imageView1.setX(50);
      imageView1.setY(25);

      //setting the fit height and width of the image view
      imageView1.setFitHeight(300);
      imageView1.setFitWidth(250);

      //Setting the preserve ratio of the image view
      imageView1.setPreserveRatio(true);

      //Setting the image view 2
      ImageView imageView2 = new ImageView(image);

      //Setting the position of the image
      imageView2.setX(350);
      imageView2.setY(25);

      //setting the fit height and width of the image view
      imageView2.setFitHeight(150);
      imageView2.setFitWidth(250);

      //Setting the preserve ratio of the image view
      imageView2.setPreserveRatio(true);

      //Setting the image view 3
      ImageView imageView3 = new ImageView(image);

      //Setting the position of the image
      imageView3.setX(350);
      imageView3.setY(200);

      //setting the fit height and width of the image view
      imageView3.setFitHeight(100);
      imageView3.setFitWidth(100);

      //Setting the preserve ratio of the image view
      imageView3.setPreserveRatio(true);

      //Creating a Group object
      Group root = new Group(imageView1, imageView2, imageView3);

      //Creating a scene object
      Scene scene = new Scene(root, 600, 400);

      //Setting title to the Stage
      stage.setTitle("Multiple views of an image");

      //Adding scene to the stage
      stage.setScene(scene);

      //Displaying the contents of the stage
      stage.show();
   }
   public static void main(String args[]) {
      launch(args);
   }
}
Compile and execute the saved java file from the command prompt using the following commands.
Javac MultipleViews.java
java MultipleViews
On executing, the above program generates a JavaFX window as follows −
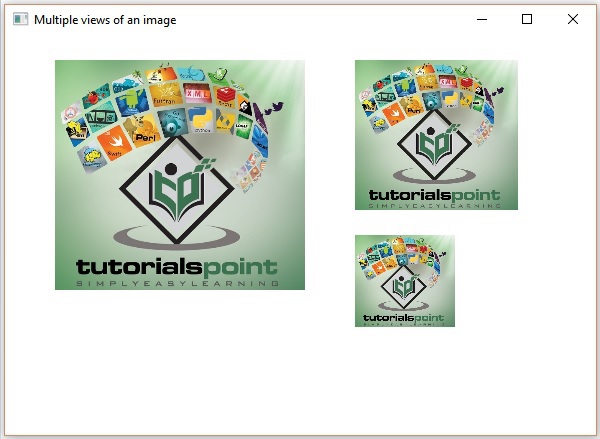
Writing Pixels
JavaFX provides classes named PixelReader and PixelWriter classes to read and write pixels of an image. The WritableImage class is used to create a writable image.
Following is an example which demonstrates how to read and write pixels of an image. Here, we are reading the color value of an image and making it darker.
Save this code in a file with the name WritingPixelsExample.java.
import java.io.FileInputStream;
import java.io.FileNotFoundException;
import javafx.application.Application;

import javafx.scene.Group;
import javafx.scene.Scene;

import javafx.scene.image.Image;
import javafx.scene.image.ImageView;
import javafx.scene.image.PixelReader;
import javafx.scene.image.PixelWriter;
import javafx.scene.image.WritableImage;

import javafx.scene.paint.Color;
import javafx.stage.Stage;

public class WritingPixelsExample extends Application {
   @Override
   public void start(Stage stage) throws FileNotFoundException {
      //Creating an image
      Image image = new Image(new FileInputStream("C:\\images\\logo.jpg"));
      int width = (int)image.getWidth();
      int height = (int)image.getHeight();

      //Creating a writable image
      WritableImage wImage = new WritableImage(width, height);

      //Reading color from the loaded image
      PixelReader pixelReader = image.getPixelReader();

      //getting the pixel writer
      PixelWriter writer = wImage.getPixelWriter();

      //Reading the color of the image
      for(int y = 0; y < height; y++) {
         for(int x = 0; x < width; x++) {
            //Retrieving the color of the pixel of the loaded image
            Color color = pixelReader.getColor(x, y);

            //Setting the color to the writable image
            writer.setColor(x, y, color.darker());
         }
      }
      //Setting the view for the writable image
      ImageView imageView = new ImageView(wImage);

      //Creating a Group object
      Group root = new Group(imageView);

      //Creating a scene object
      Scene scene = new Scene(root, 600, 500);

      //Setting title to the Stage
      stage.setTitle("Writing pixels ");

      //Adding scene to the stage
      stage.setScene(scene);

      //Displaying the contents of the stage
      stage.show();
   }
   public static void main(String args[]) {
      launch(args);
   }
}
Compile and execute the saved java file from the command prompt using the following commands.
Javac WritingPixelsExample.java
java WritingPixelsExample
On executing, the above program generates a JavaFX window as follows −
JavaFX - 3D Shapes
In the earlier chapters, we have seen how to draw 2D shapes on an XY plane. In addition to these 2D shapes, we can draw several other 3D shapes as well using JavaFX.
3D Shape
In general, a 3D shape is a geometrical figure that can be drawn on the XYZ plane. These include a Cylinder, Sphere and a Box.
Each of the above mentioned 3D shape is represented by a class and all these classes belong to the package javafx.scene.shape. The class named Shape3D is the base class of all the 3-Dimensional shapes in JavaFX.
Creating a 3D Shape
To create a 3-Dimensional shape, you need to −
Instantiate the respective class of the required 3D shape.
Set the properties of the 3D shape.
Add the 3D shape object to the group.
Instantiating the Respective Class
To create a 3-Dimensional shape, first of all you need to instantiate its respective class. For example, if you want to create a 3D box, you need to instantiate the class named Box as follows −
Box box = new Box();
Setting the Properties of the Shape
After instantiating the class, you need to set the properties for the shape using the setter methods.
For example, to draw a 3D box you need to pass its Width, Height, Depth. You can specify these values using their respective setter methods as follows −
//Setting the properties of the Box
box.setWidth(200.0);
box.setHeight(400.0);
box.setDepth(200.0);
Adding the Shape Object to the Group
Finally, you need to add the object of the shape to the group by passing it as a parameter of the constructor as shown below.
//Creating a Group object
Group root = new Group(box);
The following table gives you the list of various 3D shapes provided by JavaFX.
| S.No | Shape & Description |
|---|---|
| 1 |
Box
A cuboid is a three-dimensional shape with a length (depth), width, and a height. In JavaFX a three-dimensional box is represented by a class named Box. This class belongs to the package javafx.scene.shape. By instantiating this class, you can create a Box node in JavaFX. This class has 3 properties of the double datatype namely −
|
| 2 | Cylinder
A cylinder is a closed solid that has two parallel (mostly circular) bases connected by a curved surface. It is described by two parameters, namely, the radius of its circular base and the height of the cylinder. In JavaFX, a cylinder is represented by a class named Cylinder. This class belongs to the package javafx.scene.shape. By instantiating this class, you can create a cylinder node in JavaFX. This class has 2 properties of the double datatype namely −
|
| 3 | Sphere
A sphere is defined as the set of points that are all at the same distance r from a given point in a 3D space. This distance r is the radius of the sphere and the given point is the centre of the sphere. In JavaFX, a sphere is represented by a class named Sphere. This class belongs to the package javafx.scene.shape. By instantiating this class, you can create a sphere node in JavaFX. This class has a property named radius of double datatype. It represents the radius of a Sphere. |
Properties of 3D Objects
For all the 3 Dimensional objects, you can set various properties like Cull Face, Drawing Mode, Material.
The following section discusses the properties of 3D objects.
Cull Face
In general, culling is the removal of improperly oriented parts of a shape (which are not visible in the view area).
The Cull Face property is of the type CullFace and it represents the Cull Face of a 3D shape. You can set the Cull Face of a shape using the method setCullFace() as shown below −
box.setCullFace(CullFace.NONE);
The stroke type of a shape can be −
None − No culling is performed (CullFace.NONE).
Front − All the front facing polygons are culled. (CullFace.FRONT).
Back − All the back facing polygons are culled. (StrokeType.BACK).
By default, the cull face of a 3-Dimensional shape is Back.
Example
The following program is an example which demonstrates various cull faces of the sphere. Save this code in a file with the name SphereCullFace.java.
import javafx.application.Application;
import javafx.scene.Group;
import javafx.scene.Scene;
import javafx.scene.shape.CullFace;
import javafx.stage.Stage;
import javafx.scene.shape.Sphere;

public class SphereCullFace extends Application {
   @Override
   public void start(Stage stage) {
      //Drawing Sphere1
      Sphere sphere1 = new Sphere();

      //Setting the radius of the Sphere
      sphere1.setRadius(50.0);

      //Setting the position of the sphere
      sphere1.setTranslateX(100);
      sphere1.setTranslateY(150);

      //setting the cull face of the sphere to front
      sphere1.setCullFace(CullFace.FRONT);

      //Drawing Sphere2
      Sphere sphere2 = new Sphere();

      //Setting the radius of the Sphere
      sphere2.setRadius(50.0);

      //Setting the position of the sphere
      sphere2.setTranslateX(300);
      sphere2.setTranslateY(150);

      //Setting the cull face of the sphere to back
      sphere2.setCullFace(CullFace.BACK);

      //Drawing Sphere3
      Sphere sphere3 = new Sphere();

      //Setting the radius of the Sphere
      sphere3.setRadius(50.0);

      //Setting the position of the sphere
      sphere3.setTranslateX(500);
      sphere3.setTranslateY(150);

      //Setting the cull face of the sphere to none
      sphere2.setCullFace(CullFace.NONE);

      //Creating a Group object
      Group root = new Group(sphere1, sphere2, sphere3);

      //Creating a scene object
      Scene scene = new Scene(root, 600, 300);

      //Setting title to the Stage
      stage.setTitle("Drawing a Sphere");

      //Adding scene to the stage
      stage.setScene(scene);

      //Displaying the contents of the stage
      stage.show();
   }
   public static void main(String args[]){
      launch(args);
   }
}
Compile and execute the saved Java file from the command prompt using the following commands.
javac SphereCullFace.java
java SphereCullFace
On executing, the above program generates a JavaFX window displaying three spheres with cull face values FRONT, BACK and NONE respectively as follows −
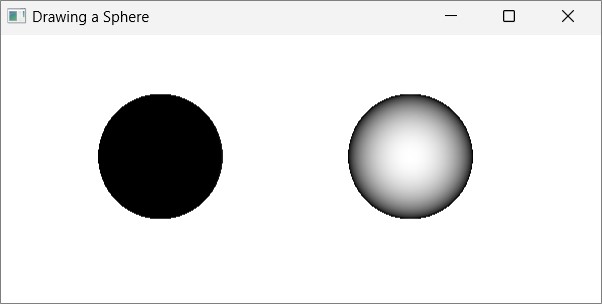
Drawing Modes
It is the property is of the type DrawMode and it represents the drawing mode used to draw the current 3D shape. You can choose the draw mode to draw a 3D shape using the method setDrawMode () as follows −
box.setDrawMode(DrawMode.FILL);
In JavaFX, you can choose two draw modes to draw a 3D shape, which are −
Fill − This mode draws and fills a 2D shape (DrawMode.FILL).
Line − This mode draws a 3D shape using lines (DrawMode.LINE).
By default, the drawing mode of a 3Dimensional shape is fill.
Example
The following program is an example which demonstrates various draw modes of a 3D box. Save this code in a file with the name BoxDrawMode.java.
import javafx.application.Application;
import javafx.scene.Group;
import javafx.scene.PerspectiveCamera;
import javafx.scene.Scene;
import javafx.scene.shape.Box;
import javafx.scene.shape.DrawMode;
import javafx.stage.Stage;

public class BoxDrawMode extends Application {
   @Override
   public void start(Stage stage) {
      //Drawing a Box
      Box box1 = new Box();

      //Setting the properties of the Box
      box1.setWidth(100.0);
      box1.setHeight(100.0);
      box1.setDepth(100.0);

      //Setting the position of the box
      box1.setTranslateX(200);
      box1.setTranslateY(150);
      box1.setTranslateZ(0);

      //Setting the drawing mode of the box
      box1.setDrawMode(DrawMode.LINE);

      //Drawing a Box
      Box box2 = new Box();

      //Setting the properties of the Box
      box2.setWidth(100.0);
      box2.setHeight(100.0);
      box2.setDepth(100.0);

      //Setting the position of the box
      box2.setTranslateX(450); //450
      box2.setTranslateY(150);//150
      box2.setTranslateZ(300);

      //Setting the drawing mode of the box
      box2.setDrawMode(DrawMode.FILL);

      //Creating a Group object
      Group root = new Group(box1, box2);

      //Creating a scene object
      Scene scene = new Scene(root, 600, 300);

      //Setting camera
      PerspectiveCamera camera = new PerspectiveCamera(false);
      camera.setTranslateX(0);
      camera.setTranslateY(0);
      camera.setTranslateZ(0);
      scene.setCamera(camera);

      //Setting title to the Stage
      stage.setTitle("Drawing a Box");

      //Adding scene to the stage
      stage.setScene(scene);

      //Displaying the contents of the stage
      stage.show();
   }
   public static void main(String args[]){
      launch(args);
   }
}
Compile and execute the saved java file from the command prompt using the following commands.
javac BoxDrawMode.java
java BoxDrawMode
On executing, the above program generates a JavaFX window displaying two boxes with draw mode values LINE and FILL respectively, as follows −
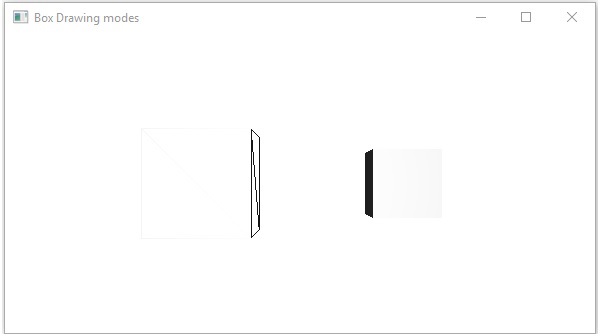
Material
The cull Face property is of the type Material and it is used to choose the surface of the material of a 3D shape. You can set the material of a 3D shape using the method setCullFace() as follows −
cylinder.setMaterial(material);
As mentioned above for this method, you need to pass an object of the type Material. The PhongMaterial class of the package javafx.scene.paint is a sub class of this class and provides 7 properties that represent a Phong shaded material. You can apply all these type of materials to the surface of a 3D shape using the setter methods of these properties.
Following are the type of materials that are available in JavaFX −
bumpMap − This represents a normal map stored as a RGB Image.
diffuseMap − This represents a diffuse map.
selfIlluminationMap − This represents a self-illumination map of this PhongMaterial.
specularMap − This represents a specular map of this PhongMaterial.
diffuseColor − This represents a diffuse color of this PhongMaterial.
specularColor − This represents a specular color of this PhongMaterial.
specularPower − This represents a specular power of this PhongMaterial.
By default, the material of a 3-Dimensional shape is a PhongMaterial with a diffuse color of light gray.
Example
Following is an example which displays various materials on the cylinder. Save this code in a file with the name CylinderMaterials.java.
import javafx.application.Application;
import javafx.scene.Group;
import javafx.scene.PerspectiveCamera;
import javafx.scene.Scene;
import javafx.scene.image.Image;
import javafx.scene.paint.Color;
import javafx.scene.paint.PhongMaterial;
import javafx.scene.shape.Cylinder;
import javafx.stage.Stage;

public class CylinderMaterials extends Application {
   @Override
   public void start(Stage stage) {
      //Drawing Cylinder1
      Cylinder cylinder1 = new Cylinder();

      //Setting the properties of the Cylinder
      cylinder1.setHeight(130.0f);
      cylinder1.setRadius(30.0f);

      //Setting the position of the Cylinder
      cylinder1.setTranslateX(100);
      cylinder1.setTranslateY(75);

      //Preparing the phong material of type bump map
      PhongMaterial material1 = new PhongMaterial();
      material1.setBumpMap(new Image
         ("http://www.tutorialspoint.com/images/tplogo.gif"));

      //Setting the bump map material to Cylinder1
      cylinder1.setMaterial(material1);

      //Drawing Cylinder2
      Cylinder cylinder2 = new Cylinder();

      //Setting the properties of the Cylinder
      cylinder2.setHeight(130.0f);
      cylinder2.setRadius(30.0f);

      //Setting the position of the Cylinder
      cylinder2.setTranslateX(200);
      cylinder2.setTranslateY(75);

      //Preparing the phong material of type diffuse map
      PhongMaterial material2 = new PhongMaterial();
      material2.setDiffuseMap(new Image
         ("http://www.tutorialspoint.com/images/tp-logo.gif"));

      //Setting the diffuse map material to Cylinder2
      cylinder2.setMaterial(material2);

      //Drawing Cylinder3
      Cylinder cylinder3 = new Cylinder();

      //Setting the properties of the Cylinder
      cylinder3.setHeight(130.0f);
      cylinder3.setRadius(30.0f);

      //Setting the position of the Cylinder
      cylinder3.setTranslateX(300);
      cylinder3.setTranslateY(75);

      //Preparing the phong material of type Self Illumination Map
      PhongMaterial material3 = new PhongMaterial();
      material3.setSelfIlluminationMap(new Image
         ("http://www.tutorialspoint.com/images/tp-logo.gif"));

      //Setting the Self Illumination Map material to Cylinder3
      cylinder3.setMaterial(material3);

      //Drawing Cylinder4
      Cylinder cylinder4 = new Cylinder();

      //Setting the properties of the Cylinder
      cylinder4.setHeight(130.0f);
      cylinder4.setRadius(30.0f);

      //Setting the position of the Cylinder
      cylinder4.setTranslateX(400);
      cylinder4.setTranslateY(75);

      //Preparing the phong material of type Specular Map
      PhongMaterial material4 = new PhongMaterial();
      material4.setSpecularMap(new Image
         ("http://www.tutorialspoint.com/images/tp-logo.gif"));

      //Setting the Specular Map material to Cylinder4
      cylinder4.setMaterial(material4);

      //Drawing Cylinder5
      Cylinder cylinder5 = new Cylinder();

      //Setting the properties of the Cylinder
      cylinder5.setHeight(130.0f);
      cylinder5.setRadius(30.0f);

      //Setting the position of the Cylinder
      cylinder5.setTranslateX(100);
      cylinder5.setTranslateY(300);

      //Preparing the phong material of type diffuse color
      PhongMaterial material5 = new PhongMaterial();
      material5.setDiffuseColor(Color.BLANCHEDALMOND);

      //Setting the diffuse color material to Cylinder5
      cylinder5.setMaterial(material5);

      //Drawing Cylinder6
      Cylinder cylinder6 = new Cylinder();

      //Setting the properties of the Cylinder
      cylinder6.setHeight(130.0f);
      cylinder6.setRadius(30.0f);

      //Setting the position of the Cylinder
      cylinder6.setTranslateX(200);
      cylinder6.setTranslateY(300);

      //Preparing the phong material of type specular color
      PhongMaterial material6 = new PhongMaterial();

      //setting the specular color map to the material
      material6.setSpecularColor(Color.BLANCHEDALMOND);

      //Setting the specular color material to Cylinder6
      cylinder6.setMaterial(material6);

      //Drawing Cylinder7
      Cylinder cylinder7 = new Cylinder();

      //Setting the properties of the Cylinder
      cylinder7.setHeight(130.0f);
      cylinder7.setRadius(30.0f);

      //Setting the position of the Cylinder
      cylinder7.setTranslateX(300);
      cylinder7.setTranslateY(300);

      //Preparing the phong material of type Specular Power
      PhongMaterial material7 = new PhongMaterial();
      material7.setSpecularPower(0.1);

      //Setting the Specular Power material to the Cylinder
      cylinder7.setMaterial(material7);

      //Creating a Group object
      Group root = new Group(cylinder1 ,cylinder2, cylinder3,
      cylinder4, cylinder5, cylinder6, cylinder7);

      //Creating a scene object
      Scene scene = new Scene(root, 600, 400);

      //Setting camera
      PerspectiveCamera camera = new PerspectiveCamera(false);
      camera.setTranslateX(0);
      camera.setTranslateY(0);
      camera.setTranslateZ(-10);
      scene.setCamera(camera);

      //Setting title to the Stage
      stage.setTitle("Drawing a cylinder");

      //Adding scene to the stage
      stage.setScene(scene);

      //Displaying the contents of the stage
      stage.show();
   }
   public static void main(String args[]){
      launch(args);
   }
}
Compile and execute the saved java file from the command prompt using the following commands.
Javac CylinderMaterials.java
java CylinderMaterials
On executing, the above program generates a JavaFX window displaying 7 cylinders with Materials, Bump Map, Diffuse Map, Self-Illumination Map, Specular Map, Diffuse Color, Specular Color, (BLANCHEDALMOND) Specular Power, respectively, as shown in the following screenshot −
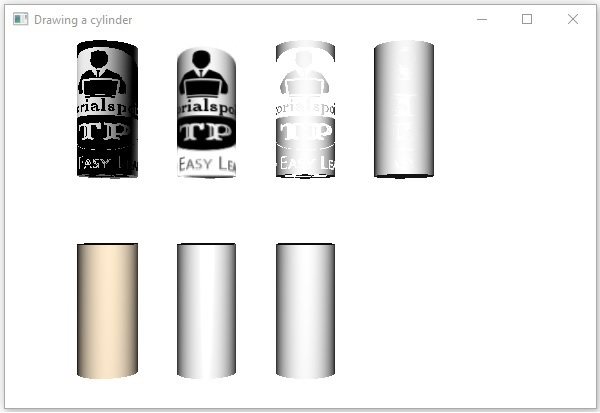
JavaFX - Event Handling
In JavaFX, we can develop GUI applications, web applications and graphical applications. In such applications, whenever a user interacts with the application (nodes), an event is said to have been occurred.
For example, clicking on a button, moving the mouse, entering a character through keyboard, selecting an item from list, scrolling the page are the activities that causes an event to happen.
Types of Events
The events can be broadly classified into the following two categories −
Foreground Events − Those events which require the direct interaction of a user. They are generated as consequences of a person interacting with the graphical components in a Graphical User Interface. For example, clicking on a button, moving the mouse, entering a character through keyboard, selecting an item from list, scrolling the page, etc.
Background Events − Those events that don't require the interaction of end-user are known as background events. The operating system interruptions, hardware or software failure, timer expiry, operation completion are the example of background events.
Events in JavaFX
JavaFX provides support to handle a wide varieties of events. The class named Event of the package javafx.event is the base class for an event.
An instance of any of its subclass is an event. JavaFX provides a wide variety of events. Some of them are are listed below.
Mouse Event − This is an input event that occurs when a mouse is clicked. It is represented by the class named MouseEvent. It includes actions like mouse clicked, mouse pressed, mouse released, mouse moved, mouse entered target, mouse exited target, etc.
Key Event − This is an input event that indicates the key stroke occurred on a node. It is represented by the class named KeyEvent. This event includes actions like key pressed, key released and key typed.
Drag Event − This is an input event which occurs when the mouse is dragged. It is represented by the class named DragEvent. It includes actions like drag entered, drag dropped, drag entered target, drag exited target, drag over, etc.
Window Event − This is an event related to window showing/hiding actions. It is represented by the class named WindowEvent. It includes actions like window hiding, window shown, window hidden, window showing, etc.
Event Handling
Event Handling is the mechanism that controls the event and decides what should happen, if an event occurs. This mechanism has the code which is known as an event handler that is executed when an event occurs.
JavaFX provides handlers and filters to handle events. In JavaFX every event has −
Target − The node on which an event occurred. A target can be a window, scene, and a node.
Source − The source from which the event is generated will be the source of the event. In the above scenario, mouse is the source of the event.
Type − Type of the occurred event; in case of mouse event – mouse pressed, mouse released are the type of events.
Assume that we have an application which has a Circle, Stop and Play Buttons inserted using a group object as follows −
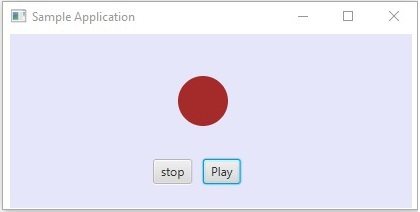
If you click on the play button, the source will be the mouse, the target node will be the play button and the type of the event generated is the mouse click.
Phases of Event Handling in JavaFX
Whenever an event is generated, JavaFX undergoes the following phases.
Route Construction
Whenever an event is generated, the default/initial route of the event is determined by construction of an Event Dispatch chain. It is the path from the stage to the source Node.
Following is the event dispatch chain for the event generated, when we click on the play button in the above scenario.

Event Capturing Phase
After the construction of the event dispatch chain, the root node of the application dispatches the event. This event travels to all nodes in the dispatch chain (from top to bottom). If any of these nodes has a filter registered for the generated event, it will be executed. If none of the nodes in the dispatch chain has a filter for the event generated, then it is passed to the target node and finally the target node processes the event.
Event Bubbling Phase
In the event bubbling phase, the event is travelled from the target node to the stage node (bottom to top). If any of the nodes in the event dispatch chain has a handler registered for the generated event, it will be executed. If none of these nodes have handlers to handle the event, then the event reaches the root node and finally the process will be completed.
Event Handlers and Filters
Event filters and handlers are those which contains application logic to process an event. A node can register to more than one handler/filter. In case of parent–child nodes, you can provide a common filter/handler to the parents, which is processed as default for all the child nodes.
As mentioned above, during the event, processing is a filter that is executed and during the event bubbling phase, a handler is executed. All the handlers and filters implement the interface EventHandler of the package javafx.event.
Adding and Removing Event Filter
To add an event filter to a node, you need to register this filter using the method addEventFilter() of the Node class.
//Creating the mouse event handler
EventHandler<MouseEvent> eventHandler = new EventHandler<MouseEvent>() {
   @Override
   public void handle(MouseEvent e) {
      System.out.println("Hello World");
      circle.setFill(Color.DARKSLATEBLUE);
   }
};
//Adding event Filter
Circle.addEventFilter(MouseEvent.MOUSE_CLICKED, eventHandler);
In the same way, you can remove a filter using the method removeEventFilter() as shown below −
circle.removeEventFilter(MouseEvent.MOUSE_CLICKED, eventHandler);
Event Handling Example
Following is an example demonstrating the event handling in JavaFX using the event filters. Save this code in a file with name EventFiltersExample.java.
import javafx.application.Application;
import static javafx.application.Application.launch;
import javafx.event.EventHandler;

import javafx.scene.Group;
import javafx.scene.Scene;
import javafx.scene.input.MouseEvent;
import javafx.scene.paint.Color;
import javafx.scene.shape.Circle;

import javafx.scene.text.Font;
import javafx.scene.text.FontWeight;
import javafx.scene.text.Text;
import javafx.stage.Stage;

public class EventFiltersExample extends Application {
   @Override
   public void start(Stage stage) {
      //Drawing a Circle
      Circle circle = new Circle();

      //Setting the position of the circle
      circle.setCenterX(300.0f);
      circle.setCenterY(135.0f);

      //Setting the radius of the circle
      circle.setRadius(25.0f);

      //Setting the color of the circle
      circle.setFill(Color.BROWN);

      //Setting the stroke width of the circle
      circle.setStrokeWidth(20);

      //Setting the text
      Text text = new Text("Click on the circle to change its color");

      //Setting the font of the text
      text.setFont(Font.font(null, FontWeight.BOLD, 15));

      //Setting the color of the text
      text.setFill(Color.CRIMSON);

      //setting the position of the text
      text.setX(150);
      text.setY(50);

      //Creating the mouse event handler
      EventHandler<MouseEvent> eventHandler = new EventHandler<MouseEvent>() {
         @Override
         public void handle(MouseEvent e) {
            System.out.println("Hello World");
            circle.setFill(Color.DARKSLATEBLUE);
         }
      };
      //Registering the event filter
      circle.addEventFilter(MouseEvent.MOUSE_CLICKED, eventHandler);

      //Creating a Group object
      Group root = new Group(circle, text);

      //Creating a scene object
      Scene scene = new Scene(root, 600, 300);

      //Setting the fill color to the scene
      scene.setFill(Color.LAVENDER);

      //Setting title to the Stage
      stage.setTitle("Event Filters Example");

      //Adding scene to the stage
      stage.setScene(scene);

      //Displaying the contents of the stage
      stage.show();
   }
   public static void main(String args[]){
      launch(args);
   }
}
Compile and execute the saved java file from the command prompt using the following commands.
javac EventFiltersExample.java
java EventFiltersExample
On executing, the above program generates a JavaFX window as shown below.

Adding and Removing Event Handlers
To add an event handler to a node, you need to register this handler using the method addEventHandler() of the Node class as shown below.
//Creating the mouse event handler
EventHandler<javafx.scene.input.MouseEvent> eventHandler =
   new EventHandler<javafx.scene.input.MouseEvent>() {

   @Override
   public void handle(javafx.scene.input.MouseEvent e) {
      System.out.println("Hello World");
      circle.setFill(Color.DARKSLATEBLUE);
   }
};
//Adding the event handler
circle.addEventHandler(javafx.scene.input.MouseEvent.MOUSE_CLICKED, eventHandler);
In the same way, you can remove an event handler using the method removeEventHandler() as shown below −
circle.removeEventHandler(MouseEvent.MOUSE_CLICKED, eventHandler);
Example
The following program is an example demonstrating the event handling in JavaFX using the event handlers.
Save this code in a file with name EventHandlersExample.java.
import javafx.animation.RotateTransition;
import javafx.application.Application;
import javafx.event.EventHandler;

import javafx.scene.Group;
import javafx.scene.PerspectiveCamera;
import javafx.scene.Scene;
import javafx.scene.control.TextField;
import javafx.scene.input.KeyEvent;
import javafx.scene.paint.Color;
import javafx.scene.paint.PhongMaterial;

import javafx.scene.shape.Box;
import javafx.scene.text.Font;
import javafx.scene.text.FontWeight;
import javafx.scene.text.Text;
import javafx.scene.transform.Rotate;
import javafx.stage.Stage;
import javafx.util.Duration;

public class EventHandlersExample extends Application {

   @Override
   public void start(Stage stage) {
      //Drawing a Box
      Box box = new Box();

      //Setting the properties of the Box
      box.setWidth(150.0);
      box.setHeight(150.0);
      box.setDepth(100.0);

      //Setting the position of the box
      box.setTranslateX(350);
      box.setTranslateY(150);
      box.setTranslateZ(50);

      //Setting the text
      Text text = new Text("Type any letter to rotate the box,
         and click on the box to stop the rotation");

      //Setting the font of the text
      text.setFont(Font.font(null, FontWeight.BOLD, 15));

      //Setting the color of the text
      text.setFill(Color.CRIMSON);

      //setting the position of the text
      text.setX(20);
      text.setY(50);

      //Setting the material of the box
      PhongMaterial material = new PhongMaterial();
      material.setDiffuseColor(Color.DARKSLATEBLUE);

      //Setting the diffuse color material to box
      box.setMaterial(material);

      //Setting the rotation animation to the box
      RotateTransition rotateTransition = new RotateTransition();

      //Setting the duration for the transition
      rotateTransition.setDuration(Duration.millis(1000));

      //Setting the node for the transition
      rotateTransition.setNode(box);

      //Setting the axis of the rotation
      rotateTransition.setAxis(Rotate.Y_AXIS);

      //Setting the angle of the rotation
      rotateTransition.setByAngle(360);

      //Setting the cycle count for the transition
      rotateTransition.setCycleCount(50);

      //Setting auto reverse value to false
      rotateTransition.setAutoReverse(false);

      //Creating a text filed
      TextField textField = new TextField();

      //Setting the position of the text field
      textField.setLayoutX(50);
      textField.setLayoutY(100);

      //Handling the key typed event
      EventHandler<KeyEvent> eventHandlerTextField = new EventHandler<KeyEvent>() {
         @Override
         public void handle(KeyEvent event) {
            //Playing the animation
            rotateTransition.play();
         }
      };
      //Adding an event handler to the text feld
      textField.addEventHandler(KeyEvent.KEY_TYPED, eventHandlerTextField);

      //Handling the mouse clicked event(on box)
      EventHandler<javafx.scene.input.MouseEvent> eventHandlerBox =
         new EventHandler<javafx.scene.input.MouseEvent>() {

         @Override
         public void handle(javafx.scene.input.MouseEvent e) {
            rotateTransition.stop();
         }
      };
      //Adding the event handler to the box
      box.addEventHandler(javafx.scene.input.MouseEvent.MOUSE_CLICKED, eventHandlerBox);

      //Creating a Group object
      Group root = new Group(box, textField, text);

      //Creating a scene object
      Scene scene = new Scene(root, 600, 300);

      //Setting camera
      PerspectiveCamera camera = new PerspectiveCamera(false);
      camera.setTranslateX(0);
      camera.setTranslateY(0);
      camera.setTranslateZ(0);
      scene.setCamera(camera);

      //Setting title to the Stage
      stage.setTitle("Event Handlers Example");

      //Adding scene to the stage
      stage.setScene(scene);

      //Displaying the contents of the stage
      stage.show();
   }
   public static void main(String args[]){
      launch(args);
   }
}
Compile and execute the saved java file from the command prompt using the following commands.
javac EventHandlersExample.java
java EventHandlersExample
On executing, the above program generates a JavaFX window displaying a text field and a 3D box as shown below −
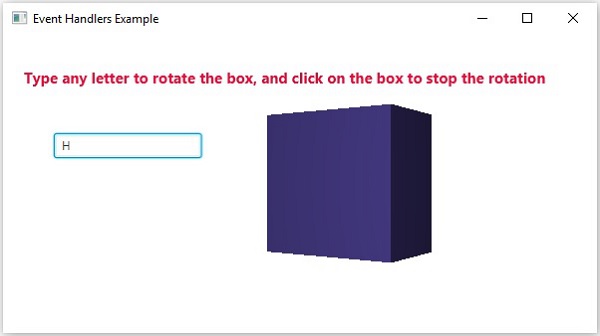
Here, if you type a letter in the text field, the 3D box starts rotating along the x axis. If you click on the box again the rotation stops.
Using Convenience Methods for Event Handling
Some of the classes in JavaFX define event handler properties. By setting the values to these properties using their respective setter methods, you can register to an event handler. These methods are known as convenience methods.
Most of these methods exist in the classes like Node, Scene, Window, etc., and they are available to all their sub classes.
For example, to add a mouse event listener to a button, you can use the convenience method setOnMouseClicked() as shown below.
playButton.setOnMouseClicked((new EventHandler<MouseEvent>() {
   public void handle(MouseEvent event) {
      System.out.println("Hello World");
      pathTransition.play();
   }
}));
Example
The following program is an example that demonstrates the event handling in JavaFX using the convenience methods.
Save this code in a file with the name ConvinienceMethodsExample.java.
import javafx.animation.PathTransition;
import javafx.application.Application;
import static javafx.application.Application.launch;
import javafx.event.EventHandler;

import javafx.scene.Group;
import javafx.scene.Scene;
import javafx.scene.control.Button;
import javafx.scene.input.MouseEvent;
import javafx.scene.paint.Color;

import javafx.scene.shape.Circle;
import javafx.scene.shape.LineTo;
import javafx.scene.shape.MoveTo;
import javafx.scene.shape.Path;
import javafx.stage.Stage;
import javafx.util.Duration;

public class ConvinienceMethodsExample extends Application {
   @Override
   public void start(Stage stage) {
      //Drawing a Circle
      Circle circle = new Circle();

      //Setting the position of the circle
      circle.setCenterX(300.0f);
      circle.setCenterY(135.0f);

      //Setting the radius of the circle
      circle.setRadius(25.0f);

      //Setting the color of the circle
      circle.setFill(Color.BROWN);

      //Setting the stroke width of the circle
      circle.setStrokeWidth(20);

      //Creating a Path
      Path path = new Path();

      //Moving to the staring point
      MoveTo moveTo = new MoveTo(208, 71);

      //Creating 1st line
      LineTo line1 = new LineTo(421, 161);

      //Creating 2nd line
      LineTo line2 = new LineTo(226,232);

      //Creating 3rd line
      LineTo line3 = new LineTo(332,52);

      //Creating 4th line
      LineTo line4 = new LineTo(369, 250);

      //Creating 5th line
      LineTo line5 = new LineTo(208, 71);

      //Adding all the elements to the path
      path.getElements().add(moveTo);
      path.getElements().addAll(line1, line2, line3, line4, line5);

      //Creating the path transition
      PathTransition pathTransition = new PathTransition();

      //Setting the duration of the transition
      pathTransition.setDuration(Duration.millis(1000));

      //Setting the node for the transition
      pathTransition.setNode(circle);

      //Setting the path for the transition
      pathTransition.setPath(path);

      //Setting the orientation of the path
      pathTransition.setOrientation(
         PathTransition.OrientationType.ORTHOGONAL_TO_TAN GENT);

      //Setting the cycle count for the transition
      pathTransition.setCycleCount(50);

      //Setting auto reverse value to true
      pathTransition.setAutoReverse(false);

      //Creating play button
      Button playButton = new Button("Play");
      playButton.setLayoutX(300);
      playButton.setLayoutY(250);

      circle.setOnMouseClicked (new EventHandler<javafx.scene.input.MouseEvent>() {
         @Override
         public void handle(javafx.scene.input.MouseEvent e) {
            System.out.println("Hello World");
            circle.setFill(Color.DARKSLATEBLUE);
         }
      });
      playButton.setOnMouseClicked((new EventHandler<MouseEvent>() {
         public void handle(MouseEvent event) {
            System.out.println("Hello World");
            pathTransition.play();
         }
      }));

      //Creating stop button
      Button stopButton = new Button("stop");
      stopButton.setLayoutX(250);
      stopButton.setLayoutY(250);

      stopButton.setOnMouseClicked((new EventHandler<MouseEvent>() {
         public void handle(MouseEvent event) {
            System.out.println("Hello World");
            pathTransition.stop();
         }
      }));
      //Creating a Group object
      Group root = new Group(circle, playButton, stopButton);

      //Creating a scene object
      Scene scene = new Scene(root, 600, 300);
      scene.setFill(Color.LAVENDER);

      //Setting title to the Stage
      stage.setTitle("Convenience Methods Example");

      //Adding scene to the stage
      stage.setScene(scene);

      //Displaying the contents of the stage
      stage.show();
   }
   public static void main(String args[]){
      launch(args);
   }
}
Compile and execute the saved java file from the command prompt using the following commands.
javac ConvinienceMethodsExample.java
java ConvinienceMethodsExample
On executing, the above program generates a JavaFX window as shown below. Here click on the play button to start the animation and click on the stop button to stop the animation.
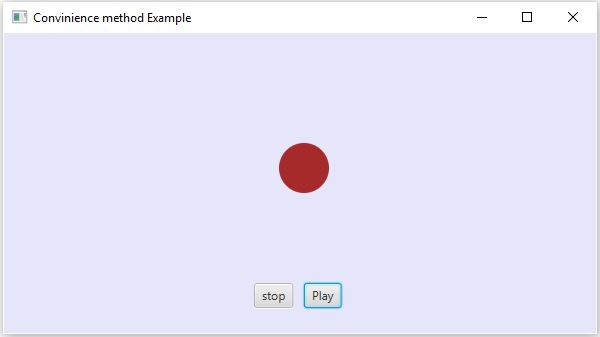
JavaFX - UI Controls
Every user interface considers the following three main aspects −
UI elements − These are the core visual elements which the user eventually sees and interacts with. JavaFX provides a huge list of widely used and common elements varying from basic to complex, which we will cover in this tutorial.
Layouts − They define how UI elements should be organized on the screen and provide a final look and feel to the GUI (Graphical User Interface). This part will be covered in the Layout chapter.
Behavior − These are events which occur when the user interacts with UI elements. This part will be covered in the Event Handling chapter.
JavaFX provides several classes in the package javafx.scene.control. To create various GUI components (controls), JavaFX supports several controls such as date picker, button text field, etc.
Each control is represented by a class; you can create a control by instantiating its respective class.
Following is the list of commonly used controls while the GUI is designed using JavaFX.
| S.No | Control & Description |
|---|---|
| 1 | Label A Label object is a component for placing text. |
| 2 | Button This class creates a labeled button. |
| 3 | ColorPicker A ColorPicker provides a pane of controls designed to allow a user to manipulate and select a color. |
| 4 | CheckBox A CheckBox is a graphical component that can be in either an on(true) or off (false) state. |
| 5 | RadioButton The RadioButton class is a graphical component, which can either be in a ON (true) or OFF (false) state in a group. |
| 6 | ListView A ListView component presents the user with a scrolling list of text items. |
| 7 | TextField A TextField object is a text component that allows for the editing of a single line of text. |
| 8 | PasswordField A PasswordField object is a text component specialized for password entry. |
| 9 | Scrollbar A Scrollbar control represents a scroll bar component in order to enable user to select from range of values. |
| 10 | FileChooser A FileChooser control represents a dialog window from which the user can select a file. |
| 11 | ProgressBar As the task progresses towards completion, the progress bar displays the task's percentage of completion. |
| 12 | Slider A Slider lets the user graphically select a value by sliding a knob within a bounded interval. |
Example
The following program is an example which displays a login page in JavaFX. Here, we are using the controls label, text field, password field and button.
Save this code in a file with the name LoginPage.java.
import javafx.application.Application;
import static javafx.application.Application.launch;
import javafx.geometry.Insets;
import javafx.geometry.Pos;

import javafx.scene.Scene;
import javafx.scene.control.Button;
import javafx.scene.control.PasswordField;
import javafx.scene.layout.GridPane;
import javafx.scene.text.Text;
import javafx.scene.control.TextField;
import javafx.stage.Stage;

public class LoginPage extends Application {
   @Override
   public void start(Stage stage) {
      //creating label email
      Text text1 = new Text("Email");

      //creating label password
      Text text2 = new Text("Password");

      //Creating Text Filed for email
      TextField textField1 = new TextField();

      //Creating Text Filed for password
      PasswordField textField2 = new PasswordField();

      //Creating Buttons
      Button button1 = new Button("Submit");
      Button button2 = new Button("Clear");

      //Creating a Grid Pane
      GridPane gridPane = new GridPane();

      //Setting size for the pane
      gridPane.setMinSize(400, 200);

      //Setting the padding
      gridPane.setPadding(new Insets(10, 10, 10, 10));

      //Setting the vertical and horizontal gaps between the columns
      gridPane.setVgap(5);
      gridPane.setHgap(5);

      //Setting the Grid alignment
      gridPane.setAlignment(Pos.CENTER);

      //Arranging all the nodes in the grid
      gridPane.add(text1, 0, 0);
      gridPane.add(textField1, 1, 0);
      gridPane.add(text2, 0, 1);
      gridPane.add(textField2, 1, 1);
      gridPane.add(button1, 0, 2);
      gridPane.add(button2, 1, 2);

      //Styling nodes
      button1.setStyle("-fx-background-color: darkslateblue; -fx-text-fill: white;");
      button2.setStyle("-fx-background-color: darkslateblue; -fx-text-fill: white;");

      text1.setStyle("-fx-font: normal bold 20px 'serif' ");
      text2.setStyle("-fx-font: normal bold 20px 'serif' ");
      gridPane.setStyle("-fx-background-color: BEIGE;");

      //Creating a scene object
      Scene scene = new Scene(gridPane);

      //Setting title to the Stage
      stage.setTitle("CSS Example");

      //Adding scene to the stage
      stage.setScene(scene);

      //Displaying the contents of the stage
      stage.show();
   }
   public static void main(String args[]){
      launch(args);
   }
}
Compile and execute the saved java file from the command prompt using the following commands.
javac LoginPage.java
java LoginPage
On executing, the above program generates a JavaFX window as shown below.

The following program is an example of a registration form, which demonstrates controls in JavaFX such as Date Picker, Radio Button, Toggle Button, Check Box, List View, Choice List, etc.
Save this code in a file with the name Registration.java.
import javafx.application.Application;
import javafx.collections.FXCollections;
import javafx.collections.ObservableList;

import javafx.geometry.Insets;
import javafx.geometry.Pos;

import javafx.scene.Scene;
import javafx.scene.control.Button;
import javafx.scene.control.CheckBox;
import javafx.scene.control.ChoiceBox;
import javafx.scene.control.DatePicker;
import javafx.scene.control.ListView;
import javafx.scene.control.RadioButton;
import javafx.scene.layout.GridPane;
import javafx.scene.text.Text;
import javafx.scene.control.TextField;
import javafx.scene.control.ToggleGroup;
import javafx.scene.control.ToggleButton;
import javafx.stage.Stage;

public class Registration extends Application {
   @Override
   public void start(Stage stage) {
      //Label for name
      Text nameLabel = new Text("Name");

      //Text field for name
      TextField nameText = new TextField();

      //Label for date of birth
      Text dobLabel = new Text("Date of birth");

      //date picker to choose date
      DatePicker datePicker = new DatePicker();

      //Label for gender
      Text genderLabel = new Text("gender");

      //Toggle group of radio buttons
      ToggleGroup groupGender = new ToggleGroup();
      RadioButton maleRadio = new RadioButton("male");
      maleRadio.setToggleGroup(groupGender);
      RadioButton femaleRadio = new RadioButton("female");
      femaleRadio.setToggleGroup(groupGender);

      //Label for reservation
      Text reservationLabel = new Text("Reservation");

      //Toggle button for reservation
      ToggleButton Reservation = new ToggleButton();
      ToggleButton yes = new ToggleButton("Yes");
      ToggleButton no = new ToggleButton("No");
      ToggleGroup groupReservation = new ToggleGroup();
      yes.setToggleGroup(groupReservation);
      no.setToggleGroup(groupReservation);

      //Label for technologies known
      Text technologiesLabel = new Text("Technologies Known");

      //check box for education
      CheckBox javaCheckBox = new CheckBox("Java");
      javaCheckBox.setIndeterminate(false);

      //check box for education
      CheckBox dotnetCheckBox = new CheckBox("DotNet");
      javaCheckBox.setIndeterminate(false);

      //Label for education
      Text educationLabel = new Text("Educational qualification");

      //list View for educational qualification
      ObservableList<String> names = FXCollections.observableArrayList(
         "Engineering", "MCA", "MBA", "Graduation", "MTECH", "Mphil", "Phd");
      ListView<String> educationListView = new ListView<String>(names);

      //Label for location
      Text locationLabel = new Text("location");

      //Choice box for location
      ChoiceBox locationchoiceBox = new ChoiceBox();
      locationchoiceBox.getItems().addAll
         ("Hyderabad", "Chennai", "Delhi", "Mumbai", "Vishakhapatnam");

      //Label for register
      Button buttonRegister = new Button("Register");

      //Creating a Grid Pane
      GridPane gridPane = new GridPane();

      //Setting size for the pane
      gridPane.setMinSize(500, 500);

      //Setting the padding
      gridPane.setPadding(new Insets(10, 10, 10, 10));

      //Setting the vertical and horizontal gaps between the columns
      gridPane.setVgap(5);
      gridPane.setHgap(5);

      //Setting the Grid alignment
      gridPane.setAlignment(Pos.CENTER);

      //Arranging all the nodes in the grid
      gridPane.add(nameLabel, 0, 0);
      gridPane.add(nameText, 1, 0);

      gridPane.add(dobLabel, 0, 1);
      gridPane.add(datePicker, 1, 1);

      gridPane.add(genderLabel, 0, 2);
      gridPane.add(maleRadio, 1, 2);
      gridPane.add(femaleRadio, 2, 2);
      gridPane.add(reservationLabel, 0, 3);
      gridPane.add(yes, 1, 3);
      gridPane.add(no, 2, 3);

      gridPane.add(technologiesLabel, 0, 4);
      gridPane.add(javaCheckBox, 1, 4);
      gridPane.add(dotnetCheckBox, 2, 4);

      gridPane.add(educationLabel, 0, 5);
      gridPane.add(educationListView, 1, 5);

      gridPane.add(locationLabel, 0, 6);
      gridPane.add(locationchoiceBox, 1, 6);

      gridPane.add(buttonRegister, 2, 8);

      //Styling nodes
      buttonRegister.setStyle(
         "-fx-background-color: darkslateblue; -fx-textfill: white;");

      nameLabel.setStyle("-fx-font: normal bold 15px 'serif' ");
      dobLabel.setStyle("-fx-font: normal bold 15px 'serif' ");
      genderLabel.setStyle("-fx-font: normal bold 15px 'serif' ");
      reservationLabel.setStyle("-fx-font: normal bold 15px 'serif' ");
      technologiesLabel.setStyle("-fx-font: normal bold 15px 'serif' ");
      educationLabel.setStyle("-fx-font: normal bold 15px 'serif' ");
      locationLabel.setStyle("-fx-font: normal bold 15px 'serif' ");

      //Setting the back ground color
      gridPane.setStyle("-fx-background-color: BEIGE;");

      //Creating a scene object
      Scene scene = new Scene(gridPane);

      //Setting title to the Stage
      stage.setTitle("Registration Form");

      //Adding scene to the stage
      stage.setScene(scene);

      //Displaying the contents of the stage
      stage.show();
   }
   public static void main(String args[]){
      launch(args);
   }
}
Compile and execute the saved java file from the command prompt using the following commands.
javac Registration.java
java Registration
On executing, the above program generates a JavaFX window as shown below.
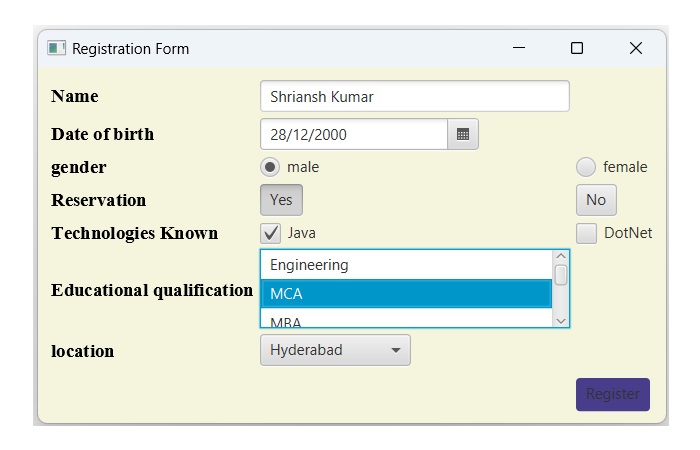
JavaFX - Charts
In general, a chart is a graphical representation of data. There are various kinds of charts to represent data such as Bar Chart, Pie Chart, Line Chart, Scatter Chart, etc.
JavaFX Provides support for various Pie Charts and XY Charts. The charts that are represented on an XY–plane include AreaChart, BarChart, BubbleChart, LineChart, ScatterChart, StackedAreaChart, StackedBarChart, etc.
Each chart is represented by a class and all these charts belongs to the package javafx.scene.chart. The class named Chart is the base class of all the charts in JavaFX and the XYChart is base class of all those charts that are drawn on the XY–plane.
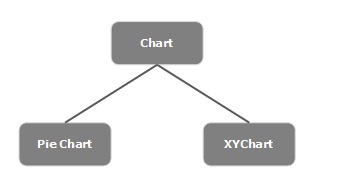
Creating a Chart
To create a chart, you need to −
- Define the axis of the chart
- Instantiate the respective class
- Prepare and pass data to the chart
Instantiating the Respective Class
To create a chart, instantiate its respective class. For example, if you want to create a line chart, you need to instantiate the class named Line as follows −
LineChart linechart = new LineChart(xAxis, yAxis);
As observed in the above code, while instantiating, you need to pass two objects representing the X and Y axis of the chart respectively.
Defining the Axis
In general, the axis of the charts can be represented by −
- Numbers such as Population, Age and
- Categories such as Days in a Week, Countries.
In JavaFX, an axis is an abstract class representing X or Y axis. It has two subclasses to define each type of axis, namely CategoryAxis and NumberAxis as shown in the following diagram −
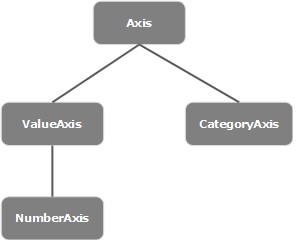
Category Axis − By instantiating this class, you can define (create) an X or Y axis along which each value represents a category. You can define a Category axis by instantiating this class as shown below −
CategoryAxis xAxis = new CategoryAxis();
To this axis, you need set the list of categories and label to the axis as shown below −
//setting the list of categories.
xAxis.setCategories(FXCollections.<String>observableArrayList
   (Arrays.asList("n ame1", "name2"….)));

//Setting label to the axis
xAxis.setLabel("name of the axis ");
NumberAxis − By instantiating this class, you can define (create) an X or Y axis along which each value represents a Numerical value. You can use any Number type with this Axis, Long, Double, BigDecimal, etc. You can define a Number axis by instantiating this class as follows −
//Defining the axis
NumberAxis yAxis = new NumberAxis();

//Setting labelto the axis
yAxis.setLabel("name of the axis");
Passing Data to XY Charts
All the XY charts are represented along the XY plane. To plot a set of points in a chart, we need to specify a series of XY coordinates.
The <X,Y> class of the javafx.scene.chart package is a class using which, you can send data to a chart. This class holds an observable list of named series. You can get this list using the getData() method of XYChart.Series class as shown below −
ObservableList list = series.getData();
Where, series is the object of the XYChart.Series class. You can add data to this list using the add() method as follows −
list.add(new XYChart.Data(x-axis data, y-axis data));
These two lines can be written together as shown below −
series.getData().add(new XYChart.Data(x-axis data, y-axis data));
The following table gives a description of various charts (classes) provided by JavaFX −
| S.No | Chart & Description |
|---|---|
| 1 | Pie Chart
A pie-chart is a representation of values as slices of a circle with different colors. These slices are labeled and the values corresponding to each slice is represented in the chart. In JavaFX, a pie chart is represented by a class named PieChart. This class belongs to the package javafx.scene.chart. |
| 2 | Line Chart
A line chart or line graph displays information as a series of data points (markers) connected by straight line segments. Line Chart shows how the data changes at equal time frequency. In JavaFX, a line chart is represented by a class named LineChart. This class belongs to the package javafx.scene.chart. By instantiating this class, you can create a LineChart node in JavaFX. |
| 3 | Area Chart
Area charts are used to draw area based charts. It plots the area between the given series of points and the axis. In general, this chart is used to compare two quantities. In JavaFX, an Area chart is represented by a class named AreaChart. This class belongs to the package javafx.scene.chart. By instantiating this class, you can create a AreaChart node in JavaFX. |
| 4 | Bar Chart
A bar chart is used to represent grouped data using rectangular bars. The length of these bars depicts the values. The bars in the bar chart can be plotted vertically or horizontally. In JavaFX, a Bar chart is represented by a class named BarChart. This class belongs to the package javafx.scene.chart. By instantiating this class, you can create a BarChart node in JavaFX. |
| 5 |
Bubble Chart
A bubble chart is used to plat three-dimensional data. The third dimension will be represented by the size (radius) of the bubble. In JavaFX, a Bubble chart is represented by a class named BubbleChart. This class belongs to the package javafx.scene.chart. By instantiating this class, you can create a BubbleChart node in JavaFX. |
| 6 | Scatter Chart
A scatterplot is a type of graph which uses values from two variables plotted in a Cartesian plane. It is usually used to find out the relationship between two variables. In JavaFX, a Scatter chart is represented by a class named ScatterChart. This class belongs to the package javafx.scene.chart. By instantiating this class, you can create a ScatterChart node in JavaFX. |
| 7 | Stacked Area Chart
In JavaFX, a Stacked Area chart is represented by a class named StackedAreaChart. This class belongs to the package javafx.scene.chart. By instantiating this class, you can create an StackedAreaChart node in JavaFX. |
| 8 | Stacked Bar Chart
In JavaFX, a Stacked Bar chart is represented by a class named StackedBarChart. This class belongs to the package javafx.scene.chart. By instantiating this class, you can create a StackedBarChart node in JavaFX. |
JavaFX - Layout Panes(Containers)
After constructing all the required nodes in a scene, we will generally arrange them in order.
This arrangement of the components within the container is called the Layout of the container. We can also say that we followed a layout as it includes placing all the components at a particular position within the container.
JavaFX provides several predefined layouts such as HBox, VBox, Border Pane, Stack Pane, Text Flow, Anchor Pane, Title Pane, Grid Pane, Flow Panel, etc.
Each of the above mentioned layout is represented by a class and all these classes belongs to the package javafx.layout. The class named Pane is the base class of all the layouts in JavaFX.
Creating a Layout
To create a layout, you need to −
- Create node.
- Instantiate the respective class of the required layout.
- Set the properties of the layout.
- Add all the created nodes to the layout.
Creating Nodes
First of all, create the required nodes of the JavaFX application by instantiating their respective classes.
For example, if you want to have a text field and two buttons namely, play and stop in a HBox layout - you will have to initially create those nodes as shown in the following code block −
//Creating a text field
TextField textField = new TextField();

//Creating the play button
Button playButton = new Button("Play");

//Creating the stop button
Button stopButton = new Button("stop");
Instantiating the Respective Class
After creating the nodes (and completing all the operations on them), instantiate the class of the required layout.
For Example, if you want to create a Hbox layout, you need to instantiate this class as follows.
HBox hbox = new HBox();
Setting the Properties of the Layout
After instantiating the class, you need to set the properties of the layout using their respective setter methods.
For example − If you want to set space between the created nodes in the HBox layout, then you need to set value to the property named spacing. This can be done by using the setter method setSpacing() as shown below −
hbox.setSpacing(10);
Adding the Shape Object to the Group
Finally, you need to add the object of the shape to the group by passing it as a parameter of the constructor as shown below.
//Creating a Group object
Group root = new Group(line);
Layout Panes
Following are the various Layout panes (classes) provided by JavaFX. These classes exist in the package javafx.scene.layout.
| S.No | Shape & Description |
|---|---|
| 1 | HBox
The HBox layout arranges all the nodes in our application in a single horizontal row. The class named HBox of the package javafx.scene.layout represents the text horizontal box layout. |
| 2 | VBox
The VBox layout arranges all the nodes in our application in a single vertical column. The class named VBox of the package javafx.scene.layout represents the text Vertical box layout. |
| 3 | BorderPane
The Border Pane layout arranges the nodes in our application in top, left, right, bottom and center positions. The class named BorderPane of the package javafx.scene.layout represents the border pane layout. |
| 4 | StackPane
The stack pane layout arranges the nodes in our application on top of another just like in a stack. The node added first is placed at the bottom of the stack and the next node is placed on top of it. The class named StackPane of the package javafx.scene.layout represents the stack pane layout. |
| 5 | TextFlow
The Text Flow layout arranges multiple text nodes in a single flow. The class named TextFlow of the package javafx.scene.layout represents the text flow layout. |
| 6 | AnchorPane
The Anchor pane layout anchors the nodes in our application at a particular distance from the pane. The class named AnchorPane of the package javafx.scene.layout represents the Anchor Pane layout. |
| 7 | TilePane
The Tile Pane layout adds all the nodes of our application in the form of uniformly sized tiles. The class named TilePane of the package javafx.scene.layout represents the TilePane layout. |
| 8 | GridPane
The Grid Pane layout arranges the nodes in our application as a grid of rows and columns. This layout comes handy while creating forms using JavaFX. The class named GridPane of the package javafx.scene.layout represents the GridPane layout. |
| 9 | FlowPane
The flow pane layout wraps all the nodes in a flow. A horizontal flow pane wraps the elements of the pane at its height, while a vertical flow pane wraps the elements at its width. The class named FlowPane of the package javafx.scene.layout represents the Flow Pane layout. |
JavaFX - CSS
Cascading Style Sheets, also referred to as CSS, is a simple design language intended to simplify the process of making web pages presentable.
CSS handles the look and feel part of a web page. Using CSS, you can control the color of the text, style of fonts, spacing between paragraphs, size of columns and layout. Apart from these, you can also control the background images or colors that are used, layout designs, variations in display for different devices and screen sizes as well as a variety of other effects.
CSS in JavaFX
JavaFX provides you the facility of using CSS to enhance the look and feel of the application. The package javafx.css contains the classes that are used to apply CSS for JavaFX applications.
A CSS comprises of style rules that are interpreted by the browser and then applied to the corresponding elements in your document.
A style rule is made of three parts, which are −
Selector − A selector is an HTML tag at which a style will be applied. This could be any tag like <h1> or <table>, etc.
Property − A property is a type of attribute of the HTML tag. In simpler terms, all the HTML attributes are converted into CSS properties. They could be color, border, etc.
Value − Values are assigned to properties. For example, a color property can have value either red or #F1F1F1, etc.
You can put CSS Style Rule Syntax as follows −
selector { property: value }
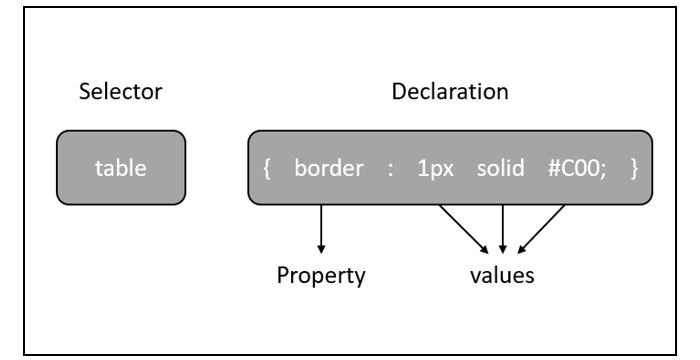
The default style sheet used by JavaFX is modena.css. It is found in the JavaFX runtime jar.
Adding Your own Style Sheet
You can add your own style sheet to a scene in JavaFX as follows −
Scene scene = new Scene(new Group(), 500, 400);
scene.getStylesheets().add("path/stylesheet.css");
Adding Inline Style Sheets
You can also add in-line styles using the setStyle() method. These styles consist of only key-value pairs and they are applicable to the nodes on which they are set. Following is a sample code of setting an inline style sheet to a button.
.button {
   -fx-background-color: red;
   -fx-text-fill: white;
}
Example
Assume that we have developed an JavaFX application which displays a form with a Text Field, Password Field, Two Buttons. By default, this form looks as shown in the following screenshot −
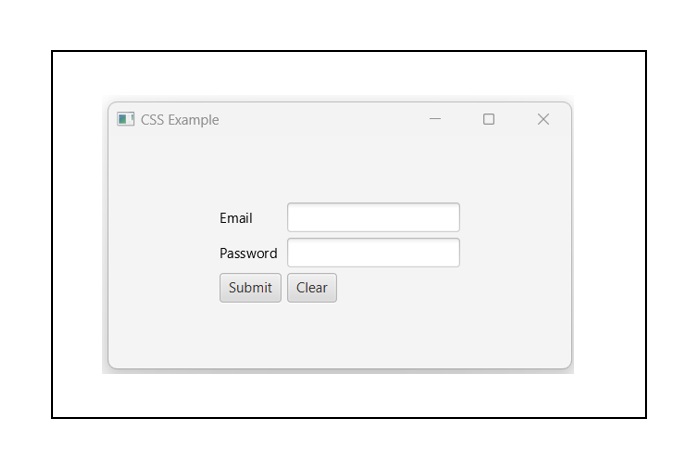
The following program is an example which demonstrates how to add styles to the above application in JavaFX.
Save this code in a file with the name CssExample.java
import javafx.application.Application;
import static javafx.application.Application.launch;
import javafx.geometry.Insets;
import javafx.geometry.Pos;
import javafx.scene.Scene;
import javafx.scene.control.Button;
import javafx.scene.control.PasswordField;
import javafx.scene.layout.GridPane;
import javafx.scene.text.Text;
import javafx.scene.control.TextField;
import javafx.stage.Stage;

public class CssExample extends Application {
   @Override
   public void start(Stage stage) {
      //creating label email
      Text text1 = new Text("Email");

      //creating label password
      Text text2 = new Text("Password");

      //Creating Text Filed for email
      TextField textField1 = new TextField();

      //Creating Text Filed for password
      PasswordField textField2 = new PasswordField();

      //Creating Buttons
      Button button1 = new Button("Submit");
      Button button2 = new Button("Clear");

      //Creating a Grid Pane
      GridPane gridPane = new GridPane();

      //Setting size for the pane
      gridPane.setMinSize(400, 200);

      //Setting the padding
      gridPane.setPadding(new Insets(10, 10, 10, 10));

      //Setting the vertical and horizontal gaps between the columns
      gridPane.setVgap(5);
      gridPane.setHgap(5);

      //Setting the Grid alignment
      gridPane.setAlignment(Pos.CENTER);

      //Arranging all the nodes in the grid
      gridPane.add(text1, 0, 0);
      gridPane.add(textField1, 1, 0);
      gridPane.add(text2, 0, 1);
      gridPane.add(textField2, 1, 1);
      gridPane.add(button1, 0, 2);
      gridPane.add(button2, 1, 2);

      //Styling nodes
      button1.setStyle("-fx-background-color: darkslateblue; -fx-text-fill: white;");
      button2.setStyle("-fx-background-color: darkslateblue; -fx-text-fill: white;");

      text1.setStyle("-fx-font: normal bold 20px 'serif' ");
      text2.setStyle("-fx-font: normal bold 20px 'serif' ");
      gridPane.setStyle("-fx-background-color: BEIGE;");

      // Creating a scene object
      Scene scene = new Scene(gridPane);

      // Setting title to the Stage
      stage.setTitle("CSS Example");

      // Adding scene to the stage
      stage.setScene(scene);

      //Displaying the contents of the stage
      stage.show();
   }
   public static void main(String args[]){
      launch(args);
   }
}
Compile and execute the saved java file from the command prompt using the following commands.
javac CssExample.java
java CssExample
On executing, the above program generates a JavaFX window as shown below.