- JavaFX Tutorial
- JavaFX - Home
- JavaFX - Overview
- JavaFX Installation and Architecture
- JavaFX - Installation Using Netbeans
- JavaFX - Installation Using Eclipse
- JavaFX - Installation using Visual Studio Code
- JavaFX - Architecture
- JavaFX - Application
- JavaFX 2D Shapes
- JavaFX - 2D Shapes
- JavaFX - Drawing a Line
- JavaFX - Drawing a Rectangle
- JavaFX - Drawing a Rounded Rectangle
- JavaFX - Drawing a Circle
- JavaFX - Drawing an Ellipse
- JavaFX - Drawing a Polygon
- JavaFX - Drawing a Polyline
- JavaFX - Drawing a Cubic Curve
- JavaFX - Drawing a Quad Curve
- JavaFX - Drawing an Arc
- JavaFX - Drawing an SVGPath
- JavaFX Properties of 2D Objects
- JavaFX - Stroke Type Property
- JavaFX - Stroke Width Property
- JavaFX - Stroke Fill Property
- JavaFX - Stroke Property
- JavaFX - Stroke Line Join Property
- JavaFX - Stroke Miter Limit Property
- JavaFX - Stroke Line Cap Property
- JavaFX - Smooth Property
- Operations on 2D Objects
- JavaFX - 2D Shapes Operations
- JavaFX - Union Operation
- JavaFX - Intersection Operation
- JavaFX - Subtraction Operation
- JavaFX Color and Texture
- JavaFX - Colors
- JavaFX Text
- JavaFX - Text
- JavaFX Effects
- JavaFX - Effects
- JavaFX Transformations
- JavaFX - Transformations
- JavaFX Animations
- JavaFX - Animations
- JavaFX Images
- JavaFX - Images
- JavaFX 3D Shapes
- JavaFX - 3D Shapes
- JavaFX - Creating a Box
- JavaFX - Creating a Cylinder
- JavaFX - Creating a Sphere
- Properties of 3D Objects
- JavaFX - Cull Face Property
- JavaFX - Drawing Modes Property
- JavaFX - Material Property
- JavaFX Event Handling
- JavaFX - Event Handling
- JavaFX - Using Convenience Methods
- JavaFX - Event Filters
- JavaFX - Event Handlers
- JavaFX UI Controls
- JavaFX - UI Controls
- JavaFX - ListView
- JavaFX - Accordion
- JavaFX - ButtonBar
- JavaFX - ChoiceBox
- JavaFX - HTMLEditor
- JavaFX - MenuBar
- JavaFX - Pagination
- JavaFX - ProgressIndicator
- JavaFX - ScrollPane
- JavaFX - Separator
- JavaFX - Slider
- JavaFX - Spinner
- JavaFX - SplitPane
- JavaFX - TableView
- JavaFX - TabPane
- JavaFX - ToolBar
- JavaFX - TreeView
- JavaFX - Label
- JavaFX - CheckBox
- JavaFX - RadioButton
- JavaFX - TextField
- JavaFX - PasswordField
- JavaFX - FileChooser
- JavaFX - Hyperlink
- JavaFX - Tooltip
- JavaFX - Alert
- JavaFX - DatePicker
- JavaFX - TextArea
- JavaFX Charts
- JavaFX - Charts
- JavaFX - Creating Pie Chart
- JavaFX - Creating Line Chart
- JavaFX - Creating Area Chart
- JavaFX - Creating Bar Chart
- JavaFX - Creating Bubble Chart
- JavaFX - Creating Scatter Chart
- JavaFX - Creating Stacked Area Chart
- JavaFX - Creating Stacked Bar Chart
- JavaFX Layout Panes
- JavaFX - Layout Panes
- JavaFX - HBox Layout
- JavaFX - VBox Layout
- JavaFX - BorderPane Layout
- JavaFX - StackPane Layout
- JavaFX - TextFlow Layout
- JavaFX - AnchorPane Layout
- JavaFX - TilePane Layout
- JavaFX - GridPane Layout
- JavaFX - FlowPane Layout
- JavaFX CSS
- JavaFX - CSS
- Media with JavaFX
- JavaFX - Playing Video
- JavaFX Useful Resources
- JavaFX - Quick Guide
- JavaFX - Useful Resources
- JavaFX - Discussion
JavaFX - Images
Images are one of the most common elements that are used on any application, including JavaFX applications. An image can be in various forms like photographs, graphics or individual video frames etc. There are various digital formats of images which are also supported by JavaFX, they are:
BMP
GIF
JPEG
PNG
You can load and modify images of all the formats mentioned above using the classes provided by JavaFX in the package javafx.scene.image.
This chapter teaches you how to load images in to JavaFX, how to project an image in multiple views and how to alter the pixels of an image.
Loading an Image
You can load an image in JavaFX by instantiating the class named Image of the package javafx.scene.image.
To the constructor of the Image class, you have to pass either of the following as the image source −
An InputStream object of the image to be loaded or,
A string variable holding the URL for the image.
An image can also be resized while they are being loaded, in order to reduce its memory storage amount. This can be done by passing following optional parameters to the constructor of Image class.
requestedWidth to set the target width of the displayed image.
requestedHeight to set the target height of the displayed image.
preserveRatio is a boolean value that specifies whether the aspect ratio of the final image must remain the same as the original image or not.
smooth represents the quality of filtering applied on the image.
backgroundLoading represents whether the image needs to be loaded in the background or not.
Once the image is loaded, you can view it by instantiating the ImageView class. Same image instance can be used by multiple ImageView classes to display it.
Syntax
Following is the syntax to load and view an Image −
//Passing FileInputStream object as a parameter
FileInputStream inputstream = new FileInputStream("C:\\images\\image.jpg");
Image image = new Image(inputstream);

//Loading image from URL
//Image image = new Image(new FileInputStream("url for the image));
After loading the image, you can set the view for the image by instantiating the ImageView class and passing the image to its constructor as follows −
ImageView imageView = new ImageView(image);
Example
Following is an example which demonstrates how to load an image in JavaFX and set the view.
Save this code in a file with the name ImageExample.java.
import java.io.FileInputStream;
import java.io.FileNotFoundException;
import javafx.application.Application;
import javafx.scene.Group;
import javafx.scene.Scene;
import javafx.scene.image.Image;
import javafx.scene.image.ImageView;
import javafx.stage.Stage;

public class ImageExample extends Application {
   @Override
   public void start(Stage stage) throws FileNotFoundException {
      //Creating an image
      Image image = new Image(new FileInputStream("path of the image"));

      //Setting the image view
      ImageView imageView = new ImageView(image);

      //Setting the position of the image
      imageView.setX(50);
      imageView.setY(25);

      //setting the fit height and width of the image view
      imageView.setFitHeight(455);
      imageView.setFitWidth(500);

      //Setting the preserve ratio of the image view
      imageView.setPreserveRatio(true);

      //Creating a Group object
      Group root = new Group(imageView);

      //Creating a scene object
      Scene scene = new Scene(root, 600, 500);

      //Setting title to the Stage
      stage.setTitle("Loading an image");

      //Adding scene to the stage
      stage.setScene(scene);

      //Displaying the contents of the stage
      stage.show();
   }
   public static void main(String args[]) {
      launch(args);
   }
}
Compile and execute the saved java file from the command prompt using the following commands.
javac --module-path %PATH_TO_FX% --add-modules javafx.controls ImageExample.java
java --module-path %PATH_TO_FX% --add-modules javafx.controls ImageExample
Output
On executing, the above program generates a JavaFX window as follows −
Example
In this example, let us try to resize an image (say the previous output image) by passing the final dimensions and the quality of filtering to the constructor of Image class. Save the code in a file named ResizedImageExample.java.
import java.io.FileInputStream;
import java.io.FileNotFoundException;
import javafx.application.Application;
import javafx.scene.Group;
import javafx.scene.Scene;
import javafx.scene.image.Image;
import javafx.scene.image.ImageView;
import javafx.stage.Stage;

public class ResizedImageExample extends Application {
   @Override
   public void start(Stage stage) throws FileNotFoundException {
      //Creating an image
	  FileInputStream fis = new FileInputStream("C:/Apache24/htdocs/javafx/images/loading_image.jpg");
      Image image = new Image(fis, 250, 300, false, false);

      //Setting the image view
      ImageView imageView = new ImageView(image);

      //Setting the position of the image
      imageView.setX(50);
      imageView.setY(25);

      //Creating a Group object
      Group root = new Group(imageView);

      //Creating a scene object
      Scene scene = new Scene(root, 600, 500);

      //Setting title to the Stage
      stage.setTitle("Loading an image");

      //Adding scene to the stage
      stage.setScene(scene);

      //Displaying the contents of the stage
      stage.show();
   }
   public static void main(String args[]) {
      launch(args);
   }
}
Compile and execute the saved java file from the command prompt using the following commands.
javac --module-path %PATH_TO_FX% --add-modules javafx.controls ResizedImageExample.java
java --module-path %PATH_TO_FX% --add-modules javafx.controls ResizedImageExample
Output
On executing, the above program generates a JavaFX window as follows −

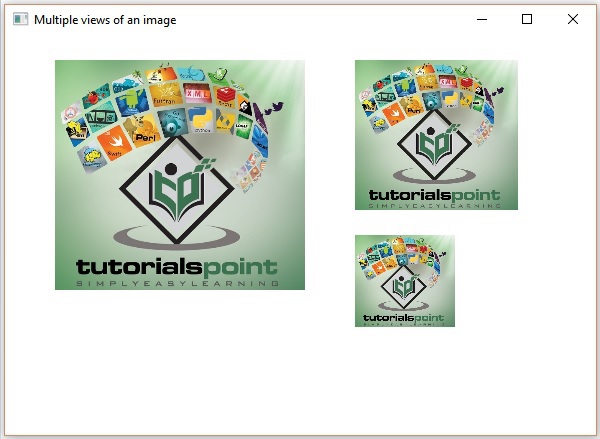
Multiple Views of an Image
In some cases, an application requires an image to be displayed in different ways: with different dimensions, with better quality, after scaling, etc.
Instead of creating a new application every time a different view of Image is needed, JavaFX allows you to set multiple views for an image in the same scene. Once an image is loaded using the Image class, multiple ImageView objects can be created by instantiating the ImageView class multiple times.
The ImageView class is a JavaFX Node that paints images that are loaded using the Image class. This class can be instantiated multiple times in a the start() method of Application class in order to display multiple views of an image.
These multiple views can vary in their sizes, quality or be the exact copy of the original.
However, to do so, you need to pass an Image object or a URL string of the source image. The syntax to create an ImageView object is as follows −
Syntax
// A new ImageView object is allocated
ImageView = new ImageView()

// ImageView object is allocated using
// the given Image object
ImageView imageview = new ImageView(Image image)

// ImageView object is allocated using
// the image loaded from a URL
ImageView imageview = new ImageView(String URL)
Example
The following program is an example that demonstrates how to set various views for an image in a scene in JavaFX.
Save this code in a file with the name MultipleViews.java.
import java.io.FileInputStream;
import java.io.FileNotFoundException;
import javafx.application.Application;
import javafx.scene.Group;
import javafx.scene.Scene;
import javafx.scene.image.Image;
import javafx.scene.image.ImageView;
import javafx.stage.Stage;

public class MultipleViews extends Application {
   @Override
   public void start(Stage stage) throws FileNotFoundException {
      //Creating an image
      Image image = new Image(new FileInputStream("file path"));

      //Setting the image view 1
      ImageView imageView1 = new ImageView(image);

      //Setting the position of the image
      imageView1.setX(50);
      imageView1.setY(25);

      //setting the fit height and width of the image view
      imageView1.setFitHeight(300);
      imageView1.setFitWidth(250);

      //Setting the preserve ratio of the image view
      imageView1.setPreserveRatio(true);

      //Setting the image view 2
      ImageView imageView2 = new ImageView(image);

      //Setting the position of the image
      imageView2.setX(350);
      imageView2.setY(25);

      //setting the fit height and width of the image view
      imageView2.setFitHeight(150);
      imageView2.setFitWidth(250);

      //Setting the preserve ratio of the image view
      imageView2.setPreserveRatio(true);

      //Setting the image view 3
      ImageView imageView3 = new ImageView(image);

      //Setting the position of the image
      imageView3.setX(350);
      imageView3.setY(200);

      //setting the fit height and width of the image view
      imageView3.setFitHeight(100);
      imageView3.setFitWidth(100);

      //Setting the preserve ratio of the image view
      imageView3.setPreserveRatio(true);

      //Creating a Group object
      Group root = new Group(imageView1, imageView2, imageView3);

      //Creating a scene object
      Scene scene = new Scene(root, 600, 400);

      //Setting title to the Stage
      stage.setTitle("Multiple views of an image");

      //Adding scene to the stage
      stage.setScene(scene);

      //Displaying the contents of the stage
      stage.show();
   }
   public static void main(String args[]) {
      launch(args);
   }
}
Compile and execute the saved java file from the command prompt using the following commands.
javac --module-path %PATH_TO_FX% --add-modules javafx.controls MultipleViews.java
java --module-path %PATH_TO_FX% --add-modules javafx.controls MultipleViews
Output
On executing, the above program generates a JavaFX window as follows −
Reading and Writing Image Pixels
Reading and Writing of Images are commonly seen in data processing techniques. Images are fundamentally composed of multiple pixels arranged in the form of 2-dimensional grid. It can be related to as the cell of a human body; as they contain information in an image.
So, in order to read and write images, we are usually referring to reading and writing its pixels.
JavaFX also provides various classes and interfaces, like WritableImage, PixelReader, PixelWriter, in order to read and write such image pixels.
The WritableImage class is used to construct a custom graphical image from its pixels that are supplied by an application, or read by a PixelReader objects from various sources including images from files or URLs.
JavaFX provides interfaces named PixelReader and PixelWriter to read and write pixels of an image.
Example
Following is an example which demonstrates how to read and write pixels of an image. Here, we are reading the color value of an image and making it darker.
Save this code in a file with the name WritingPixelsExample.java.
import java.io.FileInputStream;
import java.io.FileNotFoundException;
import javafx.application.Application;

import javafx.scene.Group;
import javafx.scene.Scene;

import javafx.scene.image.Image;
import javafx.scene.image.ImageView;
import javafx.scene.image.PixelReader;
import javafx.scene.image.PixelWriter;
import javafx.scene.image.WritableImage;

import javafx.scene.paint.Color;
import javafx.stage.Stage;

public class WritingPixelsExample extends Application {
   @Override
   public void start(Stage stage) throws FileNotFoundException {
      //Creating an image
      Image image = new Image(new FileInputStream("C:\\images\\logo.jpg"));
      int width = (int)image.getWidth();
      int height = (int)image.getHeight();

      //Creating a writable image
      WritableImage wImage = new WritableImage(width, height);

      //Reading color from the loaded image
      PixelReader pixelReader = image.getPixelReader();

      //getting the pixel writer
      PixelWriter writer = wImage.getPixelWriter();

      //Reading the color of the image
      for(int y = 0; y < height; y++) {
         for(int x = 0; x < width; x++) {
            //Retrieving the color of the pixel of the loaded image
            Color color = pixelReader.getColor(x, y);

            //Setting the color to the writable image
            writer.setColor(x, y, color.darker());
         }
      }
      //Setting the view for the writable image
      ImageView imageView = new ImageView(wImage);

      //Creating a Group object
      Group root = new Group(imageView);

      //Creating a scene object
      Scene scene = new Scene(root, 600, 500);

      //Setting title to the Stage
      stage.setTitle("Writing pixels ");

      //Adding scene to the stage
      stage.setScene(scene);

      //Displaying the contents of the stage
      stage.show();
   }
   public static void main(String args[]) {
      launch(args);
   }
}
Compile and execute the saved java file from the command prompt using the following commands.
javac --module-path %PATH_TO_FX% --add-modules javafx.controls WritingPixelsExample.java
java --module-path %PATH_TO_FX% --add-modules javafx.controls WritingPixelsExample
Output
On executing, the above program generates a JavaFX window as follows −