- JavaFX Tutorial
- JavaFX - Home
- JavaFX - Overview
- JavaFX Installation and Architecture
- JavaFX - Installation Using Netbeans
- JavaFX - Installation Using Eclipse
- JavaFX - Installation using Visual Studio Code
- JavaFX - Architecture
- JavaFX - Application
- JavaFX 2D Shapes
- JavaFX - 2D Shapes
- JavaFX - Drawing a Line
- JavaFX - Drawing a Rectangle
- JavaFX - Drawing a Rounded Rectangle
- JavaFX - Drawing a Circle
- JavaFX - Drawing an Ellipse
- JavaFX - Drawing a Polygon
- JavaFX - Drawing a Polyline
- JavaFX - Drawing a Cubic Curve
- JavaFX - Drawing a Quad Curve
- JavaFX - Drawing an Arc
- JavaFX - Drawing an SVGPath
- JavaFX Properties of 2D Objects
- JavaFX - Stroke Type Property
- JavaFX - Stroke Width Property
- JavaFX - Stroke Fill Property
- JavaFX - Stroke Property
- JavaFX - Stroke Line Join Property
- JavaFX - Stroke Miter Limit Property
- JavaFX - Stroke Line Cap Property
- JavaFX - Smooth Property
- Operations on 2D Objects
- JavaFX - 2D Shapes Operations
- JavaFX - Union Operation
- JavaFX - Intersection Operation
- JavaFX - Subtraction Operation
- JavaFX Color and Texture
- JavaFX - Colors
- JavaFX Text
- JavaFX - Text
- JavaFX Effects
- JavaFX - Effects
- JavaFX Transformations
- JavaFX - Transformations
- JavaFX Animations
- JavaFX - Animations
- JavaFX Images
- JavaFX - Images
- JavaFX 3D Shapes
- JavaFX - 3D Shapes
- JavaFX - Creating a Box
- JavaFX - Creating a Cylinder
- JavaFX - Creating a Sphere
- Properties of 3D Objects
- JavaFX - Cull Face Property
- JavaFX - Drawing Modes Property
- JavaFX - Material Property
- JavaFX Event Handling
- JavaFX - Event Handling
- JavaFX - Using Convenience Methods
- JavaFX - Event Filters
- JavaFX - Event Handlers
- JavaFX UI Controls
- JavaFX - UI Controls
- JavaFX - ListView
- JavaFX - Accordion
- JavaFX - ButtonBar
- JavaFX - ChoiceBox
- JavaFX - HTMLEditor
- JavaFX - MenuBar
- JavaFX - Pagination
- JavaFX - ProgressIndicator
- JavaFX - ScrollPane
- JavaFX - Separator
- JavaFX - Slider
- JavaFX - Spinner
- JavaFX - SplitPane
- JavaFX - TableView
- JavaFX - TabPane
- JavaFX - ToolBar
- JavaFX - TreeView
- JavaFX - Label
- JavaFX - CheckBox
- JavaFX - RadioButton
- JavaFX - TextField
- JavaFX - PasswordField
- JavaFX - FileChooser
- JavaFX - Hyperlink
- JavaFX - Tooltip
- JavaFX - Alert
- JavaFX - DatePicker
- JavaFX - TextArea
- JavaFX Charts
- JavaFX - Charts
- JavaFX - Creating Pie Chart
- JavaFX - Creating Line Chart
- JavaFX - Creating Area Chart
- JavaFX - Creating Bar Chart
- JavaFX - Creating Bubble Chart
- JavaFX - Creating Scatter Chart
- JavaFX - Creating Stacked Area Chart
- JavaFX - Creating Stacked Bar Chart
- JavaFX Layout Panes
- JavaFX - Layout Panes
- JavaFX - HBox Layout
- JavaFX - VBox Layout
- JavaFX - BorderPane Layout
- JavaFX - StackPane Layout
- JavaFX - TextFlow Layout
- JavaFX - AnchorPane Layout
- JavaFX - TilePane Layout
- JavaFX - GridPane Layout
- JavaFX - FlowPane Layout
- JavaFX CSS
- JavaFX - CSS
- Media with JavaFX
- JavaFX - Playing Video
- JavaFX Useful Resources
- JavaFX - Quick Guide
- JavaFX - Useful Resources
- JavaFX - Discussion
JavaFX - Slider
Slider is a UI control consisting of a track and a thumb along with other optional elements like tick marks and tick labels. It allows the user to select a value from a continuous or discrete range of values by dragging the thumb along a track. The common applications of a slider can be seen in audio or video players, games, brightness controllers and so on. The figure below shows two sliders, one is a volume controller and the other one is a brightness controller.

Slider in JavaFX
In JavaFX, the slider is represented by a class named Slider. This class belongs to the package javafx.scene.control. By instantiating this class, we can create a slider in JavaFX. Constructors of the Slider class are listed below −
Slider() − It is the default constructor.
Slider(double minVal, double maxVal, double currentVal) − It creates a new slider with the specified initial, minimum and maximum values.
Steps to create a Slider in JavaFX
To create a Slider in JavaFX, follow the steps given below.
Step 1: Instantiate the Slider class
Instantiate the Slider class inside the start() method. This action will create a slider control in JavaFX application.
// creating a slider using default constructor
Slider slide = new Slider();
Step 2: Set the minimum and maximum values of Slider
Every slider comes with minimum and maximum values. To set the minimum value, a built-in method named setMin() is used which accepts a double value as an argument. Similarly, the maximum value is set using the setMax() method, which also requires double as a parameter value.
// setting the minimum and maximum values
slide.setMin(0);
slide.setMax(100);
Step 3: Set the Orientation of the Slider
To set the orientation of the Slider, we use the method named setOrientation(). It accepts enum values VERTICAL or HORIZONTAL as an argument.
// setting the orientation
slide.setOrientation(Orientation.VERTICAL);
Step 4: Optional Properties of Slider
We can also set the various properties of the Slider such as major and minor tick counts, tick marks and labels. To do so, use the following code −
// major and minor tick marks
slide.setMajorTickUnit(10);
slide.setMinorTickCount(9);
slide.setShowTickMarks(true);
slide.setShowTickLabels(true);
Step 5: Launch the Application
Once the Slider is created and its properties are set, follow the given steps below to launch the application properly −
Firstly, create a VBox that holds the slider.
Next, instantiate the class named Scene by passing the VBox object as a parameter value to its constructor along with the dimensions of the application screen.
Then, set the title of the stage using the setTitle() method of the Stage class.
Now, a Scene object is added to the stage using the setScene() method of the class named Stage.
Display the contents of the scene using the method named show().
Lastly, the application is launched with the help of the launch() method.
Example
In the following example, we are going to create a slider in JavaFX application. Save this code in a file with the name SliderJavafx.java.
import javafx.application.Application;
import javafx.geometry.Insets;
import javafx.scene.Scene;
import javafx.scene.control.Label;
import javafx.scene.control.Slider;
import javafx.scene.layout.VBox;
import javafx.stage.Stage;
import javafx.geometry.Orientation;
import javafx.geometry.Pos;
public class SliderJavafx extends Application {
   @Override
   public void start(Stage stage) {
      // creating a slider using default constructor
      Slider slide = new Slider();
      // setting the minimum and maximum values
      slide.setMin(0);
      slide.setMax(100);
      // setting the orientation
      slide.setOrientation(Orientation.VERTICAL);
      // major and minor tick marks
      slide.setMajorTickUnit(10);
      slide.setMinorTickCount(9);
      slide.setShowTickMarks(true);
      slide.setShowTickLabels(true);
      // creating a label to display the slider value
      Label valueLabel = new Label("Value: " + slide.getValue());
      // creating a listener to update the label when the slider value changes
      slide.valueProperty().addListener((observable, oldValue, newValue) -> {
         valueLabel.setText("Value: " + newValue.intValue());
      });
      // creating a VBox to hold the slider and the label
      VBox root = new VBox();
      root.setAlignment(Pos.CENTER);
      root.setPadding(new Insets(10));
      root.setSpacing(10);
      root.getChildren().addAll(slide, valueLabel);
      // create a scene and stage
      Scene scene = new Scene(root, 400, 300);
      stage.setTitle("Slider in JavaFX");
      stage.setScene(scene);
      stage.show();
   }
   public static void main(String[] args) {
      launch(args);
   }
}
To compile and execute the saved Java file from the command prompt, use the following commands −
javac --module-path %PATH_TO_FX% --add-modules javafx.controls SliderJavafx.java
java --module-path %PATH_TO_FX% --add-modules javafx.controls SliderJavafx
Output
When we execute the above code, it will generate the following output.
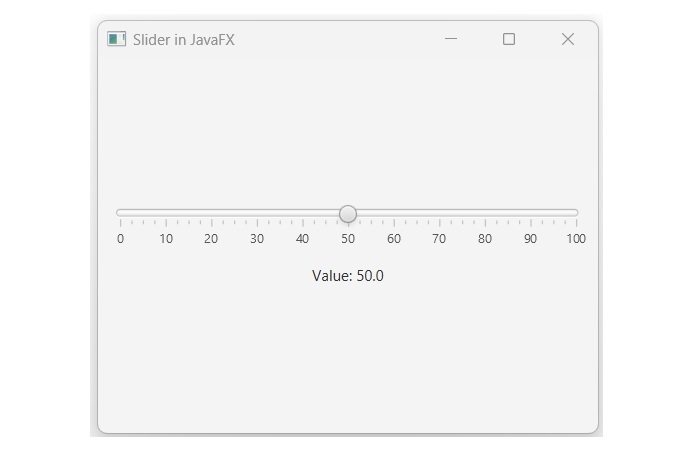
Creating a Slider in JavaFX using its parameterized constructor
We all know that there are two ways to create a slider in JavaFX: one with the help of default constructor of the Slider class, while the other uses its parameterized constructor. In the next example, we are going to use the parameterized constructor of the Slider class to create a slider in JavaFX. Save this code in a file with the name JavafxSlider.java.
Example
import javafx.application.Application;
import javafx.geometry.Insets;
import javafx.scene.Scene;
import javafx.scene.control.Label;
import javafx.scene.control.Slider;
import javafx.scene.layout.VBox;
import javafx.stage.Stage;
import javafx.geometry.Orientation;
import javafx.geometry.Pos;
public class JavafxSlider extends Application {
   @Override
   public void start(Stage stage) {
      // creating a Slider with a range of 0 to 100
      Slider slide = new Slider(0, 100, 50);
      // setting the orientation to horizontal
      slide.setOrientation(Orientation.HORIZONTAL);
      // setting the major tick unit to 10
      slide.setMajorTickUnit(10);
      // to show the tick marks and labels
      slide.setShowTickMarks(true);
      slide.setShowTickLabels(true);
      // Label to display the value of the Slider
      Label label = new Label("Value: " + slide.getValue());
      // listener to show the value of Slider
      slide.valueProperty().addListener((observable, oldValue, newValue) -> {
         // Update the Label with the new value
         label.setText("Value: " + newValue);
      });
      // creating a VBox
      VBox root = new VBox(10);
      root.setAlignment(Pos.CENTER);
      root.setPadding(new Insets(10));
      root.getChildren().addAll(slide, label);
      // creating a Scene and Stage
      Scene scene = new Scene(root, 400, 300);
      stage.setTitle("Slider in JavaFX");
      stage.setScene(scene);
      stage.show();
   }
   public static void main(String[] args) {
      launch(args);
   }
}
Compile and execute the saved Java file from the command prompt by using the following commands −
javac --module-path %PATH_TO_FX% --add-modules javafx.controls JavafxSlider.java
java --module-path %PATH_TO_FX% --add-modules javafx.controls JavafxSlider
Output
On executing the above code, it will generate the following output.