Microsoft Visio - Using the Org Chart Wizard
Although you can manually create the org chart using different shapes in the Shapes pane, Visio also provides an automated way of importing information about your organization from an external source. In this chapter, we will look into importing data from information in an Excel spreadsheet.
Creating Information in an Excel Spreadsheet
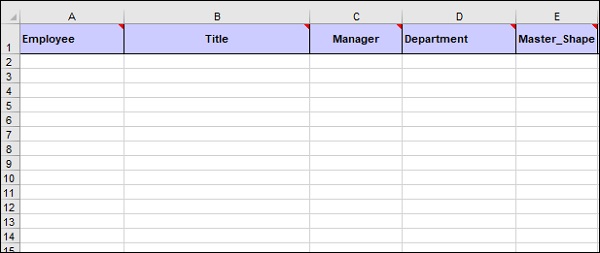
Create an Excel spreadsheet or use an existing one containing some of the important information in the header row that goes into creating an org chart. Important information includes Employee, Title, Manager and Department. The Employee and Manager fields are mandatory and the others are optional.
Additionally, you can also include a field called the Master_Shape, which indicates the exact shape to be used for a particular employee. Note that the name, Master_Shape field needs to be used as is for Visio to designate a specific shape to the employee.
Starting the Organization Chart Wizard
There are two ways of starting the Organization Chart wizard. The first method involves using the Organization Chart Wizard from the Templates section in the New menu.

The other method is to use the Import command in the Organization Data section from the Org Chart tab in the Ribbon, if you have already created an org chart.

The second method is recommended if you need the background formatting to carry over onto all the pages in the org chart. The first method creates all the pages required, but you need to individually format each page, which can get tedious if your organization is large.
Either ways, the Organization Chart Wizard appears in which you can specify the features of your org chart.
Using the Organization Chart Wizard
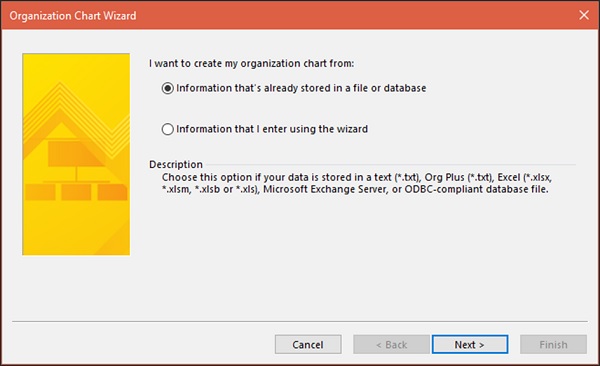
The first screen of the Organization Chart Wizard gives the option of either selecting the existing information from a file or manually entering information. For this example, we will choose the first option. Click Next to proceed to the next screen in the wizard.
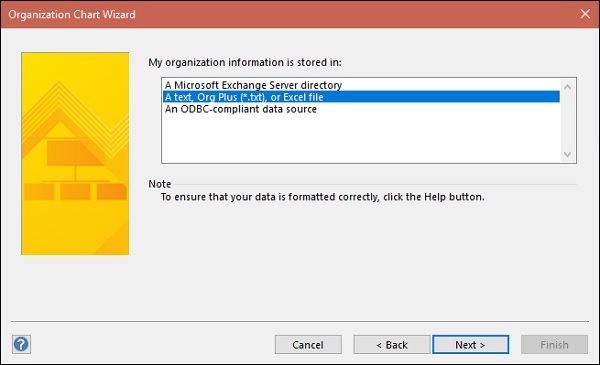
In the following screen, you can choose the source in which the organizational information is stored. It could be a location on a Microsoft Exchange Server, a local text, CSV or Excel file, or an ODBC-compliant data source. Select the second option and click Next.
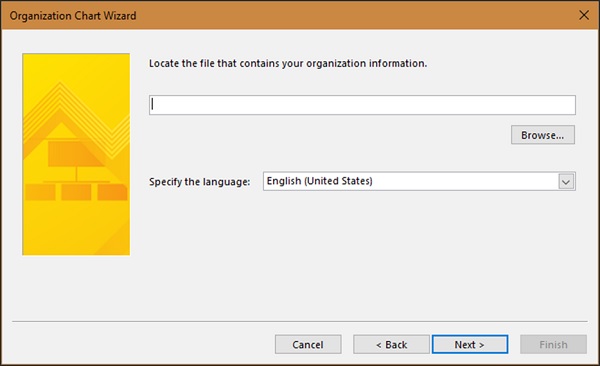
Now, enter the location or path to the Excel file and click Next.
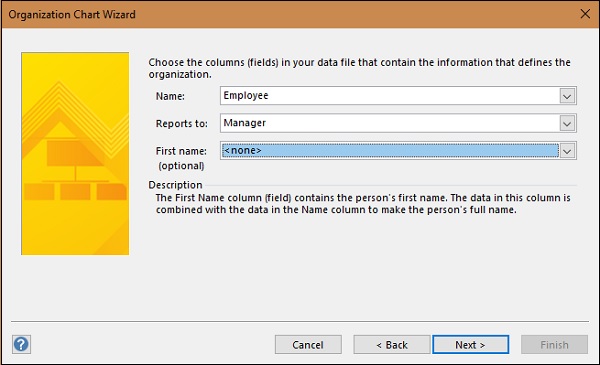
In this screen, in the Name field dropdown, select the field in the Excel spreadsheet that contains the name of the employee. In the Reports to field dropdown, select the field in the Excel spreadsheet that denotes the reporting manager. If the name and first names are in different fields, specify the field containing the first name of the employee in the First name dropdown.
Visio will combine the name and first name fields to generate the full name of the employee. Click Next to continue.
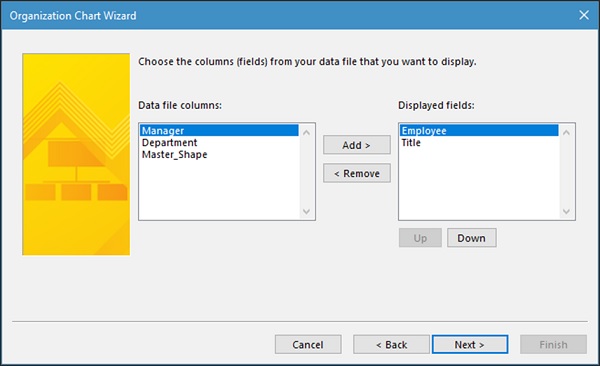
The Data File Columns box lists all the data fields that are present in the header of the Excel file. You can select the fields that you need to be displayed in the Displayed Fields section by selecting the required fields and then click Add. Click Next, once the desired fields are added.
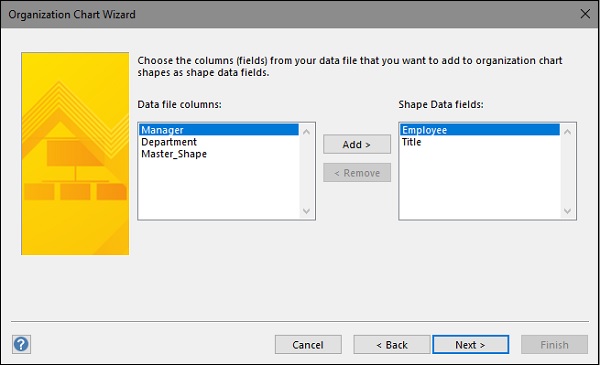
In the next screen, you can choose the fields the shape data should be based on. The shape data fields will be similar to the fields selected in the previous step so in most cases, you can leave it as such. You can also add any additional fields if needed.
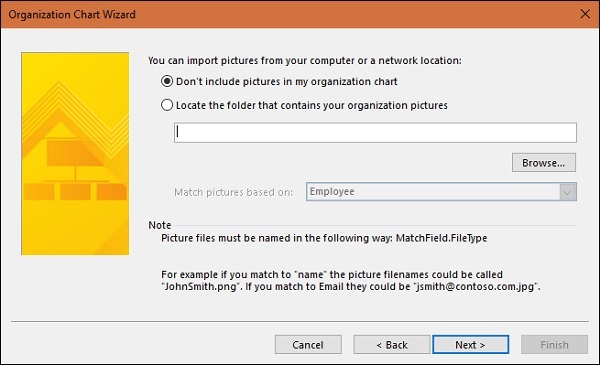
In the following screen, you can choose to include pictures of the employees. If you have labelled pictures in the same format as the employee names, you can point to the location of the folder containing pictures of all the employees. Or you can simply choose not to include any pictures.
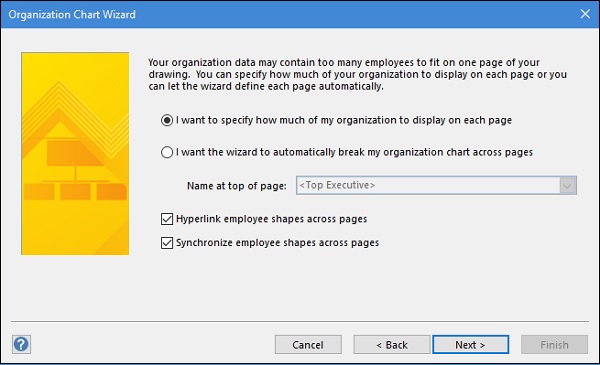
In this screen, you can choose how much of organization info can be displayed on one page, if there are many employees spanning many pages. You can also choose to allow Visio to automatically break the org chart across pages. Make sure that Hyperlink employee shapes across pages and Synchronize employee shapes across pages are selected. Click Finish to finally create the org chart.
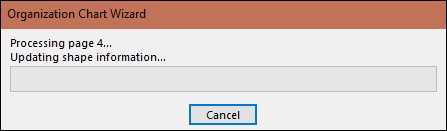
After clicking Finish, Visio will start processing information from the Excel spreadsheet and create the org chart based on the parameters specified in the wizard. You will see a progress indicator showing the status of the creation.