Adding Elements and Controls to Wireframes
Once you have created an outline for a wireframe dialog box, you can add elements, such as text boxes and dropdown menus. We are creating a wireframe for a print dialog box, so the first dropdown menu should be one in which the user can select the printer from a list of printers.
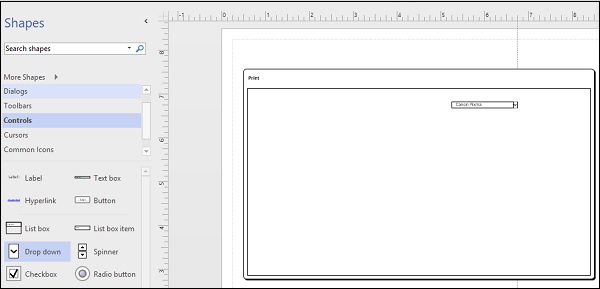
Adding a Dropdown Menu
First drag the Label shape onto the dialog box. You can use horizontal and vertical guides to help you position the shape. Next, drag the Drop down shape onto the far right of the Label shape so that it glues to it. Double-click the Label shape to type the text. In this case, the name of the printer. Note − This is just a prototype to visualize a dialog box and the menus will not actually work.
Adding Other Buttons and Controls
Now that one dropdown menu is added, you can continue to add another dropdown menu to indicate the printer presets. You can also drag a box into the dialog box to designate a document preview area.
Most print dialog boxes will also have a page setup button to set various attributes of a page and it makes sense to include one here as well. To add a button, click the Controls category in the Shapes pane and from the list of shapes, drag the Button shape onto a suitable area on the page. Double-click the shape to enter text and name it, Page Setup.
You can also add backward and forward arrows as navigation guides under the document preview pane.

You can continue to add as many elements as you wish to get a feel for the prototype. Just remember not to clutter the wireframe with too many buttons.
