- JIRA - Home
- JIRA - Overview
- JIRA - Project
- JIRA - Issues
- JIRA - Workflow
- JIRA - Installation
- JIRA - Free Trials Setup
- JIRA - Login
- JIRA - Dashboard
- JIRA - Issue Types
- JIRA - Screens
- JIRA - Issue Creation
- JIRA - Clone an Issue
- JIRA - Create a Subtask
- JIRA - Convert Issue To Subtask
- JIRA - Convert Subtask to Issue
- JIRA - Create Issue using CSV
- JIRA - Edit an Issue
- JIRA - Email an Issue
- JIRA - Label an Issue
- JIRA - Linking Issues
- JIRA - Move an Issue
- JIRA - View/Change History
- JIRA - Watch and Vote on Issue
- JIRA - Search
- JIRA - Advanced Search
- JIRA - Reports
- JIRA - Workload Pie Chart
- JIRA - Created vs Resolved Issues
- JIRA - Burndown Chart
JIRA - Watch and Vote on Issue
In this chapter, we will understand how Voting and Watching is done on an issue in JIRA.
Voting on an Issue
JIRA has a feature called as Vote to provide the opinion on the preference for that issue, whether it is resolved or completed.
- Admin needs to add permission for users to use this feature.
- Go to the View Issue page where voting is required.
- Click Vote for this issue to instantly vote for that issue.
The following screenshot shows where Votes field is present at issue detail page −
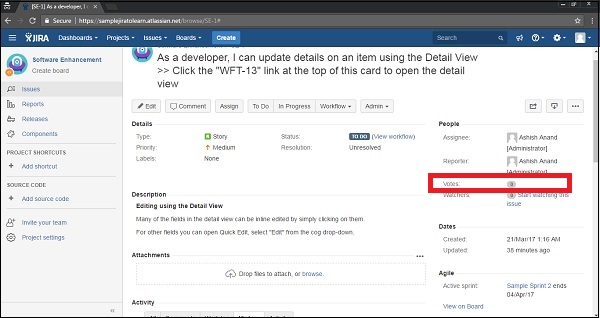
Note − Since the user does not have permission here to vote, the user is not able to view the link beside Votes field.
Watching an Issue
JIRA has a feature that allows users/stakeholders to keep an eye on the issue, whenever there is any update or changes in that issue. If there is any the issue, it sends notification/emails to those who are listed as watchers for that specific issue.
- Admin needs to add permission for users to use this feature.
- Go to the view issue page that the user wants to watch.
- Click on the Start Watching this issue link to be listed as watchers.
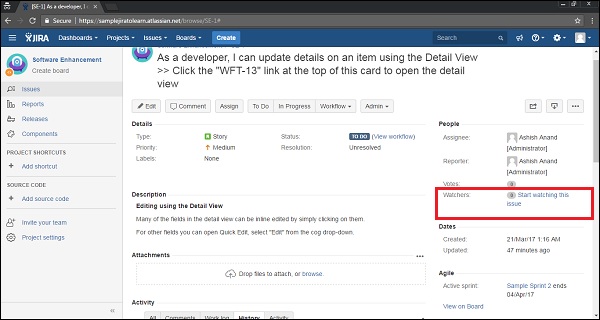
The following screenshot shows where the Watchers field is present in the Issue Detail page.
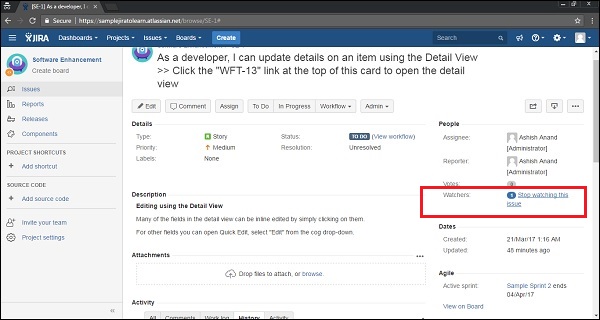
Now instead of zero watchers, there will be 1 (watcher) displayed along with the link Stop watching this issue to delist as watchers. The following screenshot shows the updated number of watchers −
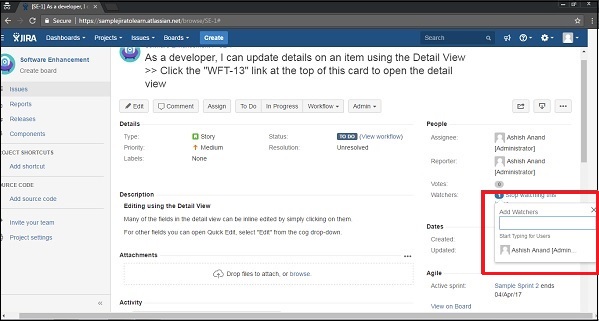
The user can click on 1, it allows to add other users as well to the list as watchers. Start typing the user name in the Add watchers box and select from the autocomplete box. The user will be listed as watchers.
The following screenshot shows how to add a new watcher by providing the users detail.