- JIRA - Home
- JIRA - Overview
- JIRA - Project
- JIRA - Issues
- JIRA - Workflow
- JIRA - Installation
- JIRA - Free Trials Setup
- JIRA - Login
- JIRA - Dashboard
- JIRA - Issue Types
- JIRA - Screens
- JIRA - Issue Creation
- JIRA - Clone an Issue
- JIRA - Create a Subtask
- JIRA - Convert Issue To Subtask
- JIRA - Convert Subtask to Issue
- JIRA - Create Issue using CSV
- JIRA - Edit an Issue
- JIRA - Email an Issue
- JIRA - Label an Issue
- JIRA - Linking Issues
- JIRA - Move an Issue
- JIRA - View/Change History
- JIRA - Watch and Vote on Issue
- JIRA - Search
- JIRA - Advanced Search
- JIRA - Reports
- JIRA - Workload Pie Chart
- JIRA - Created vs Resolved Issues
- JIRA - Burndown Chart
JIRA - Create a Subtask
An issue can be completed by performing many tasks with different persons like Dev, QA, UAT, Business, Support, etc. To track the progress in each department, sub-tasks are created in an issue and assigned to the concern person. Once all the sub-tasks are resolved, the issue can be marked as completed.
Points to Note for Creating a Subtask
The following points are to be considered when creating a subtask.
All subtasks are an essential part of their parent issue.
All subtasks are visible on the main screen of the parent issue.
Subtasks always belong to the same project as their parent issue.
Subtask has all fields that are present in the standard issue.
Subtasks cannot have a subtask of their own.
Steps to Follow for Creating a Subtask
We should consider the following steps when creating a subtask.
Open an issue where subtasks should be created.
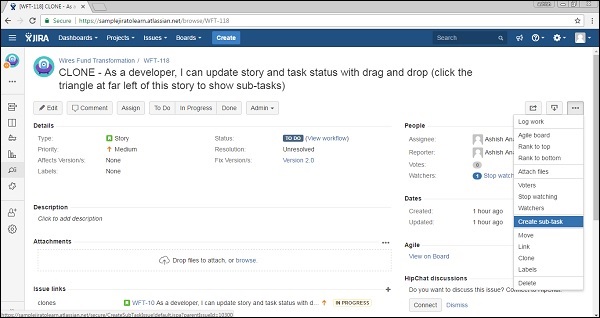
Select More → Create Subtask. Create subtask page will display.
The following screenshot shows how to access the Create Subtask functionality.
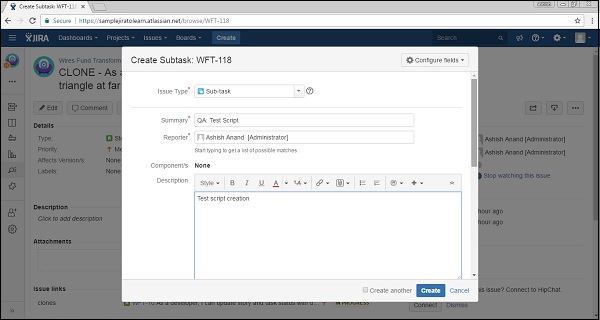
Enter the details in all the required fields and then click on Create. The following screenshot shows the Create Subtask Form with the required and optional fields.
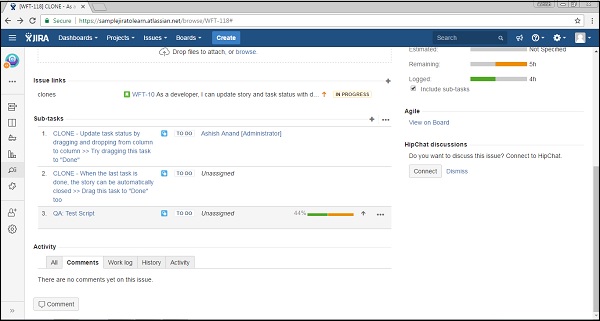
Once a subtask is created, it will be available on the Main Issue page → Subtask section. The following screenshot shows how to view a subtask in an issue.