- JIRA - Home
- JIRA - Overview
- JIRA - Project
- JIRA - Issues
- JIRA - Workflow
- JIRA - Installation
- JIRA - Free Trials Setup
- JIRA - Login
- JIRA - Dashboard
- JIRA - Issue Types
- JIRA - Screens
- JIRA - Issue Creation
- JIRA - Clone an Issue
- JIRA - Create a Subtask
- JIRA - Convert Issue To Subtask
- JIRA - Convert Subtask to Issue
- JIRA - Create Issue using CSV
- JIRA - Edit an Issue
- JIRA - Email an Issue
- JIRA - Label an Issue
- JIRA - Linking Issues
- JIRA - Move an Issue
- JIRA - View/Change History
- JIRA - Watch and Vote on Issue
- JIRA - Search
- JIRA - Advanced Search
- JIRA - Reports
- JIRA - Workload Pie Chart
- JIRA - Created vs Resolved Issues
- JIRA - Burndown Chart
JIRA - Create Issue using CSV
A User can create multiple issues at a time using Comma separated file known as CSV. The CSV files are text files those represent tabulated data and separate different sections by commas.
They have two-step process that requires importing the data from a CSV, while a third optional step is also present, which are listed below.
- Prepare a CSV file.
- Import the CSV file into the system.
- Save the configuration for future use.
Prepare the CSV File
While creating a CSV file the following points must be considered.
Each CSV file should have a heading row with a summary column. The first row is the heading row and represents the fields of the create issue page. Example − Summary, Assignee, Reporter, Priority, Description, sprint, Test Suite, Ashish, Ashish, 1, etc.
Use double quote marks () in the CSV file to capture data that appears in multip.le lines. For Example − upon import, JIRA will treat the following CSV as a single record: Summary, Description, Status, "Login issue", "This is on a new line", Open
While importing issues from a CSV file, the Project Name and Project Key are important columns in CSV. In addition, the name of these fields should match exactly as they are present in JIRA.
Import the CSV File
To import the CSV file, we should follow the steps given below.
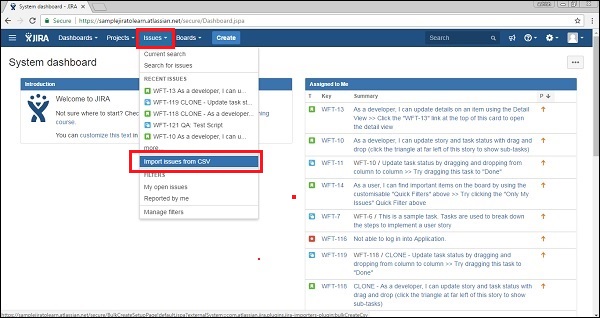
Step 1 − Select Issues → Import Issues from CSV to open the Bulk Create Setup page.
The following screenshot shows how to access the Import issues from the CSV functionality.
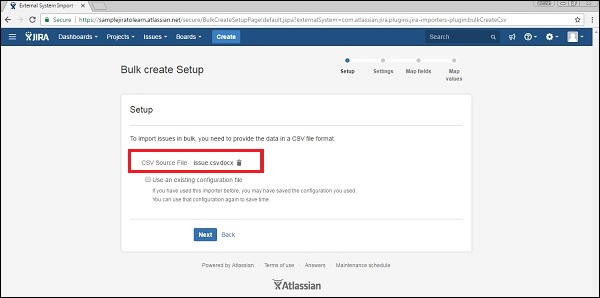
Step 2 − On the Setup page, select CSV Source File. Do not check the Use an existing configuration file check box, if you do not have a configuration file or if you want to create a new configuration file.
Configuration files specify a mapping between column names in the CSV file's header row and fields in the JIRA application.
The following screenshot shows the Bulk create setup page, where the user browses and uploads the CSV file.
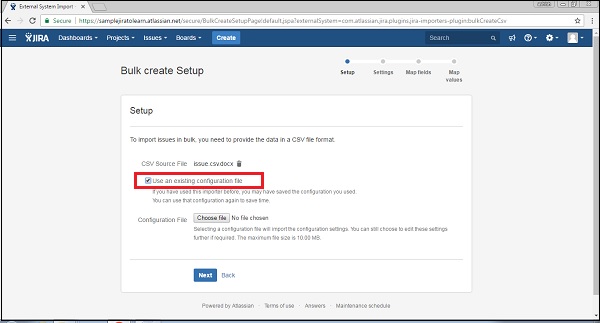
Step 3 − If the user checks the checkbox of Use an existing configuration file, JIRA will ask to specify an Existing Configuration File.
The following screenshot shows how to use an existing configuration file.
Step 4 − If the user does not select this option, then at the end of the CSV file import wizard, JIRA will ask to create a configuration file, which can be used for subsequent CSV imports.
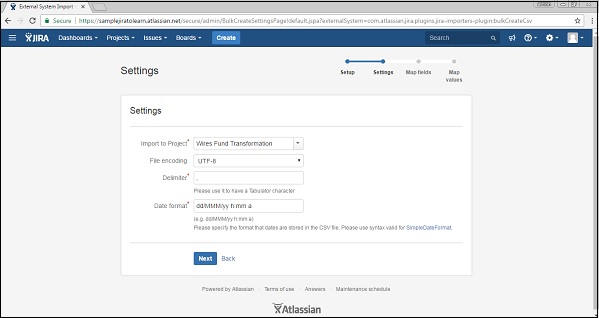
Click on the Next button → the Settings step of the CSV file import wizard will display. Complete the required fields. If the CSV file uses a different separator character other than a comma, specify that character in the CSV Delimiter field. If the separator is a 'Tab', this can be entered using the format '/t'.
The following screenshot shows how to provide settings of csv file −
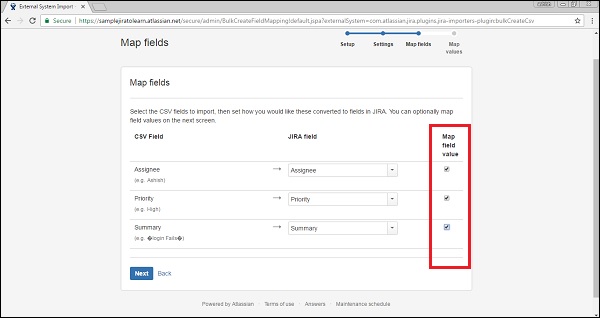
Step 5 − Click on the Next button to proceed to the Map fields step of the CSV file import wizard. Here, the user has to map the column headers of the CSV file to the fields in the selected JIRA project. After selection, tick the check box for Map field value.
A CSV field should map to the JIRA summary field. This ensures the issues created have a summary.
The following screenshot shows how to map CSV fields with JIRA fields −
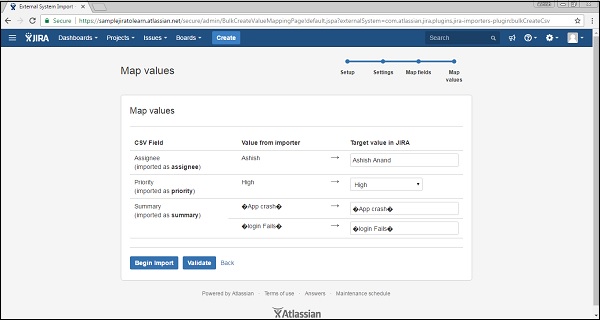
Step 6 − Click on the Next button, the Map values step of the CSV file import wizard will display. On this step of the import wizard, the user can select which specific CSV field values to map to which specific JIRA field value.
Fields whose Map Field Value check boxes were selected in the previous step will be presented on this page.
If the CSV field has a username (e.g. Reporter or Assignee) and does not select the Map Field Value check box for this field in the previous step of the CSV file import wizard, then the importer will map imported usernames from the CSV file to (lowercase) JIRA usernames.
The following screenshot shows how to map values.
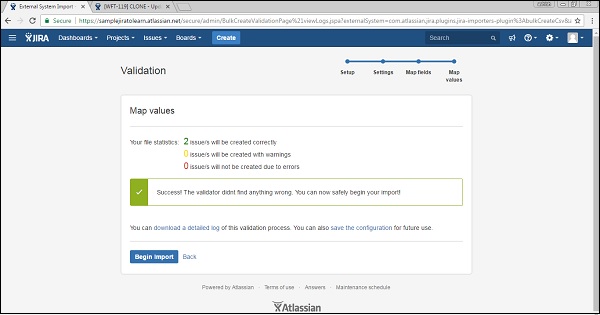
Step 7 − Click on the Validate button, it will validate the imported data and display if any errors or warnings are required, otherwise it will display how many successful imports are possible with the file.
The following screenshot shows the successful validation of CSV file.
Step 8 − Now, Click the Begin Import button. The importer will display updates like import is in progress, then a success message when the import is completed.
Following screenshot shows how many issues are created using CSV file −
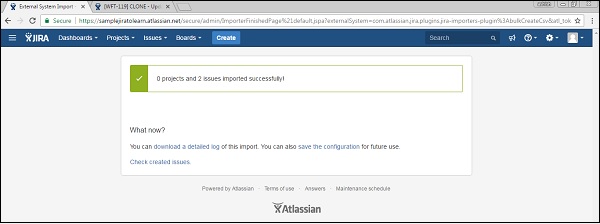
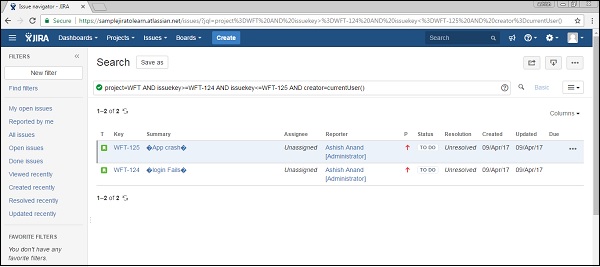
Step 9 − Click on the Check Created issues, it will display the list of issues those are created using the CSV.
The following screenshot shows the list of newly created issues using the CSV file.