- JIRA - Home
- JIRA - Overview
- JIRA - Project
- JIRA - Issues
- JIRA - Workflow
- JIRA - Installation
- JIRA - Free Trials Setup
- JIRA - Login
- JIRA - Dashboard
- JIRA - Issue Types
- JIRA - Screens
- JIRA - Issue Creation
- JIRA - Clone an Issue
- JIRA - Create a Subtask
- JIRA - Convert Issue To Subtask
- JIRA - Convert Subtask to Issue
- JIRA - Create Issue using CSV
- JIRA - Edit an Issue
- JIRA - Email an Issue
- JIRA - Label an Issue
- JIRA - Linking Issues
- JIRA - Move an Issue
- JIRA - View/Change History
- JIRA - Watch and Vote on Issue
- JIRA - Search
- JIRA - Advanced Search
- JIRA - Reports
- JIRA - Workload Pie Chart
- JIRA - Created vs Resolved Issues
- JIRA - Burndown Chart
JIRA - Issue Creation
To create an issue in JIRA, the user should have Create Issue permission in the project. Admin can add/remove the permission.
Steps to Follow
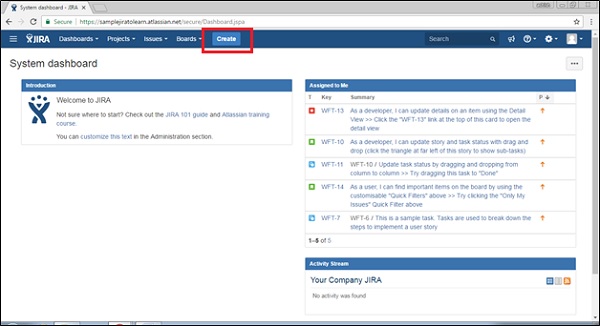
Click on the Create button in the navigation bar to open the create issue dialogue box.
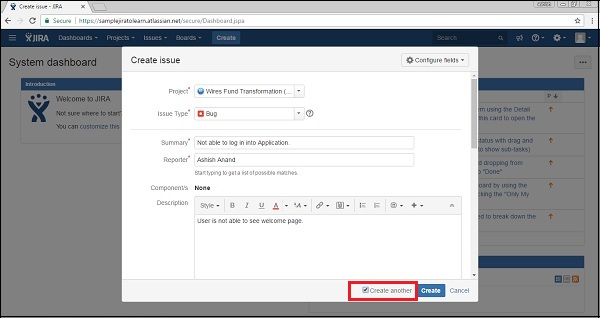
To complete the process of creating an issue, we should follow the pointers given below.
Select the Project where the issue is.
Select the type of issue, whether it is a bug/new feature/story, etc.
Write a one-line summary to provide the overall idea about the issue.
Write the details of the issue in the Description field. Explain the issue, so that stockholders can understand every detail of the issue.
To create a similar type of issue in the same project and issue type, check the checkbox of Create another otherwise keep it as unchecked.
After entering all the details, click on the Create button.
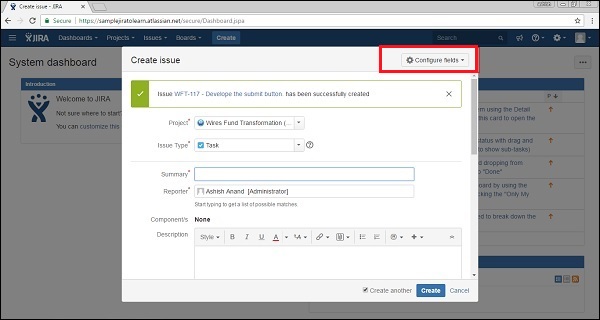
The following screenshot shows how to create an issue by providing the required and optional details.
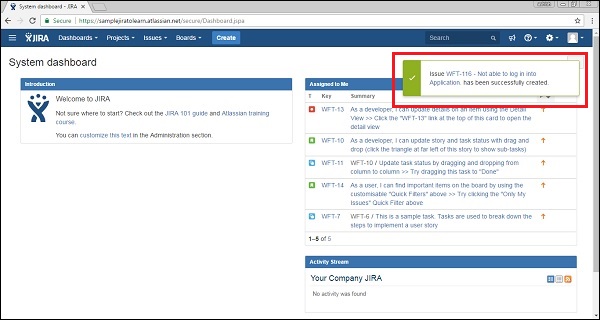
If the Create another checkbox is not checked, after clicking on the Create button, the user will have to navigate to the Dashboard and a pop-up will display on the right side with an issue id and summary.
The following screenshot shows how to know whether the issue is successfully created or not.
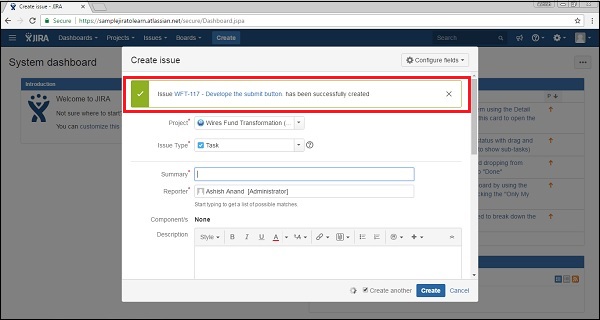
If the Create another checkbox is checked while clicking on the Create button, the user will get a new create issue page along with the issue id.
The following screenshot shows the page, if the user has checked the Create another box.
Configure Fields
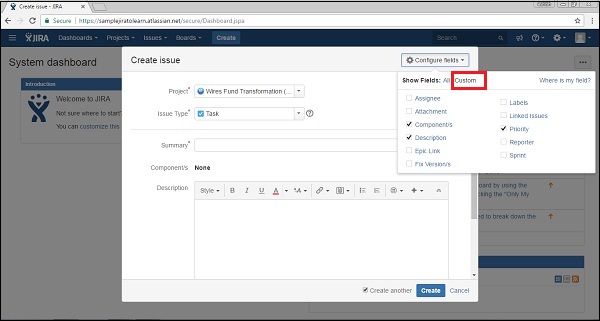
To add other fields in the Create Issue form, click on Configure fields at the top right hand side of the page. The following screenshot shows how to configure the fields in the Create Issue page.
After clicking on the Configure fields button, a drop down box will be displayed, click on Custom. The following screenshot shows the available fields under the Custom tab.
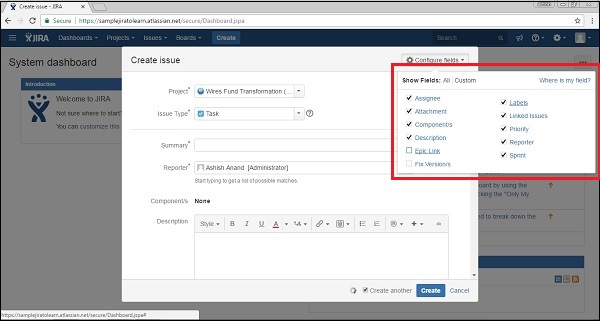
By checking and unchecking the checkboxes to show and hide, fields will be added or cleared from the form. The following screenshot shows the available fields under the All tab.
Now navigate to Create Issue, all fields based on choices will be displayed in the form that shows up. The following screenshot shows the configured fields in the Create Issue page.
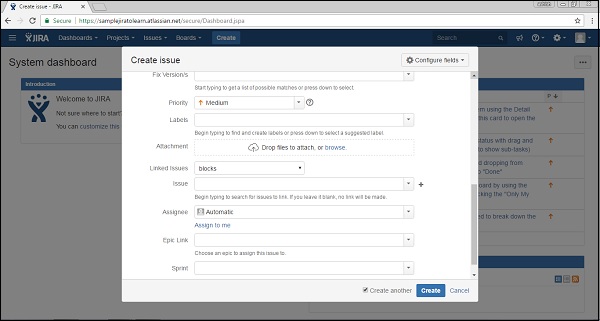
The fields in the Create Issue form are explained below.
Priority − Issue creator can set the priority to resolve the issue as High, Medium, Low, and Lowest.
Labels − It is similar to Tag; it helps in filtering out specific types of issues.
Linked Issue − It links other issues that are either dependent on this issue or this issue is dependent on them. Options in dropdowns are block, is blocked by, duplicate, clone, etc.
Issue − User can link the issue by the Typing ID or summary of those that are related to the linked issue field.
Assignee − The person who is responsible to fix this issue. Assignee name can be entered by the issue creator.
Epic Link − An Issue creator can provide an epic link, if the issue belongs to any of those.
Sprint − The user can define in which sprint, this issue belongs to, when this issue should be addressed.
In the next chapter, we will learn how to clone an issue.
