- JIRA - Home
- JIRA - Overview
- JIRA - Project
- JIRA - Issues
- JIRA - Workflow
- JIRA - Installation
- JIRA - Free Trials Setup
- JIRA - Login
- JIRA - Dashboard
- JIRA - Issue Types
- JIRA - Screens
- JIRA - Issue Creation
- JIRA - Clone an Issue
- JIRA - Create a Subtask
- JIRA - Convert Issue To Subtask
- JIRA - Convert Subtask to Issue
- JIRA - Create Issue using CSV
- JIRA - Edit an Issue
- JIRA - Email an Issue
- JIRA - Label an Issue
- JIRA - Linking Issues
- JIRA - Move an Issue
- JIRA - View/Change History
- JIRA - Watch and Vote on Issue
- JIRA - Search
- JIRA - Advanced Search
- JIRA - Reports
- JIRA - Workload Pie Chart
- JIRA - Created vs Resolved Issues
- JIRA - Burndown Chart
JIRA - Project
A Project contains issues; a JIRA project can be called as a collection of issues. A JIRA Project can be of several types. For example −
- Software Development Project
- Marketing Project
- Migration to other platform project
- Help Desk Tracking Project
- Leave Request Management System
- Employee Performance System
- Website Enhancement
Create a New Project
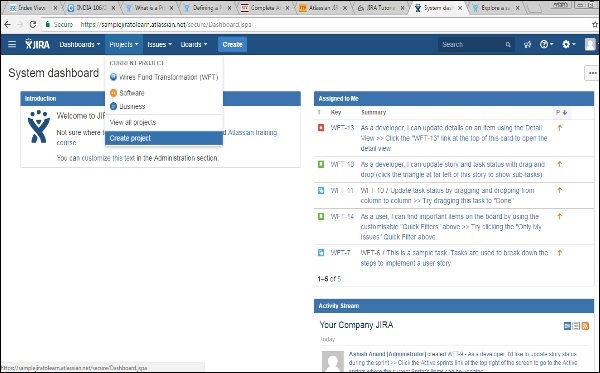
To create a project, the user should login as a JIRA Service Desk Admin and then Click on Project → Create Project.
The following screenshot shows how to reach to the Create Project button from the Dashboard.
Choose the type of Project that suits your requirement and the process it should follow.
The following screenshot displays the type of projects available in JIRA.
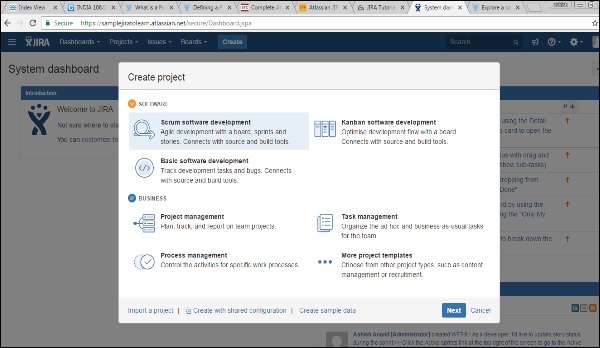
Once the type of project is selected, click on Next. The user will see the flow of the project based on the selection. Here, we have selected Basic Software development.
The following screenshot displays the available issue types and the workflow for the chosen project in the step mentioned above −

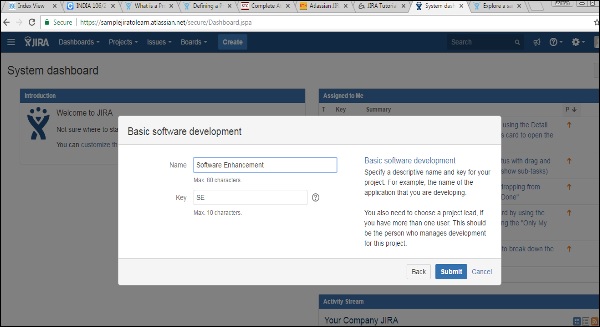
Click on the Select button, enter the name of the project and confirm the Key that the user wants to display as a reference in all the issues. Once this is done, click on the Submit button.
The following screenshot displays the fields to provide details before the creation of a project.
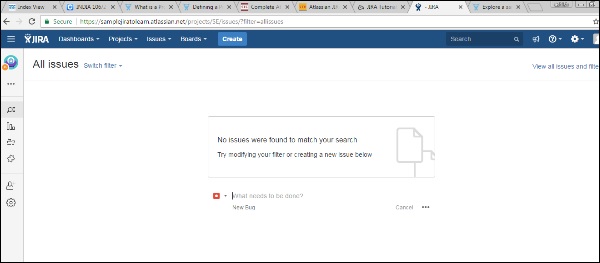
The page having issues will display. The following screenshot displays whether any issues are linked with a new created project.