- TestLink - Home
- TestLink – Introduction
- TestLink – Features
- TestLink – Installation
- TestLink – Login
- TestLink – Add a Project
- TestLink – Dashboard
- TestLink – Projects
- TestLink – Inventory
- TestLink – Test Plan
- TestLink – Build Management
- TestLink – Test Specification
- TestLink – Test Suite
- TestLink – Test Cases
- TestLink – Import Data
- TestLink – Export Data
- TestLink – Test Plan Relation
- TestLink – Search
- TestLink – Keywords
- Test Specification Document
- TestLink – Create Requirement
- TestLink – Requirement Overview
- TestLink – Assign Test Execution
- TestLink – Bulk User Assignment
- TestLink – Platforms
- TestLink – Milestones
- TestLink – Test Execution Setup
- TestLink – Test Execution
- TestLink – Reports & Metrics
- TestLink – Reports
- TestLink – Charts
TestLink - Test Suite
Test suite is a container that has a set of tests which helps the testers in executing and reporting the test execution status. It can take any of the three states namely Active, In progress, and Completed.
A test case can be added to multiple test suites and test plans. After creating a test plan, test suites are created, which in turn can have any number of tests.
TestLink supports tree structure for test suites. There could be multiple sub-test suites under a test suite.
Create a Test Suite
To create a Test Suite, you should have Create Test Suites permission.
Following are the steps to create a Test Suite −
Step 1 − Navigate to Test Specification → Test Specification from the dashboard.
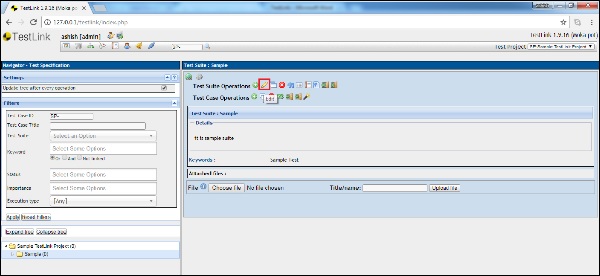
Step 2 − Click the Setting type icon  known as Actions on this page, present on the right panel as shown in the following screenshot.

It will open Test Suite Operations.
Step 3 − Click the + icon to create a new suite as shown below.
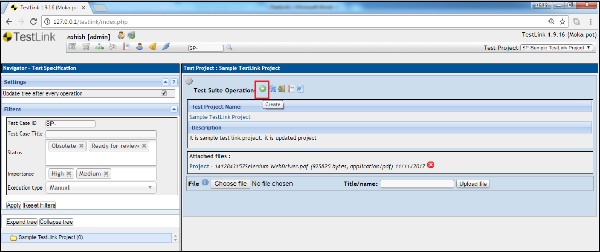
It opens the create test suite page.
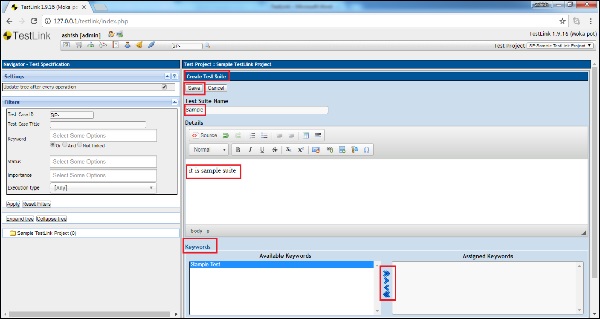
Step 4 − Enter the following fields in the form −
Name of Test Suite
Details
Keywords − It displays all the available keywords. You can assign them based on relation.
Step 5 − Click the Save button as displayed in the following screenshot.
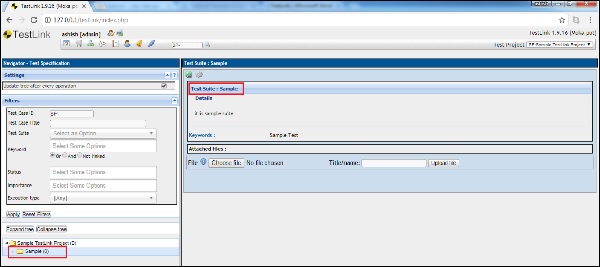
Once you click Save, you will see the test suite in tree structure on the left side panel of the screen. The details are available on the right side of the screen.
Edit a Test Suite
To edit a test suite, you should have Edit Test Suite Permission.
Following are the steps to edit a test suite −
Step 1 − Select test suite from the tree structure on the left panel and click the settings known as actions to open the Test Suite Operations as shown below.
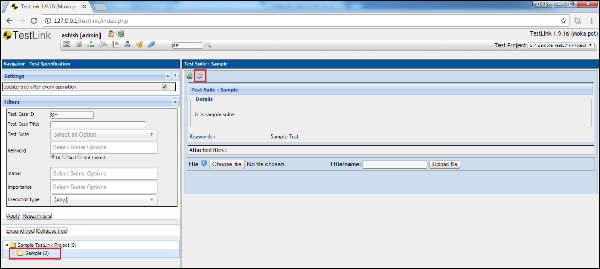
It displays Test Suite Operations.
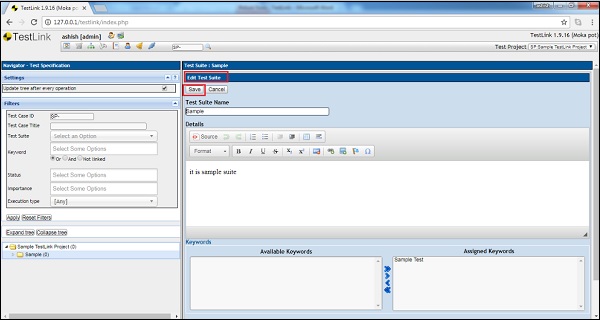
Step 2 − Click the Edit (pencil) icon as shown below.
It opens the Test Suite details on the edit page.
Step 3 − Edit Name, Details or any other fields and click the Save button to update the test suite.
Move/Copy a Test Suite
To move/copy a test suite, you should have Create/Edit Test Suite permission. This functionality allows creating a duplicate of a Test Suite or reordering of the structure.
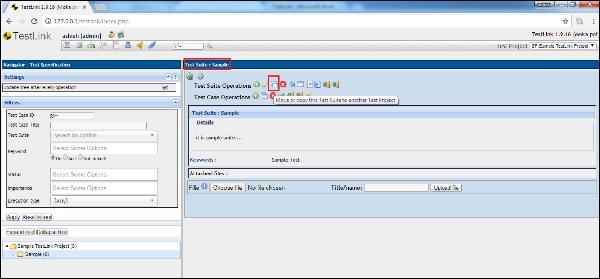
Step 1 − To copy/move a test suite into another project, select test suites those need to be copied/moved and click the setting icon known as Actions.
It will open Test suite Operations.
Step 2 − Click the Move or Copy symbol as shown in the following screenshot.
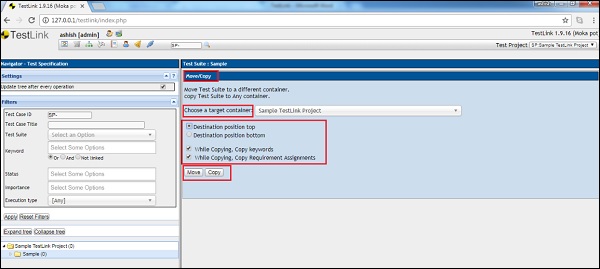
Step 3 − It opens the Move/Copy page where you can select the target container, destination position, and whether the keywords and requirements should be copied/moved to the target container.
Step 4 − After selection, click the Copy or Move button according to requirement as shown in the following screenshot. The Copy button will copy the test suite in both of the projects, while the move button will move the test suite from the current project to the target project.
Delete a Test Suite
To delete a Test Suite, you should have Delete Test Suite permission.
Step 1 − To delete a test suite, select test suites those need to be deleted and click the setting icon known as Actions. It will open Test suite Operations.
Step 2 − Click the delete symbol as shown below.
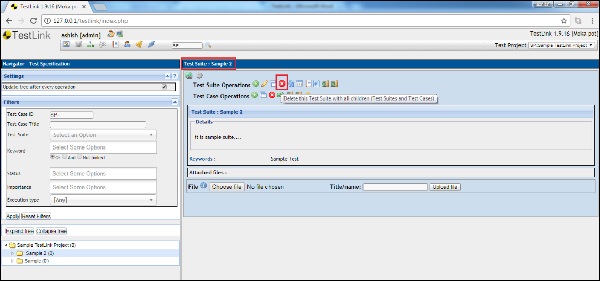
A confirmation message will be displayed to delete.
Step 3 − Click Yes to delete the test suite as shown in the following screenshot.
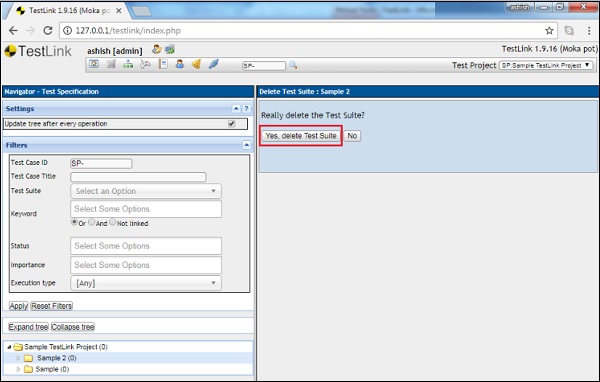
The page will be refreshed and the test suite will be deleted from the Tree structure on the left side panel of the screen.
A successful deletion message is also displayed as shown below.

