- TestLink - Home
- TestLink – Introduction
- TestLink – Features
- TestLink – Installation
- TestLink – Login
- TestLink – Add a Project
- TestLink – Dashboard
- TestLink – Projects
- TestLink – Inventory
- TestLink – Test Plan
- TestLink – Build Management
- TestLink – Test Specification
- TestLink – Test Suite
- TestLink – Test Cases
- TestLink – Import Data
- TestLink – Export Data
- TestLink – Test Plan Relation
- TestLink – Search
- TestLink – Keywords
- Test Specification Document
- TestLink – Create Requirement
- TestLink – Requirement Overview
- TestLink – Assign Test Execution
- TestLink – Bulk User Assignment
- TestLink – Platforms
- TestLink – Milestones
- TestLink – Test Execution Setup
- TestLink – Test Execution
- TestLink – Reports & Metrics
- TestLink – Reports
- TestLink – Charts
TestLink - Bulk User Assignment
Bulk user assignment is almost similar to a normal assignment. The only difference being multiple users can be assigned at a time to a single as well as multiple test cases.
Following are the steps for bulk user assignment −
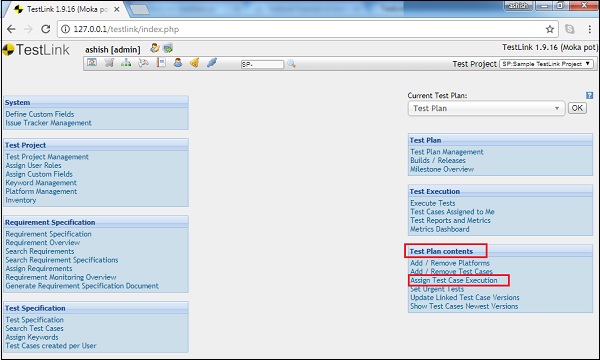
Step 1 − Go to Test Plan contents → Assign test cases execution from the dashboard as shown in the following screenshot.
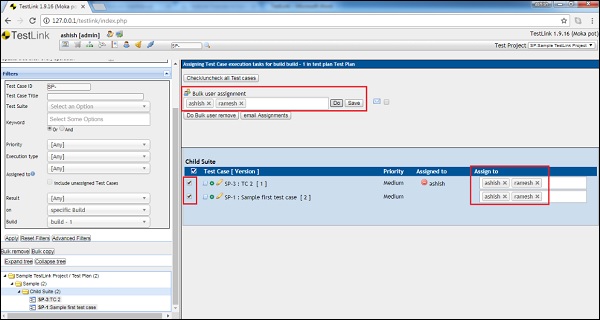
Step 2 − On the left side search the test suite and click it. It displays the details and test cases present on the right side panel.
Step 3 − Select the multiple test cases to be assigned to multiple users. Verify if any existing user is present. The Assigned To field displays the user name if it is assigned.
Step 4 − Go to Bulk User Assignment test box at the top. Start typing the name of the user. It will display the list of matched users from where the user name can be selected. Add multiple users in the text box.
Step 5 − Click the Do button present on the right side of the text box.
It displays the users name in the Assign To field of each selected test cases.
Step 6 − Click the Save button to assign the test cases to these users.
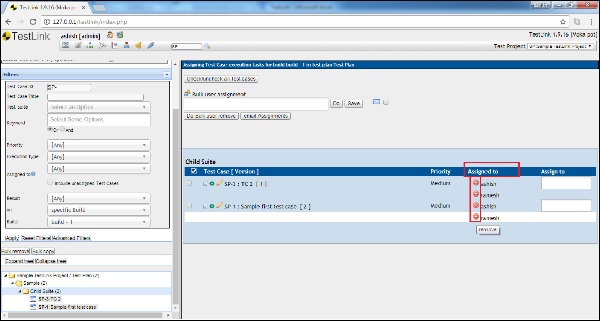
After assigning the test case, the user name appears in the Assigned to section along with a red symbol.
Step 7 − If the assigned user needs to be removed , simply click the red symbol, it will remove the assigned user.
Bulk User Removal
For bulk user removal, first select the test cases from which the assigned users need to be removed.
Click Do bulk user remove button present on the top of the screen.
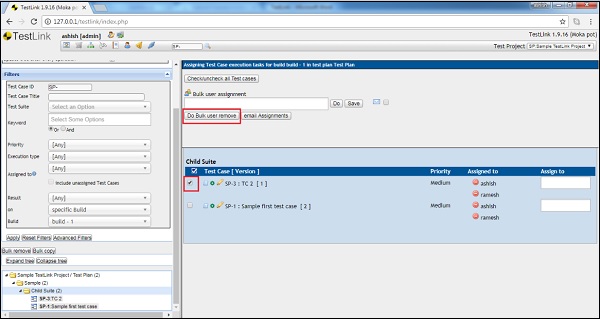
It removes the assigned user of that test case.
