- TestLink - Home
- TestLink – Introduction
- TestLink – Features
- TestLink – Installation
- TestLink – Login
- TestLink – Add a Project
- TestLink – Dashboard
- TestLink – Projects
- TestLink – Inventory
- TestLink – Test Plan
- TestLink – Build Management
- TestLink – Test Specification
- TestLink – Test Suite
- TestLink – Test Cases
- TestLink – Import Data
- TestLink – Export Data
- TestLink – Test Plan Relation
- TestLink – Search
- TestLink – Keywords
- Test Specification Document
- TestLink – Create Requirement
- TestLink – Requirement Overview
- TestLink – Assign Test Execution
- TestLink – Bulk User Assignment
- TestLink – Platforms
- TestLink – Milestones
- TestLink – Test Execution Setup
- TestLink – Test Execution
- TestLink – Reports & Metrics
- TestLink – Reports
- TestLink – Charts
TestLink - Import Data
TestLink supports XML and CVS file to import data. It supports importing the data for test suites, test cases, requirements, test execution results, keywords, etc. However, for few cases it supports only XML and in few cases both XML and CVS.
Following table displays the functionalities that support import and those that support file format.
| Item | File Format | Import |
|---|---|---|
| Test Project | XML | Yes |
| Test Suite | XML | Yes |
| Test Case | XML, XLS | Yes |
| Keyword | CSV, XML | Yes |
| Requirement | CSV, XML | Yes |
| Results | XML | Yes |
| Platforms | XML | Yes |
| Custom Fields | XML | Yes |
Import Test Suite & Cases
Sample File − Following is the XML file with keywords that can be used to import test suites.
<testsuite name = "Child Suite2">
   <details>abc</details>
   <testcase name = "Sample test case2">
      <summary>test case sample- update</summary>
      <preconditions>1. TestLink should be installed</preconditions>

      <steps>
         <step>
            <step_number>1</step_number>
            <actions>Go to www.google.com</actions>
            <expectedresults>Google Home page should display</expectedresults>
         </step>
      </steps>

      <keywords>
         <keyword name = "Sample Test">
            <notes>abc</notes>
         </keyword>
      </keywords>
   </testcase>
</testsuite>
If you dont want to add the keyword, the keyword section can be removed from the XML file.
If you want to import multiple test cases, add <testcase> section multiple times with all sub-nodes.
If only test cases need to be imported in an already existing test suite, remove the <testsuite> tag and start the XML file with <testcase>.
Import a Test Suite
Step 1 − To import the test suite, go to Test Specifications → Test Specification from the dashboard.
Step 2 − Select the project and the folder on the left pane where you want to import the test suite.
OR
To import only test cases, select the nearest test suite folders where the test cases should be imported.
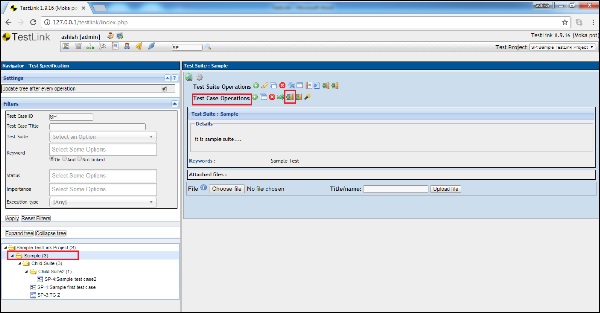
Step 3 − Click the Actions icon on the right pane as shown below.
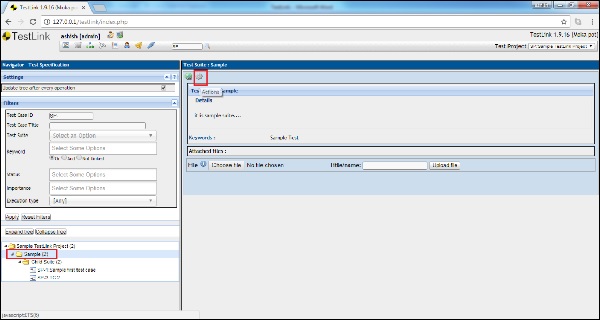
It displays the test suite operations.
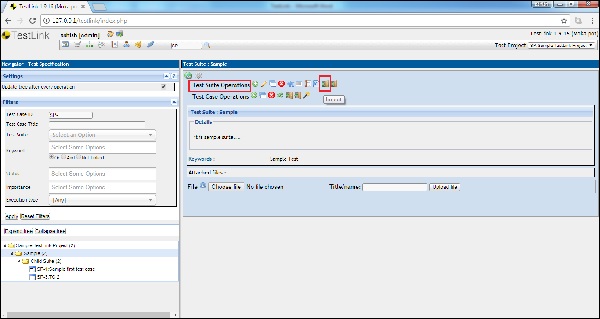
Step 4 − Click the Import icon as shown below −
OR
To upload only test cases, click the Import icon present in Test Case Operations (below the Test Suite Operations).
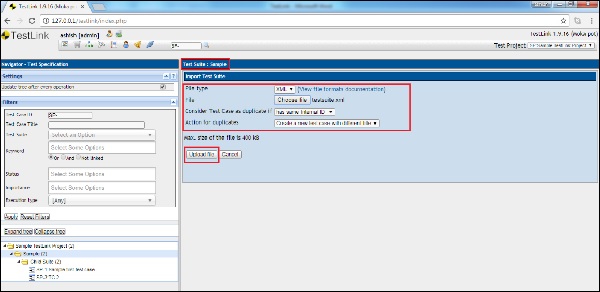
It opens the Import Test Suite page. By default, the file type is selected as XML.
Step 5 − Fill in the following details −
File − Select the XML file and upload it. Max size of the file should be 400KB.
Consider test case as duplicate if: Select the appropriate option from the list.
Action for duplicate: Select the appropriate option from the list.
Step 6 − Click the Upload file button as shown below −
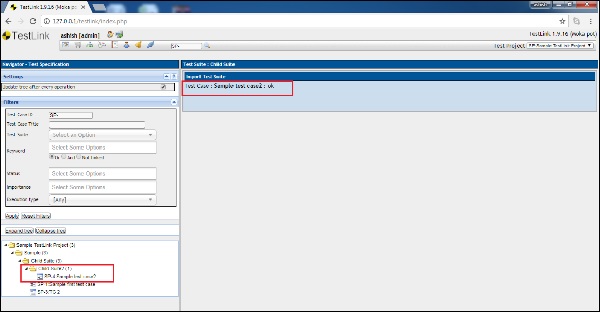
Step 7 − After import, a successful message is displayed as shown below.
Import Test Case Using XLS
Sample XLS file to import multiple test cases as the following −
| Name | Summary | Steps | Expected Result |
|---|---|---|---|
| Engine fast startup | Startup on 5 second | Too fast to write steps | Engine should start |
| Engine emergency stop | Engine stop due to panic button |
|
Engine should stop instantly |
The first row wont be imported. It is supposed to have a column description.
Step 1 − To import test cases, go to Test Specifications → Test Specification from the dashboard.
Step 2 − Select the nearest test suite folders, where the test cases should be imported.
Step 3 − Click the Actions icon on the right pane.
It displays Test Case Operations.
Step 4 − Click the Import icon as shown below.
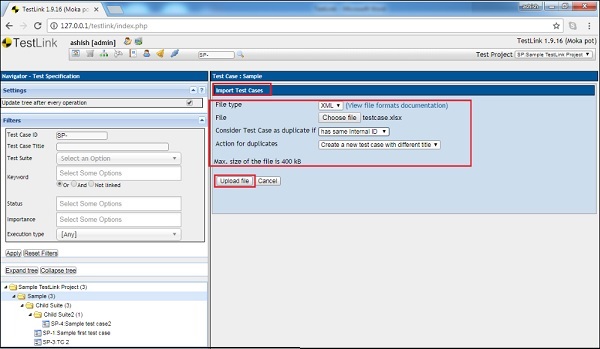
It opens the Import test case page.
Step 5 − By default, the file type selected is XML. Change it to XLS/CSV and enter the following details −
File − Select the file and upload it. Max size of the file should be 400KB.
Consider test case as duplicate if − Select the appropriate option from the list.
Action for duplicate − Select the appropriate option from the list.
Step 6 − Click the Upload file button as shown below.
Import Requirements
TestLink supports XML and CSV file to import the requirements.
Sample XML file for Requirement would be as follows −
<requirements>
   <requirement>
      <docid>ENG-0001</docid>
      <title>Add a product</title>
      <description>ABC</description>
   </requirement>

   <requirement>
      <docid>ENG-0002</docid>
      <title>Add price </title>
      <description>Price</description>
   </requirement>
</requirements>
Sample CSV file for Requirement would be as follows −
ENG-0001,Add a product,ABC

ENG-0002,Add price,Price
Step 1 − To import the requirements, go to Requirement Specification → Requirement Specification from the dashboard.
Step 2 − Select the Requirement Specification folder where the requirements should be imported on the left panel.
Step 3 − Click the Action icon present on the top of the right pane.
It displays the Requirement Operations page.
Step 4 − Click the Import button as shown below.
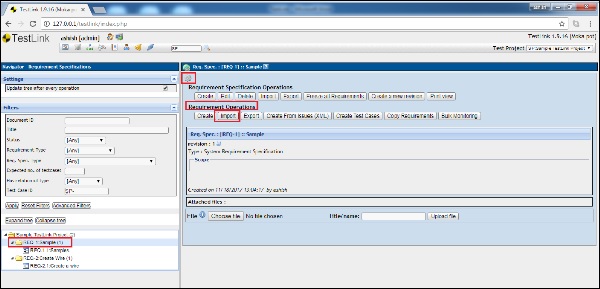
It displays the requirement import page.
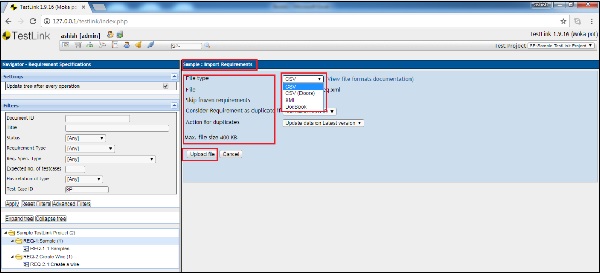
Step 5 − Enter the following details.
File Type − You can select CSV, XML or other forms of CSV and XML files as listed.
File − Upload the corresponding file.
Consider test case as duplicate if − Select the appropriate option from the list.
Action for duplicate − Select the appropriate option from the list.
Step 6 − Click the Upload file button as shown below.
After upload, it displays Import done message along with the imported details.
After upload, it displays Import done message along with the imported details.

Similarly, keywords, platforms, and results can be imported using supported file and the respective section accessing the dashboard.
