- TestLink - Home
- TestLink – Introduction
- TestLink – Features
- TestLink – Installation
- TestLink – Login
- TestLink – Add a Project
- TestLink – Dashboard
- TestLink – Projects
- TestLink – Inventory
- TestLink – Test Plan
- TestLink – Build Management
- TestLink – Test Specification
- TestLink – Test Suite
- TestLink – Test Cases
- TestLink – Import Data
- TestLink – Export Data
- TestLink – Test Plan Relation
- TestLink – Search
- TestLink – Keywords
- Test Specification Document
- TestLink – Create Requirement
- TestLink – Requirement Overview
- TestLink – Assign Test Execution
- TestLink – Bulk User Assignment
- TestLink – Platforms
- TestLink – Milestones
- TestLink – Test Execution Setup
- TestLink – Test Execution
- TestLink – Reports & Metrics
- TestLink – Reports
- TestLink – Charts
TestLink - Test Plan Relation
Test Plan contains a set of test cases those are in scope. Before starting the execution, a test plan must have test sets. A test case cannot be executed before assigning it to any test plan.
Add Test Cases to Plan
Following are the steps to add test cases to a test plan.
Step 1 − Go to Test Plan contents → Add/Remove test cases from the Dashboard as shown below.

It opens the Add/Remove Test Cases page.
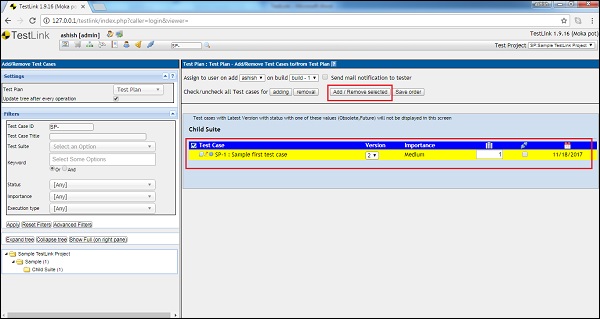
Step 2 − Search the folder using filter on the left panel and click the test case folder.
It displays Test Plan − Add Test cases to Test Plan page on the right panel.
Step 3 − Check all the available test cases to add to the test plan.
Step 4 − Select from Assign dropdown to assign this to a person.
Step 5 − Select a build as well.
Step 6 − Click the Add Selected button to add the test case to a test plan.
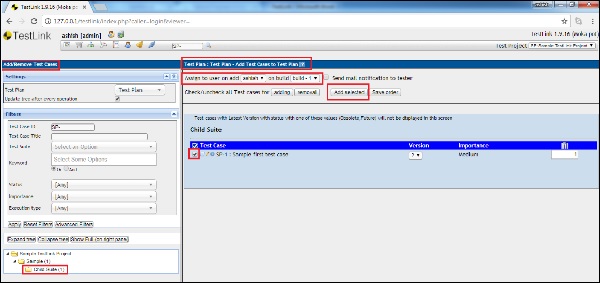
After clicking Add selected, the color of the test case gets changed.
Step 7 − The Add selected button changes to Add/Remove selected as shown in the following screenshot.
Remove a Test Case from a Plan
To remove test cases from a test plan the following steps should be performed −
Step 1 − Go to Test Plan contents → Add/ Remove test cases from the Dashboard as shown below.
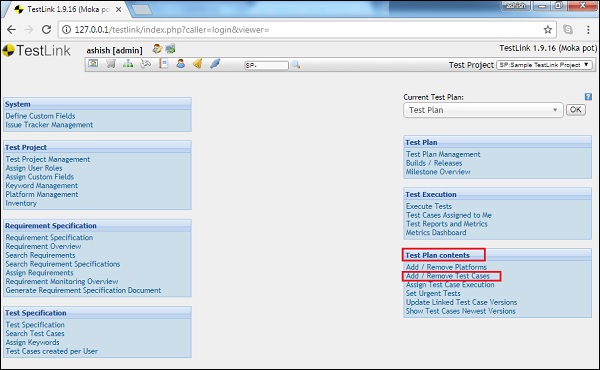
It opens the Add/Remove Test Cases page.
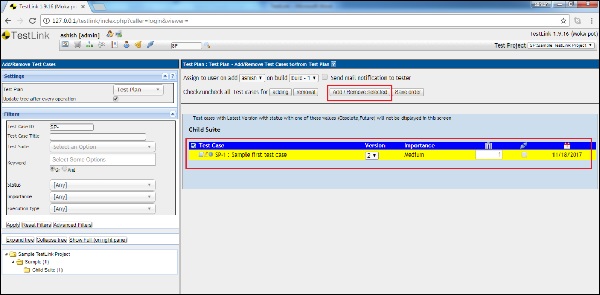
Step 2 − Search the folder using a filter on the left panel and click the test case folder.
It displays Test Plan − Add Test cases to Test Plan page on the right panel.
Step 3 − Select the test cases that need to be removed.
Step 4 − Click the Add/Remove selected button as shown below.