- TestLink - Home
- TestLink – Introduction
- TestLink – Features
- TestLink – Installation
- TestLink – Login
- TestLink – Add a Project
- TestLink – Dashboard
- TestLink – Projects
- TestLink – Inventory
- TestLink – Test Plan
- TestLink – Build Management
- TestLink – Test Specification
- TestLink – Test Suite
- TestLink – Test Cases
- TestLink – Import Data
- TestLink – Export Data
- TestLink – Test Plan Relation
- TestLink – Search
- TestLink – Keywords
- Test Specification Document
- TestLink – Create Requirement
- TestLink – Requirement Overview
- TestLink – Assign Test Execution
- TestLink – Bulk User Assignment
- TestLink – Platforms
- TestLink – Milestones
- TestLink – Test Execution Setup
- TestLink – Test Execution
- TestLink – Reports & Metrics
- TestLink – Reports
- TestLink – Charts
TestLink - Assign Test Execution
TestLink supports the feature to assign Test Case for execution to different users. Assigning test cases affects both the execution and reports. On the execution page, you can sort the executable Test Cases to view whom they are assigned to. In the reports section, you can see the remaining test cases grouped by the testers name. If there are no test cases assigned to a tester, it defaults to none. A Tester can also see the metrics of his/her own executed tests.
Assign Test Cases
Following are the steps to assign a test case −
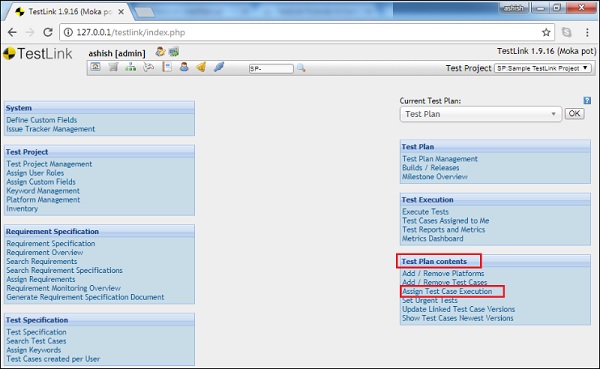
Step 1 − Go to Test Plan contents → Assign test cases execution from the dashboard as shown below.
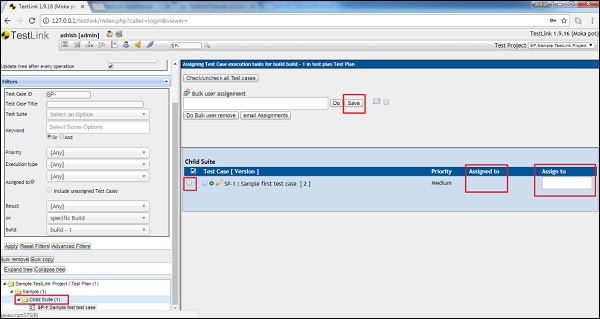
Step 2 − On the left side of the screen, search the test suite and click it. It displays the details and test cases present on the right side.
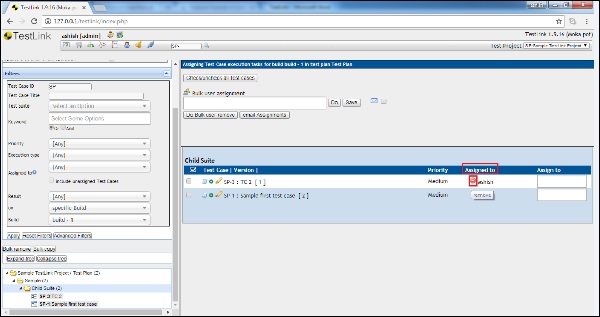
Step 3 − Select the test case to be assigned. Verify if any existing user is present. The Assigned To field displays the user name if it is assigned.
Step 4 − Go to Assign text box and start typing the name of the user. It will display the list of matched users, from which you can select the user name.
Step 5 − Click the Save button present at the top of the screen.
After assigning the test case, the user name appears in the Assigned to section along with a red symbol.
Step 6 − If the assigned user needs to be removed, simply click the red symbol  , it will remove the assigned user.