- TestLink - Home
- TestLink – Introduction
- TestLink – Features
- TestLink – Installation
- TestLink – Login
- TestLink – Add a Project
- TestLink – Dashboard
- TestLink – Projects
- TestLink – Inventory
- TestLink – Test Plan
- TestLink – Build Management
- TestLink – Test Specification
- TestLink – Test Suite
- TestLink – Test Cases
- TestLink – Import Data
- TestLink – Export Data
- TestLink – Test Plan Relation
- TestLink – Search
- TestLink – Keywords
- Test Specification Document
- TestLink – Create Requirement
- TestLink – Requirement Overview
- TestLink – Assign Test Execution
- TestLink – Bulk User Assignment
- TestLink – Platforms
- TestLink – Milestones
- TestLink – Test Execution Setup
- TestLink – Test Execution
- TestLink – Reports & Metrics
- TestLink – Reports
- TestLink – Charts
TestLink - Quick Guide
TestLink - Introduction
TestLink is a test management tool used for project management, bug tracking and test management. It follows a centralized test management concept that helps to communicate easily for rapid development of tasks across QA teams and other stakeholders. It keeps the requirement specification and test specification in sync.
Points to Note
Following salient features of TestLink need to be noted to understand the topic better.
TestLink is open source test management tool. There is no license is required to use TestLink.
It is developed and maintained by Teamtest.
It is licensed under GPL General Public License.
It supports different Windows OS such as Windows XP, Vista, 7, etc. along with other cloud-based support.
It provides free access to tools for multiple users.
It can be integrated with many other tools JIRA, Bugzilla, FogBugz, VersionOne, etc.
TestLink Uses
Following points describe the various usages of TestLink.
Useful in tracking all QA activities from the first phase of software testing lifecycle.
Useful in Project Management, Task Tracking, Requirement Management and Test Management.
Supports all macro level activities performed by QA.
Useful in performing QA tasks such as writing test cases, execution reports, etc.
Supports both manual as well as automated test execution.
TestLink Specifications
Following table lists some of the important specifications of TestLink.
| Sr.No. | Specification & Description |
|---|---|
| 1 | Application Copyright It is developed and maintained by Teamtest. It is an open source tool. |
| 2 | Tool Scope It can be used as a Test Automation framework. It is utilized as a Testing Utility. |
| 3 | Testing Methods
|
| 4 | Tool Objectives
|
| 5 | Management Features
|
| 6 | Software Requirements Apache: 2.2.2.1 MySQL : 5.5.16 PHP: 5.3.8 PhpMyAdmin: 3.4.5 Filezilla FTP Server: 0.9.39 Tomcat: 7.0.21 |
| 7 | Error Handling Capture screenshots |
| 8 | User Interface Available
|
TestLink - Features
TestLink has a wide range of features to attract QAs and other stakeholders for test management.
TestLink Core Features
Following table lists the core features of TestLink.
| Sr.No. | Core Features & Description |
|---|---|
| 1 | Testing Supports TestLink supports the following test methodologies −
|
| 2 | Centralize & organize
|
| 3 | Manage & Track Execution
|
| 4 | Notification
|
| 5 | Power Search
|
| 6 | Reports
|
| 7 | Scale with Team Growth TestLink supports any business team and any project, irrespective of the size and complexity. |
| 8 | Integration
|
| 9 | Common Features
|
| 10 | Customization
|
TestLink - Installation
Following are some points to note before we go for the installation of TestLink.
TestLink is a web application; it provides a private website to an individual or a set of requested users belonging to the same company/project.
TestLink can be run at the server side.
TestLink is a PHP based application and supports all OS platforms such as Windows, Linux of different versions, MAC, etc.
TestLink supports all famous browsers such as Chrome, IE, Mozilla, and Safari.
System Requirements
Since TestLink is a web-application it follows the concept of client/server. It means that TestLink can be installed centrally on a server and users can interact with it through web browsers using a website from any computer.
Web Server − TestLink supports Apache 2.2.2.1. However, it can work with any latest web server software. TestLink only uses .php file. Configure the web server with .php extension only.
PHP − The web server should support PHP. It can be installed as CGI or any other integration technology. It is recommended to use 5.3.8 PHP version.
Mandatory PHP Extensions − Extensions for RDBMS are mysqli, pgsql, oci8, sqlsrv. Mbstring is required for Unicode UTF-8 support.
Optional Extensions − Curl, GD, Fileinfo
Database − TestLink requires database to store its data. MySQL (5.5.16) is recommended.
FileZilla FTP Server − FileZilla FTP Server 0.9.39 is required to install XAMPP as optional.
You can install all the requirements separately either manually or through an automatic process to use TestLink.
Installation of System Requirements
If the user has required knowledge about the installation process, the user can install all the discussed requirements one-by-one separately before proceeding to TestLink.
Alternatively, there are many all-in-one packages available and can automatically install in the system by exe file. Here, we will take the help of XAMPP to install the pre-requisites easily.
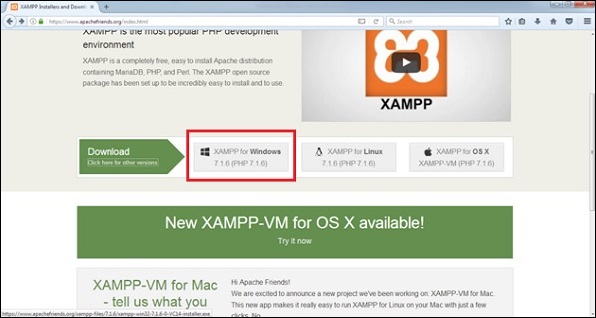
Step 1 − Go to https://www.apachefriends.org/index.html and click XAMPP for Windows as shown in the following screenshot.
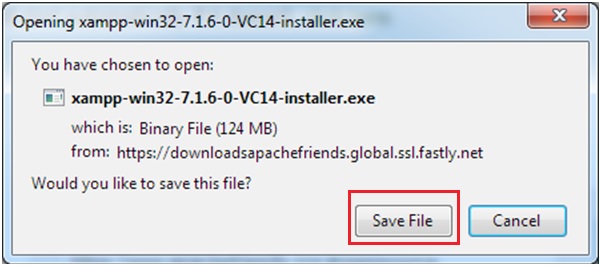
Step 2 − A pop-up will be displayed to save the file. Click Save File. It will start to download the file.
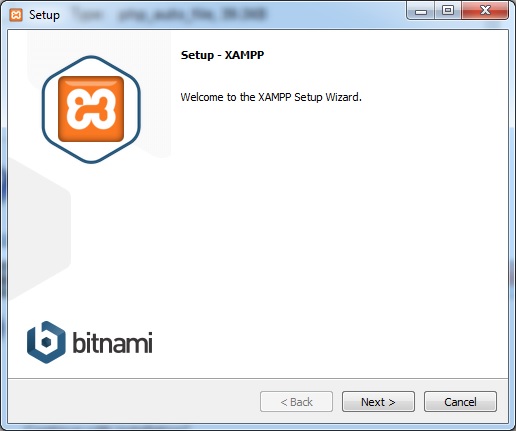
Step 3 − Run the .exe file to run the installation wizard. After clicking the .exe file, the XAMPP Setup wizard is displayed as shown in the following screenshot. Click Next.
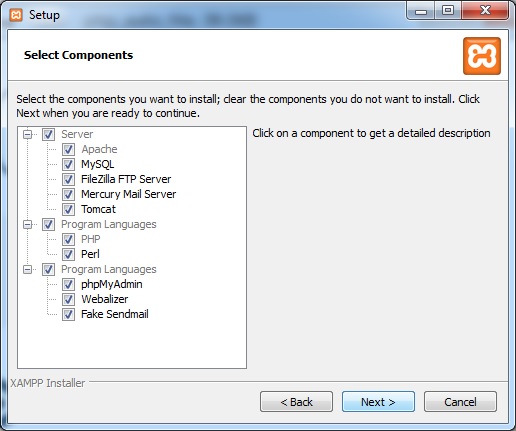
Step 4 − Next, the wizard displays all the component files (shown in the following screenshot) that will be installed. Click Next after selecting the components.
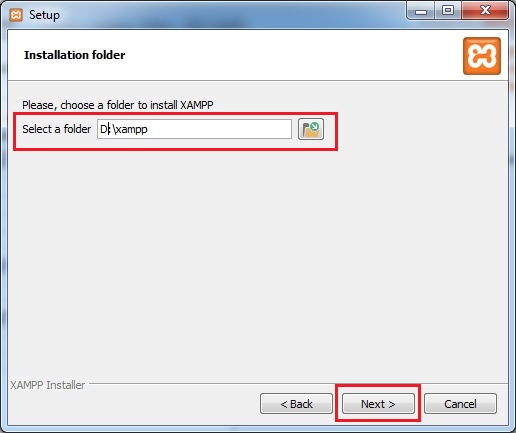
Step 5 − Provide a folder name where XAMPP will be installed and click Next.
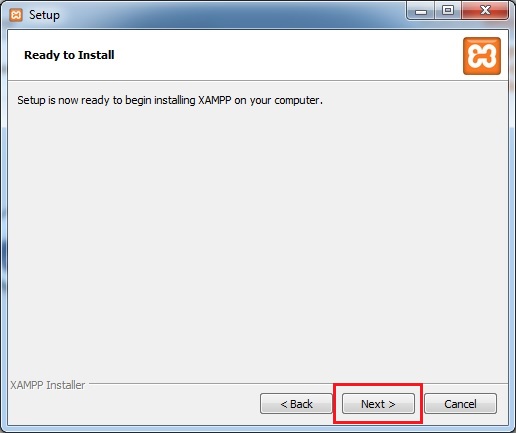
Step 6 − Ready to Install wizard is displayed. Click Next to start the installation.
Step 7 − After successful installation, it will prompt to start the control panel. Select the checkbox and click Finish. It will open the XAMPP control panel as displayed in the following screenshot.
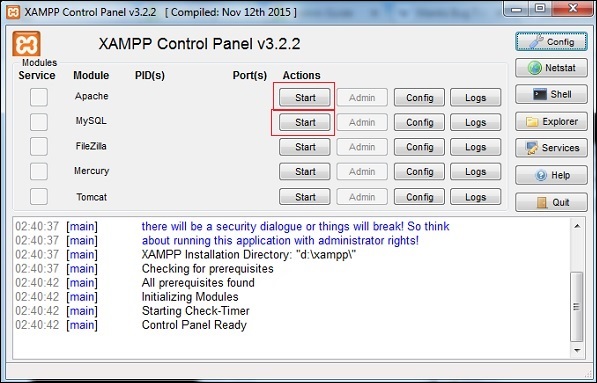
Step 8 − Click the Start button for Apache and MySQL required for TestLink as shown in the above screenshot.
Step 9 − To verify whether all the pre-requisites such as Apache, PHP and MySQL is installed properly, navigate to any of the browser and type http://localhost. Then, press Enter.
Step 10 − It will display the dashboard of XAMPP. Click phpAdmin at the right top corner of the screenshot.
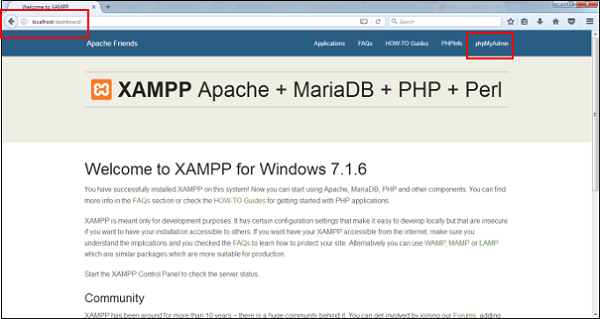
It will display General Settings, Application Settings, Details of Database, Web Server and phpMyAdmin as shown in the following screenshot.
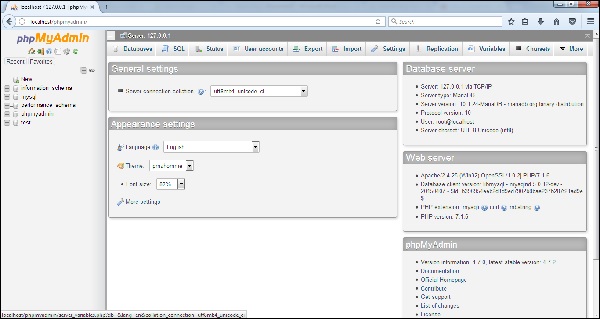
If the installation is not proper, this page wont display. Till this point, all the pre-requisites are successfully installed in the system.
Install and Launch TestLink
After successful installation of XAMPP, we need to work with TestLink.
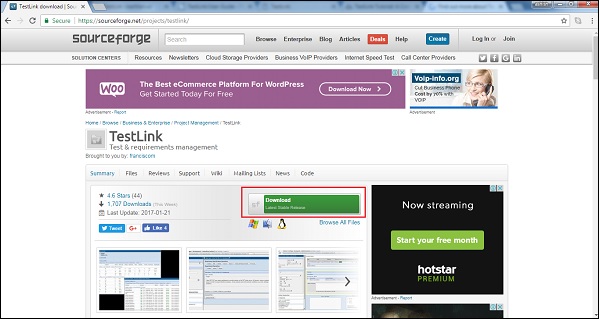
Step 1 − Go to https://sourceforge.net/projects/testlink/ and click Download.
Step 2 − Now unzip the downloaded .tar file and rename the folder name as TestLink.
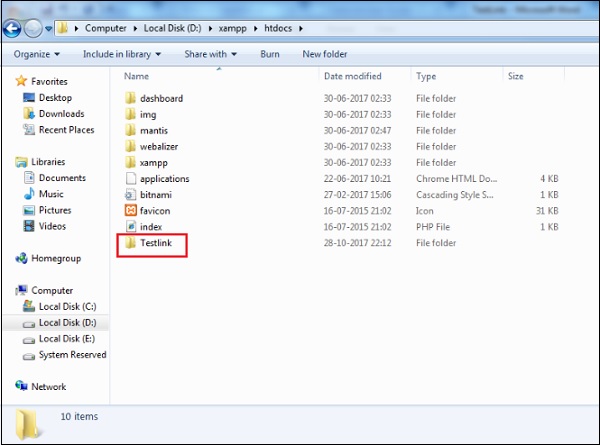
Step 3 − Go to XAMPP folder where it is installed and navigate to htdocs folder. Place the TestLink folder here as shown in the following screenshot.
Step 4 − Go to TestLink package and open config.inc.php file, update path $tlCfg→log_path and $g_repositoryPath as below −
$tlCfg→log_path = D:/xampp/htdocs/testlink/logs/;
$g_repositoryPath = D:/xampp/htdocs/testlink/upload area/;
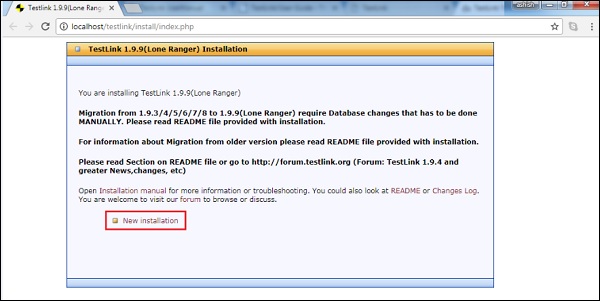
Step 5 − Now open a browser and type http://localhost/Testlink in the navigation bar and press Enter. It will display the installation page of TestLink.
Step 6 − Click New Installation.
Step 7 − Check the checkbox for Terms and Conditions and click the Continue button.
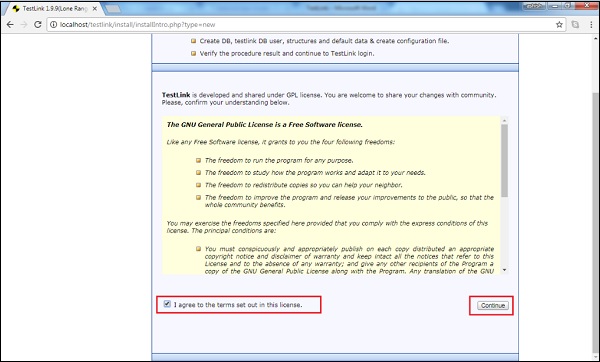
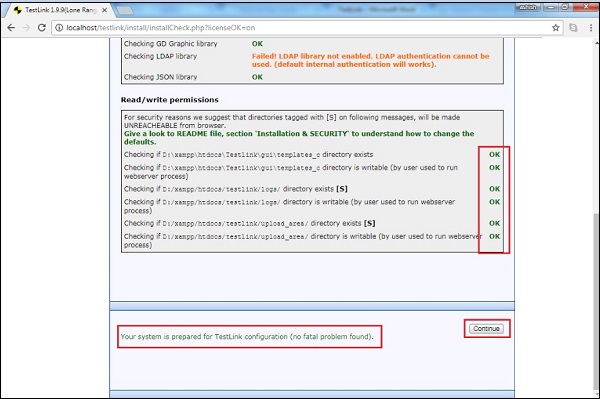
The system will check the pre-requisites to ensure everything is fine. A Continue button will appear at the bottom, otherwise an error message will be displayed.
Step 8 − Click Continue as shown in the following screenshot.
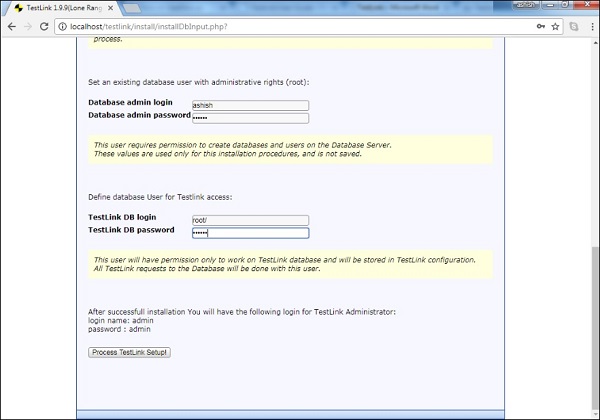
Step 9 − In the next step, Database Admin and Admin password is required to define MySQL access. TestLink admin username/password can be anything given by the user.
Database login/password: root/<empty> (Default login/password of MYSQL for xampp)
Step 10 − Click Process TestLink Setup button. You should see the TestLink Installation was successful! message being displayed.
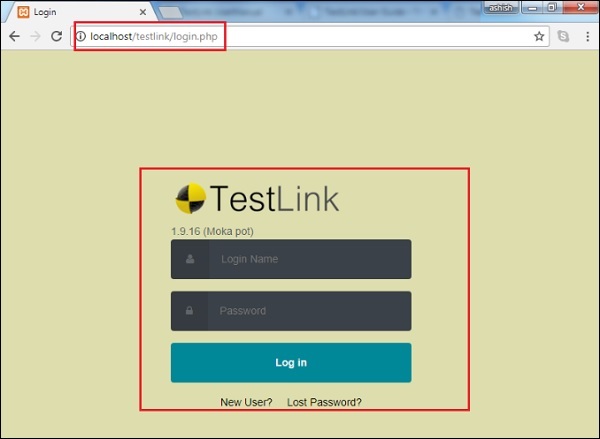
Step 11 − Now again navigate to http://localhost/testlink
You will see the login page as shown in the following screenshot.
TestLink - Login
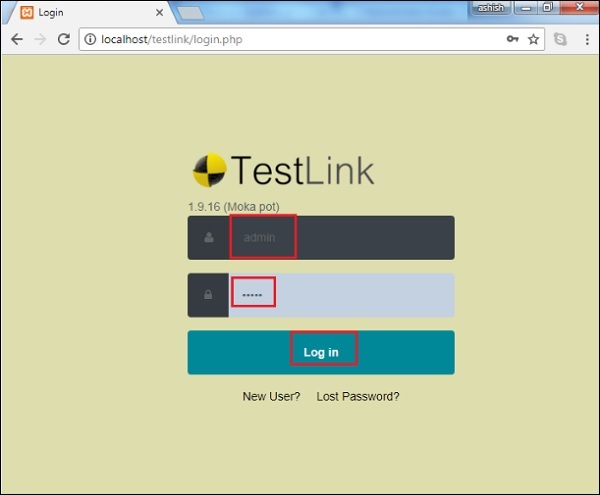
To login into TestLink, go to your sample website, http://localhost/testlink. It will open a login page as shown in the following screenshot.
Step 1 − Enter admin as both username and Password. Admin is the default credential.
Step 2 − Click the Log in button.
Following screenshot shows how to login into TestLink using credentials −
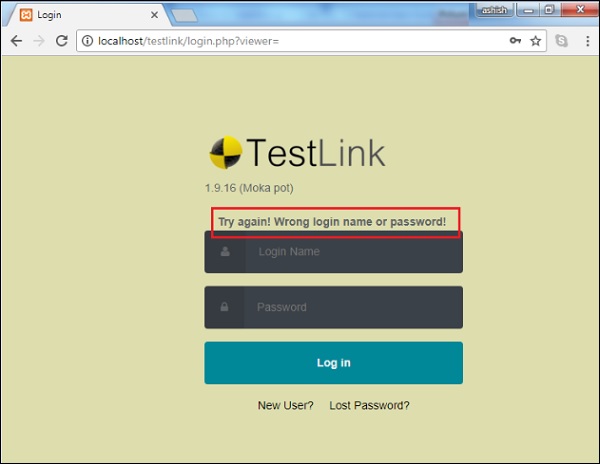
On Unsuccessful Login
Due to unsuccessful login, an error page is displayed. Error may occur due to wrong combination of email id or password.
Following screenshot shows the error message, the user receives if the credentials are not correct.
If you forgot the password, to recover it, following are the steps −
Step 1 − Click the Lost Password? link below the Log in button.
Step 2 − Enter the Login Name.
Step 3 − Click Send.
Following screenshot shows how to recover the password if you forgot.
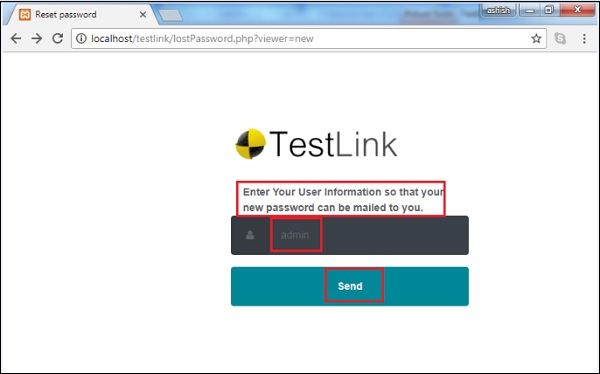
You will get an email with the details of username or a link to reset the password.
On Successful Login
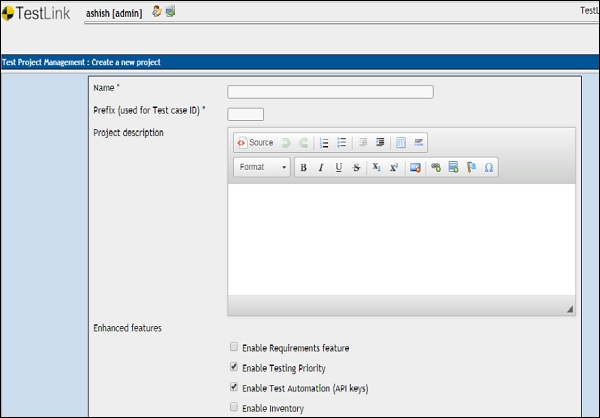
On successful login, the system dashboard will display if the account is associated with any project by admin or if you can create a sample project.
Following screenshot displays the Create a Project page of TestLink on successful login.
TestLink - Add a Project
To add a project, you should have Admin role. Once you log in for the first time as an Admin, TestLink opens the Create a new project form. You cannot see any other page until the project is created or assigned to you.
Create a Project
Following are the steps involved to add a project into TestLink −
Usually to create a project, an option is available at the Test Project Management menu as shown in the following screenshot.
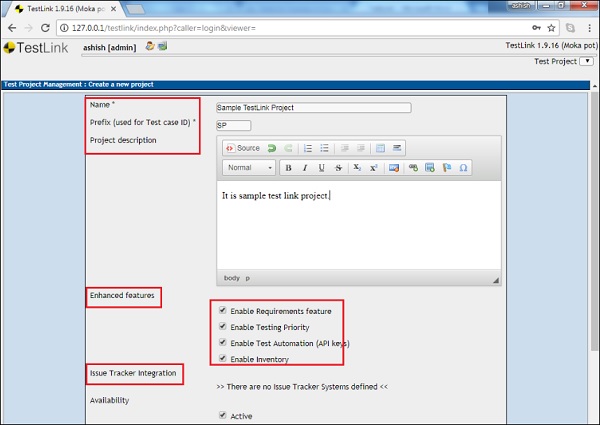
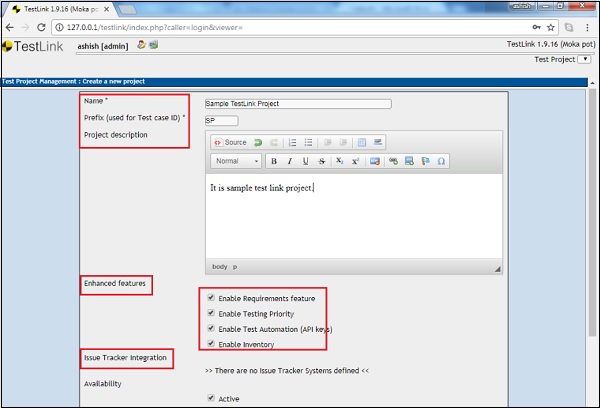
Step 1 − Enter the following details into Create a Project form −
Name − It should be a unique project name.
Prefix − It is used for test case ID to identify the test cases.
Project description − Details about the project.
Enhanced features − You can check the checkboxes based on the requirement of the project. It allows to select which features you want such as Requirement, Automation, etc.
Issue tracker − If any issue tracker is linked with TestLink, it will be displayed here.
Step 2 − Select the Availability option and then click the Create button as shown in below.
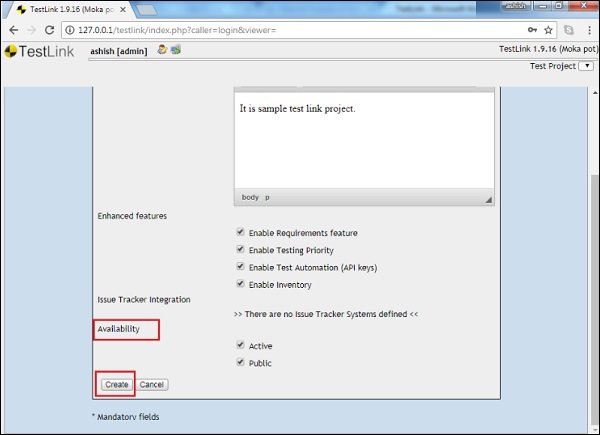
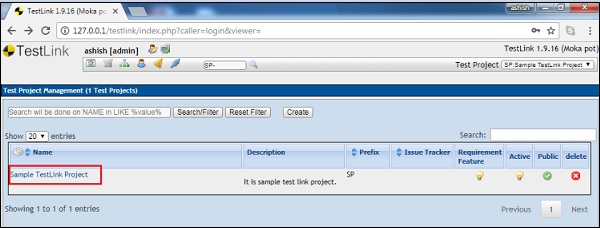
Clicking the Create button adds the project along with Delete and Active/Inactive switch for Requirement and Active features as shown in the following screenshot.
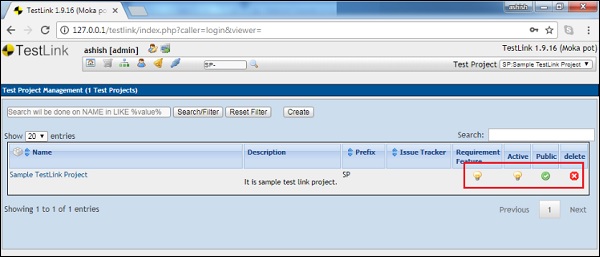
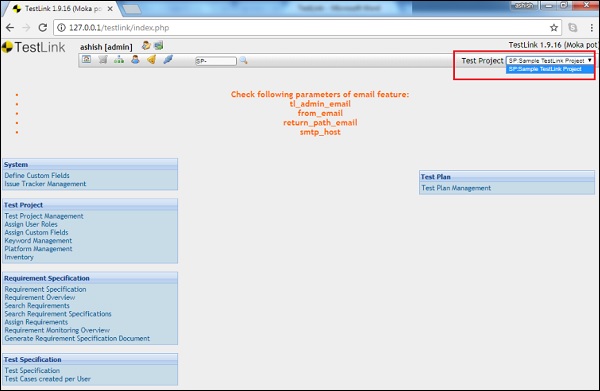
Step 3 − You can view the project by selecting a project name from the Test Project dropdown at the top right corner of the screen as seen below.
TestLink - Dashboard
After logging into TestLink, Dashboard is the first page that is displayed as soon as you are assigned to a project. Dashboard is customized by Admin. Based on the roles, admin can set the access of TestLink.
Following screenshot shows the overview of the Dashboard page of TestLink.
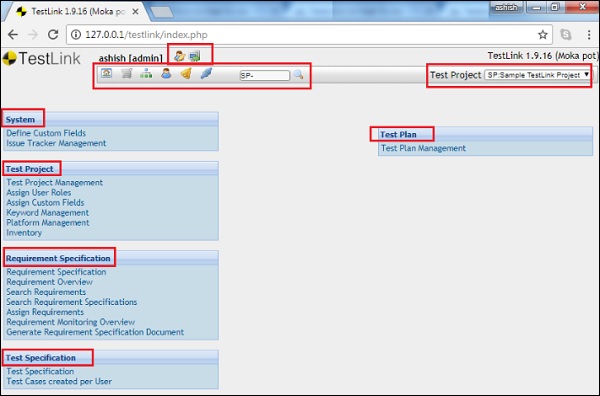
Following are some points to note with regards to the dashboard.
The tool bar icons present at the top left corner of TestLink page will be the same across all pages/screen of TestLink. My Settings, Project, Requirement Specification, Test Specification, User Management and Event as the main links. These links are used to navigate to the respective functionality.
The navigation bar contains the links that provide a quick access to the most useful functions of TestLink.
On the left side of the page - System, Test Project, Requirement Specification and Test Specification categories are present. These categories present different links for quick access to all the features of TestLink.
On the right side, Test Plan category has Test Plan Management link to add or manage a test plan.
On the top left side of the screen, a Search functionality is available while on the right side, there is a Test Project dropdown.
My Settings Page
My Settings icon is present at the top left corner of the screen as the first icon. Following screenshot shows the My Settings icon encircled in red.
Once you click the icon, it opens the settings page where various information is available to update.
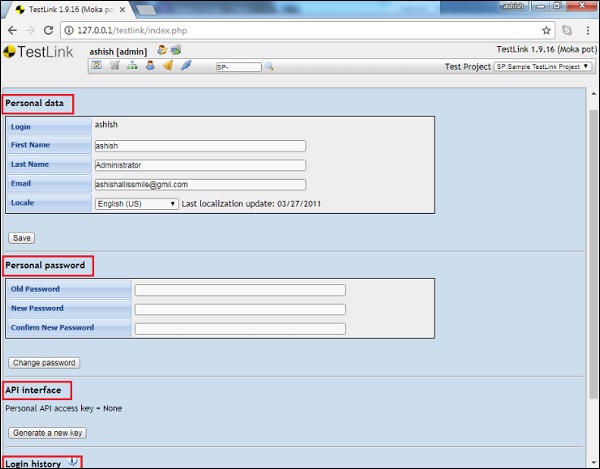
First, there is Personal Data where you can update your first name, last name, email id or Locale.
Then, there is the Personal Password section, where you can change the login password.
The third section shows API interface, where you can generate a personal API key.
In the last section, you can view the login history.
Logout
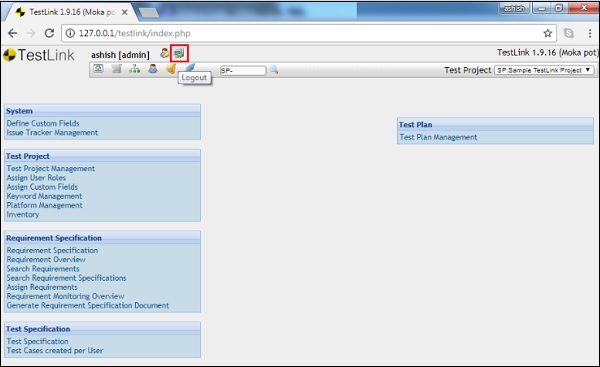
The logout icon is present at the top left side of the screen, beside the My Settings icon. After clicking the Logout icon, you can go back to the login page and the active session ends. To utilize all TestLink features, you have to login again.
In the following screenshot the logout icon is encircled in red.
TestLink - Projects
In this chapter, you will learn how to create, edit, and delete a project in TestLink.
Create a Project
TestLink supports multiple projects at a time.
To create a Project, you should have Admin permissions. Following are the steps to create a Project.
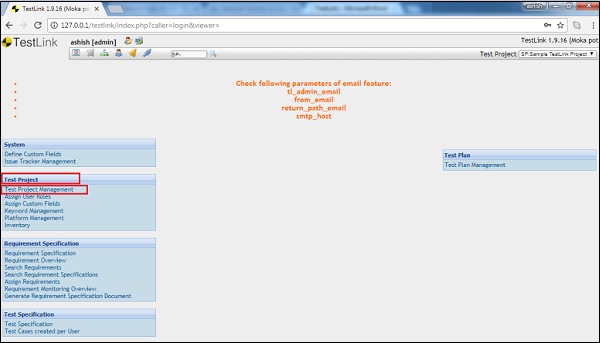
Step 1 − To create a new project, click Test Project → Test Project Management at dashboard as shown in the following screenshot.
It will display all the available projects along with filters and Create a button at the top.
Step 2 − Click the Create button as shown in the following screenshot.

It opens the Create Project page.
Step 3 − Enter the following details into Create a Project form:
Name − It should be a unique project name.
Prefix − It is used for test case ID to identify the test cases.
Project description − Details about the project.
Enhanced features − You can check the checkboxes based on the requirement of the project. It allows to select the features that you wish such as Requirement, Automation, etc.
Issue tracker integration − If any issue tracker is linked with TestLink, it will be displayed here.
Step 4 − Select the Availability option and then click the Create button as shown in the following screenshot.
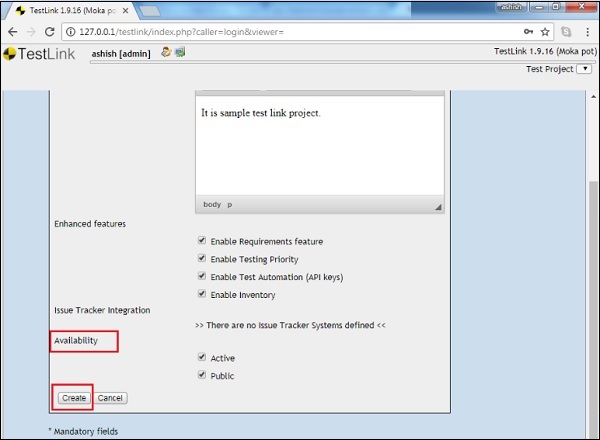
Clicking the Create button adds the project into the system.
Edit a Project
To edit a project, you should have Edit Project Permission.
Following are the steps to edit the project details −
Step 1 − Click Test Project → Test Project Management.
It will display all the available projects.
Step 2 − Click the Project Name to edit the details as shown in the following screenshot.
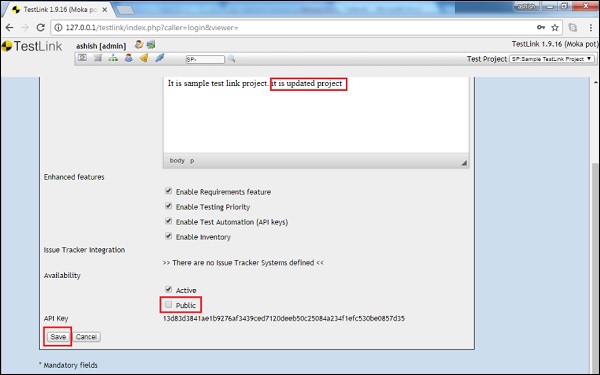
Step 3 − It opens the Project Details in edit mode. You can update the details in any of the sections and click the Save button.
Delete a Project
To delete a project, you should have Delete project Permission.
Step 1 − Click Test Project → Test Project Management.
It will display all the available projects along with a delete icon in red at the right corner as shown in the following screenshot.
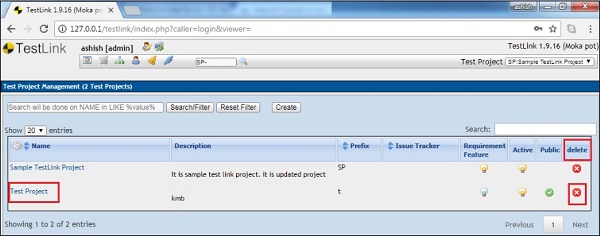
Step 2 − Click the Delete icon related to the respective project.
It will display a warning message for deletion along with an advice to deactivate rather than delete a project. Following screenshot displays the same.
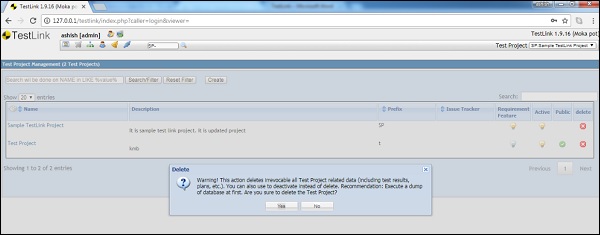
Step 3 − Click the Yes button. It will refresh the page and the project will be removed from the list.
TestLink - Inventory
In the Inventory, you can list all hardware details required in the project. To access this feature, you should enable it while creating a project or in the edit project page.
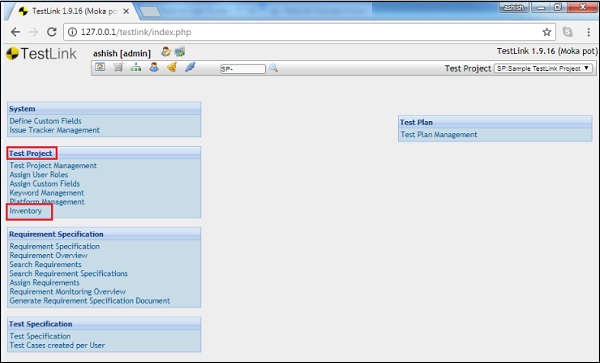
You can access the Inventory by navigating to Test Project → Inventory in Dashboard as shown in the below screenshot. Inventory offers three actions − Create, Edit and Delete.
Create a Record
Following are the steps to create a record in inventory −
Step 1 − Click Inventory on the Dashboard to visit the Inventory page.
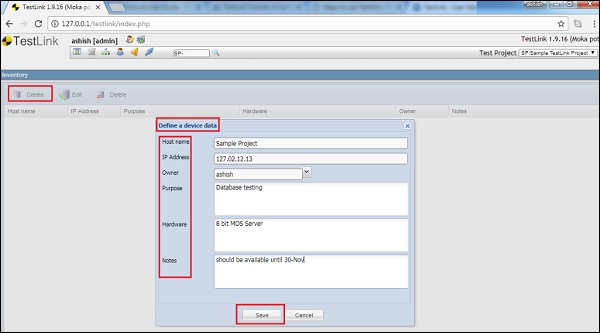
Step 2 − Click the Create link present at the left top corner of the screen. It will open a pop-up form to define a device data.
Step 3 − Enter the following details −
- Host Name
- IP Address
- Owner
- Purpose − It supports up to 2000 characters.
- Hardware − It supports up to 2000 characters.
- Notes − It supports up to 2000 characters.
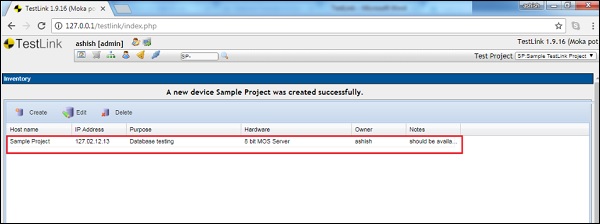
Step 4 − Click the Save button.
Once you click Save, a new row gets added along with all the entered details as shown in the following screenshot.
Edit a Record
To edit a record, a row must be selected.
Following are the steps to edit a record −
Step 1 − Click the Host Name to select a record to edit in the Inventory page.

Step 2 − Click the Edit link present at the top left corner of the screen. It will open a pop-up form to define a device data.
Step 3 − Update the following details −
- Host Name
- IP Address
- Owner
- Purpose − It supports up to 2000 characters.
- Hardware − It supports up to 2000 characters.
- Notes − It supports up to 2000 characters.
Step 4 − Click the Save button.
Step 5 − Once you click the Save button, all the details get updated and saved in the same row.
Delete a Record
Following are the steps to delete a record −
Step 1 − Click the Host Name to select a record to delete in the Inventory page.
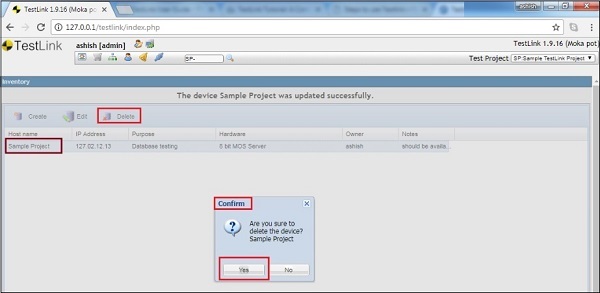
Step 2 − Click the Delete link present at the top left corner of the screen. It will ask for confirmation to delete.
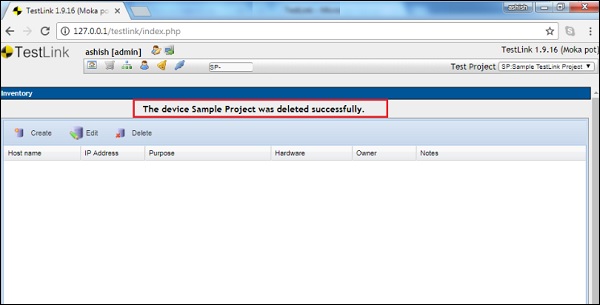
Step 3 − Click Yes to delete the record.
You will receive a successful deletion message and the row gets deleted as shown in the following screenshot.
TestLink - Test Plan
Test planning, is the most important activity to ensure that there is initially a list of tasks and milestones in a baseline plan to track the progress of the project. It also defines the size of the test effort.
It is the main document often called as the master test plan or a project test plan and is usually developed during the early phase of the project.
Create a Test Plan
To create a test plan, you should have Create Test Plan Permission.
Following are the steps to create a test plan −
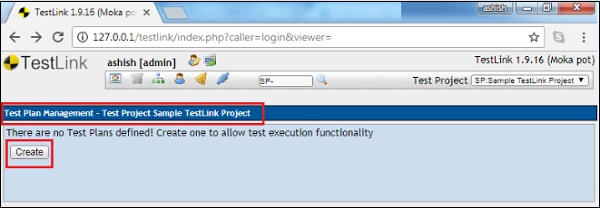
Step 1 − Go to Test Plan → Test Plan Management on the dashboard as shown in the following screenshot.
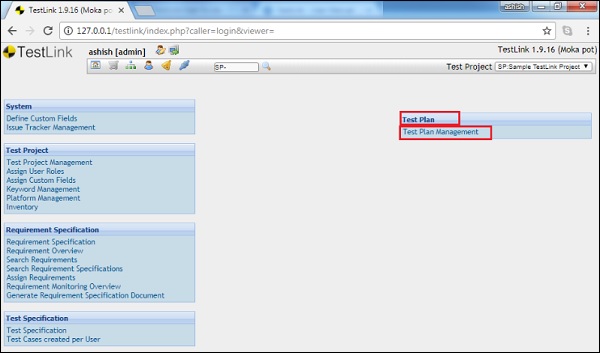
If any test plan is listed for the project, it displays the list of test plans. Otherwise, it displays a message to create a test plan to support the test execution functionality.
Step 2 − Click the Create button as shown in the following screenshot.
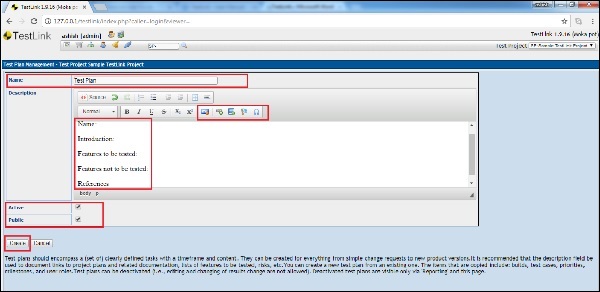
It displays the test plan create form.
Step 3 − Enter the following details in the form.
Name − It should be the name of the test plan.
Description − This field should contain the detailed information of a test plan. Generally, a test plan consists of the following information.
| Sr.No. | Parameter & Description |
|---|---|
| 1 |
Test plan identifier Unique identifying reference. |
| 2 |
Introduction A brief introduction about the project and of the document. |
| 3 |
Test items A test item is a software item that is the application under test. |
| 4 |
Features to be tested A feature that needs to tested on the testware. |
| 5 |
Features not to be tested Identify the features and the reasons for not including as part of testing. |
| 6 |
Approach Details about the overall approach to testing. |
| 7 |
Item pass/fail criteria Documented whether a software item has passed or failed its test. |
| 8 |
Test deliverables Deliverables that are part of the testing process, such as test plans, test specifications and test summary reports. |
| 9 |
Testing tasks All tasks for planning and executing the testing. |
| 10 |
Environmental needs Defining the environmental requirements such as hardware, software, OS, network configurations, and tools required. |
| 11 |
Responsibilities Lists the roles and responsibilities of the team members. |
| 12 |
Staffing and training needs Captures the actual staffing requirements and any specific skills and training requirements. |
| 13 |
Schedule States the important project delivery dates and key milestones. |
| 14 |
Risks and Mitigation High-level project risks and assumptions as well as a mitigating plan for each identified risk. |
| 15 |
Approvals Captures all approvers of the document, their titles and the sign-off date. |
Testlink supports images, table, links, special characters, etc. to make content rich description.
There are 2 checkboxes as can be seen in the following screenshot.
Active − It will activate the document after creation and you can utilize this document in test execution or any other activities as a reference.
Public − It allows other users to use this document. It will be visible to other users as well who are linked with this project. If this checkbox is unchecked, only the person who has created can use and view this document.
Step 4 − Click the Create button present at the bottom of the form.
Once you click Create, you can see the added Test Plan along with a few icons at the extreme right of screen as seen below.
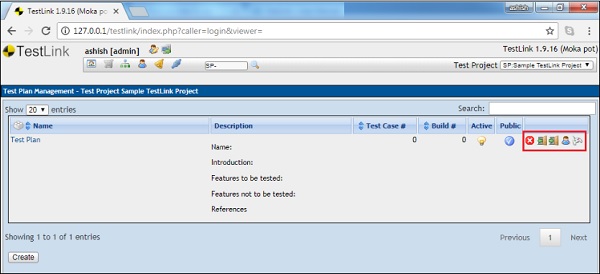
These icons are delete the test plan, export links to the test cases and platform, import links to the test cases and platform, Assign Role and test execution from left to right as displayed in below screenshot.
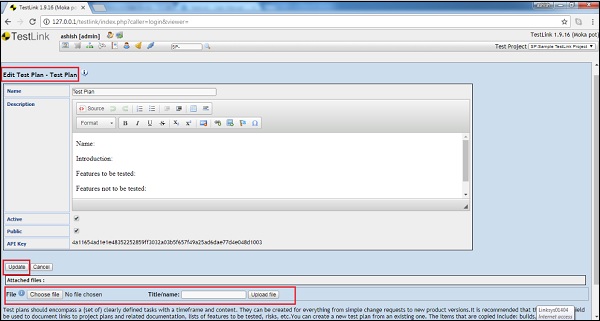
Edit a Test Plan
To edit a test plan, you should have Edit Permission.
Following are the steps to edit a test plan.
Step 1 − Click the Test Plan name to open the details. The name of the Test Plan is present in the first column and it is hyperlinked as shown in the following screenshot.
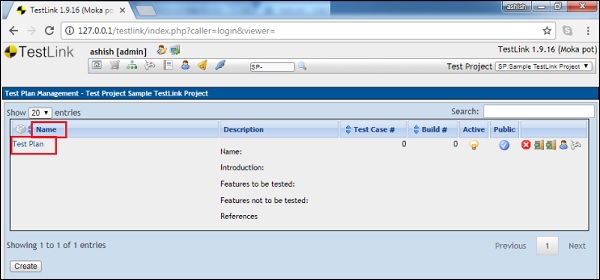
Step 2 − It opens the test plan details in edit mode. You can edit the name, description, and selection of Active and Public mode.
Step 3 − Attach a file in the test plan. This feature is available in the edit mode only. While creating the test plan, you can add images/tables into the description. However, attaching a file option is not available.
Step 4 − After updating the details, click Update to finish editing.
Following screenshot displays how to edit a test plan.
Delete a Test Plan
To delete a plan, you should have Delete Permission.
If a test plan is deleted, it deletes both the test plan and all of its corresponding data. Data includes test cases, results, etc.
Following are the steps to delete a build −
Step 1 − Go to the Test Plan Management → Test Plan from the dashboard.
Step 2 − Click the Delete icon corresponding to the row of the test plan that needs to be deleted as seen below.
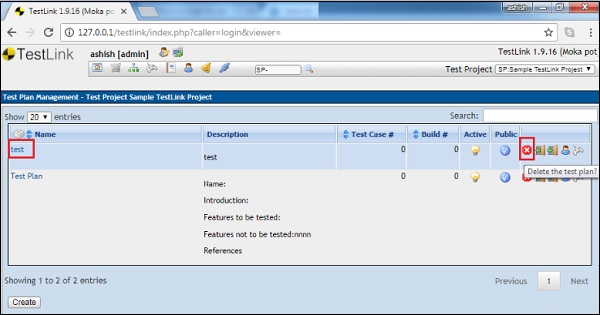
A pop-up will be displayed for a confirmation to delete.
Step 3 − Click Yes as shown below.

The page gets refreshed and the test plan will be deleted.
TestLink - Build Management
To achieve the objective of a Release, there could be multiple builds. Build is always associated with only one Release. A build fulfills the partial objective of Release with limited functionalities.
In TestLink, test execution is made up of both builds and test cases. If the build is not created for a project, you wont be able to perform test execution.
Create a Build
To create a Build, you should have Create Builds permission.
Following are the steps to create a Build −
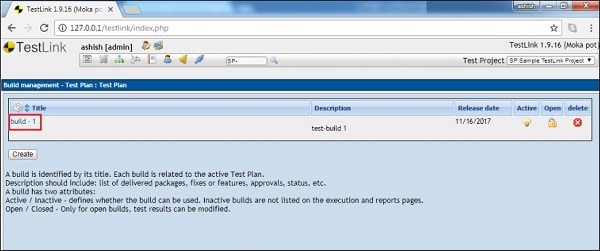
Step 1 − Go to Test Plan → Build/Releases from the dashboard.
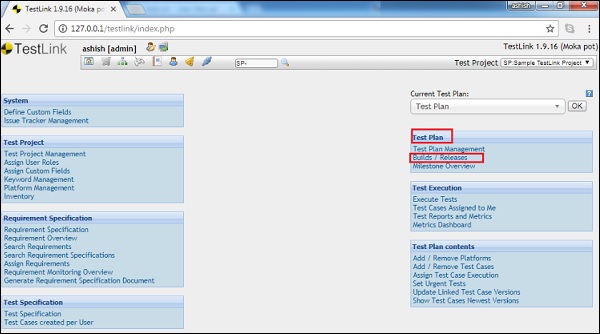
It opens the Build Management page along with the available builds.
Step 2 − Click the Create button as shown below.
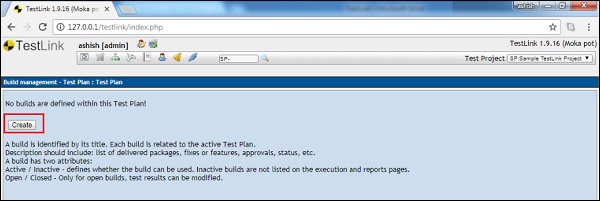
It opens the Create a new build form.
Step 3 − Enter the following fields in the form −
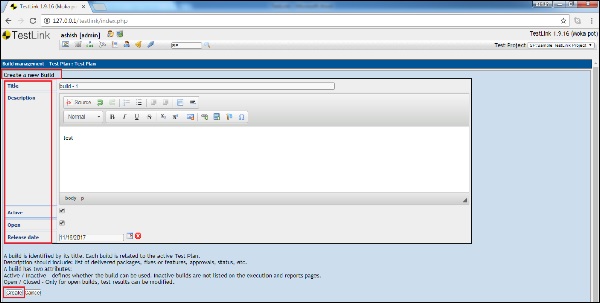
Title − A build is identified by its title. Each build is related to the active Test Plan.
Description − Description should include a list of delivered packages, fixes or features, approvals, status, etc.
Active − A build has two attributes - Active / Inactive defines whether the build can be used. Inactive builds are not listed on the execution and reports pages. Open / Closed Test results can be modified only for open builds. Ensure that the Build date must is within the Release Timeline.
Release Timeline − It should be a future date.
Step 4 − After entering all the details, click the Create button to add the build.
Edit a Build
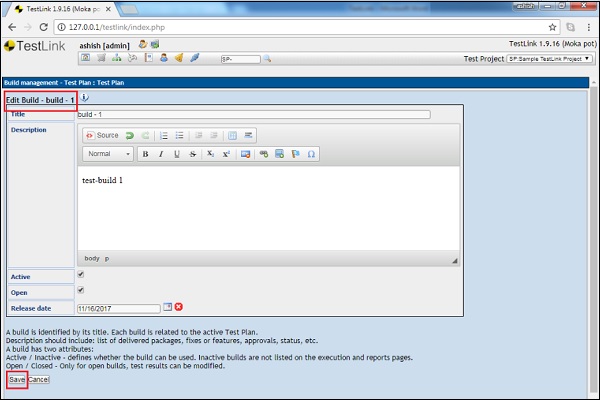
To edit a build, you should have Edit Builds permission. Following are the steps to edit a build −
Step 1 − Select a Build to edit and click the build title to open the details as shown below.
It opens the build details in the edit mode as shown in the following screenshot.
Step 2 − After updating the build details, click the Save button.
Delete a Build
To delete a Build, you should have Delete Builds permission.
Following are the steps to delete a build −
Step 1 − Go to the Test Plan Management − Builds/Releases from the dashboard.
Step 2 − Click the Delete icon corresponding to the row of the build that needs to be deleted as shown below.
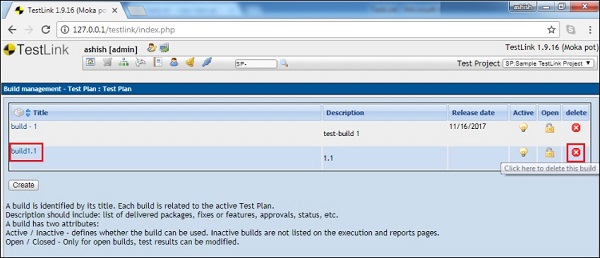
A pop-up will be displayed for confirmation to delete.
Step 3 − Click Yes as shown in the following screenshot.
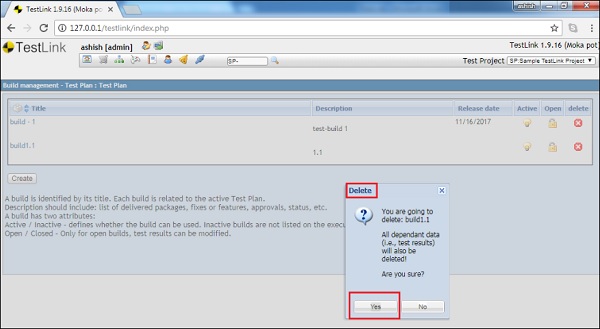
The page will be refreshed and the build will be deleted.
TestLink - Test Specification
Test Specification defines the structure of Test Design. Creation of Test Suits and Cases are done through test specification. However, one project can have only one test specification.
Test Specification can be accessed by navigating to Test Specification → Test Specification from the dashboard.
It is divided into two panels − Settings and Filter (Left side) and Test Project (right side).
You can create test suite/cases by working on the right side.
Filters
After navigating to test specification, Filters are displayed on the left side panel of the screen. Filters help out to narrow down the search and provide unique test cases.
Following are the steps to use the Filter functionality −
Step 1 − Go to the filter section on the left side of the screen.
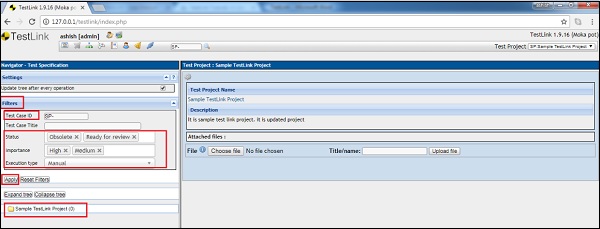
Step 2 − Provide different filter options as the following −
Test Case ID
Test Case Title
Status − You can select multiple choices at a time from the dropdown. It supports Any, Draft, Ready for Review, Review in Progress, Rework, Obsolete, Future and Final.
Importance − You can select multiple choices at a time from the dropdown. It supports Any, Help, Medium and Low.
Execution Type − It is a single selection dropdown. It supports Any, Manual or Automated option.
Step 3 − After selection, click the Apply button to display the result. Reset Filters button will remove all selection in default mode.
You can expand the tree to display the structure of the result.
Test Project
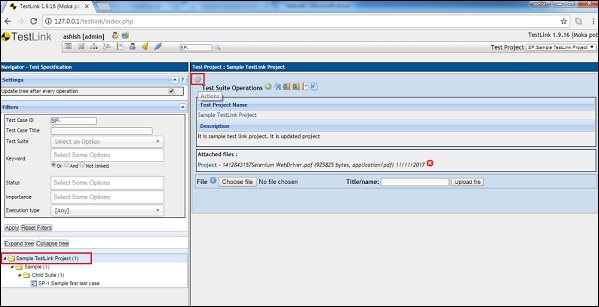
On the right side, Test Project is displayed.
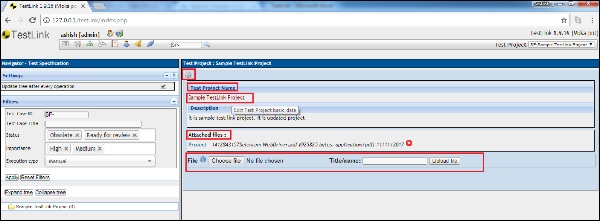
Test Project name is hyperlinked.
When you click the name, it displays the details of the project in edit form, where you can update the project details.
After the name, it displays Project Description and Attached files. It supports a feature to add an attachment. You can browse and upload the file to the project. It supports max 1048576 Bytes. You can upload up to a maximum size of the file. You can upload multiple files to the project.
At the top of the screen, there is a settings symbol  , called Actions
You can add test suites and test cases by clicking this symbol.
TestLink - Test Suite
Test suite is a container that has a set of tests which helps the testers in executing and reporting the test execution status. It can take any of the three states namely Active, In progress, and Completed.
A test case can be added to multiple test suites and test plans. After creating a test plan, test suites are created, which in turn can have any number of tests.
TestLink supports tree structure for test suites. There could be multiple sub-test suites under a test suite.
Create a Test Suite
To create a Test Suite, you should have Create Test Suites permission.
Following are the steps to create a Test Suite −
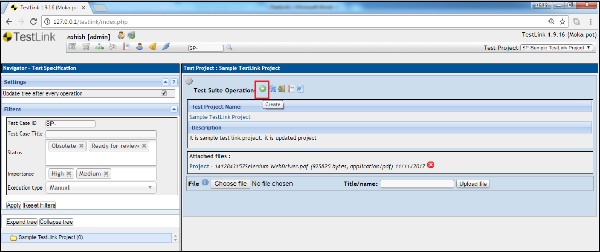
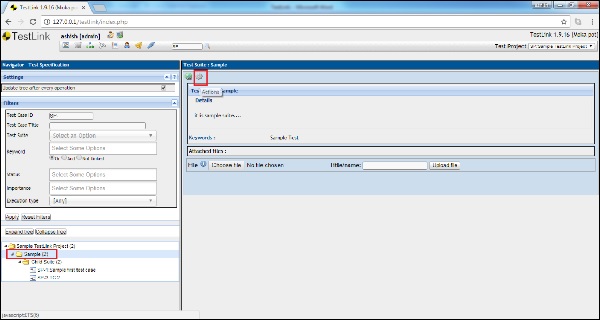
Step 1 − Navigate to Test Specification → Test Specification from the dashboard.
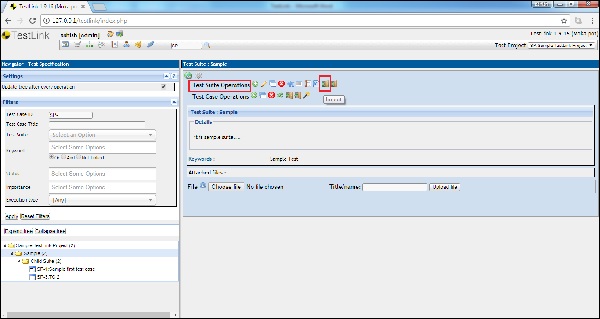
Step 2 − Click the Setting type icon known as Actions on this page, present on the right panel as shown in the following screenshot.

It will open Test Suite Operations.
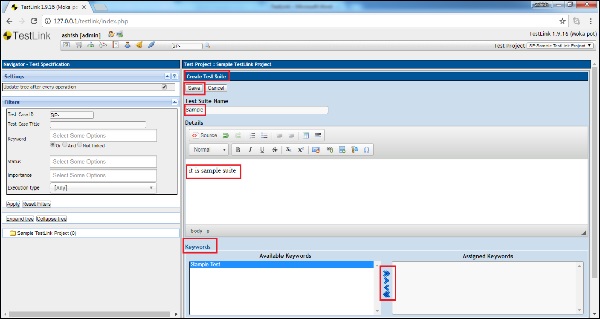
Step 3 − Click the + icon to create a new suite as shown below.
It opens the create test suite page.
Step 4 − Enter the following fields in the form −
Name of Test Suite
Details
Keywords − It displays all the available keywords. You can assign them based on relation.
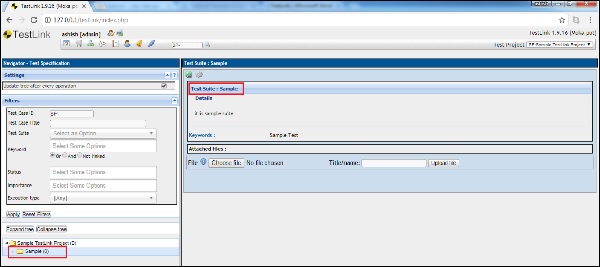
Step 5 − Click the Save button as displayed in the following screenshot.
Once you click Save, you will see the test suite in tree structure on the left side panel of the screen. The details are available on the right side of the screen.
Edit a Test Suite
To edit a test suite, you should have Edit Test Suite Permission.
Following are the steps to edit a test suite −
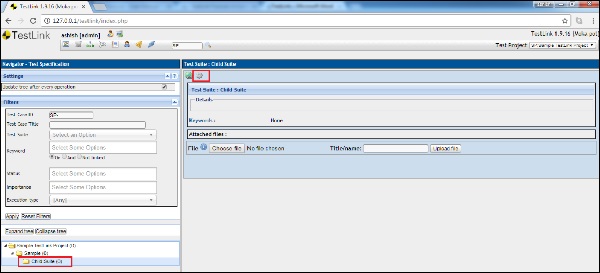
Step 1 − Select test suite from the tree structure on the left panel and click the settings known as actions to open the Test Suite Operations as shown below.
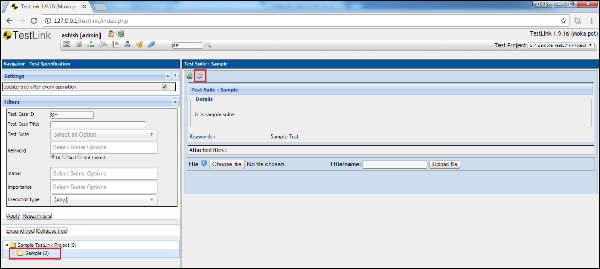
It displays Test Suite Operations.
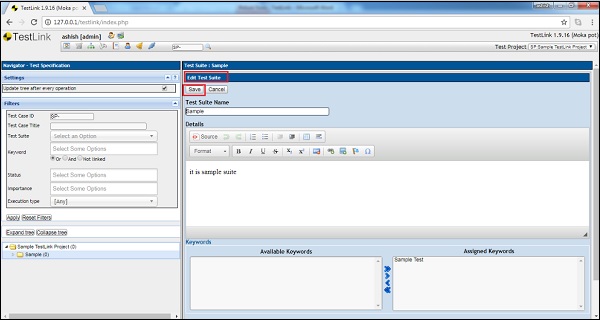
Step 2 − Click the Edit (pencil) icon as shown below.
It opens the Test Suite details on the edit page.
Step 3 − Edit Name, Details or any other fields and click the Save button to update the test suite.
Move/Copy a Test Suite
To move/copy a test suite, you should have Create/Edit Test Suite permission. This functionality allows creating a duplicate of a Test Suite or reordering of the structure.
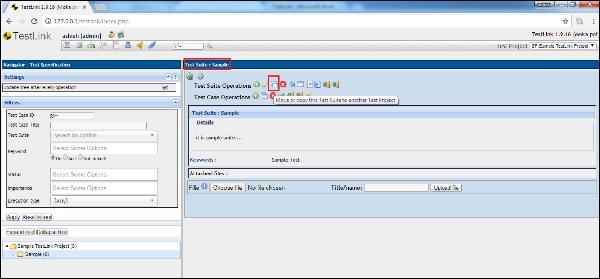
Step 1 − To copy/move a test suite into another project, select test suites those need to be copied/moved and click the setting icon known as Actions.
It will open Test suite Operations.
Step 2 − Click the Move or Copy symbol as shown in the following screenshot.
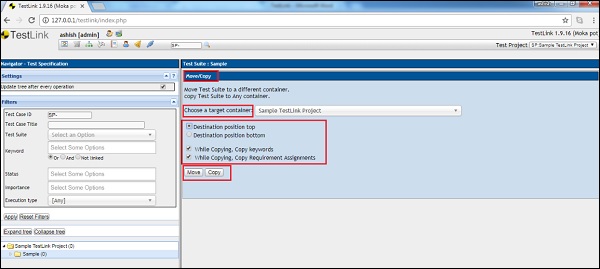
Step 3 − It opens the Move/Copy page where you can select the target container, destination position, and whether the keywords and requirements should be copied/moved to the target container.
Step 4 − After selection, click the Copy or Move button according to requirement as shown in the following screenshot. The Copy button will copy the test suite in both of the projects, while the move button will move the test suite from the current project to the target project.
Delete a Test Suite
To delete a Test Suite, you should have Delete Test Suite permission.
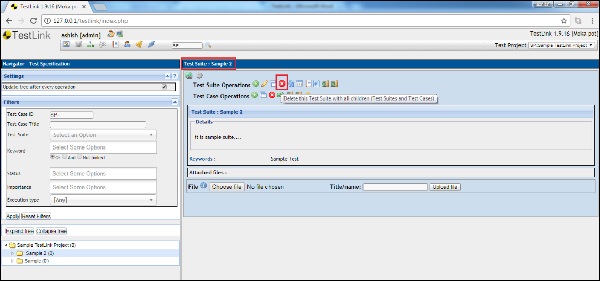
Step 1 − To delete a test suite, select test suites those need to be deleted and click the setting icon known as Actions. It will open Test suite Operations.
Step 2 − Click the delete symbol as shown below.
A confirmation message will be displayed to delete.
Step 3 − Click Yes to delete the test suite as shown in the following screenshot.
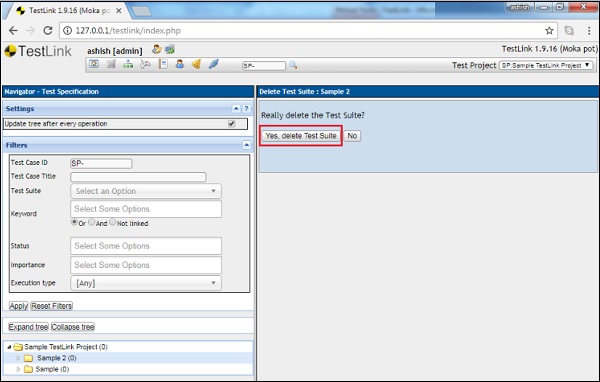
The page will be refreshed and the test suite will be deleted from the Tree structure on the left side panel of the screen.
A successful deletion message is also displayed as shown below.

TestLink - Test Cases
A test case is a document, which has a set of test data, preconditions, expected results and post-conditions, developed for a particular test scenario in order to verify compliance against a specific requirement.
Test case acts as the starting point for test execution, and after applying a set of input value the application has a definitive outcome and leaves the system at some endpoint, also known as execution post-condition.
Create a Test Case
To create a Test Case, you should have Create Test Cases permission.
Following are the steps to create a Test Case −
Step 1 − Navigate to Test Specification → Test Specification from the dashboard.
Step 2 − Select the test suite from the tree structure on the left side panel on the screen.
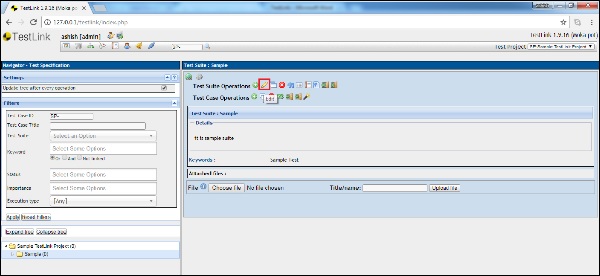
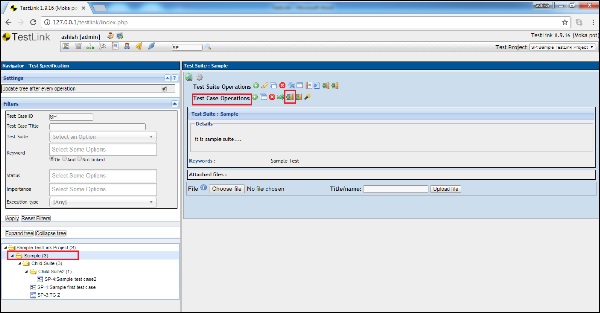
Step 3 − Click the Setting type icon known as Actions on this page, present on the right panel of the screen as shown below.
It will open Test Suite Operations as well as Test Case Operations.
Step 4 − Click the + icon of Test Case Operations to create a new test case as shown below.
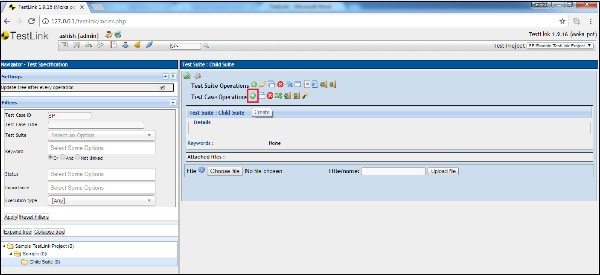
It opens the create test case page.
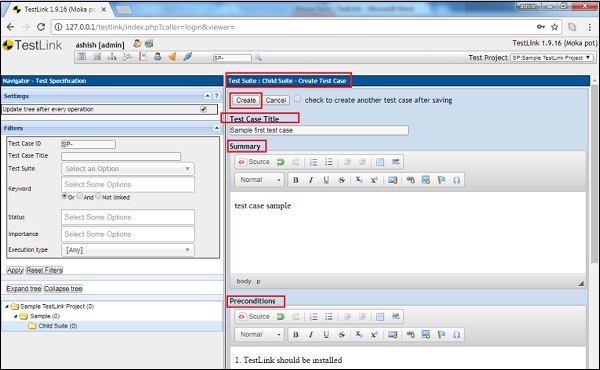
Step 5 − Enter the following fields in the form −
Name of Test Case
Summary
Pre-conditions
Select Status, Importance and Execution type
Enter the estimated execution type in minutes
Keywords − It displays all the available keywords. You can assign them based on the relation.
Step 6 − Click the Create button as displayed in the following screenshot.

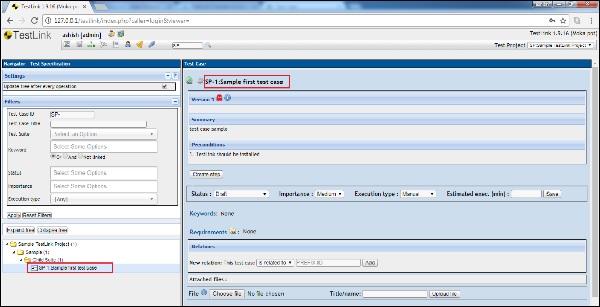
Once you click the Create button, you can see the test case in the tree structure on the left side panel as well as the details are available on the right side of the screen.
Edit a Test Case
To edit a test case, you should have Edit Test Case permission.
Following are the steps to edit a test case −
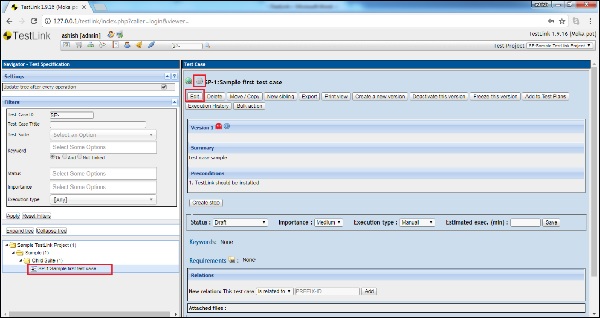
Step 1 − Select the test case from the tree structure on the left panel of the screen and click the settings known as actions to display all the available options.
Step 2 − Click the Edit button as shown below.
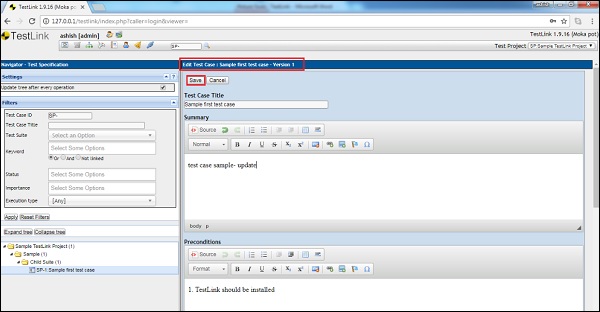
It opens the Test case details in the edit page.
Step 3 − You can edit the Name, Details or any other fields as shown below.
Step 4 − Click the Save button to update the test case.
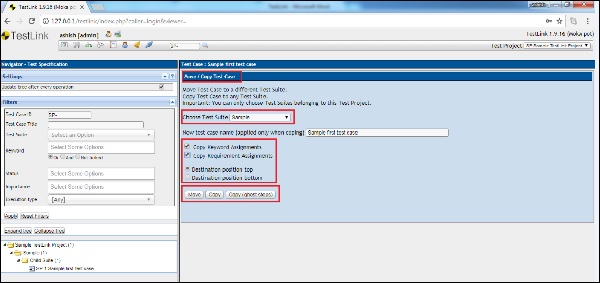
Move/Copy a Test Case
To Move/Copy a test case, you should have Create/Edit Test Suite permission. This functionality allows creating a duplicate test case or reordering of the structure.
Step 1 − To copy/move a test suite into another project, select the test cases that need to be copied/moved and click the setting icon known as Actions.
Step 2 − Click the Move/Copy button as shown below.
Step 3 − It opens the Move/Copy page. You can select the test suite to move or copy a new test case name and decide whether the keywords and requirements should be copied/moved to the target suite.
Step 4 − After selection, click the Copy or Move button according to requirement.
Step 5 − The Copy button will copy the test suite in both of the suites, while the move button will move the test case from the current suite to the target suite.
Following screenshot shows how to copy/move the test case to another suite −
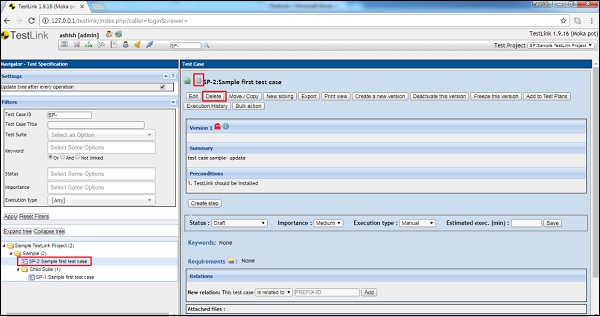
Delete a Test Case
To delete a Test Case, you should have Delete Test Case permission.
Step 1 − To delete a test case, select the test case from the suite that needs to be deleted and click the setting icon known as Actions.
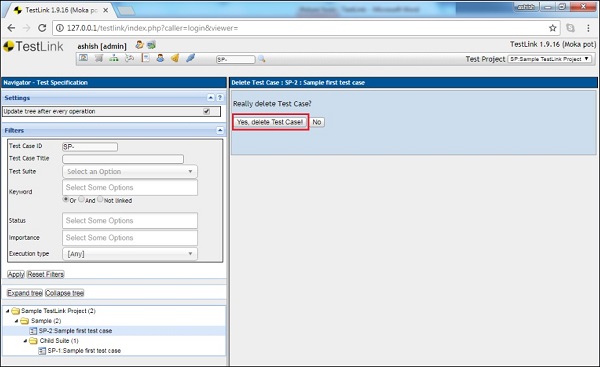
Step 2 − Once done, click the delete button as shown below.
A confirmation message will be displayed to delete. Click Yes to delete the test cases as shown in following screenshot.
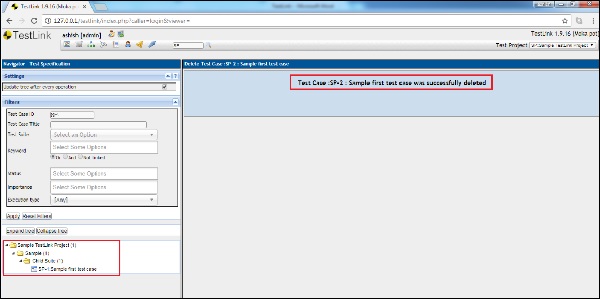
The page will be refreshed and the test case will be deleted from the tree structure on the left side panel of the screen.
A successful deletion message will be displayed as shown below.
Active Attribute
This feature is very useful when one test case has many versions. Active/Inactive attribute helps to recognize which test case should be used.
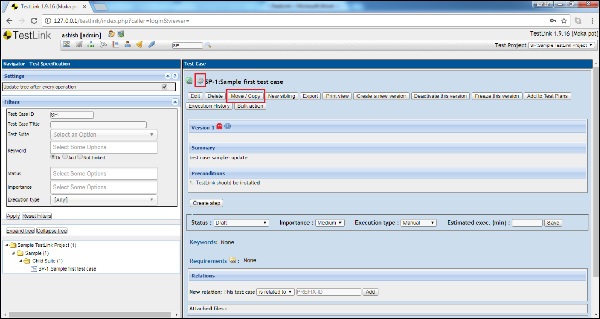
Step 1 − To create a new version of the test case, click the button Create a new version as shown below.
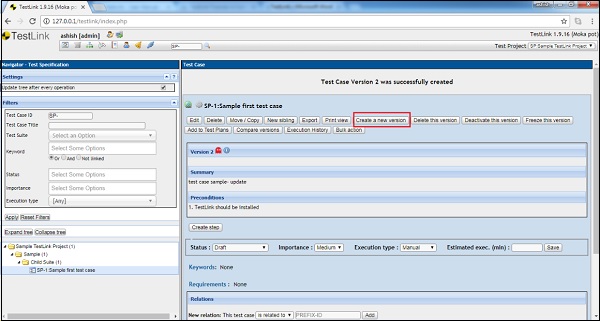
It will create a new version of test case and a successful message will be displayed as shown below.
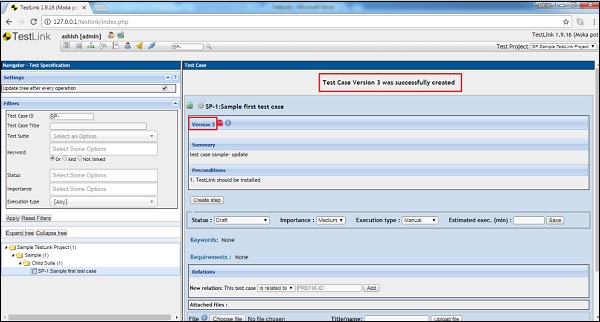
Once a new version is created, by default it is in Active mode.
It is recommended to deactivate the version of previous test case before creating a new version.
Deactivate Test Case Version is not available in "Add Test Cases to Test Plan". This can be useful for test designers. They can edit or change the Test Case Version and only when they decide it is completed, change the Status to ACTIVE for it to be available to be used in a Test Plan.
Step 2 − After clicking on Actions, the button - Deactivate this version is displayed.
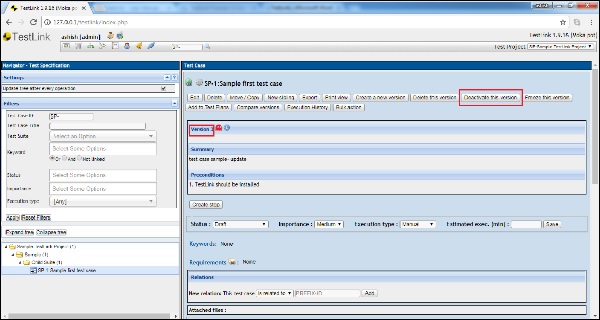
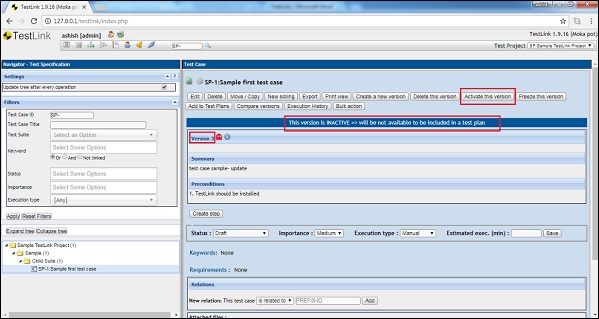
Step 3 − Once you click the button, a message that the test case version is deactivated is displayed and the button changes to Activate this version.
TestLink - Import Data
TestLink supports XML and CVS file to import data. It supports importing the data for test suites, test cases, requirements, test execution results, keywords, etc. However, for few cases it supports only XML and in few cases both XML and CVS.
Following table displays the functionalities that support import and those that support file format.
| Item | File Format | Import |
|---|---|---|
| Test Project | XML | Yes |
| Test Suite | XML | Yes |
| Test Case | XML, XLS | Yes |
| Keyword | CSV, XML | Yes |
| Requirement | CSV, XML | Yes |
| Results | XML | Yes |
| Platforms | XML | Yes |
| Custom Fields | XML | Yes |
Import Test Suite & Cases
Sample File − Following is the XML file with keywords that can be used to import test suites.
<testsuite name = "Child Suite2">
   <details>abc</details>
   <testcase name = "Sample test case2">
      <summary>test case sample- update</summary>
      <preconditions>1. TestLink should be installed</preconditions>

      <steps>
         <step>
            <step_number>1</step_number>
            <actions>Go to www.google.com</actions>
            <expectedresults>Google Home page should display</expectedresults>
         </step>
      </steps>

      <keywords>
         <keyword name = "Sample Test">
            <notes>abc</notes>
         </keyword>
      </keywords>
   </testcase>
</testsuite>
If you dont want to add the keyword, the keyword section can be removed from the XML file.
If you want to import multiple test cases, add <testcase> section multiple times with all sub-nodes.
If only test cases need to be imported in an already existing test suite, remove the <testsuite> tag and start the XML file with <testcase>.
Import a Test Suite
Step 1 − To import the test suite, go to Test Specifications → Test Specification from the dashboard.
Step 2 − Select the project and the folder on the left pane where you want to import the test suite.
OR
To import only test cases, select the nearest test suite folders where the test cases should be imported.
Step 3 − Click the Actions icon on the right pane as shown below.
It displays the test suite operations.
Step 4 − Click the Import icon as shown below −
OR
To upload only test cases, click the Import icon present in Test Case Operations (below the Test Suite Operations).
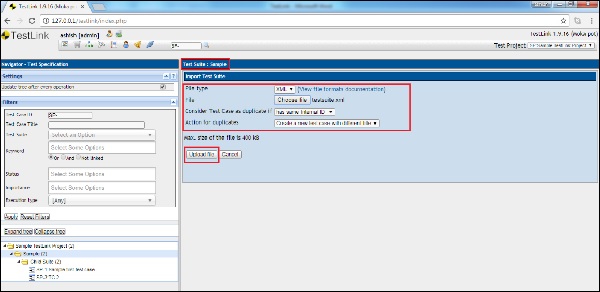
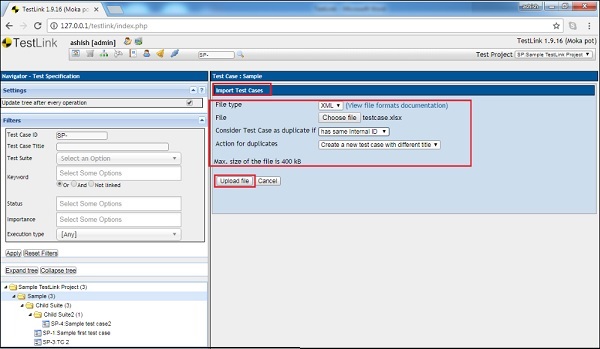
It opens the Import Test Suite page. By default, the file type is selected as XML.
Step 5 − Fill in the following details −
File − Select the XML file and upload it. Max size of the file should be 400KB.
Consider test case as duplicate if: Select the appropriate option from the list.
Action for duplicate: Select the appropriate option from the list.
Step 6 − Click the Upload file button as shown below −
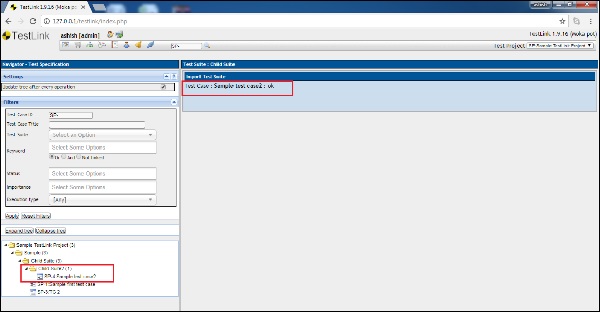
Step 7 − After import, a successful message is displayed as shown below.
Import Test Case Using XLS
Sample XLS file to import multiple test cases as the following −
| Name | Summary | Steps | Expected Result |
|---|---|---|---|
| Engine fast startup | Startup on 5 second | Too fast to write steps | Engine should start |
| Engine emergency stop | Engine stop due to panic button |
|
Engine should stop instantly |
The first row wont be imported. It is supposed to have a column description.
Step 1 − To import test cases, go to Test Specifications → Test Specification from the dashboard.
Step 2 − Select the nearest test suite folders, where the test cases should be imported.
Step 3 − Click the Actions icon on the right pane.
It displays Test Case Operations.
Step 4 − Click the Import icon as shown below.
It opens the Import test case page.
Step 5 − By default, the file type selected is XML. Change it to XLS/CSV and enter the following details −
File − Select the file and upload it. Max size of the file should be 400KB.
Consider test case as duplicate if − Select the appropriate option from the list.
Action for duplicate − Select the appropriate option from the list.
Step 6 − Click the Upload file button as shown below.
Import Requirements
TestLink supports XML and CSV file to import the requirements.
Sample XML file for Requirement would be as follows −
<requirements>
   <requirement>
      <docid>ENG-0001</docid>
      <title>Add a product</title>
      <description>ABC</description>
   </requirement>

   <requirement>
      <docid>ENG-0002</docid>
      <title>Add price </title>
      <description>Price</description>
   </requirement>
</requirements>
Sample CSV file for Requirement would be as follows −
ENG-0001,Add a product,ABC

ENG-0002,Add price,Price
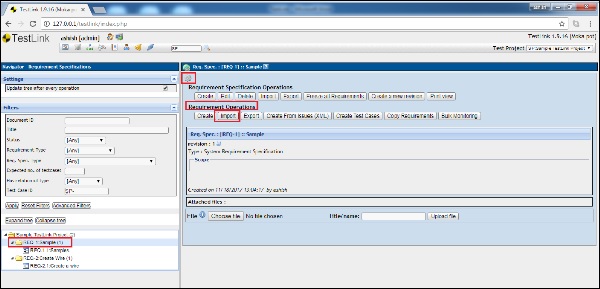
Step 1 − To import the requirements, go to Requirement Specification → Requirement Specification from the dashboard.
Step 2 − Select the Requirement Specification folder where the requirements should be imported on the left panel.
Step 3 − Click the Action icon present on the top of the right pane.
It displays the Requirement Operations page.
Step 4 − Click the Import button as shown below.
It displays the requirement import page.
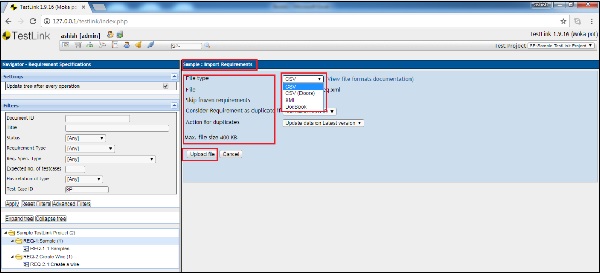
Step 5 − Enter the following details.
File Type − You can select CSV, XML or other forms of CSV and XML files as listed.
File − Upload the corresponding file.
Consider test case as duplicate if − Select the appropriate option from the list.
Action for duplicate − Select the appropriate option from the list.
Step 6 − Click the Upload file button as shown below.
After upload, it displays Import done message along with the imported details.
After upload, it displays Import done message along with the imported details.

Similarly, keywords, platforms, and results can be imported using supported file and the respective section accessing the dashboard.
TestLink - Export Data
TestLink supports XML and CSV file to export data. It supports exporting the data of test suites, test cases, requirements, test execution results, keywords, etc. However, for a few cases it supports only XML and in few cases both XML and CSV.
Following table displays the functionalities that support export and file format.
| Item | File Format | Export |
|---|---|---|
| Test Project | XML | Yes |
| Test Suite | XML | Yes |
| Test Case | XML | Yes |
| Keyword | CSV, XML | Yes |
| Requirement | CSV, XML | Yes |
| Platforms | XML | Yes |
| Custom Fields | XML | Yes |
Export Requirements
TestLink supports XML and CSV to export the requirement data.
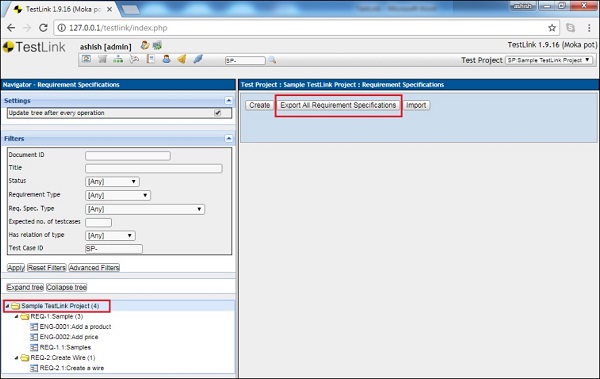
Step 1 − Go to Requirement Specification → Requirement Specification from the dashboard.
Step 2 − To export all the Requirement Specifications, select the parent folder from the left pane and click the Export All Requirement Specification button on the right side as follows.
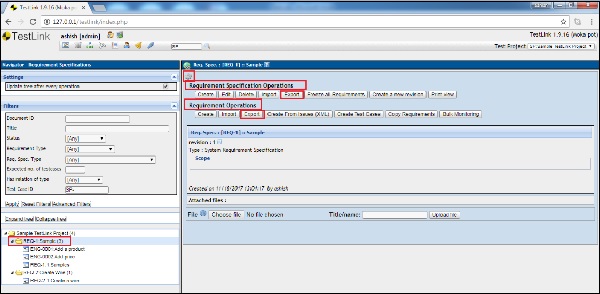
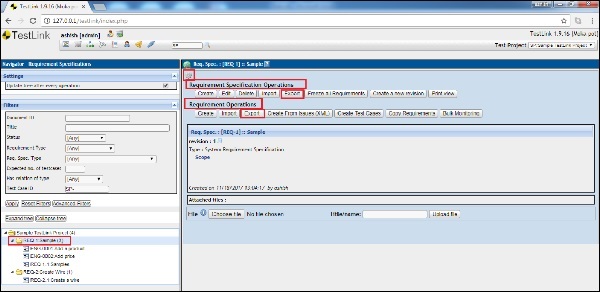
Step 3 − To export any one requirement specification with all the requirement details inside the folder, select the folder in the left pane and click the Actions icon on the right pane.
It displays the Requirement Specification Operation page.
Step 4 − Click Export.
OR
If you want to only export the Requirement Details but not Requirement Specification, click the Export button present under Requirement Operations (present below the Requirement Specification Operations section) as shown below.
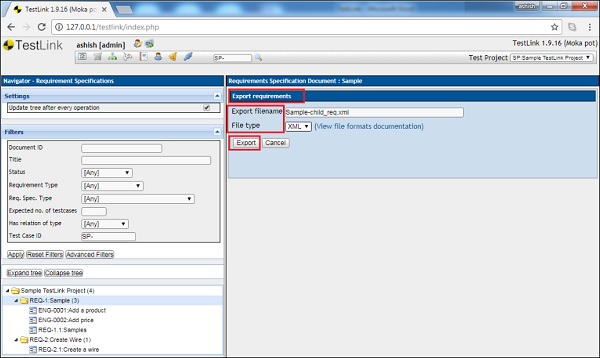
Once any of these Export buttons is clicked, it displays the Export Requirement page.
Step 5 − Export Filename can be edited. Choose the file type. Then, click the Export button as shown below.
It will download the corresponding files into the local drive that can be accessed by navigating the Downloads folder.
Export Test Suites & Cases
TestLink supports XML to export test suites and cases data.
Step 1 − Go to Test Specification → Test Specification from the dashboard.
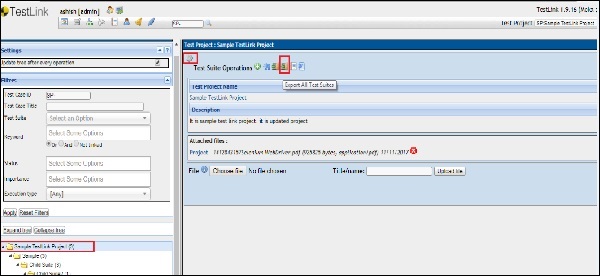
Step 2 − To export all the test suites, select the parent folder from the left pane and click the Action icon on the right pane.
It opens the test suite operations page.
Step 3 − Click Export All Test Suites icon on the right side as shown below.
Step 4 − To export any one test suite with all the test cases inside the folder, select the folder on the left pane and click the Actions icon on the right pane.
It displays Test Suite Operations page.
Step 5 − Click Export.
OR
If you want to only export Test Cases but not Test Suites, click the Export button present under Test Case Operations as shown below.

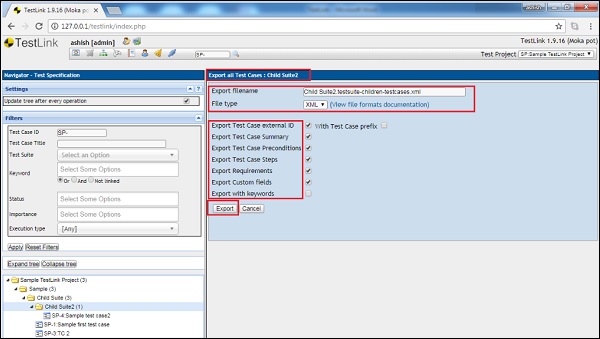
Once any of these Export buttons is clicked, it displays the Export Test Suite/Case page.
Step 6 − The Export Filename can be edited. Choose the file type.
You can select and narrow down the exported data by selecting the checkbox for available details.
Step 7 − Click the Export button as shown below.
It will download the corresponding files into the local drive that can be accessed by navigating the Downloads folder.
TestLink - Test Plan Relation
Test Plan contains a set of test cases those are in scope. Before starting the execution, a test plan must have test sets. A test case cannot be executed before assigning it to any test plan.
Add Test Cases to Plan
Following are the steps to add test cases to a test plan.
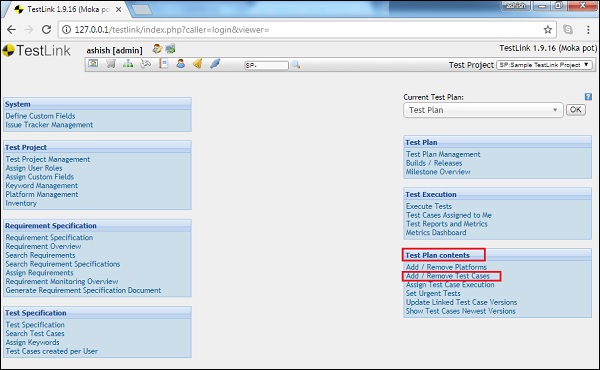
Step 1 − Go to Test Plan contents → Add/Remove test cases from the Dashboard as shown below.

It opens the Add/Remove Test Cases page.
Step 2 − Search the folder using filter on the left panel and click the test case folder.
It displays Test Plan − Add Test cases to Test Plan page on the right panel.
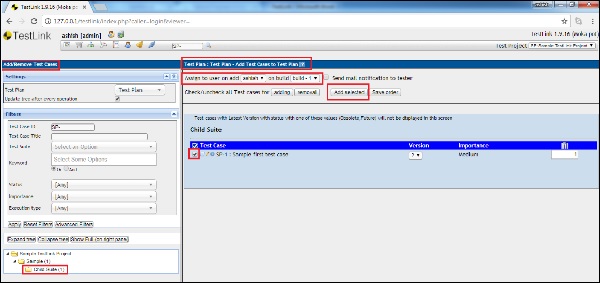
Step 3 − Check all the available test cases to add to the test plan.
Step 4 − Select from Assign dropdown to assign this to a person.
Step 5 − Select a build as well.
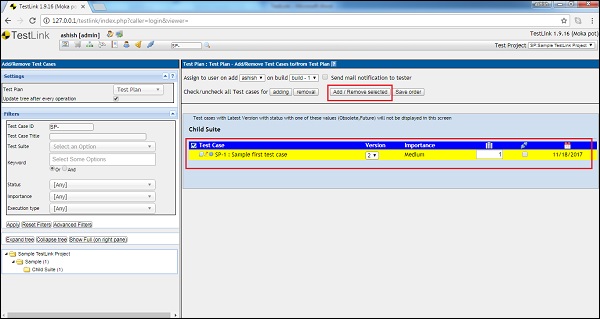
Step 6 − Click the Add Selected button to add the test case to a test plan.
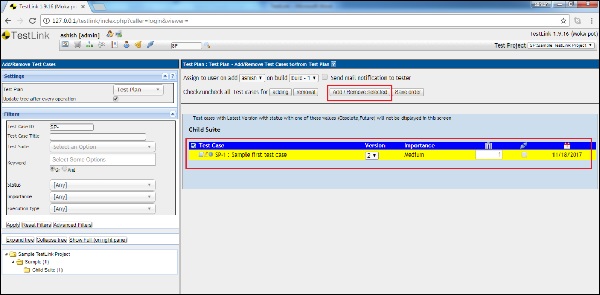
After clicking Add selected, the color of the test case gets changed.
Step 7 − The Add selected button changes to Add/Remove selected as shown in the following screenshot.
Remove a Test Case from a Plan
To remove test cases from a test plan the following steps should be performed −
Step 1 − Go to Test Plan contents → Add/ Remove test cases from the Dashboard as shown below.
It opens the Add/Remove Test Cases page.
Step 2 − Search the folder using a filter on the left panel and click the test case folder.
It displays Test Plan − Add Test cases to Test Plan page on the right panel.
Step 3 − Select the test cases that need to be removed.
Step 4 − Click the Add/Remove selected button as shown below.
TestLink - Search
Search functionality is used to narrow down the displayed result. TestLink supports a wide range of search functionalities with a lot of fields to find out a specific result.
TestLink supports the following search functionalities −
- Search Requirements
- Search Requirements Specification
- Search Test Cases
- Common Search Text Box
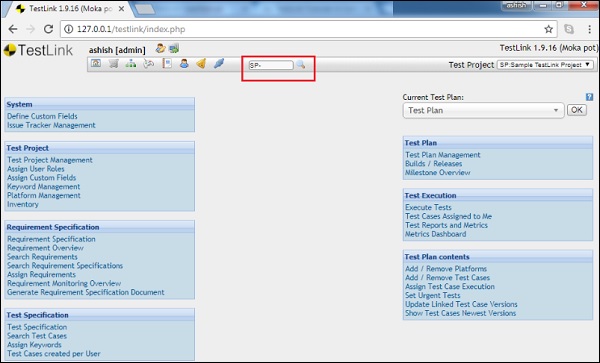
Common Search Text Box
As seen in the following screenshot, at the top, there is a search text box used to find the specific test case. Usually a test case ID starts with SP-<index>. You can enter numbers to find a specific test case directly. This text box is present across all the pages.
Search Requirements
In the requirement specification section, TestLink supports the Search Requirements functionality.
Following steps should be performed to use Search Requirements −
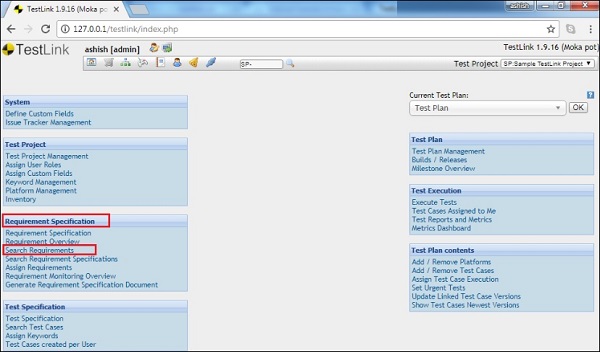
Step 1 − Go to Requirement Specifications → Search Requirements as shown below.
It opens the Requirement Search page.
The search is not case sensitive. Result includes just requirements from the actual Test Project.
Step 2 − Write the searched string to an appropriate box. Leave unused fields as blank.
Step 3 − Choose the required keyword or leave the value as 'Not applied'.
It has the following list of supported fields to find the requirement −
Req. Doc ID, Version, Title, Scope, Status, Type, Expected no. of test cases, Has relation of type, Creation Date from, Creation Date to, Modification Date from, Modification date to, Test Case ID and Log Message.
Step 4 − Click the 'Find' button.
All fulfilling requirements are shown. You can modify requirements via 'Title' link.
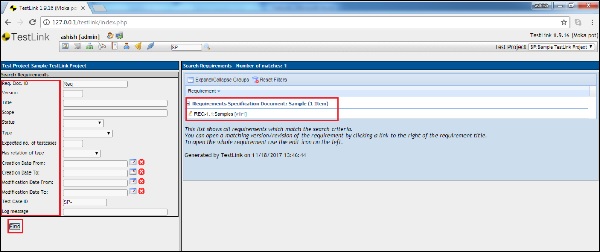
Search Requirements Specifications
In the requirement specification section, TestLink supports the Search Requirement Specifications functionality.
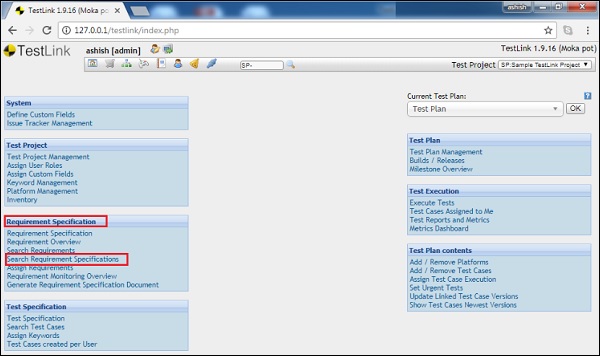
Following steps should be performed to use Search Requirement Specifications −
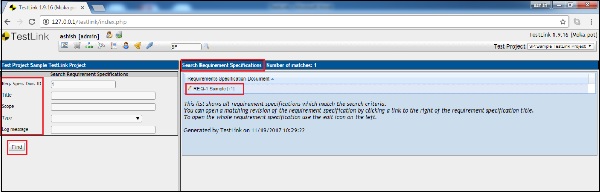
Step 1 − Go to Requirement Specifications → Search Requirement Specifications as shown below.
It opens the Requirement Specifications Search page. The search is not case sensitive. Result includes just the requirement specifications from the actual Test Project.
Step 2 − Write the searched string to an appropriate box. Leave the unused fields in the form as blank.
Step 3 − Choose the required keyword or leave the value as 'Not applied'.
It has the following list of supported fields to find the requirement specifications −
Req. Doc ID, Title, Scope, Type and Log Message.
Step 4 − Click the 'Find' button.
All fulfilling requirement specifications are shown. You can modify requirements via 'Title' link.
Search Test Cases
In the Test specification section, TestLink supports the Search Test Cases functionality.
Following are the steps to be performed to use Search Test Cases.
Step 1 − Go to Test Specification → Search Test Cases as shown in the following screenshot.
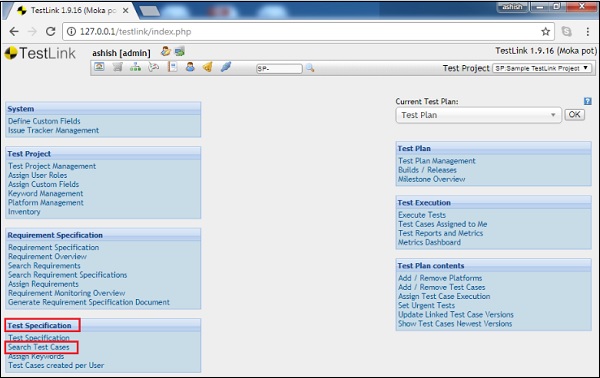
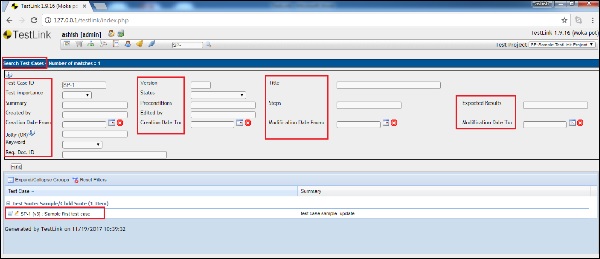
It opens the Search Test Cases page. The search is not case sensitive. Result includes just test cases from the actual Test Project.
Step 2 − Write the searched string to an appropriate box. Leave the unused fields in the form as blank.
Step 3 − Choose the required keyword or leave the value as 'Not applied'.
It has the following list of supported fields to find the test case −
Test case ID, Version, Title, Test Importance, Status, Summary, Pre-conditions, Steps, Expected Result, Created by, Edited by, Modified date from, Modification date to, Jolly or Keyword and Req. Doc ID.
Step 4 − Click the 'Find' button.
All fulfilling test cases are shown. You can modify test cases via 'Title' link.
TestLink - Keywords
Keywords are used to categorize test cases. Keywords are ideal for filtering. It is not categorizing and placing the same test cases at one place; keywords help to bring test cases from different folders with the same scope together using the same keywords. For Example − Regression Test Cases, Smoke Test Cases, Solaris and Change Request, etc.
Create Keywords
To create keywords, you should have create keyword permission.
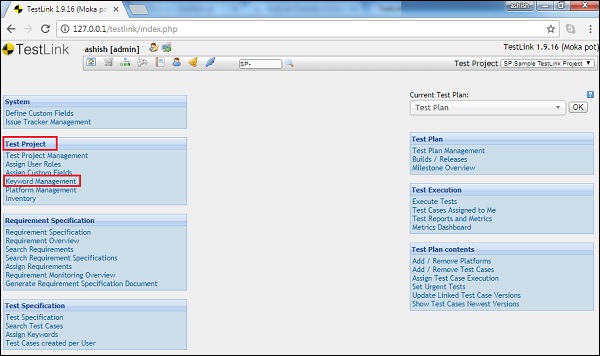
Step 1 − Go to Test Project → Keyword Management from the dashboard as shown below.
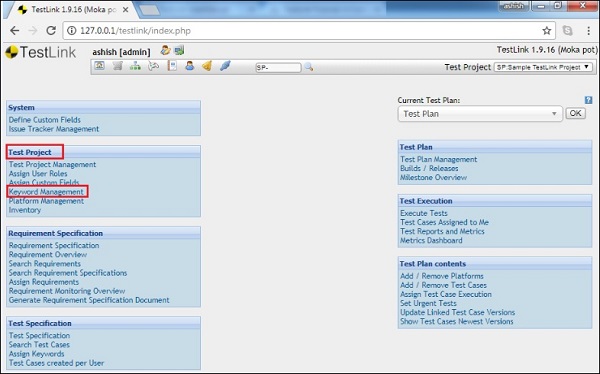
It opens the Keyword Management page along with the Create Keyword button.
Step 2 − Click the Create Keyword button as shown below.
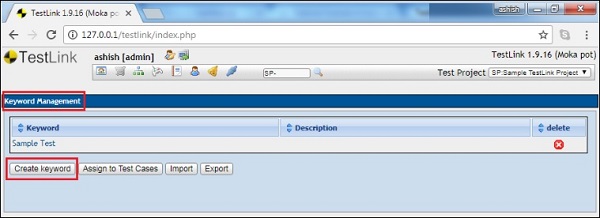
It opens the Create Keyword page.
Step 3 − Enter the Keyword and Description.
Step 4 − Click the Save button a shown below.

List of saved keywords gets displayed at Keyword Management page.
Assign Keywords
Following are the steps to assign keywords −
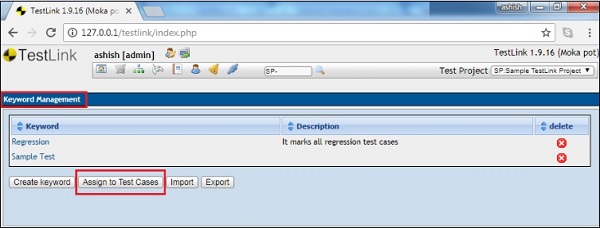
Step 1 − Go to Test Project → Keyword Management from the dashboard as shown below.
It opens the Keyword Management page along with the Assign to Test Cases button.
Step 2 − Click the Assign to Test Cases button as shown below.
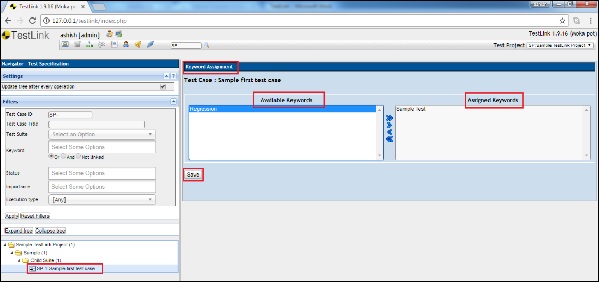
Step 3 − Select a Test Suite or Test Case on the tree view on the left.
The topmost box that shows up on the right hand side will allow you to assign the available keywords to every single test case.
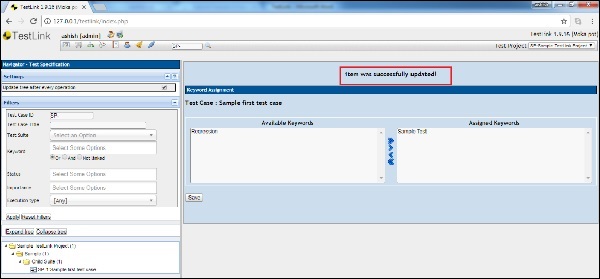
Step 4 − After selection, click the Save button as shown in the following screenshot.
Finally, you will get a successful message that the item is updated.
TestLink - Test Specification Document
You can generate the Test Specification as a document.
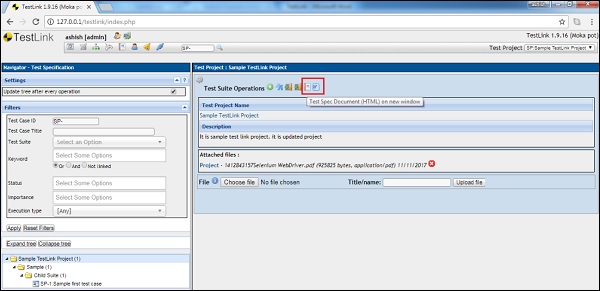
Step 1 − To generate a Test Specification, go to Test Specification → Test Specification from the dashboard.
It opens the Test Specification page.
Step 2 − Select the folder to generate a test specification document, either the root project folder or the suite folder on the left side.
Step 3 − Click the Settings icon known as Action present on the right side panel as shown below.
It opens the Test Suite Operations page.
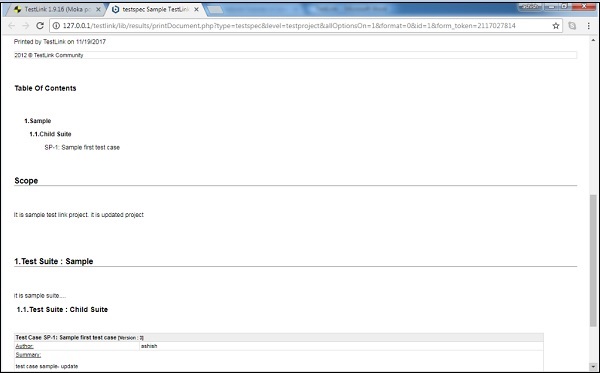
You can see two options − Test Spec document (HTML) on the new window and another option Download Test spec document (Pseudo word) as shown below.
After clicking the option, you will get the Test specification details as follows.
TestLink - Create Requirement
Requirements are high-level descriptions about particular system services, constraints, or a detailed specification generated during the requirements gathering process.
TestLink supports Requirement Specification where you can create a Requirement and take various actions such as Edit, Delete, or Freeze the version, etc.
Create a Requirement
To create a requirement, you should have the Create Requirement permission.
Following are the steps to create a requirement −
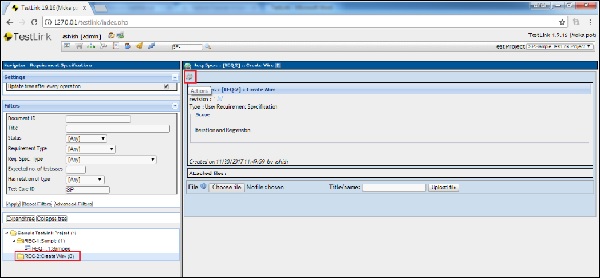
Step 1 − Go to Requirement Specification → Requirement Specification from the dashboard as shown below.

Step 2 − On the left side, Search the folder structure where you want to add a requirement.
Step 3 − Click the Create button present on the right side panel as shown below.
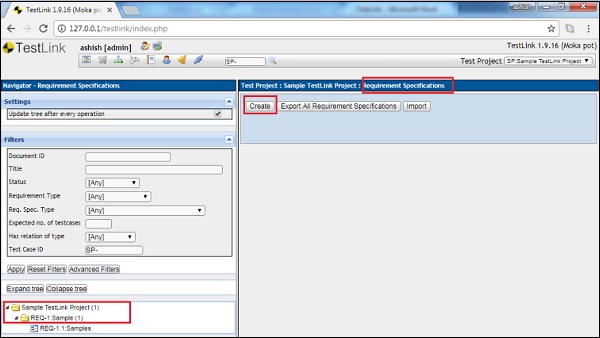
It opens the create requirement page where you can specify the Document ID, Title, Scope and the type of requirement.
Step 4 − Click the Save button to add the requirement in the list as shown below.
It adds the parent folder as Requirement Specification.
Step 5 − Click the parent folder and then click the Settings icon known as Actions displayed on the right side panel as shown in the following screenshot.
It shows Requirement Operations page.
Step 6 − Click the Create button as displayed in the following screenshot.
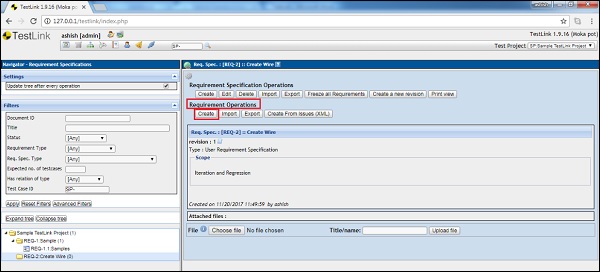
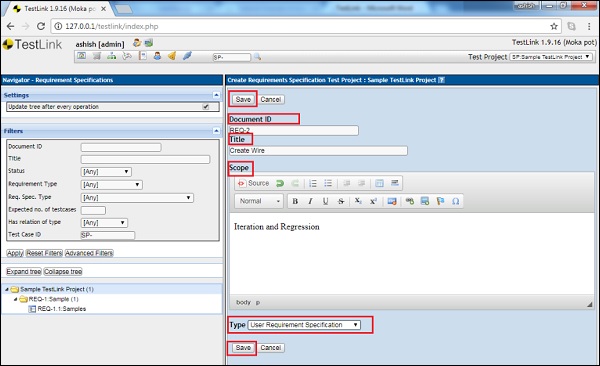
It displays the Create Requirement form.
Step 7 − Enter the following fields before clicking the Save button.
Document ID − Unique ID to identify.
Title − A unique title and must be within 100 characters.
Scope − It is text into HTML format.
Status − It can have value as Valid, Draft, Review, Rework, Finish, implemented, Not testable and Obsolete.
Type − It could have a value as Informational, Feature, Use Case, User Interface, Non-Functional, Constraint or System Function.
Number of test cases needed − An estimated test case needs to cover the requirement.
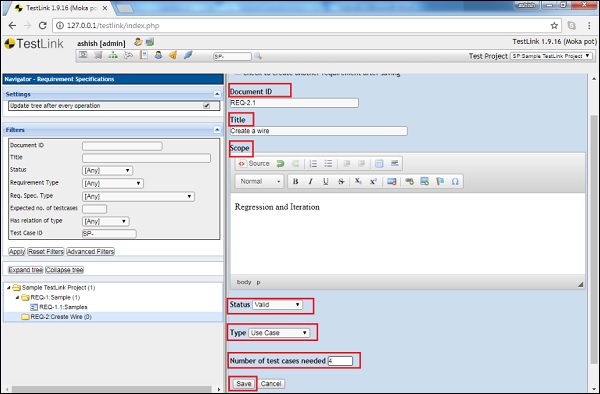
After clicking Save, the requirement gets added and is displayed with additional fields.
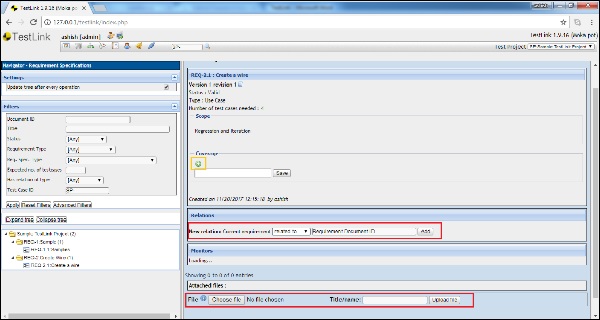
Step 8 − Add Coverage by clicking the + icon.
Step 9 − Add the relation of the current requirement with any existing requirement as parent, child, related to, blocks or depends on.
In addition, you can attach a file as well for more details about requirement as shown in the following screenshot.
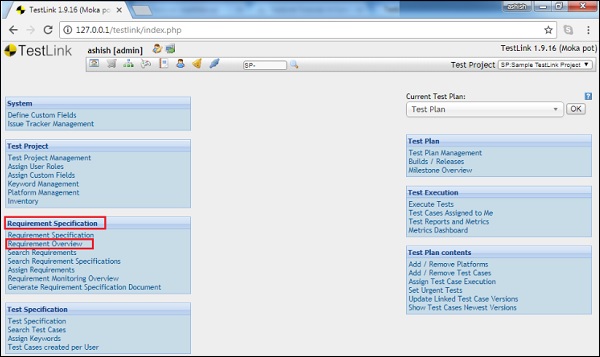
TestLink - Requirement Overview
Requirement Overview is one of the useful features of TestLink. You can see all the listed requirements at one place along with all the available versions in case there is more than one.
Go to Requirement Specification → Requirement Overview from the dashboard as shown below.
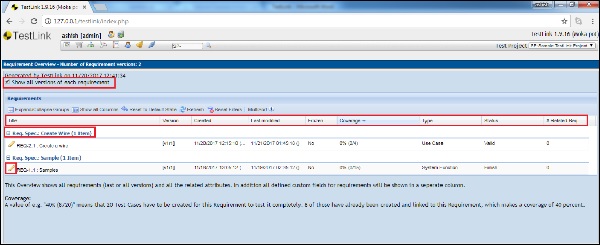
It displays the Requirement Overview page with the list of requirements.
This Overview shows all the requirements (last or all versions) and all the related attributes. In addition, all the defined custom fields for requirements is displayed in a separate column.
The show all versions will be displayed if you check the checkbox at top Show all versions of each requirement.
Coverage − A value of e.g. "20% (4/20)" means that 20 Test Cases have to be created for this Requirement to test it completely. 4 of those have already been created and linked to this Requirement, which makes the coverage of 20 percent.
Following screenshot displays the Requirement Overview page.
By clicking the pencil icon, you can edit the requirement details as shown in the above screenshot. It opens a new window along with the requirement detail in edit mode.
TestLink - Assign Test Execution
TestLink supports the feature to assign Test Case for execution to different users. Assigning test cases affects both the execution and reports. On the execution page, you can sort the executable Test Cases to view whom they are assigned to. In the reports section, you can see the remaining test cases grouped by the testers name. If there are no test cases assigned to a tester, it defaults to none. A Tester can also see the metrics of his/her own executed tests.
Assign Test Cases
Following are the steps to assign a test case −
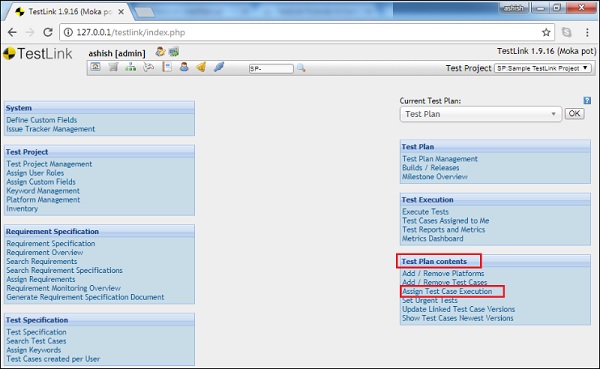
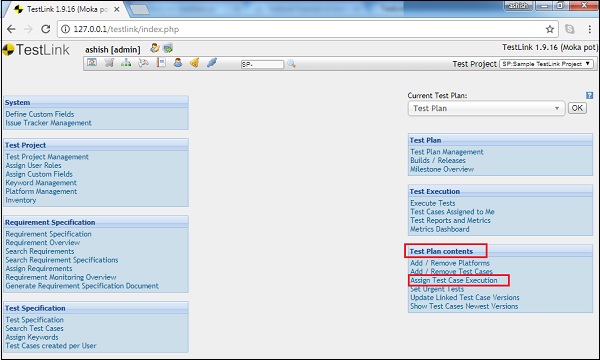
Step 1 − Go to Test Plan contents → Assign test cases execution from the dashboard as shown below.
Step 2 − On the left side of the screen, search the test suite and click it. It displays the details and test cases present on the right side.
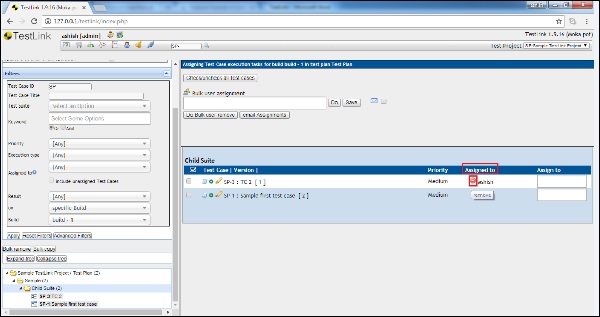
Step 3 − Select the test case to be assigned. Verify if any existing user is present. The Assigned To field displays the user name if it is assigned.
Step 4 − Go to Assign text box and start typing the name of the user. It will display the list of matched users, from which you can select the user name.
Step 5 − Click the Save button present at the top of the screen.
After assigning the test case, the user name appears in the Assigned to section along with a red symbol.
Step 6 − If the assigned user needs to be removed, simply click the red symbol  , it will remove the assigned user.
TestLink - Bulk User Assignment
Bulk user assignment is almost similar to a normal assignment. The only difference being multiple users can be assigned at a time to a single as well as multiple test cases.
Following are the steps for bulk user assignment −
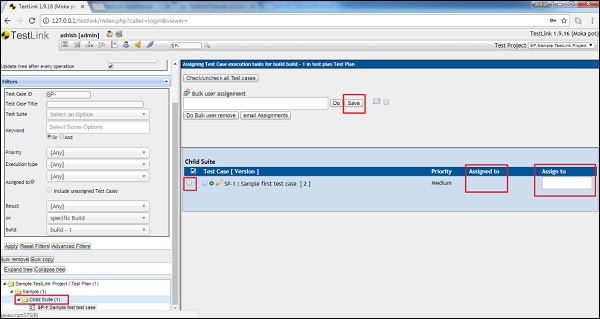
Step 1 − Go to Test Plan contents → Assign test cases execution from the dashboard as shown in the following screenshot.
Step 2 − On the left side search the test suite and click it. It displays the details and test cases present on the right side panel.
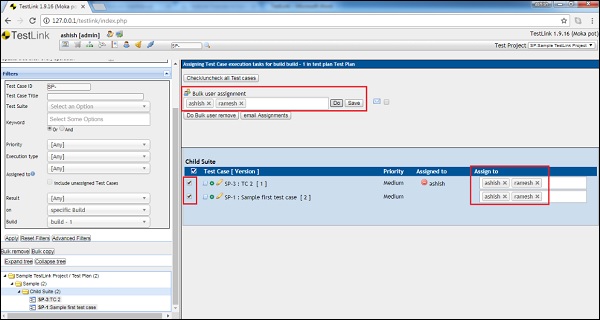
Step 3 − Select the multiple test cases to be assigned to multiple users. Verify if any existing user is present. The Assigned To field displays the user name if it is assigned.
Step 4 − Go to Bulk User Assignment test box at the top. Start typing the name of the user. It will display the list of matched users from where the user name can be selected. Add multiple users in the text box.
Step 5 − Click the Do button present on the right side of the text box.
It displays the users name in the Assign To field of each selected test cases.
Step 6 − Click the Save button to assign the test cases to these users.
After assigning the test case, the user name appears in the Assigned to section along with a red symbol.
Step 7 − If the assigned user needs to be removed , simply click the red symbol, it will remove the assigned user.
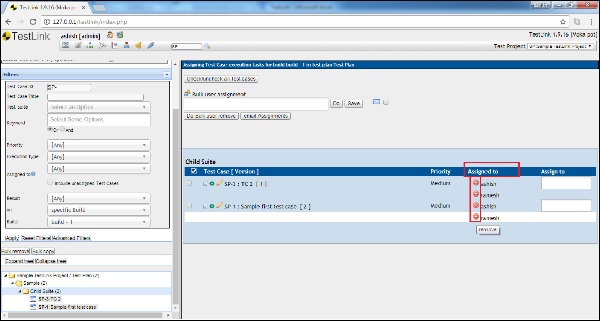
Bulk User Removal
For bulk user removal, first select the test cases from which the assigned users need to be removed.
Click Do bulk user remove button present on the top of the screen.
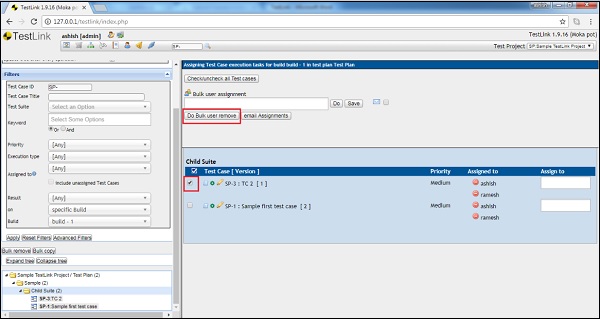
It removes the assigned user of that test case.
TestLink - Platforms
Platform means a place or configuration of system where a test case has to be executed. A platform can be different web browsers such as Chrome, Safari, IE, Mozilla, etc. or different operating systems, hardware devices or configurations.
The chosen platforms should be associated with Test Plan where test cases are executed. A test project might need several platforms to test before releasing a product. Test cases must be connected with Platforms as well as Test Plans too.
Add Platform
To use the Platform feature, it should be created first under Platform Management. You should have Platform Management right to create a platform.
Following are the steps to create a platform.
Step 1 − Go to Test Project → Platform Management from the dashboard as shown below.
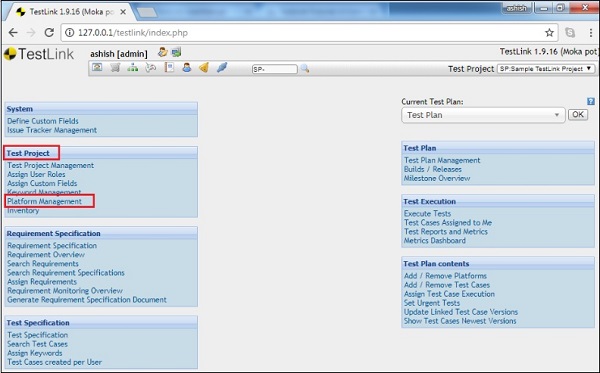
It displays the Platform Management page.
Step 2 − Click the Create Platform button as shown below.
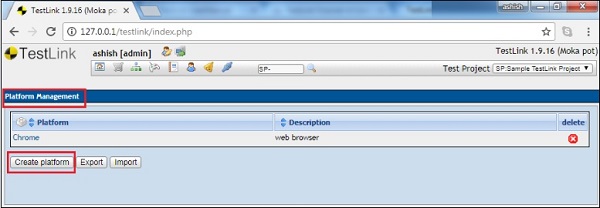
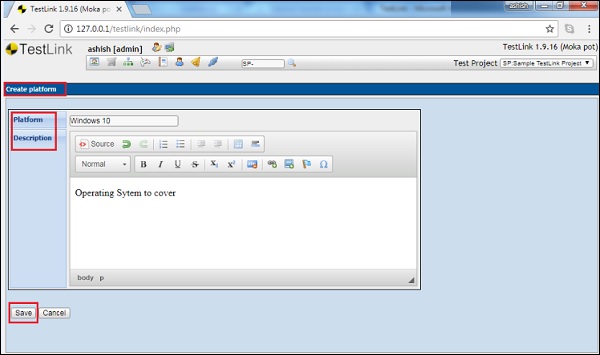
It opens the Create platform form.
Step 3 − Enter the Platform Name and Description.
Step 4 − Click the Save button.
After clicking Save, the platform gets listed in the Platform Management.
Delete a Platform
Step 1 − Navigate to Test Project → Platform Management. It displays a list of all available platforms along with the delete symbol in red as X.
Step 2 − Click the Delete symbol as shown below.

A delete confirmation pop-up displays.
Step 3 − Click the Yes button.

The page gets refreshed and the platform is delisted from the page.
TestLink - Milestones
Milestones are associated with the project and is one of the best ways to track the progress and timeline. It is similar to the small targets in a project. A milestone can be an important target such as a planned public software release, an internal test version, a new beta release for an important customer, etc.
Once stakeholders add milestones to TestLink, the users can assign test runs to specific milestones. It helps to track the milestones progress separately. Especially, if multiple milestones are in progress in parallel or if the users have many test runs active at the same time.
Add a Milestone
Following are the steps to add a milestone.
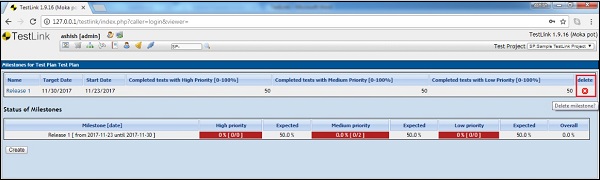
Step 1 − Go to Test Plan → Milestone Overview from the dashboard as shown below.
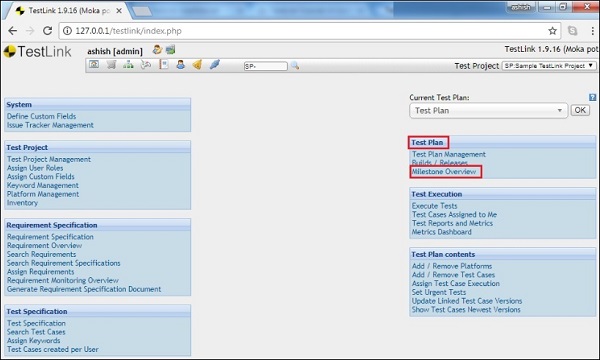
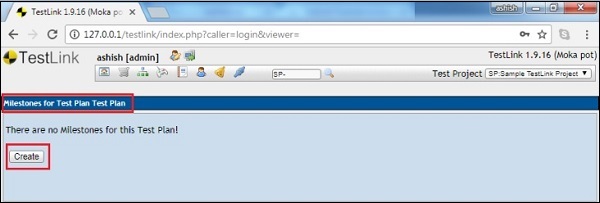
It opens the Milestone page along with the Create button.
Step 2 − Click the Create button as shown below.
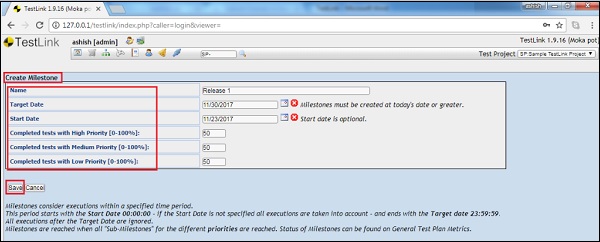
It opens the Create Milestone forms.
Step 3 − Enter the Name, Target Date and Start Date.
There are sub-milestones as Complete test with high priority, Complete test with medium priority and Complete test with low priority.
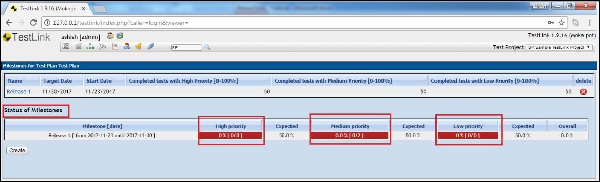
Step 4 − After entering the percentage, click the Save button.
You can see the status and progress of the milestone as shown in the following screenshot.
Delete a Milestone
Step 1 − Navigate to Test Plan → Milestone Overview. It displays a list of all available milestones along with the delete symbol in red as X.
Step 2 − Click the Delete symbol as shown below.
A delete confirmation pop-up is displayed.
Step 3 − Click the Yes button as shown below.
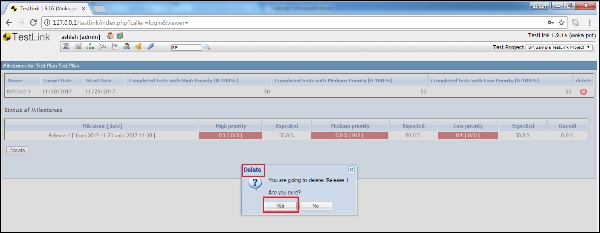
The page gets refreshed and the Milestone is delisted from the page.
TestLink - Test Execution Setup
Before starting the actual execution, setup of the execution suite is the required step to track the progress and the status of execution. This stage is called as test execution setup.
Before execution, make sure the following documents are ready −
- Test specification is written and mentioned in the project.
- Test Plan is created and reviewed.
- Test cases are created and mapped into the test plan for coverage.
- At least one build is created for the project.
You should have proper permission for execution and to work in this test plan.
Navigation & Settings
Following are the steps to set the navigation and settings for executing test cases.
Step 1 − Go to Test Execution → Execute Tests from the dashboard as shown below.
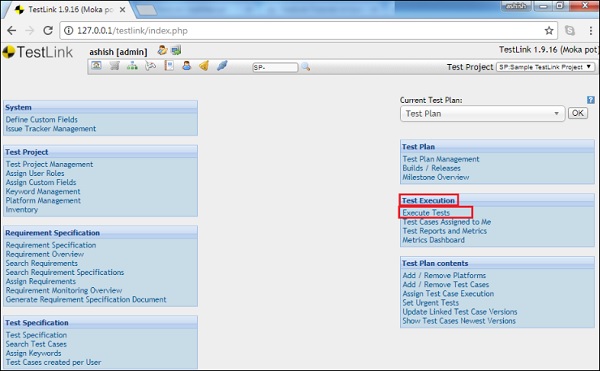
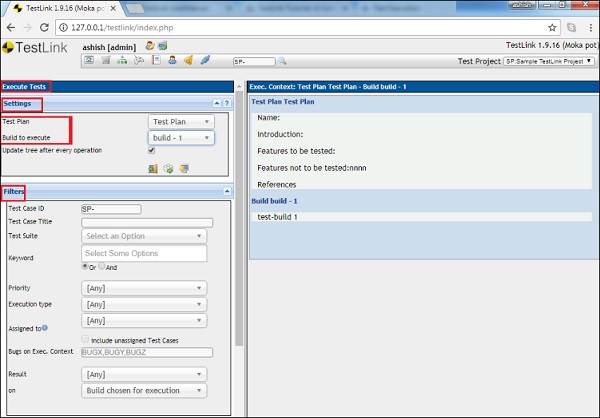
It opens Execute Test page where Settings and Filters are present on the left panel.
Along with these two, there is a tree menu as well.
Step 2 − Select Test Plan and build at the setting section.
Step 3 − In the filter section, you can narrow down the tree structure present below the filter.
Following screenshots displays Navigation & Settings in execute tests page −

Define a Tested Build
You should specify one of the active Builds to add test case execution results. If you do not specify, the latest build is set by default.
Build label specifies the exact package of application under test for tracking purposes. Each Test Case may be run one or more times per Build. However, it's recommended that only one test cycle should be executed against a Build.
Builds can be created by Test Leader using the Create New Build page.
Tree Menu
The tree menu in the navigation pane below the Filter section displays the filtered list of Test Cases in the Test Plan.
By selecting the test case, it allows to open an appropriate Test Case for test execution on the right panel.
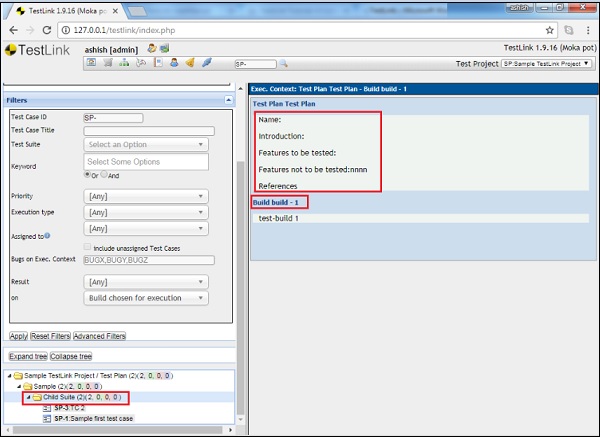
Test Suites in the tree menu display Test Plan details and build details as shown in the following screenshot.
TestLink - Test Execution
Test execution is the process of executing the code and comparing the expected and actual results.
Test Status
By default, a test case remains in No Run status. Once a status is assigned to a test case, it cannot revert to the no Run status.
A test case can be assigned a result as Passed, Failed or Blocked. TestLink supports to assign a result to individual test steps as well. You can assign Passed, Failed or Blocked status at each individual step of a test case.
Passed − When a test case or step matches the expected result, it is marked as Passed.
Failed − When a test case or step deviates from the expected result, it is marked as Failed.
Blocked − When a test case or step cannot be executed due to an outstanding issue, it is marked as Blocked.
Insert Test Result
Once a test case or test step is executed, the result should be assigned to those.
Following steps should be performed while insering a test result −
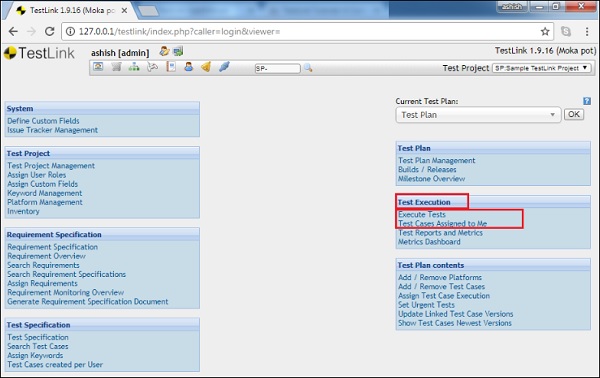
Step 1 − Go to Test Execution → Execution Tests or Test Cases Assigned to Me as shown below.
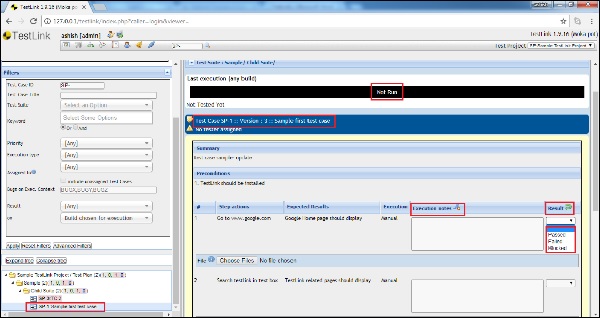
Step 2 − Select the test case from the left panel. It displays all the details and steps of the test cases.
Step 3 − In the test step, there are Execution Notes and Result column. After execution, you can enter comments as Execution Notes.
Step 4 − Select Results as Passed, Failed or Blocked.
You can also attach an image or screenshot file as an artefact in support of result selection.
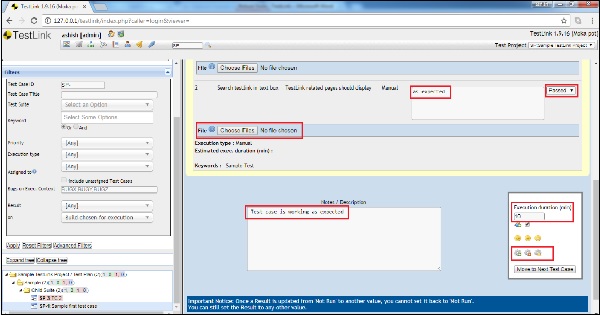
Step 5 − In the Notes/Description section present below, enter overall comment for the test case execution.
Step 6 − On the right side of Notes/Description, Execution duration (min) is present. Enter the number of minutes spent while executing this test case.
Step 7 − Below the Execution Duration text box, three icons are present to select the overall result status for the test case. Icons are Passed, Failed and Blocked from left to right.
After selection, the overall result gets updated with all execution iterations.
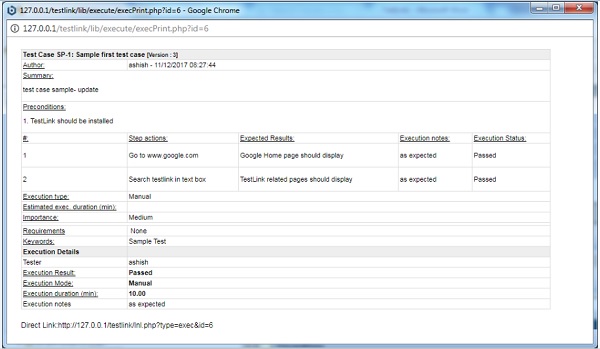
Step 8 − Click the Print icon to view detailed execution result. The symbol is present in Run Mode column at the extreme right as shown below.
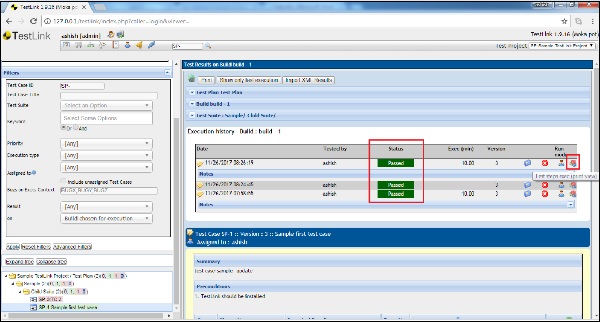
It opens a new window with details of execution and comment step-wise as shown below.
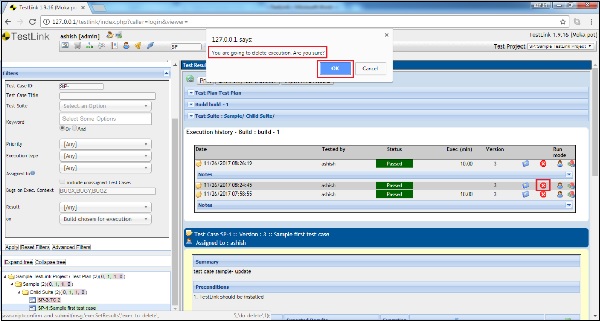
Delete Execution
You can delete the execution result by clicking the delete red symbol as X, present in Run Mode column.
It opens a confirmation pop-up to delete. Click the OK button.
TestLink - Reports & Metrics
Reports and Metrics group the results of execution at one place that helps to track the progress of the project.
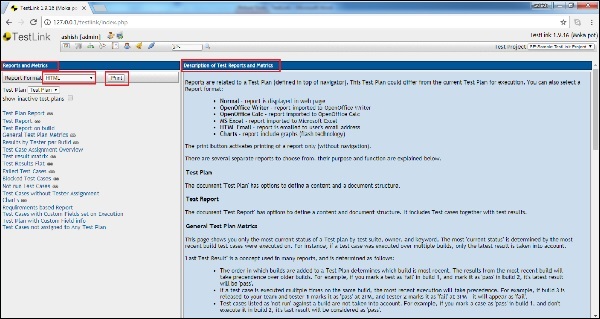
To access the Report and Metrics section, select Test Execution → Test Reports and Metrics from the dashboard as shown below.
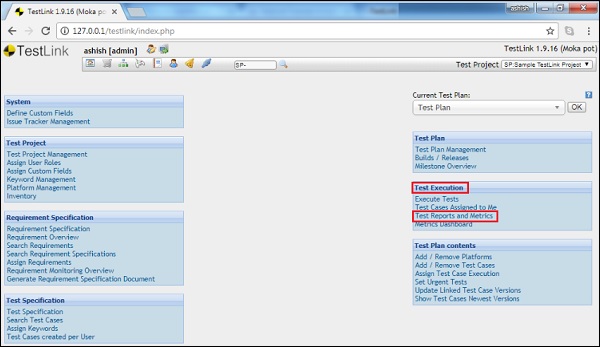
The left pane is used to navigate to each report and operate controls of reports behavior and display. The button Print initializes the printing of the right pane (no navigation will be printed).
You can print as HTML or Pseudo MS Word. You can also email the report in HTML format. The right pane displays a summary of each report.
General Test Plan Metrics
These metrics display the current status of a Test Plan by the following criteria - test suite, owner, milestone, priority and keyword.
In addition to this, it also displays the basic metrics for all enabled builds. The current status is determined by the recent Build where Test Cases are executed.
For instance, if a Test Case is executed in multiple builds, only the latest result is counted. Last Test Result is a concept used in many reports, and is determined as follows −
The order of Builds is created into a Test Plan. For example, if a test fails in Build 1, and is marked as pass in Build 2, the latest result will pass.
If a Test Case is executed multiple times on the same Build, the most recent execution will be considered. For example, if Build 3 is released and marked as pass at 1PM and marked as fail at 5PM will be considered as fail.
Test Cases listed as No Run in a Build is not considered. For example, if a test case is marked as pass in Build 1 and don't execute in Build 2, the last result will be considered as pass.
When you click General Test Plan Metrics on the left side of the screen, it displays all the results as shown below.
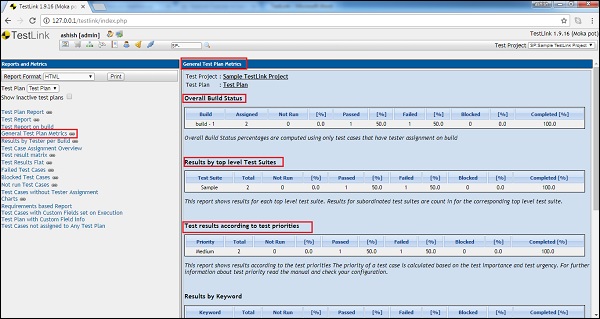
Results by Top Level Test Suites − It lists the results of each top level suite. It displays the number of test cases with status as Passed, Failed, Blocked, Not run, and Completed (%). Results for top level suites include all children suites.
Results by Build − It lists the execution results for every Build. For each Build, it displays the total Test Cases, total pass, % passed, total failed, % failed, blocked, % blocked, not run, and % not run. If a Test Case has been executed twice on the same Build, the most recent execution will be taken into account.
Results by Keyword − It lists all the keywords assigned to cases in the current Test Plan, and the results associated with them. For each keyword, it displays the total Test Cases, total pass, % passed, total failed, % failed, blocked, % blocked, not run and % not run.
TestLink - Reports
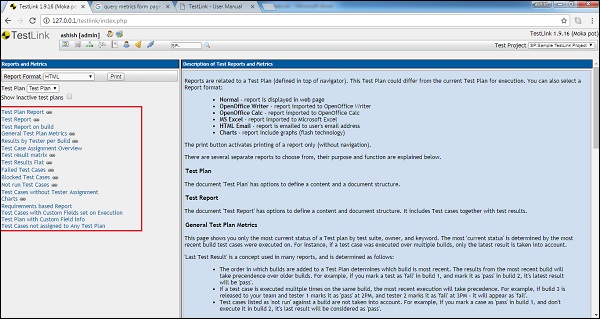
In the Reports module, you can create, view, and export reports supported by TestLink. TestLink supports a wide range of reports at all phases of STLC to better track the progress such as test execution, requirements coverage, and test case creation details. These reports fetch the most important information to prepare any of the metrics.
When you navigate to Test Reports and Metrics from the dashboard, it displays the list of available reports for different activities on the left panel. On the right panel, it displays the details of the selected report as shown below.
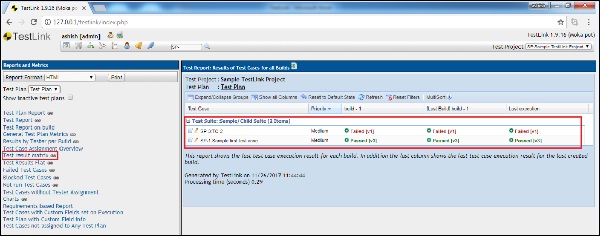
Test Result Matrix
This report displays all of the currently blocked, failed, passed or not run Test Cases. It shows the last test case execution result for each build. In addition, the last column shows the last test case execution result for the last created build.
Last Test Result logic (which is described above under General Test Plan Metrics) is used to determine if a Test Case should be considered blocked, failed, passed or no run.
Blocked and failed Test Case reports will display the associated bugs if the user is an associate of integrated bug tracking system with TestLink.
To access the Test Result Matrix, click the Test Result Matrix on the left pane. it displays the report on the right side as shown in the following screenshot.
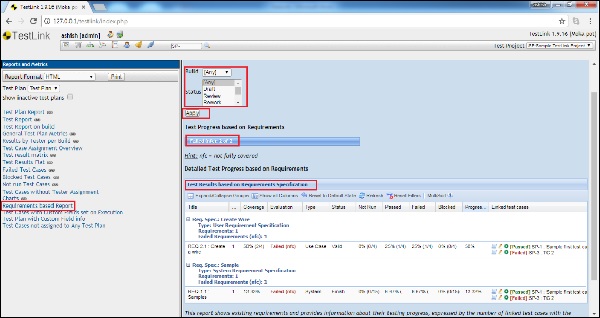
Requirement Reports
This report is available in Test Report and Metrics, if the requirements are linked with test cases of the current Test Project.
The Report is generated against one Requirement Specification document selected from Build and Status dropdown.
There are two sections − metrics and results overview. Following metrics are available −
- Total number of requirements
- Requirements within TestLink
- Requirements covered by Test Cases
- Requirements not covered by Test Cases
- Requirements not covered or not tested
- Requirements not tested
Requirements are divided into four sections. Each requirement is listed together with all related Test Cases (colored according to Test Case result) −
- Passed Requirements
- Failed Requirements
- Blocked Requirements
- Not-executed Requirements
Following screenshot displays Requirement Report −
TestLink - Charts
This report requires graphic library installed on the web server. Last Test Result logic is used for all four charts.
To access the Charts, click the Charts on the left pane as shown below.
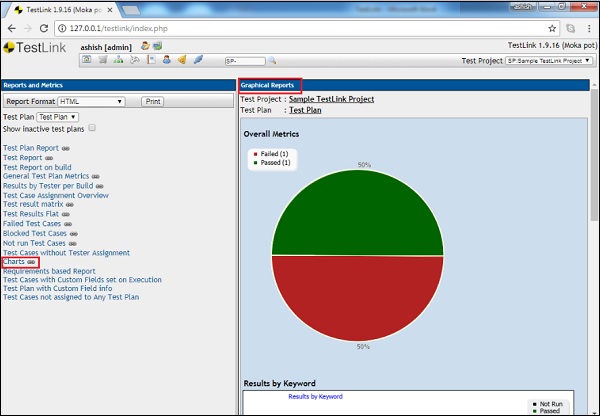
Report contains the following charts −
Pie chart of overall passed / failed / blocked / and not run Test Cases as shown above.
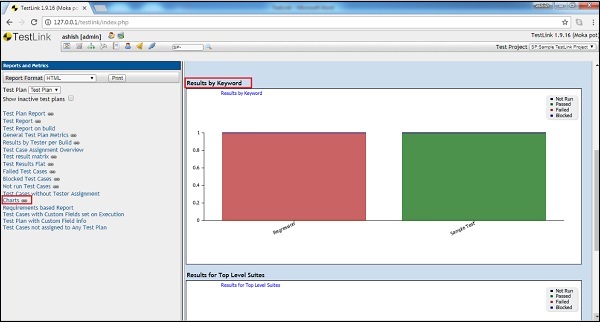
Bar chart of Results by Keyword as shown below.
Bar chart of Results by Top Level Suite as shown below.
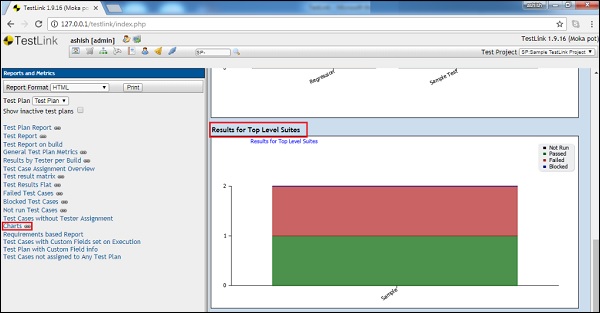
The bars in the bar charts are colored such that the user can identify the approximate number of passed, failed, blocked, and not run cases.
