- TestLink - Home
- TestLink – Introduction
- TestLink – Features
- TestLink – Installation
- TestLink – Login
- TestLink – Add a Project
- TestLink – Dashboard
- TestLink – Projects
- TestLink – Inventory
- TestLink – Test Plan
- TestLink – Build Management
- TestLink – Test Specification
- TestLink – Test Suite
- TestLink – Test Cases
- TestLink – Import Data
- TestLink – Export Data
- TestLink – Test Plan Relation
- TestLink – Search
- TestLink – Keywords
- Test Specification Document
- TestLink – Create Requirement
- TestLink – Requirement Overview
- TestLink – Assign Test Execution
- TestLink – Bulk User Assignment
- TestLink – Platforms
- TestLink – Milestones
- TestLink – Test Execution Setup
- TestLink – Test Execution
- TestLink – Reports & Metrics
- TestLink – Reports
- TestLink – Charts
TestLink - Add a Project
To add a project, you should have Admin role. Once you log in for the first time as an Admin, TestLink opens the Create a new project form. You cannot see any other page until the project is created or assigned to you.
Create a Project
Following are the steps involved to add a project into TestLink −
Usually to create a project, an option is available at the Test Project Management menu as shown in the following screenshot.
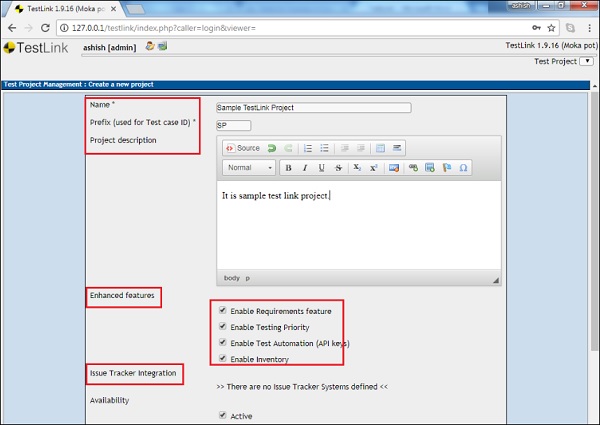
Step 1 − Enter the following details into Create a Project form −
Name − It should be a unique project name.
Prefix − It is used for test case ID to identify the test cases.
Project description − Details about the project.
Enhanced features − You can check the checkboxes based on the requirement of the project. It allows to select which features you want such as Requirement, Automation, etc.
Issue tracker − If any issue tracker is linked with TestLink, it will be displayed here.
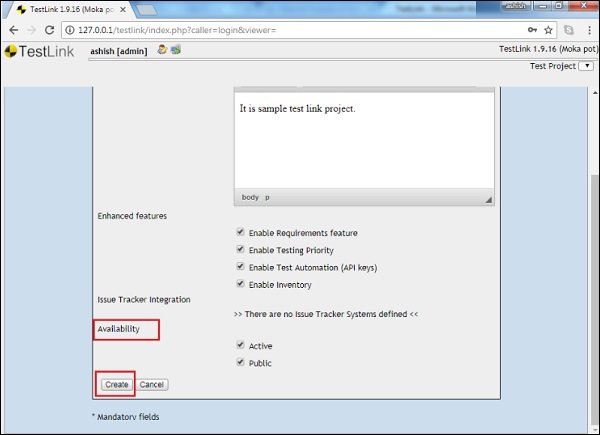
Step 2 − Select the Availability option and then click the Create button as shown in below.
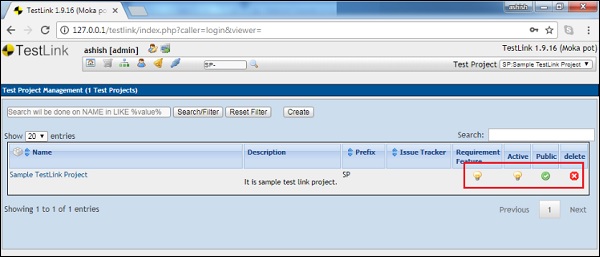
Clicking the Create button adds the project along with Delete and Active/Inactive switch for Requirement and Active features as shown in the following screenshot.
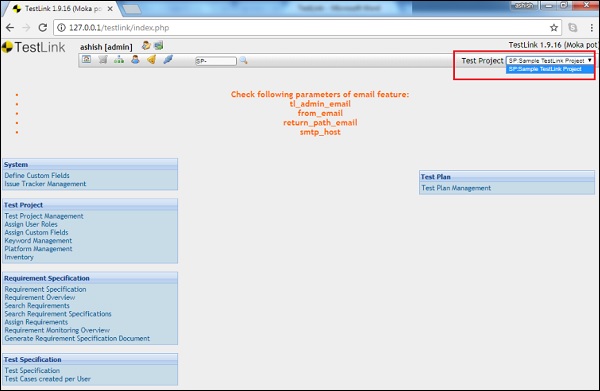
Step 3 − You can view the project by selecting a project name from the Test Project dropdown at the top right corner of the screen as seen below.