- React - Home
- React - Introduction
- React - Roadmap
- React - Installation
- React - Features
- React - Advantages & Disadvantages
- React - Architecture
- React - Creating a React Application
- React - JSX
- React - Components
- React - Nested Components
- React - Using Newly Created Components
- React - Component Collection
- React - Styling
- React - Properties (props)
- React - Creating Components using Properties
- React - props Validation
- React - Constructor
- React - Component Life Cycle
- React - Event management
- React - Creating an Event−Aware Component
- React - Introduce Events in Expense Manager APP
- React - State Management
- React - State Management API
- React - Stateless Component
- React - State Management Using React Hooks
- React - Component Life Cycle Using React Hooks
- React - Layout Component
- React - Pagination
- React - Material UI
- React - Http Server
- React - Http client programming
- React - Form Programming
- React - Forms
- React - Controlled Component
- React - Uncontrolled Component
- React - Formik
- React - Conditional Rendering
- React - Lists
- React - Keys
- React - Routing
- React - Redux
- React - Animation
- React - Bootstrap
- React - Map
- React - Table
- React - Managing State Using Flux
- React - Testing
- React - CLI Commands
- React - Building and Deployment
- React - Example
- Hooks
- React - Introduction to Hooks
- React - Using useState
- React - Using useEffect
- React - Using useContext
- React - Using useRef
- React - Using useReducer
- React - Using useCallback
- React - Using useMemo
- React - Custom Hooks
- React Advanced
- React - Accessibility
- React - Code Splitting
- React - Context
- React - Error Boundaries
- React - Forwarding Refs
- React - Fragments
- React - Higher Order Components
- React - Integrating With Other Libraries
- React - Optimizing Performance
- React - Profiler API
- React - Portals
- React - React Without ES6 ECMAScript
- React - React Without JSX
- React - Reconciliation
- React - Refs and the DOM
- React - Render Props
- React - Static Type Checking
- React - Strict Mode
- React - Web Components
- Additional Concepts
- React - Date Picker
- React - Helmet
- React - Inline Style
- React - PropTypes
- React - BrowserRouter
- React - DOM
- React - Carousel
- React - Icons
- React - Form Components
- React - Reference API
- React Useful Resources
- React - Quick Guide
- React - Cheatsheet
- React - Axios CheatSheet
- React - Useful Resources
- React - Discussion
React - simulate() method
Handling events such as clicks and keypresses are commonly required when creating interactive user interfaces in React. So React provides a helpful utility called Simulate() to simulate these events for testing purposes. In this tutorial, we will go over the basics of Simulate and create different applications to showcase its functionality.
To simulate a button click, first identify the button element and then use ReactTestUtils.Simulate.click().
Syntax
Simulate.{eventName}(
   element,
   [eventData]
)
Parameters
eventName − It is the type of simulated event, like "click," "change," or "keyDown." It defines the DOM node event to be dispatched.
element − It is the DOM node that will get the simulated event. The target element is where the event is set to happen.
[eventData] − This is optional. This parameter defines any additional event data we choose to include. It depends on the sort of event being carried out. For example, we can send information about the key pushed for a "keyDown" event.
Return Value
The Simulate function returns nothing. It is used to simulate and trigger events on the specified DOM node. The goal is to replicate user interactions for testing reasons.
Let us see an example below −
Usage
// Button component
<button ref={(node) => this.button = node}>Click me</button>

// Simulating a click event
const node = this.button;
ReactTestUtils.Simulate.click(node);
This code example creates a button and uses Simulate.click() to simulate a click on it. This method can be used on any clickable element in our React application.
Here are the examples of using Simulate() function in React −
Example − Basic Click Counter Application
In this example, we will have a React component with a button. And we will use ReactTestUtils.Simulate.click() to simulate a click event on the button. So the code for this application is as follows −
ClickExample.js
import React from 'react';
import { render } from '@testing-library/react';
import ReactTestUtils from 'react-dom/test-utils';
import './App.css'

class ClickExample extends React.Component {
   // Click logic: Increment a counter
      state = {
      clickCount: 0,
   };

   handleClick = () => {
      this.setState((prevState) => ({
         clickCount: prevState.clickCount + 1,
      }));
   };

   render() {
      return (
         <div className='App'>
            <button className="click-button" onClick={this.handleClick}>Click me</button>
            <p>Click Count: {this.state.clickCount}</p>
         </div>
      );
   }
}

// Test: Simulate a click event
const { getByText } = render(<ClickExample />);
const buttonNode = getByText('Click me');
ReactTestUtils.Simulate.click(buttonNode);
App.css
.click-button {
   background-color: #4caf50;
   color: white;
   padding: 10px 20px;
   font-size: 16px;
   cursor: pointer;
   border: none;
   border-radius: 4px;
}

.click-button:hover {
   background-color: #45a049;
}
Output
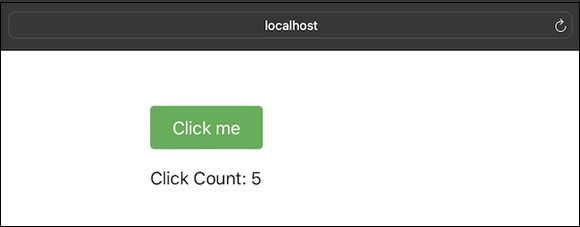
In this example, when we click the button it will increment a counter, and the current count will be displayed.
Example − Simulating the Change Input
In this example we will have a React component with an input field. We will make use of ReactTestUtils to simulate a change event on the input, using Simulate.change(). And handling input change logic involves defining what should happen when the input value changes. So the code this entire app is as follows −
InputExample.js
import React from 'react';
import { render } from '@testing-library/react';
import ReactTestUtils from 'react-dom/test-utils';
import './App.css'

class InputExample extends React.Component {
   state = {
      inputValue: '',
   };

   handleChange = (event) => {
      this.setState({
         inputValue: event.target.value,
      });
   };

   render() {
      return (
         <div className='App'>
            <input
               className="input-field"
               type="text"
               value={this.state.inputValue}
               onChange={this.handleChange}
            />
            <p>Current Input Value: {this.state.inputValue}</p>
         </div>
      );
   }
}

// Test: Simulate a change event on the input
const { container } = render(<InputExample />);
const inputNode = container.querySelector('input');
ReactTestUtils.Simulate.change(inputNode);
App.css
.input-field {
   width: 200px;
   padding: 10px;
   font-size: 16px;
   margin-bottom: 10px;
}
Output
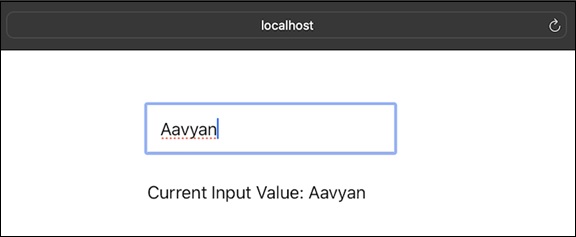
In this example, the handleChange method is updating the state of the component with the current value of the input field. After that the current input value will then be displayed below the input field. This is a basic example, and we can adapt the logic based on the specific requirements.
Example − Simulating a KeyDown Event with Enter Key
In this example, we will have a React component with an input field. So we will use ReactTestUtils.Simulate.keyDown() to simulate a key down event with the Enter key on the input. So the code for this app is as follows −
KeyDownExample.js
import React from 'react';
import { render } from '@testing-library/react';
import ReactTestUtils from 'react-dom/test-utils';
import './App.css'; // Import the CSS file

class KeyDownExample extends React.Component {
   // Highlight the selected item
   state = {
      selectedItem: null,
   };

   handleKeyDown = (event) => {
      // Set the selected item when Enter key is pressed
      if (event.key === 'Enter') {
         this.setState({
            selectedItem: event.target.innerText,
         });
      }
   };

   render() {
      return (
         <div className="menu">
            <div
               className={`menu-item ${this.state.selectedItem === 'Item 1' ? 'selected' : ''}`}
               onKeyDown={this.handleKeyDown}
            >
            Item 1
            </div>
            <div
               className={`menu-item ${this.state.selectedItem === 'Item 2' ? 'selected' : ''}`}
               onKeyDown={this.handleKeyDown}
            >
               Item 2
            </div>
            <div
               className={`menu-item ${this.state.selectedItem === 'Item 3' ? 'selected' : ''}`}
               onKeyDown={this.handleKeyDown}
            >
               Item 3
            </div>
         </div>
      );
   }
}

// Test: Simulate a key down event with Enter key
const { container } = render(<KeyDownExample />);
const menuNode = container.querySelector('.menu-item');
ReactTestUtils.Simulate.keyDown(menuNode, { key: 'Enter', keyCode: 13, which: 13 });
App.css
.menu {
   margin-left: 250px;
   display: flex;
   flex-direction: column;
}

.menu-item {
   padding: 10px;
   font-size: 16px;
   cursor: pointer;
   border-bottom: 1px solid #ddd;
}

.menu-item:last-child {
   border-bottom: none;
}

.menu-item:hover {
   background-color: #f5f5f5;
}
Output
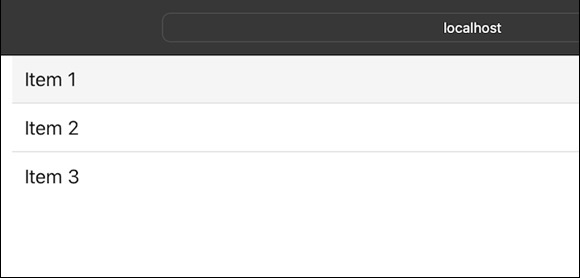
In this example when we press the Enter key on a menu item highlights the selected item.
Summary
The Simulate function in React is used to dispatch events on DOM nodes for testing. It takes parameters like eventName (the type of event), element (the DOM node), and optional eventData (additional event data). In this tutorial we have explored the usage of the Simulate function in React, provided examples and practical applications for better understanding.
