- React - Home
- React - Introduction
- React - Roadmap
- React - Installation
- React - Features
- React - Advantages & Disadvantages
- React - Architecture
- React - Creating a React Application
- React - JSX
- React - Components
- React - Nested Components
- React - Using Newly Created Components
- React - Component Collection
- React - Styling
- React - Properties (props)
- React - Creating Components using Properties
- React - props Validation
- React - Constructor
- React - Component Life Cycle
- React - Event management
- React - Creating an Event−Aware Component
- React - Introduce Events in Expense Manager APP
- React - State Management
- React - State Management API
- React - Stateless Component
- React - State Management Using React Hooks
- React - Component Life Cycle Using React Hooks
- React - Layout Component
- React - Pagination
- React - Material UI
- React - Http Server
- React - Http client programming
- React - Form Programming
- React - Forms
- React - Controlled Component
- React - Uncontrolled Component
- React - Formik
- React - Conditional Rendering
- React - Lists
- React - Keys
- React - Routing
- React - Redux
- React - Animation
- React - Bootstrap
- React - Map
- React - Table
- React - Managing State Using Flux
- React - Testing
- React - CLI Commands
- React - Building and Deployment
- React - Example
- Hooks
- React - Introduction to Hooks
- React - Using useState
- React - Using useEffect
- React - Using useContext
- React - Using useRef
- React - Using useReducer
- React - Using useCallback
- React - Using useMemo
- React - Custom Hooks
- React Advanced
- React - Accessibility
- React - Code Splitting
- React - Context
- React - Error Boundaries
- React - Forwarding Refs
- React - Fragments
- React - Higher Order Components
- React - Integrating With Other Libraries
- React - Optimizing Performance
- React - Profiler API
- React - Portals
- React - React Without ES6 ECMAScript
- React - React Without JSX
- React - Reconciliation
- React - Refs and the DOM
- React - Render Props
- React - Static Type Checking
- React - Strict Mode
- React - Web Components
- Additional Concepts
- React - Date Picker
- React - Helmet
- React - Inline Style
- React - PropTypes
- React - BrowserRouter
- React - DOM
- React - Carousel
- React - Icons
- React - Form Components
- React - Reference API
- React Useful Resources
- React - Quick Guide
- React - Cheatsheet
- React - Axios CheatSheet
- React - Useful Resources
- React - Discussion
ReactJS - Animations
In this chapter, we will learn how to animate elements using React.
Step 1 − Install React CSS Transitions Group
This is React add-on used for creating basic CSS transitions and animations. We will install it from the command prompt window −
C:\Users\username\Desktop\reactApp>npm install react-addons-css-transition-group
Step 2 − Add a CSS file
Let's create a new file style.css.
C:\Users\Tutorialspoint\Desktop\reactApp>type nul > css/style.css
To be able to use it in the app, we need to link it to the head element in index.html.
<!DOCTYPE html>
<html lang = "en">
   <head>
      <link rel = "stylesheet" type = "text/css" href = "./style.css">
      <meta charset = "UTF-8">
      <title>React App</title>
   </head>
   <body>
      <div id = "app"></div>
      <script src = 'index_bundle.js'></script>
   </body>
</html>
Step 3 − Appear Animation
We will create a basic React component. The ReactCSSTransitionGroup element will be used as a wrapper of the component we want to animate. It will use transitionAppear and transitionAppearTimeout, while transitionEnter and transitionLeave are false.
App.jsx
import React from 'react';
var ReactCSSTransitionGroup = require('react-addons-css-transition-group');
class App extends React.Component {
render() {
return (
<div>
<ReactCSSTransitionGroup transitionName = "example"
transitionAppear = {true} transitionAppearTimeout = {500}
transitionEnter = {false} transitionLeave = {false}>
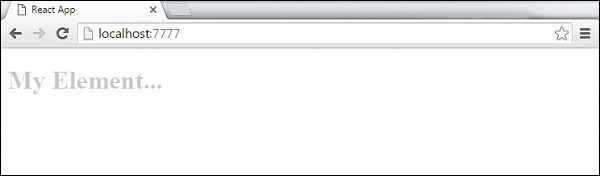
<h1>My Element...</h1>
</ReactCSSTransitionGroup>
</div>
);
}
}
export default App;
main.js
import React from 'react'
import ReactDOM from 'react-dom';
import App from './App.jsx';

ReactDOM.render(<App />, document.getElementById('app'));
The CSS animation is very simple.
css/style.css
.example-appear {
   opacity: 0.04;
}
.example-appear.example-appear-active {
   opacity: 2;
   transition: opacity 50s ease-in;
}
Once we start the app, the element will fade in.
Step 4 - Enter and Leave Animations
Enter and leave animations can be used when we want to add or remove elements from the list.
App.jsx
import React from 'react';
var ReactCSSTransitionGroup = require('react-addons-css-transition-group');

class App extends React.Component {
   constructor(props) {
      super(props);

      this.state = {
         items: ['Item 1...', 'Item 2...', 'Item 3...', 'Item 4...']
      }
      this.handleAdd = this.handleAdd.bind(this);
   };
   handleAdd() {
      var newItems = this.state.items.concat([prompt('Create New Item')]);
      this.setState({items: newItems});
   }
   handleRemove(i) {
      var newItems = this.state.items.slice();
      newItems.splice(i, 1);
      this.setState({items: newItems});
   }
   render() {
      var items = this.state.items.map(function(item, i) {
         return (
            <div key = {item} onClick = {this.handleRemove.bind(this, i)}>
               {item}
            </div>
         );
      }.bind(this));

      return (
         <div>
            <button onClick = {this.handleAdd}>Add Item</button>

            <ReactCSSTransitionGroup transitionName = "example"
               transitionEnterTimeout = {500} transitionLeaveTimeout = {500}>
               {items}
            </ReactCSSTransitionGroup>
         </div>
      );
   }
}
export default App;
main.js
import React from 'react'
import ReactDOM from 'react-dom';
import App from './App.jsx';

ReactDOM.render(<App />, document.getElementById('app'));
css/style.css
.example-enter {
   opacity: 0.04;
}
.example-enter.example-enter-active {
   opacity: 5;
   transition: opacity 50s ease-in;
}
.example-leave {
   opacity: 1;
}
.example-leave.example-leave-active {
   opacity: 0.04;
   transition: opacity 50s ease-in;
}
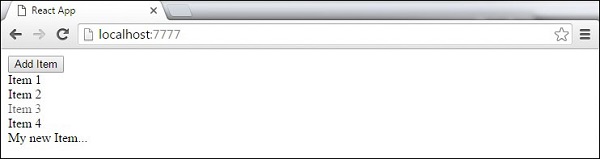
When we start the app and click the Add Item button, the prompt will appear.
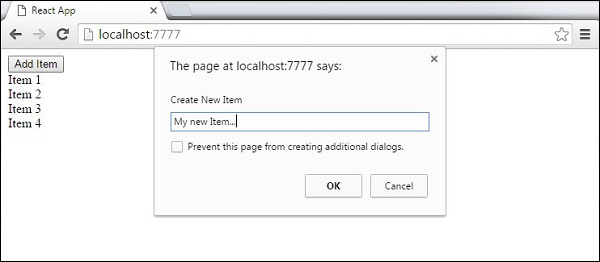
Once we enter the name and press OK, the new element will fade in.
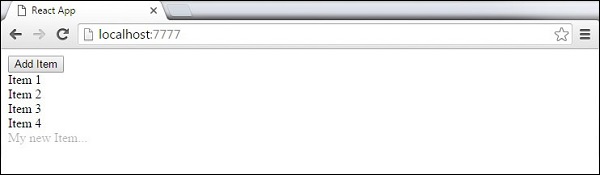
Now we can delete some of the items (Item 3...) by clicking it. This item will fade out from the list.