- Adobe InDesign CC Tutorial
- Adobe InDesign CC - Home
- Desktop Publishing - Introduction
- Popular DTP Software
- InDesign CC - Introduction
- InDesign CC - Workspace Basics
- Create the First Document
- InDesign CC - Page Management
- InDesign CC - Section Options
- InDesign CC - Text Frames
- InDesign CC - Story Editor
- Spellchecking Features
- InDesign CC - Find/Change Function
- InDesign CC - Import Images
- InDesign CC - Image Links
- InDesign CC - Edit Images
- InDesign CC - Image Fitting
- InDesign CC - Image Transparency
- InDesign CC - QR Codes
- Selection Tools & Fill Strokes
- Image Color & Transparency
- InDesign CC - Drop Shadows
- Special Effects to Objects
- InDesign CC - Eyedropper Tool
- Find/Change Feature for Objects
- InDesign CC - Swatches Panel
- InDesign CC - Color Panel
- InDesign CC - Gradients & Blends
- InDesign CC - Paths & Outlines
- InDesign CC - Stack Objects
- InDesign CC - Layers
- InDesign CC - Nest Objects
- InDesign CC - Align Objects
- Text Wrap & Anchor Objects
- InDesign CC - Object Transformation
- InDesign CC - Characters
- InDesign CC - Text Formatting
- InDesign CC - Paragraph Formatting
- Paragraph & Character Styles
- InDesign CC - Tables
- InDesign CC - Long Documents
- InDesign CC - Table of Contents
- InDesign CC - Interactive Documents
- InDesign CC - Ebook
- InDesign CC - Preflighting
- InDesign CC - Package Documents
- Print Documents & Booklets
- Export Documents as PDFs
- Selective Text Frame Export
- Word & InDesign
- Word File Import to InDesign
- Word To InDesign
- Photoshop & Illustrator Workflows
- Export InDesign Artwork
- Preserve Layers & Vectors
- Adobe InDesign CC Resources
- Adobe InDesign CC - Quick Guide
- Adobe InDesign CC - Resources
- Adobe InDesign CC - Discussion
Adobe InDesign CC - Layers
As seen before, working directly with object stacks can get confusing. Therefore, the ideal way is to use layers to determine how the objects are actually stacked upon each other.
Layers can be used to create better organized objects. You can access layers from the Layers panel.
Creating a New Layer
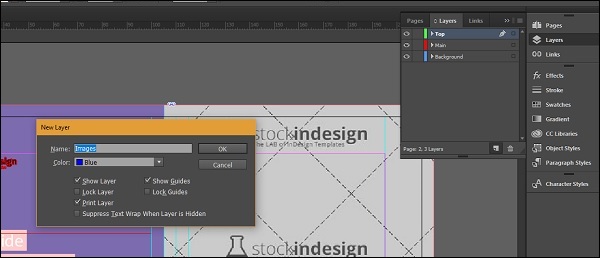
Clicking the Layers panel will reveal the layers in the document. You can create a new layer by clicking the Create New Layer at the bottom on the Layers panel, which will directly create a new layer or you can also hold down the Alt key on Windows or Option key on the Mac and click on Create New Layer to get the New Layer dialog box.
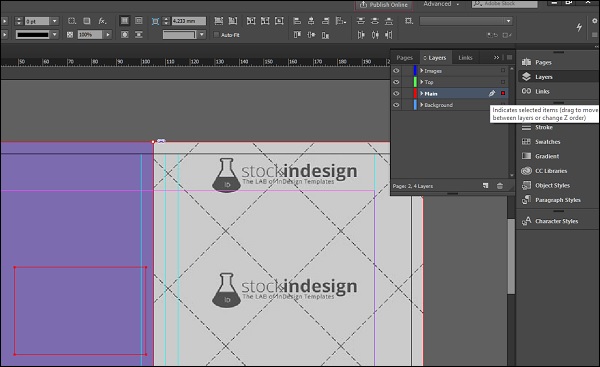
You will notice that each layer is color coded and has an active square beside its name. That square is an indication that elements of that layer are being worked on currently. You can click and drag the square to another layer, which will reveal items belonging to that layer. In the following example, clicking and dragging the blue square from the Background layer to the Main layer, changes the square to red and highlights the elements in the document belonging to the Main layer.
Clicking the eyeball icon in front of the layer name will hide or reveal the layer. Clicking the box just beside the eyeball will lock the layer and prevent you from making edits to it.
Sometimes, you might want to see the layer on screen but need not have to print the objects in that layer. To do this, double-click on the layer in which the object is present to open the New Layer dialog box we’ve seen earlier. Then remove the checkmark beside the Print Layer option. This will show the layer on screen but will not print it on paper or when exported to PDF.
Layer Objects
Every layer is composed of objects which can be rearranged within the layer or even between the layers. Each object is given a name within a layer.
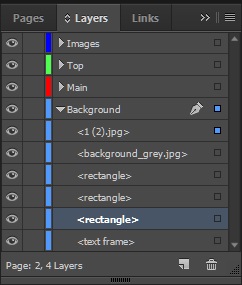
For example, collapsing the Background layer will reveal the objects within it. The name <rectangle> means the rectangular frame. Images if any, will be shown by their file names. If there is some text within a text frame, the starting words of the text will be shown so as to easily identify it.
It is possible to rearrange these objects by simply clicking and dragging the object (for multiple object select by holding Ctrl on Windows or Command on Mac) into the desired layer.
Sometimes, in a complex document, it can be difficult to keep track of what each <rectangle> actually means. You can simply rename the object name by clicking once, pausing for a second and clicking again. This will enable you to rename the object to something more recognizable.