- Adobe InDesign CC Tutorial
- Adobe InDesign CC - Home
- Desktop Publishing - Introduction
- Popular DTP Software
- InDesign CC - Introduction
- InDesign CC - Workspace Basics
- Create the First Document
- InDesign CC - Page Management
- InDesign CC - Section Options
- InDesign CC - Text Frames
- InDesign CC - Story Editor
- Spellchecking Features
- InDesign CC - Find/Change Function
- InDesign CC - Import Images
- InDesign CC - Image Links
- InDesign CC - Edit Images
- InDesign CC - Image Fitting
- InDesign CC - Image Transparency
- InDesign CC - QR Codes
- Selection Tools & Fill Strokes
- Image Color & Transparency
- InDesign CC - Drop Shadows
- Special Effects to Objects
- InDesign CC - Eyedropper Tool
- Find/Change Feature for Objects
- InDesign CC - Swatches Panel
- InDesign CC - Color Panel
- InDesign CC - Gradients & Blends
- InDesign CC - Paths & Outlines
- InDesign CC - Stack Objects
- InDesign CC - Layers
- InDesign CC - Nest Objects
- InDesign CC - Align Objects
- Text Wrap & Anchor Objects
- InDesign CC - Object Transformation
- InDesign CC - Characters
- InDesign CC - Text Formatting
- InDesign CC - Paragraph Formatting
- Paragraph & Character Styles
- InDesign CC - Tables
- InDesign CC - Long Documents
- InDesign CC - Table of Contents
- InDesign CC - Interactive Documents
- InDesign CC - Ebook
- InDesign CC - Preflighting
- InDesign CC - Package Documents
- Print Documents & Booklets
- Export Documents as PDFs
- Selective Text Frame Export
- Word & InDesign
- Word File Import to InDesign
- Word To InDesign
- Photoshop & Illustrator Workflows
- Export InDesign Artwork
- Preserve Layers & Vectors
- Adobe InDesign CC Resources
- Adobe InDesign CC - Quick Guide
- Adobe InDesign CC - Resources
- Adobe InDesign CC - Discussion
Adobe InDesign CC - Align Objects
InDesign offers a lot of flexibility when it comes to aligning objects. There are two ways in which you can align objects with respect to each other – one is by using alignment guides and the other is by using the Align panel.
Aligning Objects Using Alignment Guides
When you click and drag objects to position them with respect to other objects, you will see green lines which serve as alignment guides. You can use these green lines to guide you on positioning the object either with respect to the center of the reference object/frame or with respect to the edges of the surrounding object/frame.
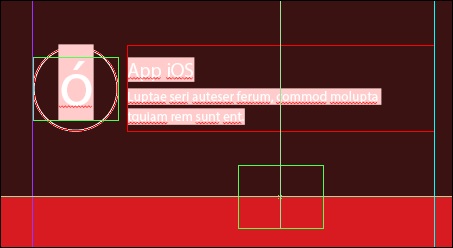
In the above example, it can be seen that the green box is being aligned with respect the text box above and the vertical green line is the alignment guide, which shows the center of the text box.
Aligning Objects Using the Align Panel
The Align panel makes it easy to align multiple objects at once. To access the Align panel, go to the Window menu, then go to the Object and Layout submenu and click Align to open the Align panel. Note, that the Align panel is contained in the same Pathfinder panel we’ve seen earlier.
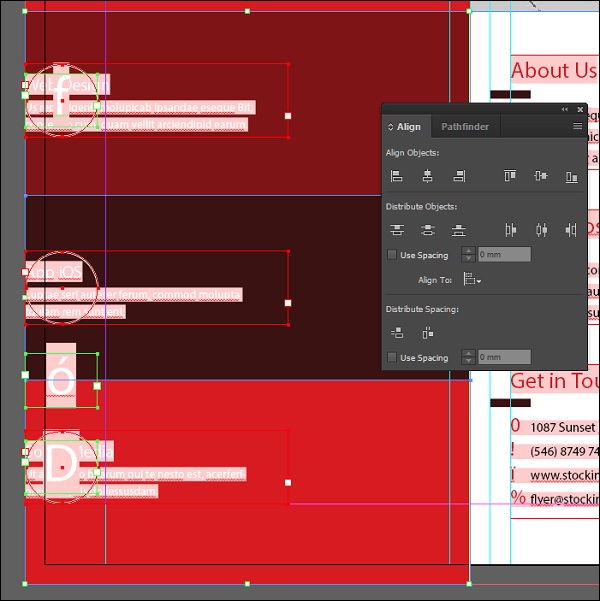
The top row of the Align panel has options to align everything left, right, top, or bottom.
You can also use the Align panel to distribute objects within a given distance or align other objects with respect to a reference object or the key object. In the above example, it can be seen that all the selected objects could be aligned to the left with one click instead of relying on alignment guides.