- Adobe InDesign CC Tutorial
- Adobe InDesign CC - Home
- Desktop Publishing - Introduction
- Popular DTP Software
- InDesign CC - Introduction
- InDesign CC - Workspace Basics
- Create the First Document
- InDesign CC - Page Management
- InDesign CC - Section Options
- InDesign CC - Text Frames
- InDesign CC - Story Editor
- Spellchecking Features
- InDesign CC - Find/Change Function
- InDesign CC - Import Images
- InDesign CC - Image Links
- InDesign CC - Edit Images
- InDesign CC - Image Fitting
- InDesign CC - Image Transparency
- InDesign CC - QR Codes
- Selection Tools & Fill Strokes
- Image Color & Transparency
- InDesign CC - Drop Shadows
- Special Effects to Objects
- InDesign CC - Eyedropper Tool
- Find/Change Feature for Objects
- InDesign CC - Swatches Panel
- InDesign CC - Color Panel
- InDesign CC - Gradients & Blends
- InDesign CC - Paths & Outlines
- InDesign CC - Stack Objects
- InDesign CC - Layers
- InDesign CC - Nest Objects
- InDesign CC - Align Objects
- Text Wrap & Anchor Objects
- InDesign CC - Object Transformation
- InDesign CC - Characters
- InDesign CC - Text Formatting
- InDesign CC - Paragraph Formatting
- Paragraph & Character Styles
- InDesign CC - Tables
- InDesign CC - Long Documents
- InDesign CC - Table of Contents
- InDesign CC - Interactive Documents
- InDesign CC - Ebook
- InDesign CC - Preflighting
- InDesign CC - Package Documents
- Print Documents & Booklets
- Export Documents as PDFs
- Selective Text Frame Export
- Word & InDesign
- Word File Import to InDesign
- Word To InDesign
- Photoshop & Illustrator Workflows
- Export InDesign Artwork
- Preserve Layers & Vectors
- Adobe InDesign CC Resources
- Adobe InDesign CC - Quick Guide
- Adobe InDesign CC - Resources
- Adobe InDesign CC - Discussion
Export InDesign Artwork
Just like it is easy to import PSD and AI files into InDesign, it is also easy to export InDesign artwork into either of these programs. The simplest method to do this is copy and paste. The procedure is the same for both the programs but keep in mind that the objects’ paths in InDesign are more appropriately imported into Illustrator to retain the vector paths rather than in Photoshop. Photoshop rasterizes the image so you are left with fewer editing options.
It is always recommended to first import the InDesign artwork into Illustrator and then take it from Illustrator to Photoshop.
To copy the InDesign artwork, simply select the desired objects using the Selection tool and press Ctrl+C on Windows or Command+C on the Mac to copy the objects to the clipboard.
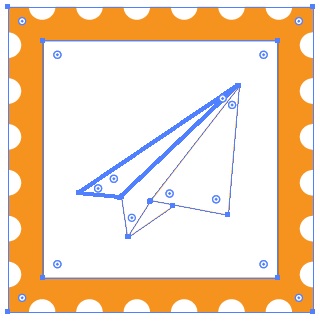
Create a new Illustrator document and press Ctrl+V on Windows or Command+V on the Mac to paste the InDesign artwork. You will notice that all the vector paths are carried over to the Illustrator document and you are also able to scale freely without loss of resolution.
However, while pasting the same artwork in Photoshop, you will see that there is loss of resolution and the image gets rasterized. It is still pasted as a vector smart object but in order to change the paths, you need to go back to Illustrator, change the paths, save the file and come back to Photoshop.

Therefore, it is always recommended to import InDesign artwork into Illustrator than Photoshop. If you must use Photoshop, then import it into Photoshop via Illustrator but never paste directly.