- qTest - Home
- qTest - Introduction
- qTest - Features
- qTest - Free Trial Access
- qTest - Login
- qTest - Dashboard
- qTest - Invite Users
- qTest - Add a Project
- Test Plan & Release Management
- Test Plan & Build Management
- qTest - Modules Management
- qTest - Requirements
- qTest - Create Associated Test Cases
- qTest - Import Requirements
- qTest - Export Requirements
- qTest - Export RTM
- qTest - Test Design
- qTest - Calling a Test Case
- qTest - Approve a Test Case
- qTest - Import Test Cases
- qTest - Export Test Cases
- qTest - Test Cycle Management
- qTest - Test Suite Management
- qTest - Add Test Runs
- qTest - Test Execution
- qTest - Quick Run
- qTest - Submit a Defect
- qTest - Clone a Defect
- qTest - Import a Defect
- qTest - Reports
- qTest - Filter
- qTest - Drag & Drop
- qTest - Hotkeys
- qTest - Recycle Bin
- qTest - Search
- qTest - Toggle ID
- qTest - Tagging ID
qTest - Recycle Bin
qTest supports the Recycle bin concept, i.e., you can temporarily delete unnecessary objects and restore them later, if required. While deleting an object, qTest moves the object in the Recycle Bin and you can restore these objects later to their original locations. Recycle bin supports only Test Plan, Requirements, Test Design, and Test Execution section. This functionality is not applicable to Defects and Reports section.
To delete and restore, you should have Delete objects permission.
Temporary Deletion
As discussed earlier, you can use the drag and drop functionality to move an object into the Recycle bin. Alternatively, you can also delete the object, which will eventually move it to the recycle bin.
A dialog box will appear asking for confirmation, click YES.

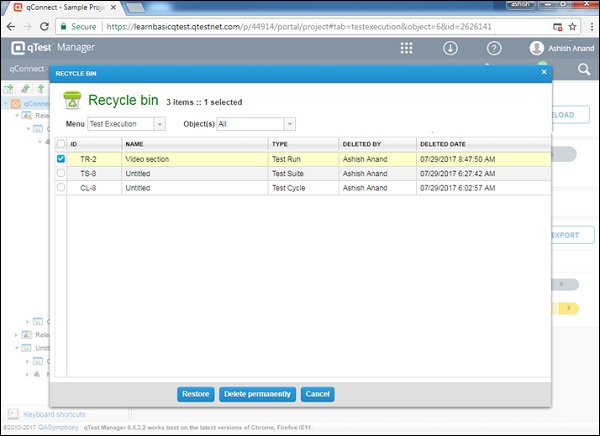
To view all the deleted objects, click the Recycle bin at the toolbar.
Permanent Deletion
Let us now discuss how to delete objects on a permanent basis.
Step 1 − Click the Recycle bin icon on the left navigation bar. Select Menu and Object to delete an object permanently.
Step 2 − To delete multiple objects at a time, check the checkbox present for each item as shown in the following screenshot.

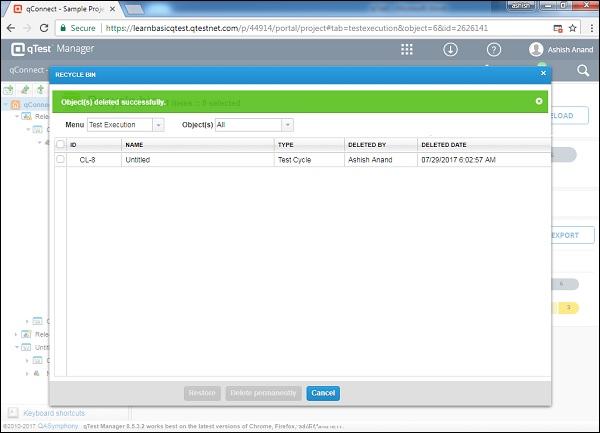
Step 3 − Click the Delete Permanently button present at the bottom of the page as shown in the above screenshot.
You will get the permanently delete message. Upon clicking this, an object permanently disappears from the Recycle Bin.
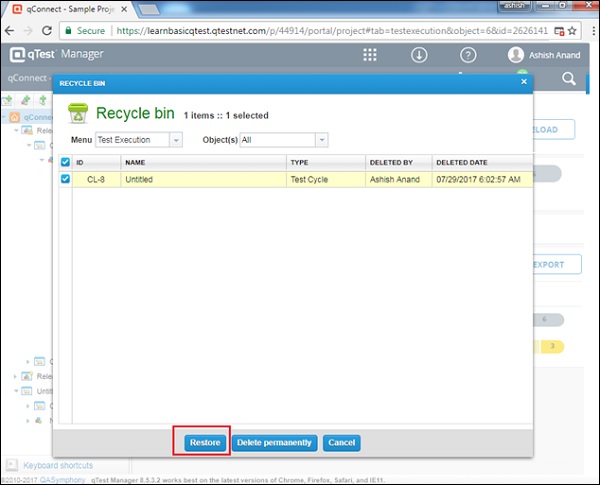
Restore Object
In this section, we will discuss how to restore objects in qTest.
Step 1 − Click the Recycle Bin icon on top of the toolbar of the left panel.
Step 2 − Select the Menu and Objects to find the objects to restore from the Recycle Bin.
Step 3 − Click the Restore button at the bottom of the page to confirm. The selected objects will be moved back to their original locations.