- qTest - Home
- qTest - Introduction
- qTest - Features
- qTest - Free Trial Access
- qTest - Login
- qTest - Dashboard
- qTest - Invite Users
- qTest - Add a Project
- Test Plan & Release Management
- Test Plan & Build Management
- qTest - Modules Management
- qTest - Requirements
- qTest - Create Associated Test Cases
- qTest - Import Requirements
- qTest - Export Requirements
- qTest - Export RTM
- qTest - Test Design
- qTest - Calling a Test Case
- qTest - Approve a Test Case
- qTest - Import Test Cases
- qTest - Export Test Cases
- qTest - Test Cycle Management
- qTest - Test Suite Management
- qTest - Add Test Runs
- qTest - Test Execution
- qTest - Quick Run
- qTest - Submit a Defect
- qTest - Clone a Defect
- qTest - Import a Defect
- qTest - Reports
- qTest - Filter
- qTest - Drag & Drop
- qTest - Hotkeys
- qTest - Recycle Bin
- qTest - Search
- qTest - Toggle ID
- qTest - Tagging ID
qTest - Create Associated Test Cases
qTest allows you to create test cases to cover specific requirements. You can create associated test cases while creating the requirement or later. You can create test case structure based on Requirements.
Following are the steps to create associated test case for a requirement.
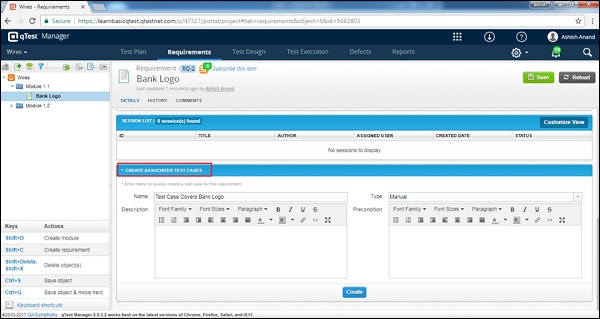
Step 1 − Select a Requirement, i.e., Requirement or Test Design tab under the module folder.
The view/edit page of Requirement will open.
The following screenshot shows the section name written as Create Associated Test Cases.
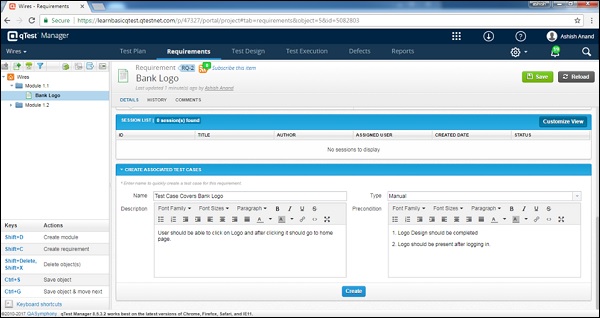
Step 2 − Enter the Name of test case, select one of the options from the type list. Enter the Description and Pre-condition of Test Cases.
The following screenshot shows how to enter the details for a test case.
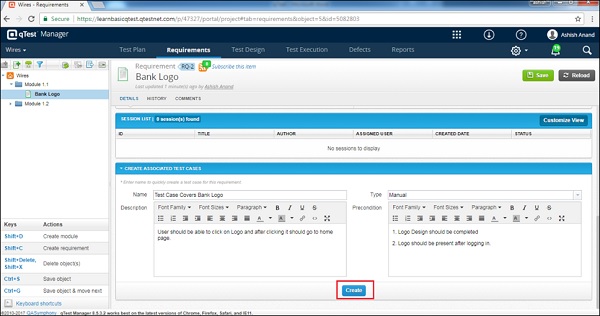
Step 3 − Click the Create button to complete the creation process as shown in the following screenshot. You should not click the Save button after creating associated test cases in Requirement.
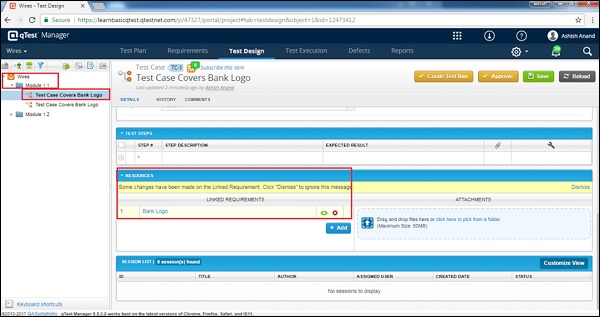
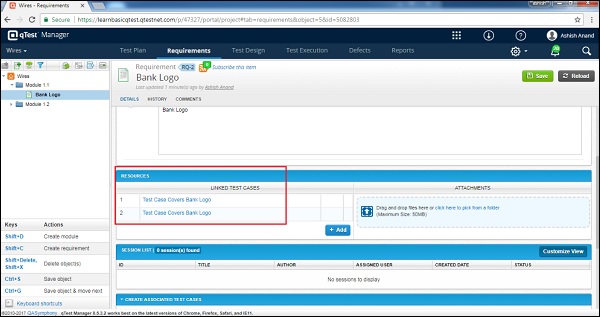
After the creation of the associated test case, the test case will automatically get linked to the requirement. Now, the Test Case appears at the Linked Test Case section as shown in the following screenshot.
The same test case will automatically add into the Test Design as well under the same module and display the linked requirement.
The following screenshot presents an overview of the Test Design tab.