- qTest - Home
- qTest - Introduction
- qTest - Features
- qTest - Free Trial Access
- qTest - Login
- qTest - Dashboard
- qTest - Invite Users
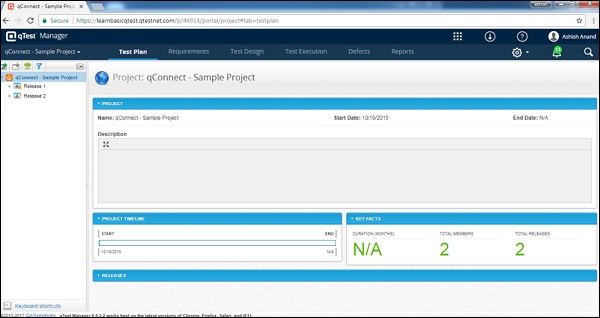
- qTest - Add a Project
- Test Plan & Release Management
- Test Plan & Build Management
- qTest - Modules Management
- qTest - Requirements
- qTest - Create Associated Test Cases
- qTest - Import Requirements
- qTest - Export Requirements
- qTest - Export RTM
- qTest - Test Design
- qTest - Calling a Test Case
- qTest - Approve a Test Case
- qTest - Import Test Cases
- qTest - Export Test Cases
- qTest - Test Cycle Management
- qTest - Test Suite Management
- qTest - Add Test Runs
- qTest - Test Execution
- qTest - Quick Run
- qTest - Submit a Defect
- qTest - Clone a Defect
- qTest - Import a Defect
- qTest - Reports
- qTest - Filter
- qTest - Drag & Drop
- qTest - Hotkeys
- qTest - Recycle Bin
- qTest - Search
- qTest - Toggle ID
- qTest - Tagging ID
qTest - Test Plan & Release Management
In this chapter, we will discuss what is a Test Plan and how a release is managed.
What is a Test Plan?
Consider the following points to understand what a Test Plan is.
qTest supports flexible and lightweight project management within the Test Plan module.
Test Plan supports the Release and Build Management sub-module.
Release is usually known as Sprint in Agile methodology.
Build is known as Sub-Sprint or Iteration in Agile
Test Plan allows the users and stakeholders to manage and track all testing and development work schedules and actual status.
Along with these, the users can add requirements to the scope of these Release and Build.
It helps in traceability from the test plan about requirements, defects, etc.
Create a New Release
A release is a sub-plan of a Test Plan. All releases combine with the complete objectives of a Test Plan. Release structure is synchronized from Test Plan to Test Execution.
To create a Release, you should have the Create Release permission.
Following are the steps to create a Release.
Step 1 − To create a new Release, there are two options. Right-click somewhere on the left panel and select New → New Release.

Step 2 − Click the New Release image on the left side of the panel as shown in the following screenshot.
Step 3 − Clicking any one of the options generate a Create Release form as shown in the following screenshot.
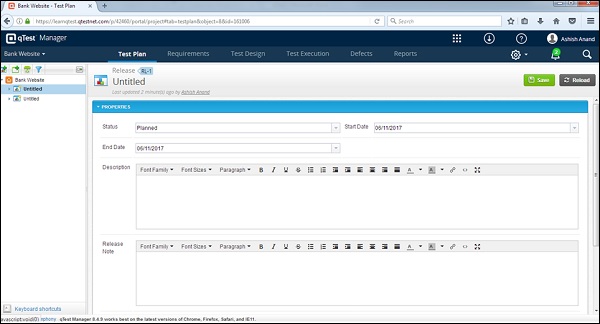
Step 4 − Enter the following fields in the form −
- Name of Release
- Status
- Start Date
- End Date
- Description
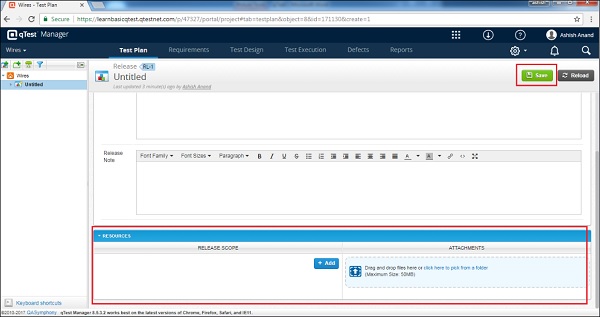
- Release Note
- Resources
- Attachments if any
Note − Make sure the Start and End date must be within the Project Timeline. The dates should be in sync with the Test Execution.

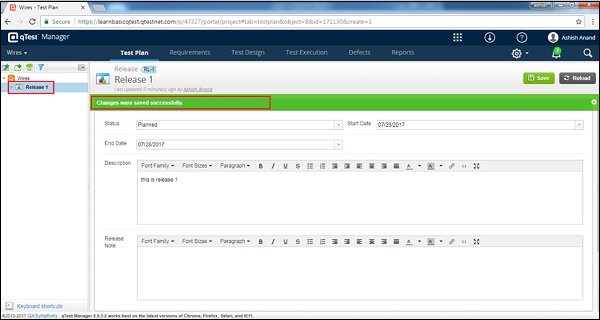
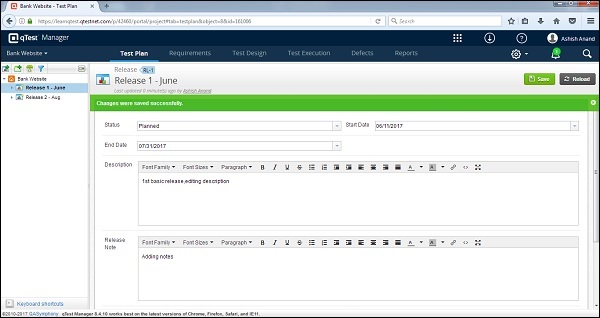
Step 5 − After entering all the details, click the Save button present on the top right corner of the screen.
After clicking Save, you will get a message which shows that all the changes are saved successfully. The Release Name appears on the left panel below the projects name as displayed in the following screenshot.
Edit a Release
Let us now discuss how to edit a release. To edit a release, you should have the Edit Release Permission.
Following are the steps to edit a release.
Step 1 − Select a Release to Edit and double-click to explore it further.
Step 2 − Edit the Release Name, Properties, Status, Start Date, End Date, Description, Release Note, or any other fields as shown in the following screenshot.
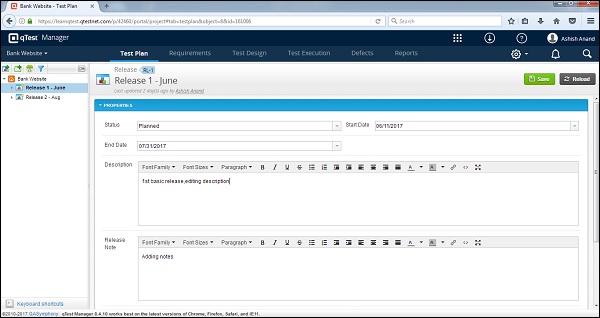
Step 3 − Click Save to finish editing.
Move/Copy a Release
We will now understand how to move or copy a release. To Move/Copy a release, a user should have the Create/Edit Preference. This functionality allows creating a duplicate of a Release or reordering of the release structure.
Follow these steps to move/copy a release.
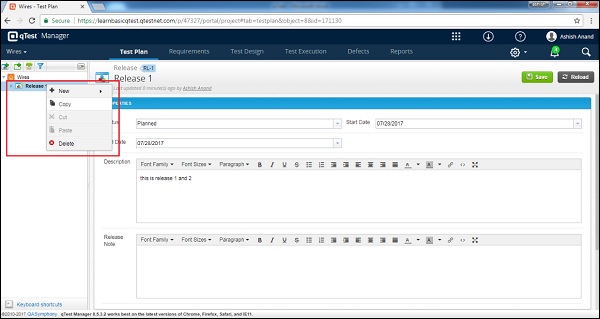
Step 1 − To copy single or multiple releases, select the releases and right-click the selected releases.
Step 2 − Click Copy as shown in the following screenshot.
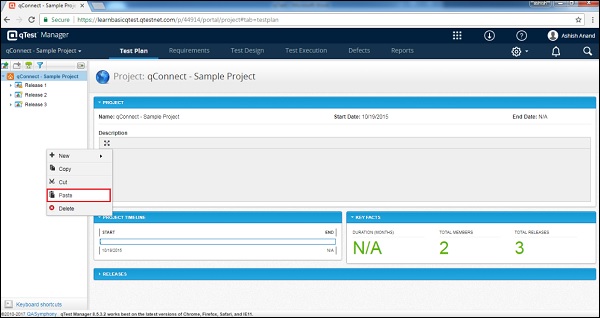
Step 3 − Now, right-click anywhere on the test plan tree and select Paste to copy the releases as shown in the following screenshot.
A closed Release can also be copied. It copies only the properties but not the scope and attachment.
Release can be moved only in the Test Plan structure not in Test Execution.
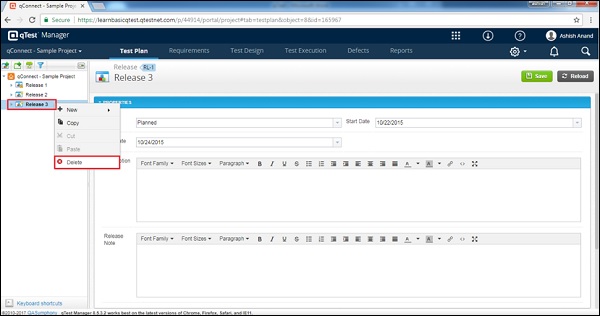
Delete a Release
Let us now understand how to delete a release. To delete a release, you should have the Delete Release Permission.
Follow these steps to delete a release.
Step 1 − Select a single or multiple project to delete.
Step 2 − Right-click on selected Releases and click Delete as shown in the following screenshot.
Step 3 − A dialog box appears asking for confirmation to delete. Click YES as shown in the following screenshot.
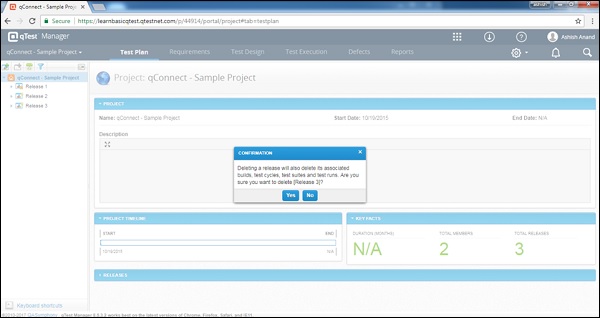
Step 4 − The page will be refreshed and the release will be deleted from the Test plan panel.