- qTest - Home
- qTest - Introduction
- qTest - Features
- qTest - Free Trial Access
- qTest - Login
- qTest - Dashboard
- qTest - Invite Users
- qTest - Add a Project
- Test Plan & Release Management
- Test Plan & Build Management
- qTest - Modules Management
- qTest - Requirements
- qTest - Create Associated Test Cases
- qTest - Import Requirements
- qTest - Export Requirements
- qTest - Export RTM
- qTest - Test Design
- qTest - Calling a Test Case
- qTest - Approve a Test Case
- qTest - Import Test Cases
- qTest - Export Test Cases
- qTest - Test Cycle Management
- qTest - Test Suite Management
- qTest - Add Test Runs
- qTest - Test Execution
- qTest - Quick Run
- qTest - Submit a Defect
- qTest - Clone a Defect
- qTest - Import a Defect
- qTest - Reports
- qTest - Filter
- qTest - Drag & Drop
- qTest - Hotkeys
- qTest - Recycle Bin
- qTest - Search
- qTest - Toggle ID
- qTest - Tagging ID
qTest - Dashboard
After logging into qTest, Dashboard is the first page that is displayed. The Dashboard is customized by Admin. Based on the roles, the admin can set the access to qTest.The admin even has the right to change the colors and logo of qTest.
Following are a few important points relating to the qTest Dashboard −
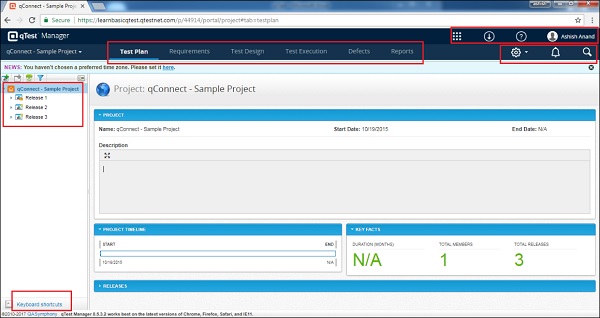
The navigation bar, present at the top of the qTest page, will be the same across all pages/screen of qTest.
qConnect − <Project Name>, Test Plan, Requirements, Test Design, Test Execution, Defects and Reportsare the main links. These links are used to navigate to respective functionalities.
Navigation bar contains links that provide quick access to the most useful functions of qTest.
By Default, the Test Plan page of the default project displays on successful login.
Below the navigation bar, the News bar of the page has an advisory to set a time zone as You havent chosen a preferred time zone. Please set it here.
The information provided on the left side of the white area is related to the releases of project along with a few exciting features of qTest.
On the right side of the Navigation bar, Settings, Notification and Search are the main features and remain the same across all pages/screen of qTest.
On the right side, above the navigation bar, there are few links qTest Apps, Resources, Repository, and Help for qTest and Profile Summary.
On the left bottom, there is a link Keyboard Shortcuts. When you click it, it displays different keyboard keys combination to navigate to a specific functionality.
Shift + D = Create Release
Shift + C = Create Build
Shift + X or Shift + Delete = Delete Object
CTRL + G = Save objects and move next
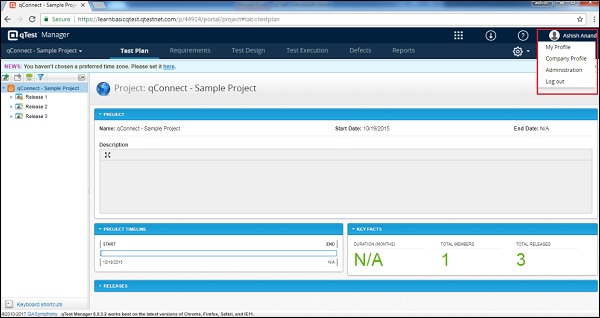
The following screenshot shows the overview of the Dashboard page of qTest.
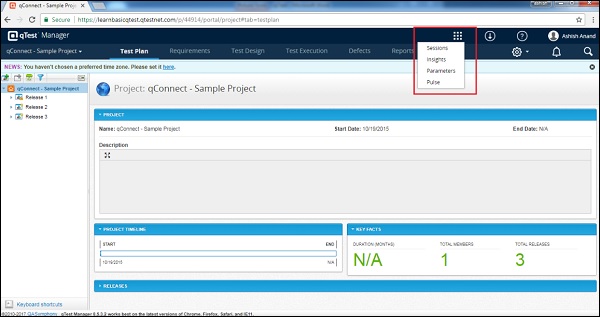
qTest Apps
qTest has many different apps. The most widely used app is the qTest Manager. Along with this, qTest also has Session, Insights, Parameters, and Pulse. These apps come with a lot of advantages and can be used along with the qTest Explorer and others.
Repository
It has many sub-links to access different documents about qTest. These documents provide information about qTest and also extend knowledge to new users on the functionalities of qTest. These documents also help to find a solution if you dont know how to accomplish a particular task.
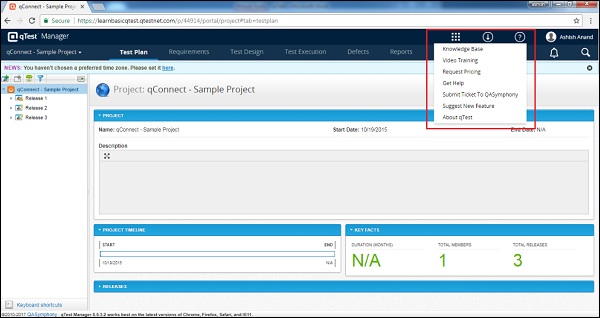
The repository contains links to the following −
Knowledge Base − It provides information about the other apps of qTest.
Video training − It provides training to new users. New users can go through it to know the different functionalities and how to use qTest.
Request Pricing − A user can ask to provide a pricing chart based on the requirements.
Get Help − It is a documented section where a user can find all basic/advanced functionalities of qTest and can know how to use those.
Submit Ticket To QASymphony − The main purpose of this link is to provide real-time support to the users at instances, where they find difficulties in accomplishing tasks. This does not support free-trial users.
Suggest New Features − Here, a user can provide suggestions or feedback relating to qTest, which will make it more user-friendly.
About qTest − It provides the details of qTest such as Versions and Copyright Info.
Following screenshots shows the different documents available under Repository.
User Profile
By clicking the profile link, you can view your personal profile as My Profile and Company Profile as Company Profile and manage the sections. By clicking Logout, you will go back to the login page and will not be able to access the project details without logging again.
Administration is the role, the availability of which depends on the logged-in users role. If the user is an administrator, only then this link will be present. In free trials, all users are administrators by default.
Following screenshot shows the available functionality under the User-Profile section.
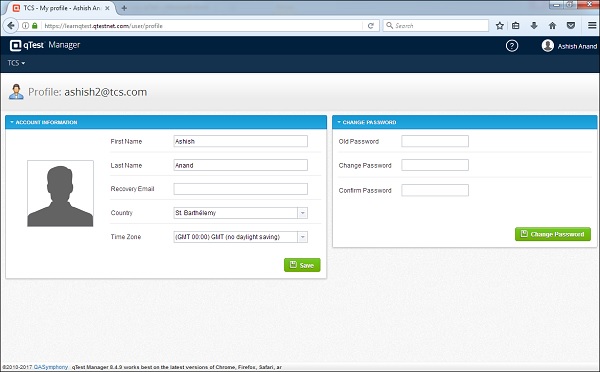
My Profile
By clicking My Profile, you can view and edit the details of your account. You need to click Save to save all edited details. There is an additional functionality to change the password here. After entering the required details, click Change Password to activate a new password.
Following screenshot displays the account information and the change password section.
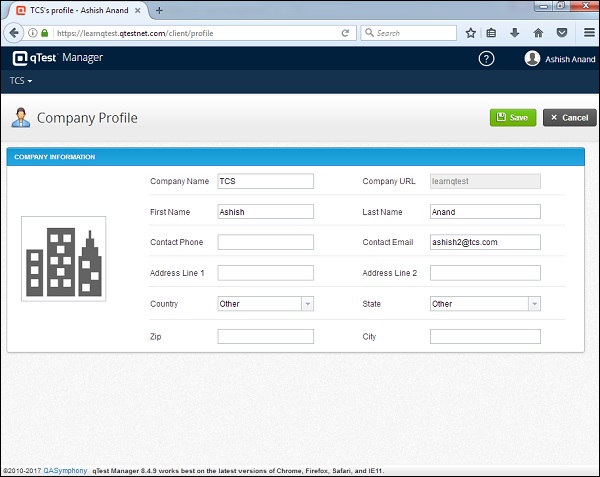
Company Profile
By clicking the Company Profile link, the basic information of the company is displayed. These are the details entered while registering. You can edit and add new details. Click Save to save the details.