- MacOS - Home
- Mac - Factory Reset
- Mac - Erase Assistant Not Supported
- Mac - Update macOS
- Mac - iMessage not working on Mac
- Mac - Rename a Screenshot
- Mac - Password Protect Folder
- Mac - Turn Off Sleep Mode
- Mac - Migration Assistant not Working
- Mac - Remove Background from Images
- Mac - Scan QR Codes
- Mac - Change Folder Color
- Mac - Alternatives to Notepad++
- Mac - Fix Screen Lines
- Mac - Update Roblox
- Mac - Recover Deleted Files
- Mac - Convert HEIC to JPG
- Mac - Take Screenshots
- Mac - PDFs to Word Docs
- Mac - Open & Use Emoji Keyboard
- Mac - ~/Library Folder
- Mac - Uninstalling Programs
- Fix 'MacBook Keyboard Not Working' Issue
- Fix If Touch Bar Not Working
- Mac - Check Storage
- Convert Screenshot to PDF
- Mac - Fix MacBook Pro Trackpad Not Working
- Fix Your Account has been Disabled in App Store and iTunes
- iPhone - Delete Wallpaper
- Mac - Show ~/Library Folder
- iPhone: How To & User Guide
- iPhone - Configure Proxy
- iPhone - Factory Reset
- iPhone - Fix Charging Issue
- iPhone - How To Backup
- iPhone - Retrieve Deleted Messages
- iPhone - Clear Cookies & Cache
- iPad: How To & Guides
- iPad - Free Up Storage
How to Convert HEIC to JPG on a Mac?
Clicking images on your smartphone is common among us. The images you click on your smartphone are captured in HEIC format. This format is all ok until you use it inside the Apple ecosystem, but when you upload it to any website or transfer it to other Android phones. The file cannot be opened, due to this the need for conversion of HEIC format to JPG is needed.
Methods to Convert HEIC to JPG on Mac
Its a simple process in Mac to convert HEIC images to JPG, also there are more than one method that can solve the problem. Lets see all the methods to perform the conversion.
- Conversion using Photos application
- Conversion using preview application
- Bulk convert using Apples quick action
- Convert using websites
- Convert using third-party application
HEIC Images Format
Apples HEIC format stands for High Efficiency Image Container. It is the image format used by iPhone to store images captured. This format uses less space and the images are sharper.
This is great for storing iPhone images but when sharing elsewhere conversion is required.
Converting HEIC to JPG using Photos Application
The photo application on Mac can be employed to convert images. For this, you need to add the images to your photos library. For photos on your Photo app follow these steps to convert HEIC,
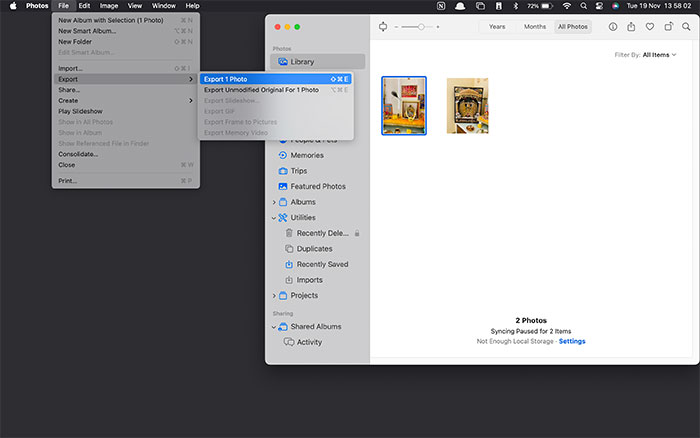
- Click on the image to be converted.
- Click on File on top-left > Export > Export Photos.
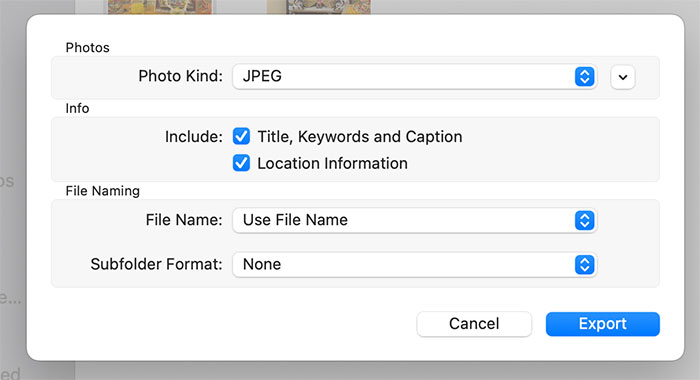
- Update the photo options and click on Export.
- Go to the location where the file will be saved and click Export.
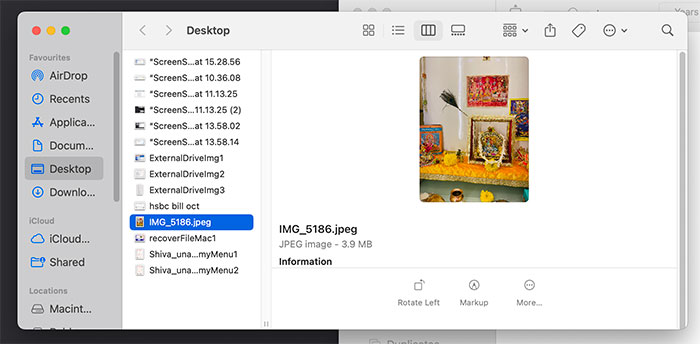
Now, your photo will be saved as a JPG extension with the same name as the original HEIC file.
Converting HEIC to JPG using Preview Application
One more method to convert your iPhones HEIC image to JPG is by using the preview application on your Mac. The conversion is done using the preview application has a limitation that only one image can be converted at a time. One benefit of using the preview is that you would be able to adjust the quality of the resulting image.
Lets see the method to convert HEIC to JPG on Mac,
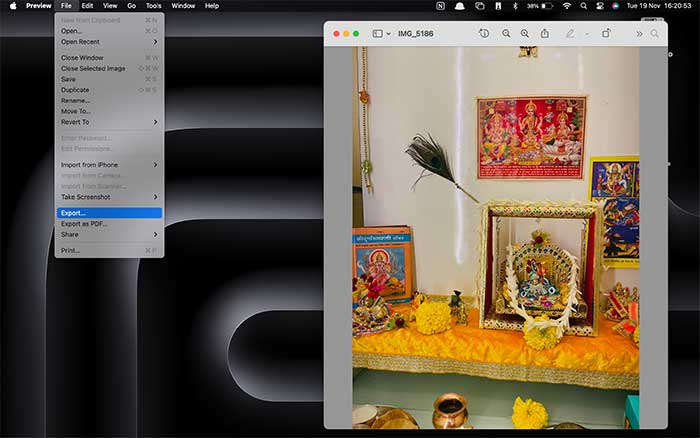
- Open the HEIC image in the Preview application.
- Click on File on top-left > Export.
- Under the format option, select the JPEG option.
- You can adjust the quality of the image and folder where it is to be saved.
- Click on Save to save your converted image.
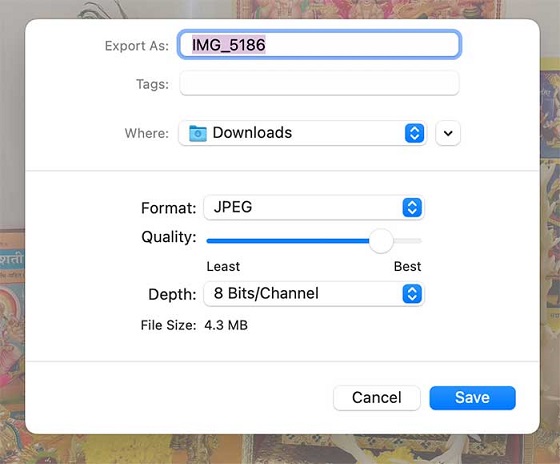
This process is a lot easier and more direct for a single image if you dont have an active photos app on Mac.
Converting HEIC to JPG using Bulk Convert with Apples Quick Action
Apple has recently added a new set of quick actions that can help you ease out your workflow with a single step and without opening any extra applications. You just need 2-3 clicks and its done. This process can also be for bulk images i.e. select multiple photos and use quick action for conversion.
Here, are steps to convert HEIC to JPG on Mac,
- Select the HEIC images you want to convert.
- Double-click on it, and click on Quick Actions > Convert Images.
- From the window that pops up, choose JPEG as the format and click on Convert to JPEG.
This will store the JPEG-converted images of the HEIC file in the same folder. You can select a single image as well as multiple images on your Mac
