- QlikView - Home
- QlikView - Overview
- QlikView - Desktop Installation
- QlikView - Architecture
- QlikView - Navigation
- QlikView - Excel file
- QlikView - Delimited file
- QlikView - XML file
- QlikView - Web file
- QlikView - Database
- QlikView - Inline Data
- QlikView - Resident Load
- QlikView - Preceding Load
- QlikView - Incremental Load
- QlikView - Data - files(QVD)
- QlikView Report Interface
- QlikView - Sheet and Objects
- QlikView - Scripting
- Qlikview - Functions
- QlikView - IntervalMatch
- QlikView - Aggregate Functions
- QlikView - Match Function
- QlikView - Rank Function
- QlikView - Peek Function
- QlikView - RangeSum Function
- QlikView - Documents
- QlikView - List Box
- QlikView - Multi Box
- QlikView - Text Object
- QlikView - Bar Chart
- QlikView - Pie Chart
- QlikView - Dashboard
- QlikView Data Transformation
- QlikView - Transformation Wizard
- QlikView - Fill Function
- QlikView - Column Manipulation
- QlikView - Rotating Tables
- QlikView Data Model
- QlikView - Dimensions & measures
- QlikView - Star Schema
- QlikView - Synthetic Key
- QlikView - Generating Data
- QlikView Data Analysis
- QlikView - Cross Tables
- QlikView - Straight Tables
- QlikView - Pivot Tables
- QlikView - Set Analysis
- QlikView - Joins
- QlikView - Keeps
- QlikView - Concatenation
- QlikView - Master Calendar
- QlikView - Mapping Tables
- QlikView - Circular Reference
- Qlikview Useful Resources
- Qlikview - Questions/Answers
- Qlikview - Quick Guide
- Qlikview - Useful Resources
- Qlikview - Discussion
QlikView - Database Connection
QlikView can connect to most of the popular databases like MySQL, SQL Server, Oracle, Postgress etc. It can fetch data and table structures into QlikView environment and store the results in its memory for further analysis. The steps to connect to any of these databases involves creating an ODBC connection using a DSN and then using this DSN to fetch the data.
For this tutorial, we will be connecting to MySQL database. This tutorial assumes you have a MySQL environment available. Create an ODBC DSN (Data Source Name) for MySQL, following these steps − to create DSN. Name the DSN as mysqluserdsn or you may prefer to use the existing one if you have already created a DSN for MySql.
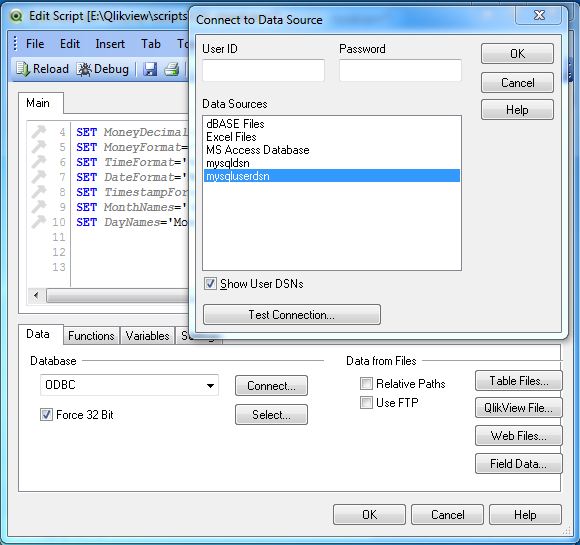
Connecting to the Database
For this chapter we will use the MySql inbuilt database named sakila. We create a new QlikView document and open the script editor (pressing Control+E). Under the tab Data, we locate the section named Database. Choose ODBC from the drop down list and click Connect. The following window opens. Choose the DSN named mysqluserdns and click Test Connection. The message Connection Test succeeded should appear.
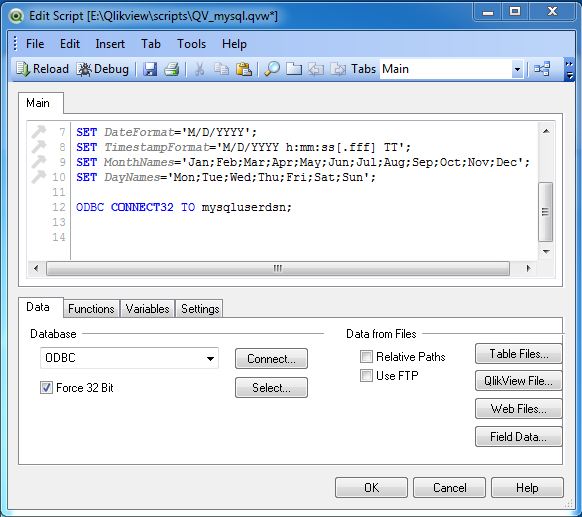
Verifying Connection to Database
On successful connection, the screen given below appears showing the connection to the DB in the main window of the script editor.
Select Database Table
Click Select iin the above window to get the list of tables and columns. Here as we have created the DSN with sakila as the default database we get the list of tables and columns from this database. We can choose another database from the database drop down list as shown in the screenshot given below. We will continue using the sakila database for this chapter.
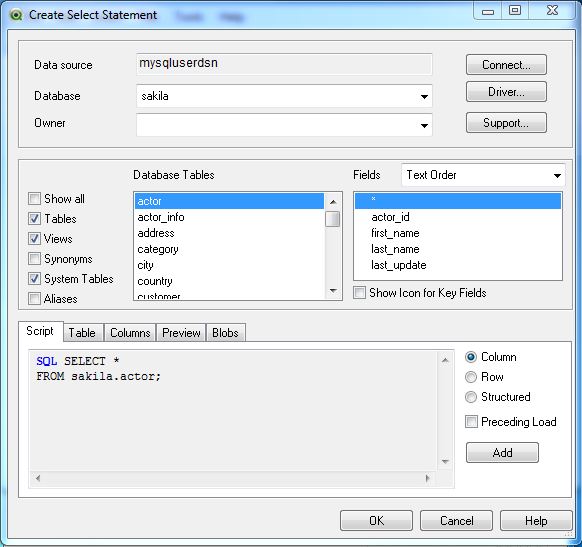
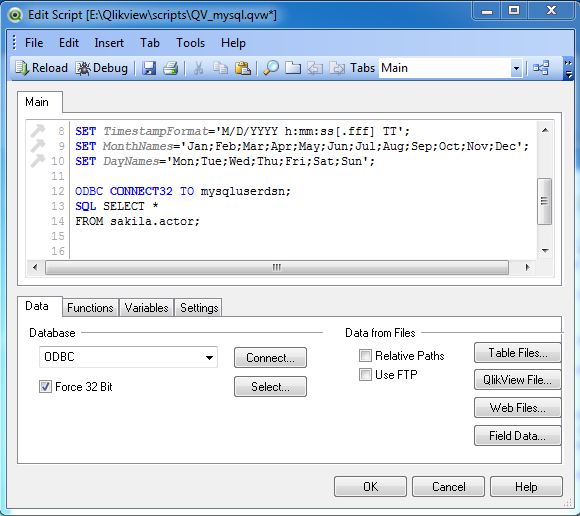
Table Loader Script
On Clicking OK in the above window, we get back to the main script editor showing the script for using the table named actor.
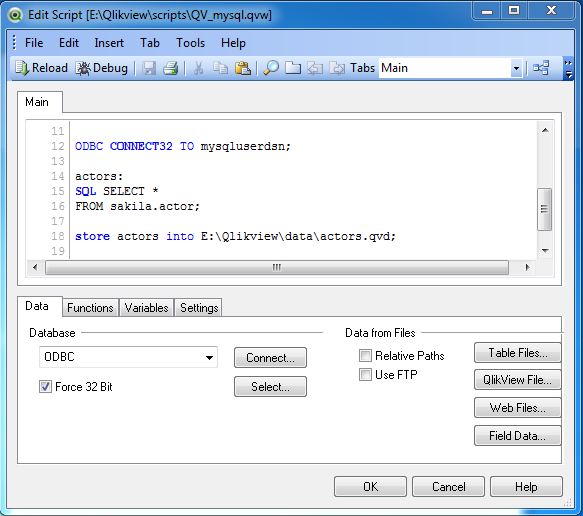
Showing the Result in qvd File
Now the data loaded into QlikView document needs to be stored permanently to be analyzed further. For this, we will edit the script to store the data in the form of a qvd file. Press Control+E to open the edit script window and write the following code.
In the code, we give appropriate names to the columns and mention the table name above the load statement. In addition, we give a path where the generated qvd file will be stored. Save this file as QV_mysql.qvw
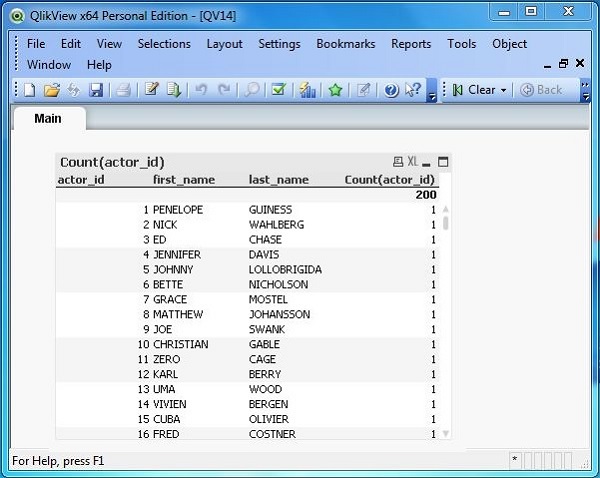
Using the qvd File
The qvd file can be loaded into the main document and used to create graphs and tables for further analysis. Press Control+R to reload the QV_mysql.qvw file and click Next in the chart wizard. Choose the straight table to be created with actor_id, first_name, last_name as the dimensions and count of actor_id as the expression. A chart appears as given below.