- Microsoft Azure Tutorial
- Microsoft Azure - Home
- Cloud Computing - Overview
- Microsoft Azure - Windows
- Microsoft Azure - Components
- Microsoft Azure - Compute Module
- Microsoft Azure - Fabric Controller
- Microsoft Azure - Storage
- Microsoft Azure - Blobs
- Microsoft Azure - Queues
- Microsoft Azure - Tables
- Microsoft Azure - CDN
- Microsoft Azure - Applications
- Microsoft Azure - Security
- Microsoft Azure - Datacenters
- Microsoft Azure - Scenarios
- Microsoft Azure Advanced
- Microsoft Azure - Management Portal
- Azure - Create Virtual Network
- Azure - Deploying Virtual Machines
- Azure - Endpoint Configuration
- Azure - Point-to-Site Connectivity
- Azure - Site-to-Site Connectivity
- Microsoft Azure - Traffic Manager
- Microsoft Azure - PowerShell
- Azure - Monitoring Virtual Machines
- Azure - Setting Up Alert Rules
- Azure - Application Deployment
- Microsoft Azure - Backup & Recovery
- Azure - Self-Service Capabilities
- Azure - Multi-Factor Authentication
- Azure - Forefront Identity Manager
- Azure - Data Import & Export Job
- Microsoft Azure - Websites
- Microsoft Azure - Scalability
- Microsoft Azure - Disk Configuration
- Microsoft Azure - Disk Caching
- Microsoft Azure - Personalize Access
- Azure - Personalize Company Brand
- Azure - Self-Service Password Reset
- Microsoft Azure - Self-Service Group
- Microsoft Azure - Create a Group
- Azure - Security Reports & Alerts
- Azure - Orchestrated Recovery
- Microsoft Azure - Health Monitoring
- Microsoft Azure - Upgrades
- Microsoft Azure Useful Resources
- Microsoft Azure - Quick Guide
- Microsoft Azure - Useful Resources
- Microsoft Azure - Discussion
Microsoft Azure - Personalize Access
We have two portals to access and manage our Azure service by logging in to our Azure account. Azure management portal has some issues with responsiveness, thus a second portal named preview portal was designed. The preview portal was launched later to improve the user experience on tablets and mobile devices.
Clients, who are managing their services through Azure portal, often come here and Azure team has provisioned the personalization of the look of Azure preview portal. Users can choose the color and features to be displayed on the dashboard, which makes it easy for them to navigate through the services in the portal. Let us see what can be personalized in Azure preview portal.
You can directly login to the preview portal by visiting https://portal.azure.com/ and using your Azure account or you can switch to it from Azure management portal. Azure team keeps making little changes but the overall concept remains the same. So when you try to customize your portal, it might look a little different but the basic features will remain the same.
Step 1 − Login to Azure management portal.
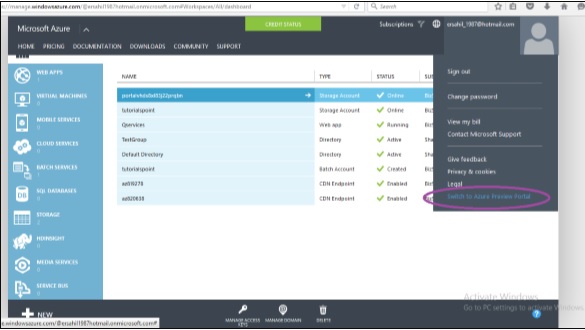
Step 2 − Switch to Azure preview portal by clicking on your photo and choosing ‘Switch to Azure Preview Portal’.
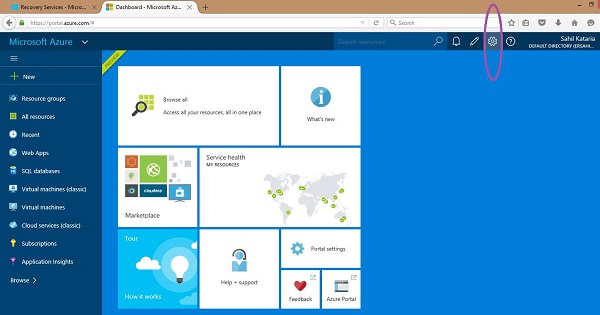
Step 3 − You will see the following screen which is the dashboard of your Azure account. The tiles in the middle of the screen are some of the common tasks performed by Azure preview portal. To personalize these tiles click the ‘Settings Icon’ encircled.
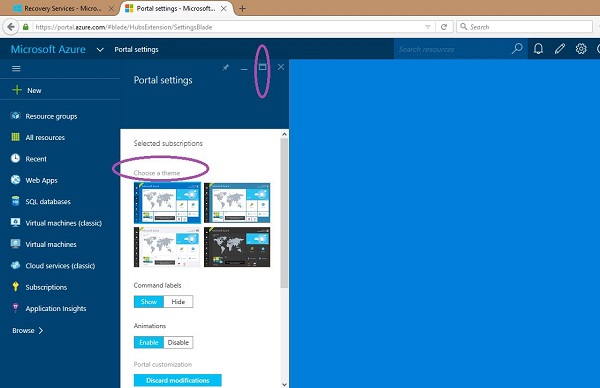
Step 4 − It will take you to the following screen. You can maximize the screen by clicking on the button encircled. You can choose from the available themes which will change the background color of the screen. On the same screen, you can choose to show/hide the command labels that display the name of the command. Similarly, you can enable/disable the animations.
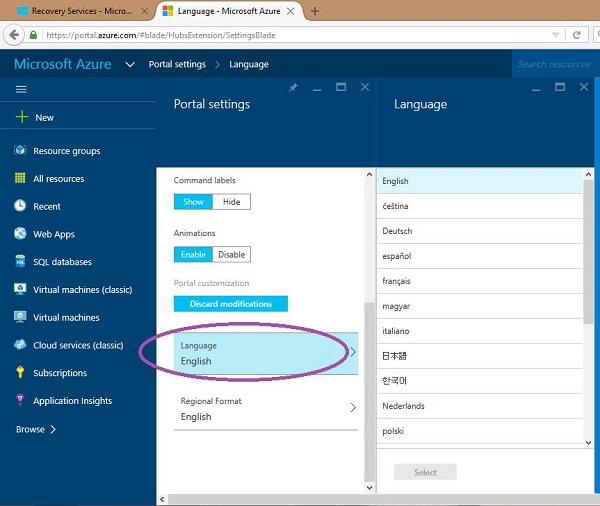
Step 5 − If you scroll down, you will see an option to change the language.
Step 6 − You can also change the size of the tile. You can make it bigger or smaller. For example, on the following screen if you want my resource groups bigger −
Right-click on the tile and choose customize.
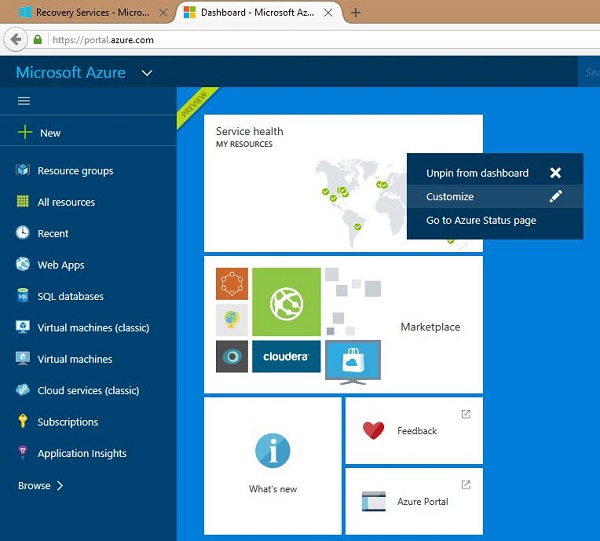
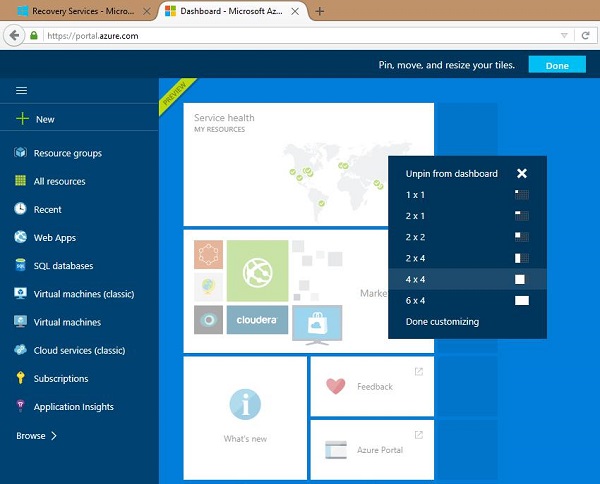
Alternatively, choose ‘customize’ from the top strip of the tile. It will appear when you hoover your cursor over it.
Choose the size of the tile. Click ‘Done’ on the top of the screen.
Step 7 − You can also customize your dashboard by moving the tiles as per your choice. You just have to drag and drop the tile to a different location on the screen.
Step 8 − You can pin any of your resources to the dashboard.
Go to the resource. Right-click on it or click the three dots.
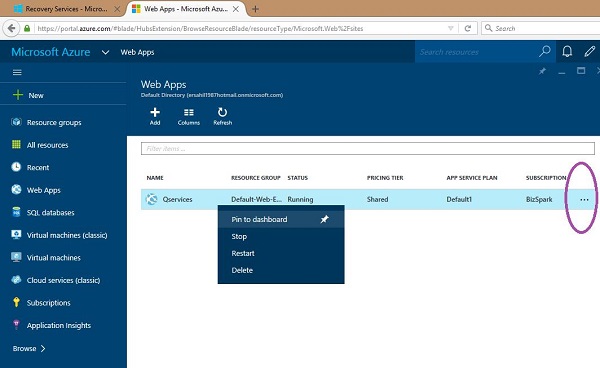
Click on the ‘Pin to Dashboard’.
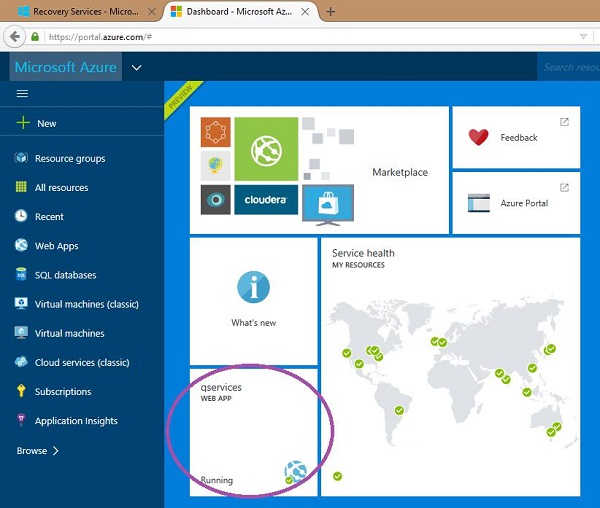
When you come back to the dashboard by clicking on the ‘Microsoft Azure’ at the top left corner, you will see the resource there as shown in following image.
