- Microsoft Azure Tutorial
- Microsoft Azure - Home
- Cloud Computing - Overview
- Microsoft Azure - Windows
- Microsoft Azure - Components
- Microsoft Azure - Compute Module
- Microsoft Azure - Fabric Controller
- Microsoft Azure - Storage
- Microsoft Azure - Blobs
- Microsoft Azure - Queues
- Microsoft Azure - Tables
- Microsoft Azure - CDN
- Microsoft Azure - Applications
- Microsoft Azure - Security
- Microsoft Azure - Datacenters
- Microsoft Azure - Scenarios
- Microsoft Azure Advanced
- Microsoft Azure - Management Portal
- Azure - Create Virtual Network
- Azure - Deploying Virtual Machines
- Azure - Endpoint Configuration
- Azure - Point-to-Site Connectivity
- Azure - Site-to-Site Connectivity
- Microsoft Azure - Traffic Manager
- Microsoft Azure - PowerShell
- Azure - Monitoring Virtual Machines
- Azure - Setting Up Alert Rules
- Azure - Application Deployment
- Microsoft Azure - Backup & Recovery
- Azure - Self-Service Capabilities
- Azure - Multi-Factor Authentication
- Azure - Forefront Identity Manager
- Azure - Data Import & Export Job
- Microsoft Azure - Websites
- Microsoft Azure - Scalability
- Microsoft Azure - Disk Configuration
- Microsoft Azure - Disk Caching
- Microsoft Azure - Personalize Access
- Azure - Personalize Company Brand
- Azure - Self-Service Password Reset
- Microsoft Azure - Self-Service Group
- Microsoft Azure - Create a Group
- Azure - Security Reports & Alerts
- Azure - Orchestrated Recovery
- Microsoft Azure - Health Monitoring
- Microsoft Azure - Upgrades
- Microsoft Azure Useful Resources
- Microsoft Azure - Quick Guide
- Microsoft Azure - Useful Resources
- Microsoft Azure - Discussion
Microsoft Azure - Disk Configuration
You would have noticed that we can attach a disk to a virtual machine that we create in Azure. We will be discussing those disks in this chapter. Disk here is referred to the data disks that can be stored on Azure. All kinds of disks are virtual hard drives with .vhd extensions. Vhds are the image file that stores the contents of physical hard drive. So they are images of the files, which we usually find on our computer’s hard drive. There are two types of virtual hard disks −
- Operating system VHDs and Data Disks
- Image VHDs
On the basis of the extendibility, there are two types of VHDs −
- Fixed Size
- Dynamically Expanding
Azure supports only fixed sized VHDs. If you have to upload expandable VHD you will have to first convert it to fixed size VHDs. Maximum size supported by Azure is 1 terabyte for a disk.
Virtual Machine and Disks
When we create a virtual machine, it always resides in a storage account in Azure account. If there is no existing storage account in Azure, while attempting to create a virtual machine, Azure will automatically create one. If you already have a storage account, it will ask you to choose the storage account while creating a virtual machine. There is a detailed how-to on creating a virtual machine in this tutorial.
Create/Attach a Disk in Virtual Machine
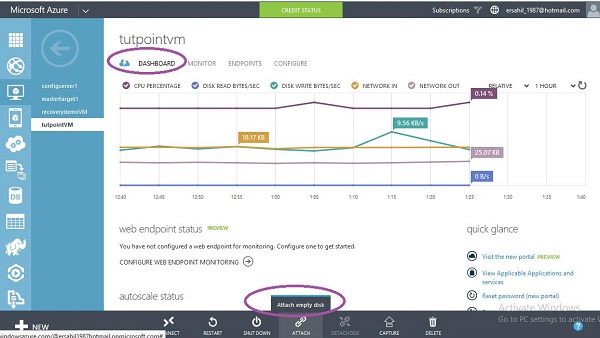
Step 1 − Go to the virtual machine.
Step 2 − Select ‘Dashboard’ from the top menu.
Step 3 − Click ‘Attach disk’ → Attach empty disk at the bottom of the screen.
Step 4 − Enter the details in the following screen that pops up.
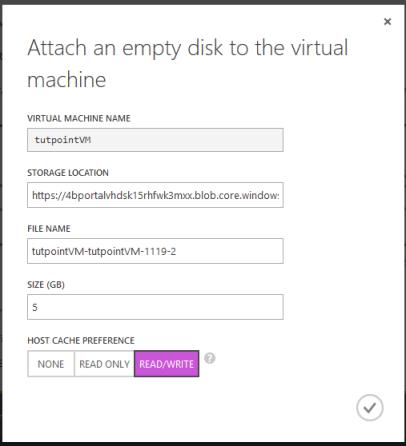
It will take few seconds to attach the disk to the virtual machine.
Configure the Disk in Virtual Machine
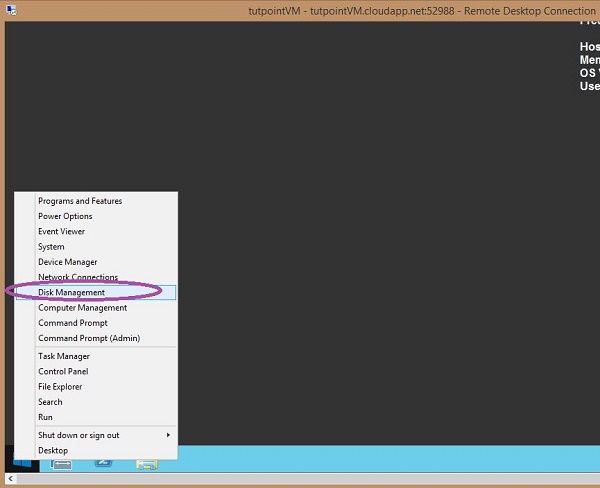
Step 1 − Connect to the virtual machine through .rpd file downloaded on your local machine.
Step 2 − In the virtual machine, right-click the windows icon at the left bottom corner and select ‘Disk Management’.
Step 3 − You will see a message saying Disk is available on the screen. This is the same disk that you attached in the previous step.
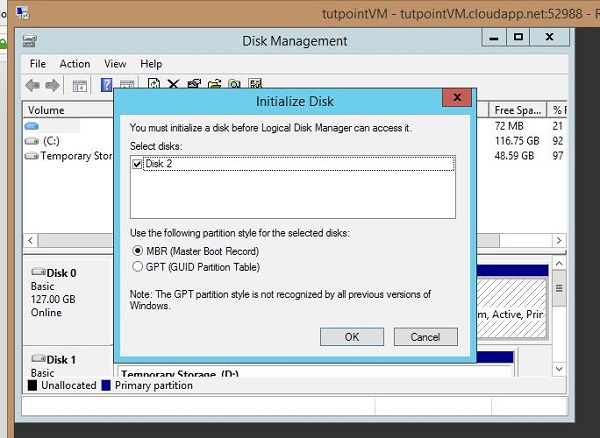
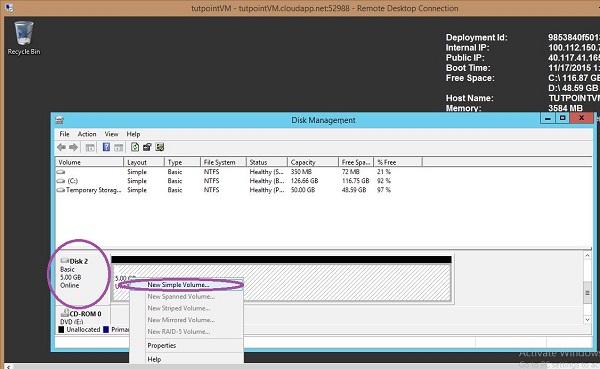
Step 4 − Before you can use it, you need to allocate it. You will see that it is still unallocated. Scroll down on the same screen and locate the disk as shown in the following image, it is Disk 2. Right-click on it and select ‘New Simple Volume’.
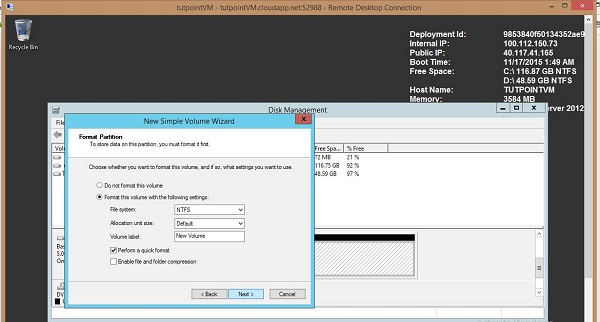
Step 5 − Follow the wizard. It will ask very general things, like naming the drive and file system. In the last screen, make sure to keep the quick format option checked.
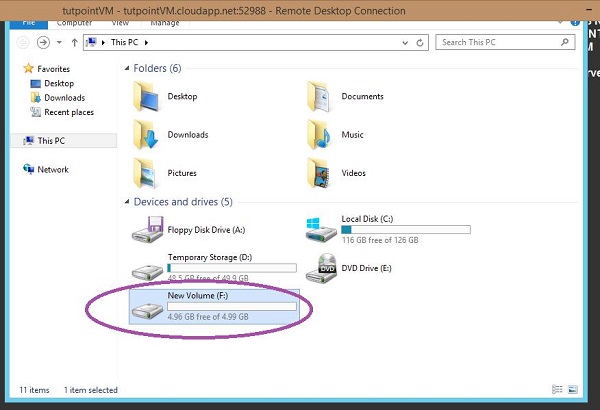
Step 6 − After the wizard’s job is over, you will be ready to use the disk. In this example, we have created the ‘F’ drive. You can create the folder and files or copy your data in the F drive.
Delete the Disk
You will have to first locate the disk in order to delete. Locating the right disk is very important. When you create a virtual machine you select the storage account for it. Disks reside in the storage account.
Step 1 − Go to the storage account of the virtual machine.
Step 2 − Click ‘Containers’ from the top menu.
Step 3 − Click vhd.
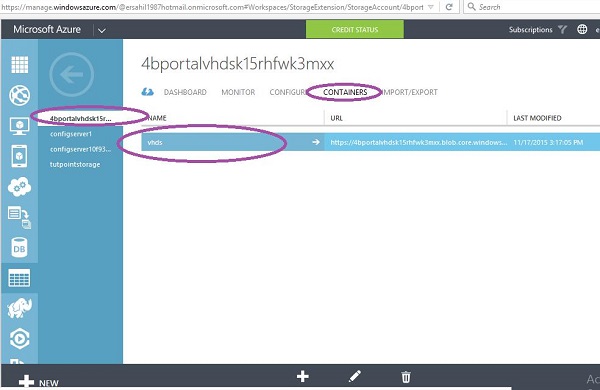
Step 4 − All the vhds in that storage account will be listed. This list will also contain the vhds from other virtual machines so be very careful while selecting the vhd.
Step 5 − Select the vhd you want to delete. You must know the name of the disk in order to identify it among the several vhds in the list (when you attach the disk you are prompted to enter the name of the disk).
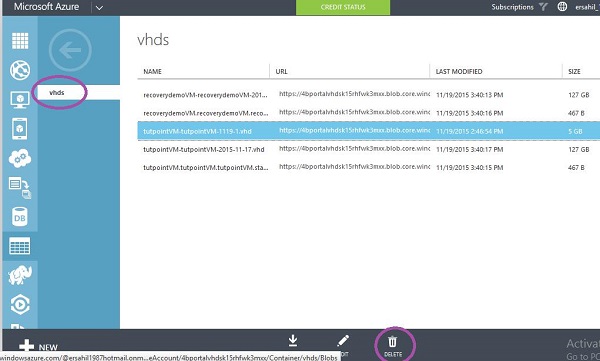
Image Disks
Create an image from Virtual Machine
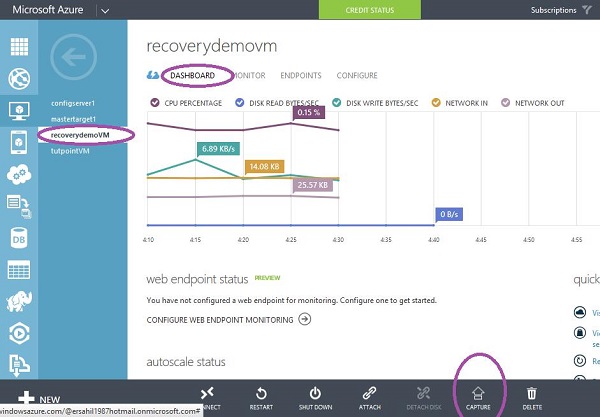
Step 1 − Go to the management portal.
Step 2 − Select the virtual machine you want to create an image of.
Step 3 − Click ‘Dashboard’ from the top menu.
Step 4 − Click the ‘Capture’ icon at the bottom of the window.
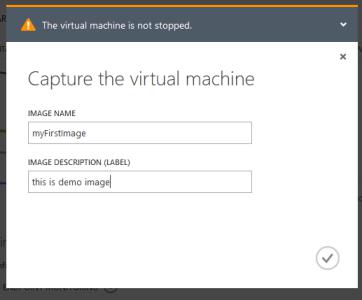
Step 5 − Name the image and enter the description.
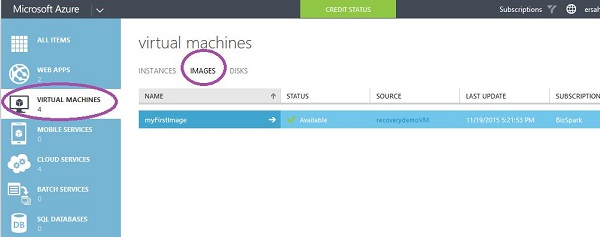
Step 6 − Once capturing is done, to find the image, follow the points given below −
Select Virtual Machines from the panel. All the virtual machines in your account will be listed there.
Click ‘Images’ from the top menu.
Create an Image from Your Computer
This is done through sysprep tool available in all modern Windows operating system.
Step 1 − Go C drive −> Windows −> System32 → Sysprep
Step 2 − Alternatively copy the following path in the address bar C:\Windows\System32\Sysprep
Step 3 − Run ‘sysprep’ application. This will create a VHD file on your computer which is the image of your machine.

Considerations
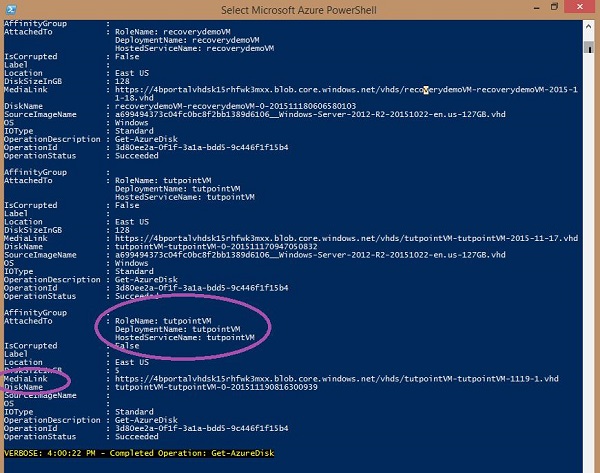
You might get confused with the names of vhds, when you have multiple virtual machines under the same storage account. A way of knowing the name of the vhds associated with a particular machine is running ‘Get-AzureDisk’ cmdlet in Windows PowerShell. This cmdlet will get you all the details of disks in each virtual machine.
Step 1 − Run the following command
Get-AzureDisk
Step 2 − Locate your virtual machine name in the list. Under that virtual machine, check the diskname and medialink for your vhd name and link.