- Microsoft Azure Tutorial
- Microsoft Azure - Home
- Cloud Computing - Overview
- Microsoft Azure - Windows
- Microsoft Azure - Components
- Microsoft Azure - Compute Module
- Microsoft Azure - Fabric Controller
- Microsoft Azure - Storage
- Microsoft Azure - Blobs
- Microsoft Azure - Queues
- Microsoft Azure - Tables
- Microsoft Azure - CDN
- Microsoft Azure - Applications
- Microsoft Azure - Security
- Microsoft Azure - Datacenters
- Microsoft Azure - Scenarios
- Microsoft Azure Advanced
- Microsoft Azure - Management Portal
- Azure - Create Virtual Network
- Azure - Deploying Virtual Machines
- Azure - Endpoint Configuration
- Azure - Point-to-Site Connectivity
- Azure - Site-to-Site Connectivity
- Microsoft Azure - Traffic Manager
- Microsoft Azure - PowerShell
- Azure - Monitoring Virtual Machines
- Azure - Setting Up Alert Rules
- Azure - Application Deployment
- Microsoft Azure - Backup & Recovery
- Azure - Self-Service Capabilities
- Azure - Multi-Factor Authentication
- Azure - Forefront Identity Manager
- Azure - Data Import & Export Job
- Microsoft Azure - Websites
- Microsoft Azure - Scalability
- Microsoft Azure - Disk Configuration
- Microsoft Azure - Disk Caching
- Microsoft Azure - Personalize Access
- Azure - Personalize Company Brand
- Azure - Self-Service Password Reset
- Microsoft Azure - Self-Service Group
- Microsoft Azure - Create a Group
- Azure - Security Reports & Alerts
- Azure - Orchestrated Recovery
- Microsoft Azure - Health Monitoring
- Microsoft Azure - Upgrades
- Microsoft Azure Useful Resources
- Microsoft Azure - Quick Guide
- Microsoft Azure - Useful Resources
- Microsoft Azure - Discussion
Microsoft Azure - Scalability
Scaling is adaptability of the system to the changed amount of workload or traffic to the web application. One of the great features of Azure service is its ability to auto scale according to the demands of the application usage.
Basically, increasing or decreasing the resources for application is called scaling. Instance is created each time a web app is deployed. Creating the instance means assigning a server to that application. Increasing the instance means adding up the servers assigned to that application. The scaling is done by creating more instances which is called scaling out. Another way of achieving the scaling is provisioning the larger role instances, also called scaling up.
Configuring scaling is easier in Azure as compared to traditional hosting. The primary server does not need to be taken down. It also eliminates the physical constraints of adding resources.
Scaling features depend on the app service plan you opt for in Azure. There are five App service plans in Azure −
| Maximum Instances | Auto-scaling Supported | |
|---|---|---|
| Free | 1 | No |
| Shared | 1 | No |
| Basic | 3 | No |
| Standard | 10 | Yes |
| Premium | 50 | Yes |
In free and shared service plan, you cannot scale the application as only one instance is available. In basic plan, you can scale the application manually. This means you have to check the metrics manually to see if more instances are needed and then can increase or decrease them from your Azure management portal. In standard and premium plan, you can choose to auto scale based on few parameters.
To see the all options available in different plans −
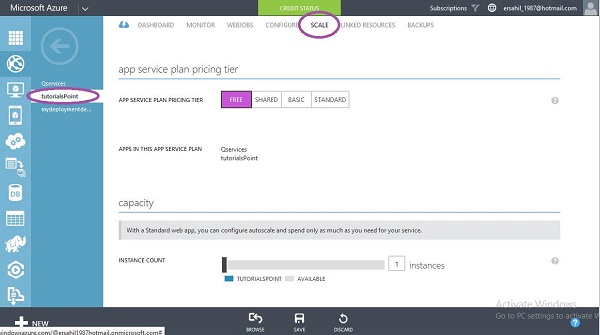
Step 1 − Go to your web app in the management portal and select ‘scale’ from the top menu. You can see under free service plan only 1 instance is created.
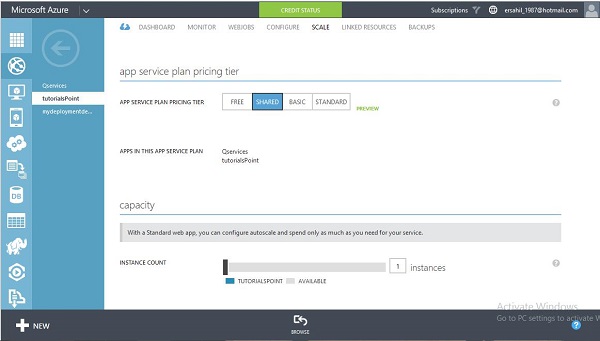
Step 2 − Under shared plan, you can create 1 instance but you don’t have the option of auto scaling.
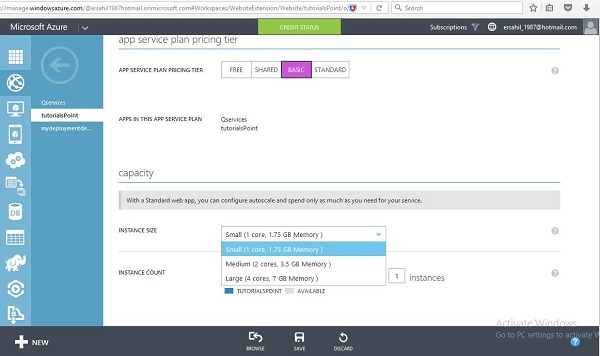
Step 3 − Under basic service plan, you can create up to 3 instances but do have option to auto scale. That means you can increase instances manually when you need to. Moreover, you can choose the size of the instance.
Step 4 − Under standard service plan, you can chose auto-scaling based on −
CPU percentage − You can choose to increase the instances depending upon the average CPU percentage over a specified period of time. In the following image, you can see we have chosen to increase the instances up to 3 if average CPU usage gets between 60% and 80%.
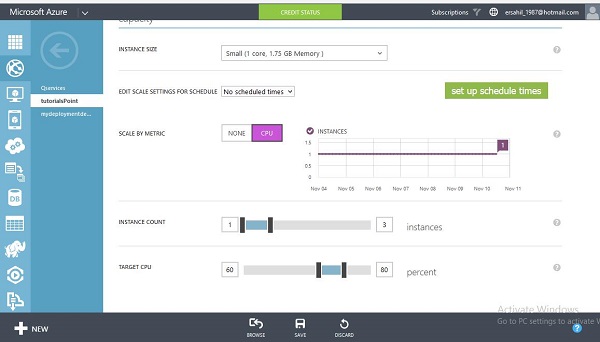
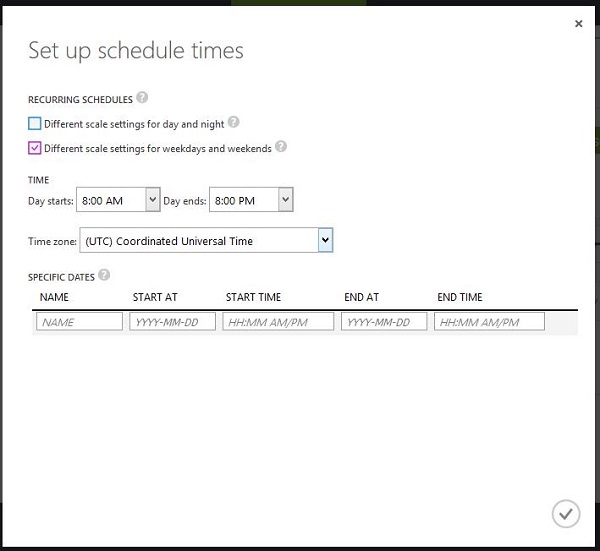
Schedule − You can set the number of instances that should run for a particular day of the week or for a particular time in a day. Additionally, you can specify the dates when you need to increase the instances.
Here premium option for this application is not discussed. You might see different options based on your subscription for service plans. But the concept will remain the same.
Things to Consider
You can change the service plan even after creating it.
All the instances are from the same service plan. You cannot have one instance from shared and another from standard for the same application. Thus, you cannot mix and match instances from different service plans for the same application.
Even if you have opted for auto-scaling, you should keep a check on metrics and performance of your application for the best out of Azure. This way you would be able to save money as well as optimize the performance of the applications.