- Microsoft Azure Tutorial
- Microsoft Azure - Home
- Cloud Computing - Overview
- Microsoft Azure - Windows
- Microsoft Azure - Components
- Microsoft Azure - Compute Module
- Microsoft Azure - Fabric Controller
- Microsoft Azure - Storage
- Microsoft Azure - Blobs
- Microsoft Azure - Queues
- Microsoft Azure - Tables
- Microsoft Azure - CDN
- Microsoft Azure - Applications
- Microsoft Azure - Security
- Microsoft Azure - Datacenters
- Microsoft Azure - Scenarios
- Microsoft Azure Advanced
- Microsoft Azure - Management Portal
- Azure - Create Virtual Network
- Azure - Deploying Virtual Machines
- Azure - Endpoint Configuration
- Azure - Point-to-Site Connectivity
- Azure - Site-to-Site Connectivity
- Microsoft Azure - Traffic Manager
- Microsoft Azure - PowerShell
- Azure - Monitoring Virtual Machines
- Azure - Setting Up Alert Rules
- Azure - Application Deployment
- Microsoft Azure - Backup & Recovery
- Azure - Self-Service Capabilities
- Azure - Multi-Factor Authentication
- Azure - Forefront Identity Manager
- Azure - Data Import & Export Job
- Microsoft Azure - Websites
- Microsoft Azure - Scalability
- Microsoft Azure - Disk Configuration
- Microsoft Azure - Disk Caching
- Microsoft Azure - Personalize Access
- Azure - Personalize Company Brand
- Azure - Self-Service Password Reset
- Microsoft Azure - Self-Service Group
- Microsoft Azure - Create a Group
- Azure - Security Reports & Alerts
- Azure - Orchestrated Recovery
- Microsoft Azure - Health Monitoring
- Microsoft Azure - Upgrades
- Microsoft Azure Useful Resources
- Microsoft Azure - Quick Guide
- Microsoft Azure - Useful Resources
- Microsoft Azure - Discussion
Microsoft Azure - Multi-Factor Authentication
All of us at some point have encountered multi-factor authentication. For example, customers of some banks receive a call or one-time password as text message on their mobile phones while signing in to their bank account online. The multi-factor authentication refers to the system in which more than one system authenticates the user to access an application. The multi-factor authentication offers better security for Azure clients. It lets the client choose if they want to use more than one system of credentials to allow the users to access the applications. Multi-factor authentication can be used to protect both on-premise and on-cloud directories.
In this process, the user first signs in with the username and password in a normal way. The credentials are verified and then if the automated call authentication is activated, the user receives a call and is asked to confirm the sign-in attempt.
Mobile App − Mobile apps for all platforms (Android, iOS and Windows) are available. This app pushes a notification when a sign-in attempt is made and then the user can choose to authenticate, if it is genuine attempt.
Text Message − This method sends a one-time password to the registered mobile phone of the user. They either reply from their phone or enter the one-time password into their sign-in page.
Automated Call − The automated call asks for the user to validate the sign-in attempt by pressing a key on their phone’s dial pad.
Create a Multi-Factor Authentication Provider
Step 1 − Click ‘New’ at the left bottom corner → App Services → Active Directory → Multi Factor Auth Provider → Quick Create.
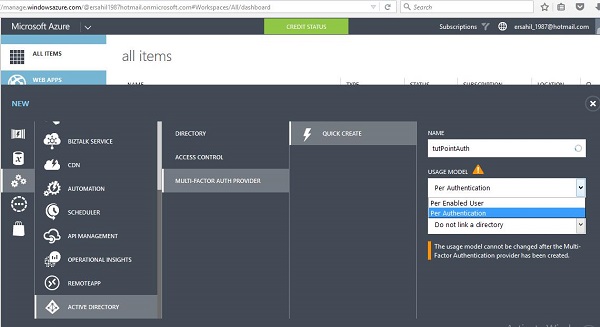
Step 2 − Enter the name for the provider.
Step 3 − Select Usage model. Let’s choose ‘Per Authentication’ for this example. Please note that you won’t be able to change the usage model once multi-authentication provider is created. So please take your needs in consideration before choosing it.
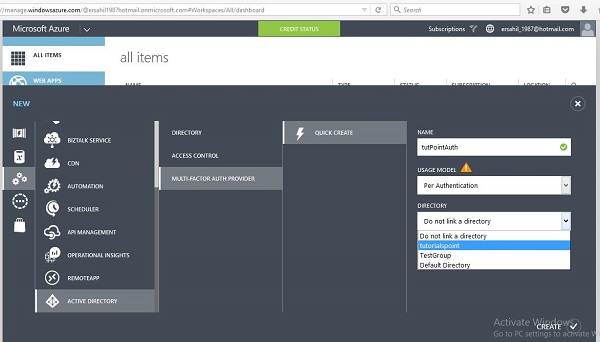
Step 4 − Next, there is an option, if you wish to link the existing directory or not. Here, let’s link an existing directory name ‘tutorialspoint’ that was previously created to this multi-factor provider.
Step 5 − After you click ‘Create’, it will be listed in your services list. Select the multi-factor provider you just created and you will the following screen.
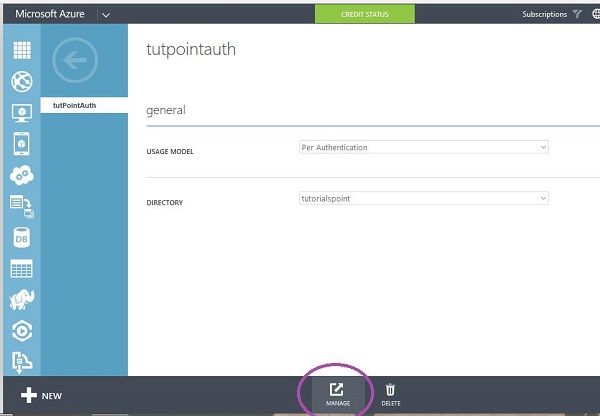
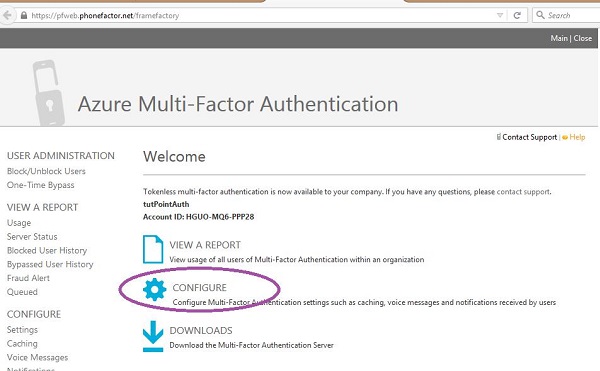
Step 6 − Select ‘Manage’ at the bottom of the screen and you will be taken to a new page as shown in the following image.
Step 7 − Select ‘Configure’ to choose the authentication.
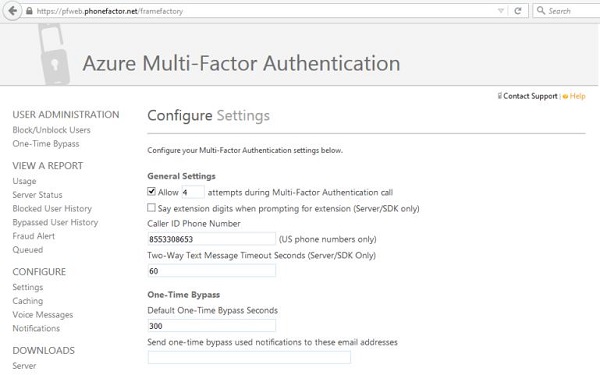
Step 8 − You can set the number of attempts, change the phone number from where the call is made (default number is already there), two-way message timeout (default is 60 seconds), one-time password’s timeout (default is 300 seconds) under general settings. You can also provide an e-mail address where you can be notified if one-time password is bypassed.
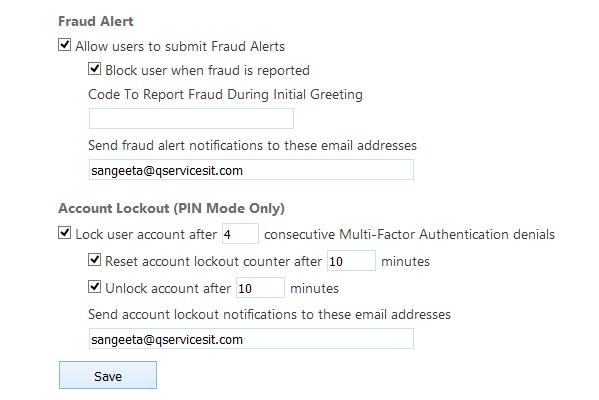
Step 9 − Scroll down the page and you will see fraud settings. Under Fraud Setting, you can choose to allow the users to send fraud alerts, block the user if an alert is reported and also set an e-mail address where alerts are sent.
After the multi-factor authentication is activated for the users, they will be asked to choose one of the three methods (automated message, text message or mobile app) when they sign in to their account next time. The chosen method will be used to authenticate them each time they sign in to their account.
Enable the Multi-Factor Authentication for Existing Directory
One way is to link the directory to multi-factor authentication provider while creating it, as we seen in the previous section. However, you can also do it in the following way for a particular user.
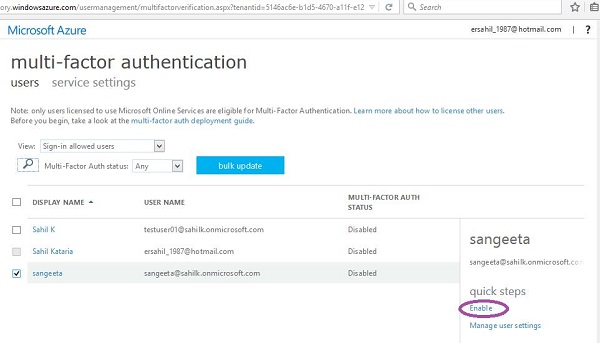
Step 1 − Go to your directory by choosing it from the left panel and click ‘Manage MultiFactor Auth’ at the bottom of the screen.
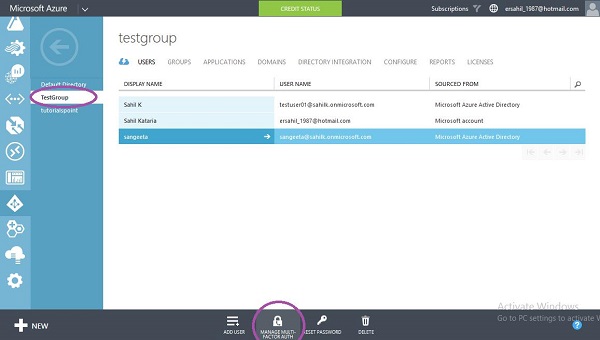
Step 2 − It will take you to the following screen. Here you can select the user and enable or disable the multi-factor authentication for the user.
Enable Multi-Factor Authentication for On-premises Applications
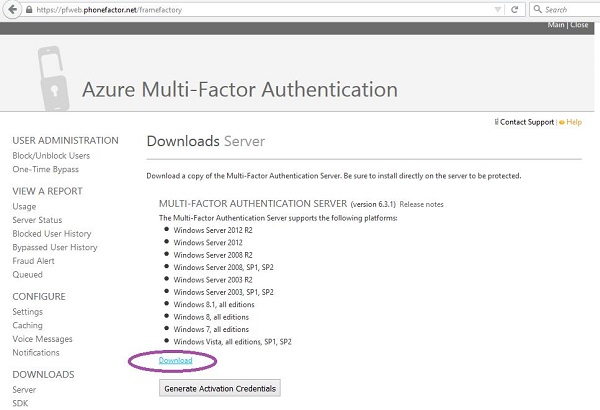
When you create a new multi-authentication provider using the management portal and select to manage it, you are taken to the page as was shown in the first section of this chapter. If you want to enable the multi-factor authentication for your on-premise application, you have to install the authentication server by clicking the highlighted link. Then you can configure the setting as desired.
Step 1 − Click the link encircled in the following image.
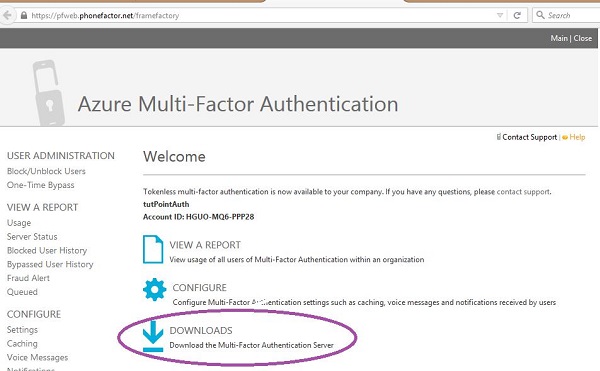
Step 2 − You will be taken to the following screen, download the setup and generate activation credentials in order to login to the server.