- SwiftUI - Home
- SwiftUI - Overview
- SwiftUI vs UIkit
- SwiftUI Environment
- SwiftUI - Environment Setup
- SwiftUI - Basic Components
- SwiftUI - Building First Application
- SwiftUI Views
- SwiftUI - Views
- SwiftUI - Customize Text View
- SwiftUI - Custom Image View
- SwiftUI - Stacks
- SwiftUI Drawing Shapes
- SwiftUI - Shapes
- SwiftUI - Drawing line
- SwiftUI - Drawing Rectangle
- SwiftUI - Drawing Rounded Rectangle
- SwiftUI - Drawing Triangle
- SwiftUI - Drawing Circle
- SwiftUI - Drawing Star
- SwiftUI - Drawing Polygon
- SwiftUI - Drawing Pie chart
- SwiftUI - Using built-in shapes
- SwiftUI - Text
- SwiftUI - Text View
- SwiftUI - Text Input and Output
- SwiftUI - Color
- SwiftUI - Color
- SwiftUI - Colorpicker
- SwiftUI - Gradients
- SwiftUI - Adjust Color
- SwiftUI - Effects
- SwiftUI - Effects
- SwiftUI - Blend Effect
- SwiftUI - BLur Effect
- SwiftUI - Shadow Effect
- SwiftUI - Hover Effect
- SwiftUI - Animations
- SwiftUI - Animations
- SwiftUI - Creating Animations
- SwiftUI - Creating an Explicit Animation
- SwiftUI - Multiple Animations
- SwiftUI - Transitions
- SwiftUI - Asymmetric Transition
- SwiftUI - Custom Transition
- SwiftUI - Image
- SwiftUI - Images
- SwiftUI - Image as Background
- SwiftUI - Rotating Image
- SwiftUI - Media
- SwiftUI - View Layout
- SwiftUI - View Layout
- SwiftUI - View Size
- SwiftUI - View Spacing
- SwiftUI - View Padding
- SwiftUI - UI Controls
- SwiftUI - UI Controls
- SwiftUI - Button
- SwiftUI - CheckBox
- SwiftUI - Menubar
- SwiftUI - Toolbar
- SwiftUI - Search Bar
- SwiftUI - TextField
- SwiftUI - Slider
- SwiftUI - Toggle
- SwiftUI - Pickers
- SwiftUI - Menus
- SwiftUI - List & Tables
- SwiftUI - Lists
- SwiftUI - Static List
- SwiftUI - Dynamic List
- SwiftUI - Customize List
- SwiftUI - Tables
- SwiftUI - Forms
- SwiftUI - Forms
- SwiftUI - Breaking Forms in Sections
- SwiftUI - Event Handling
- SwiftUI - Event Handling
- SwiftUI - Gesture
- SwiftUI - Clipboard
- SwiftUI - Drag and Drop
- SwiftUI - Focus
- SwiftUI - Alert
- SwiftUI - Miscellaneous
- SwiftUI - Containers
- SwiftUI - Navigation
- SwiftUI - Notifications
- SwiftUI - Cross-Platform UI
- SwiftUI - Data
- SwiftUI - Accessibility
- SwiftUI - Framework Integration
- SwiftUI - Framework Integration
- SwiftUI - Interfacing with UIKit
- SwiftUI - Creating macOS App
- SwiftUI Useful Resources
- SwiftUI - Useful Resources
- SwiftUI - Discussion
SwiftUI - Gesture
Gestures are used to handle user interactions with the UI components present in the app. Or we can say that gestures handle the touch events. It creates interactive and responsive apps for all of Apple's platforms by responding to the user's touch and movements.
SwiftUI supports a wide range of in-built gestures such as taps, drags, swipes, etc., and we are also allowed to create a custom gesture to fulfill the requirements of the app.
Here, the gestures generally support single-finger interaction, and SwiftUI does not provide any special functionality to set the total number of fingers for movements. Gesture replaces the traditional buttons and provides more features as compared to buttons.
Type of Gestures in SwiftUI
SwiftUI provide a wide range of gestures for different types of interactions. It supports both pre-defined gestures as well as customized gestures. Some of the commonly used gestures are as follows−
Tap Gesture
A tap gesture is used to identify single or multiple tapes on the view. It is the most commonly used and simplest gesture. We can achieve the tap gesture with the help of the .onTapGesture() modifier. This modifier performs the specified action whenever it finds the tap gesture.
Syntax
Following is the syntax −
func onTapGesture(count:Int, perfrom: action)
Parameters
Following are the parameters accepted by the modifier −
count: Represent the total number of taps. By default the value is 1.
action: Represent the action to be performed.
Example
The following SwiftUI program performs a tap gesture. Here, when we tap on the shape, the shape changes from capsule to rectangle.
import SwiftUI
struct ContentView: View {
   @State private var isShape = true
   var body: some View {
      Group {
         if isShape {
            Capsule()
               .fill(.green)
               .frame(width: 100, height: 50)
               .overlay(Text("Tap Me").font(.title2))
         } else {
            Rectangle().fill(.blue).frame(width: 100, height: 100)
         }
      }.onTapGesture {

         // Toggle the shape between capsule and rectangle
         isShape.toggle()
      }
   }
}
#Preview {
   ContentView()
}
Output
Long Press Gesture
A long press gesture is used to identify a long press on the view. This gesture is activated by using the .onLongPressGesture() modifier. This modifier inserts an action that will be performed whenever the user presses a long press on the given UI component or view.
Syntax
Following is the syntax−
func onLongPressGesture(minimumDuration:Double, perfrom:action, onPressingChanged: Bool)
Parameters
Following are the parameters accepted by the modifier −
minimumDuration: Represent the minimum duration of long press.
action: Represent the action to be performed.
onPressingChanged: Represent a closure that will run when the pressing state of the gesture changes.
Example
The following SwiftUI program performs long press gesture.
import SwiftUI
struct ContentView: View {
   @State private var isPress = false
   var body: some View {
      Rectangle()
         .fill(isPress ? .red : .yellow)
         .frame(width: 100, height: 100)
         .gesture(
            // Press and hold for 0.5 second
            LongPressGesture(minimumDuration: 0.5).onEnded { _ in
                  // Toggle the color when the long press ends
                  isPress.toggle()
               }
         )
   }
}
#Preview {
   ContentView()
}
Output
DragGesture
A drag gesture is used to track the movement of the user's fingers across the screen. It allows the user to update the position of the view by dragging it on the screen. We can achieve drag gestures with the help of the DragGesture() method. This method creates a drag gesture with minimum dragging distance before the gesture succeeds and also contains the coordinates of the gesture's location. This method is always used inside the .gesture() modifier.
Syntax
Following is the syntax −
func DragGesture(minimumDistance:CGFloat, coordinateSpace:coordinates)
Parameters
Following are the parameters accepted by the modifier −
minimumDistance: Represent the minimum dragging distance.
coordinateSpace: Represent the coordinate space in which the drag gesture is being perform.
Example
The following SwiftUI program perform drag gesture.
import SwiftUI
struct ContentView: View {
   // Track the position
   @State private var position = CGSize.zero

   // Track the dragged offset
   @State private var dragOffsetValue = CGSize.zero
   var body: some View {
      VStack {
         Text("Drag the Text").font(.title)

         // Draggable Text
         Text("TutorialsPoint")
            .font(.largeTitle)
            .frame(width: 200)
            .foregroundStyle(.red)
            .offset(x: position.width + dragOffsetValue.width, y: position.height + dragOffsetValue.height)
            .gesture(
               DragGesture().onChanged { g in
                     // Update the offset value during the drag
                     dragOffsetValue = g.translation
                  }.onEnded { _ in

                     // Update position after the drag is finished.
                     position.width += dragOffsetValue.width
                     position.height += dragOffsetValue.height
                     dragOffsetValue = .zero
                  }
            ).animation(.easeIn, value: position)
      }
   }
}
#Preview {
   ContentView()
}
Output
MagnifyGesture
A magnify gesture is used to track magnification motion or pinch-to-zoom gesture. This gesture is achieved by using the MagnifyGesture() method. This method creates a magnifying gesture through which we can scale the view. It is also used inside the .gesture() modifier.
Syntax
Following is the syntax−
func MagnifyGesture(minimumDelta:CGFloat)
Parameter
It takes only one parameter which is the minimum scale value to start the gesture.
Example
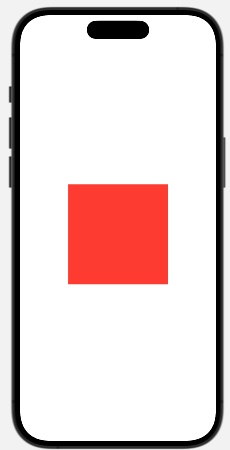
The following SwiftUI program performs a magnify gesture.
import SwiftUI
struct ContentView: View {
   // Tracks the current scale
   @State private var initialScale: CGFloat = 1.0

   // Tracks scale before gesture began
   @State private var finalScale: CGFloat = 1.0

   var body: some View {
      Rectangle()
         .fill(.red)
         .frame(width: 200, height: 200)

         // Apply the scaling factor
         .scaleEffect(initialScale)
         .gesture(
            MagnificationGesture().onChanged { x in

                  // Update scale based on magnification amount
                  initialScale = finalScale * x
               }.onEnded { _ in
                  // Save the scale when the gesture ends
                  finalScale = initialScale
               }
         ).animation(.easeInOut, value: initialScale)
   }
}
#Preview {
   ContentView()
}
Output
RotateGesture
A rotate gesture is used to track the rotation movement and allows us to rotate the view around its anchor point to the specified angle. We can create a rotate gesture using the RotateGesture() method. This method creates a rotate gesture that tracks the rotation motion and the angle in the view is rotated. It is also used inside the .gesture() modifier.
Syntax
Following is the syntax−
func RotateGesture(minimumAngleDelta: Angle)
Parameter
It takes only one parameter which is the minimum angle to start the gesture. The default value of this parameter is 0 degrees.
Example
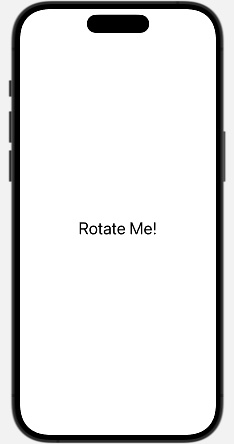
The following SwiftUI program perform rotate gesture.
import SwiftUI
struct ContentView: View {
   // Current rotation angle
   @State private var initialAngle: Angle = .zero

   // Last confirmed angle
   @State private var endAngle: Angle = .zero
   var body: some View {
      Text("Rotate Me!").font(.largeTitle).padding()
         // Apply the rotation effect to the text
         .rotationEffect(initialAngle)
         .gesture(
            RotationGesture()
               .onChanged { x in

                  // Update angle according to the rotation gesture
                  initialAngle = endAngle + x
               }.onEnded { _ in

                  // Final angle after the gesture ends
                  endAngle = initialAngle
               }
         ).animation(.easeInOut, value: initialAngle)
   }
}

#Preview {
   ContentView()
}
Output
Combining Gestures in SwiftUI
In SwiftUI, we are allowed to combine multiple gestures so that we can use multiple gestures simultaneously. Or by combining multiple gestures we can able to create a new gesture. So to combine the gesture we can follow any of the following method −
Simultaneous
A simultaneous gesture is a container where we can use two gestures that run at the same time without any precedence. For example, we combine rotation and tap gestures simultaneously, so whenever we tap on the image, the image will start rotating.
Syntax
Following is the syntax−
func SimultaneousGesture(first: FirstGesture, second: SecondGesture)
Parameter
It takes two parameters that hold the two gestures of the same type or different type.
Example
The following SwiftUI program runs two gestures that are tap and drag gestures simultaneously with the help of SimultaneousGesture().
import SwiftUI

struct ContentView: View {
   // Track the tap state
   @State private var isTap = false
   // Track the current position
   @State private var currentPosition = CGSize.zero
   // Track the drag the position
   @GestureState private var dragPosition = CGSize.zero
   var body: some View {
      Text("Tap Me and Drag Me")
         .font(.largeTitle)
         .background(isTap ? .brown : .green)
         .foregroundStyle(.white)
         .offset(x: currentPosition.width + dragPosition.width, y: currentPosition.height + dragPosition.height)
         .gesture(

            // Running two gestures using SimultaneousGesture
            SimultaneousGesture(
               TapGesture().onEnded {

                     // Toggle color when we tap
                     isTap.toggle()
                  },
               DragGesture()
                  .updating($dragPosition) { x, dragPosition, _ in
                     // Update the drag offset
                     dragPosition = x.translation
                  }.onEnded { x in
                     // Update the position when the drag is finished
                     currentPosition.width += x.translation.width
                     currentPosition.height += x.translation.height
                  }
            )
         ).animation(.easeInOut, value: isTap)
   }
}
#Preview {
   ContentView()
}
Output

Sequence
The sequence is used to apply two gestures in a sequence, here the second gesture is recognized after completing the first gesture. Or we can say the gestures are recognized in a sequence. It is useful when we want to trigger an action after the specified sequence of gestures. Here the precedence of the gesture matters.
Syntax
Following is the syntax−
func SequenceGesture(first: FirstGesture, second: SecondGesture)
Parameter
It takes two parameters that hold the two gestures of the same type or different type.
Example
The following SwiftUI program runs two gestures(tap and drag gestures) in a sequence with the help of the SequenceGesture() function.
import SwiftUI

struct ContentView: View {

   // Track the tap state
   @State private var isTap = false

   // Track the current position
   @State private var currentPosition = CGSize.zero

   // Track the drag the position
   @GestureState private var dragPosition = CGSize.zero

   var body: some View {
      Text("Tap Me and Drag Me")
         .font(.largeTitle)
         .background(isTap ? .brown : .green)
         .foregroundStyle(.white)
         .offset(x: currentPosition.width + dragPosition.width, y: currentPosition.height + dragPosition.height)
         .gesture(
            // Running two gestures in sequence using SequenceGesture
            SequenceGesture(
               TapGesture().onEnded {
                     // Toggle color when we tap
                     isTap.toggle()
                  },
               DragGesture()
                  .updating($dragPosition) { x, dragPosition, _ in
                     // Update the drag offset
                     dragPosition = x.translation
                  }.onEnded { x in
                     // Update the position when the drag is finished
                     currentPosition.width += x.translation.width
                     currentPosition.height += x.translation.height
                  }
            )
         ).animation(.easeInOut, value: isTap)
   }
}
#Preview {
   ContentView()
}
Output

Exclusive
Exclusive gesture is a gesture which consists of two gestures where only one gesture of them will be performed. By default, the system will prioritize the first gesture.
Syntax
Following is the syntax−
func ExclusiveGesture(first: FirstGesture, second: SecondGesture)
Parameter
It takes two parameters that hold the two gestures.
Example
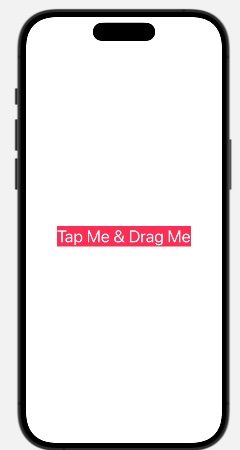
The following SwiftUI program performs a tap gesture.
import SwiftUI

struct ContentView: View {
   // Track the tap state
   @State private var isTap = false

   // Track the current position
   @State private var currentPosition = CGSize.zero

   // Track the drag the position
   @GestureState private var dragPosition = CGSize.zero
   var body: some View {
      Text("Tap Me & Drag Me")
         .font(.largeTitle)
         .background(isTap ? .yellow : .pink)
         .foregroundStyle(.white)
         .offset(x: currentPosition.width + dragPosition.width, y: currentPosition.height + dragPosition.height)
         .gesture(

            // Running two gestures in sequence using ExclusiveGesture()
            ExclusiveGesture(
               TapGesture().onEnded {
                     // Toggle color when we tap
                     isTap.toggle()
                  },
               DragGesture()
                  .updating($dragPosition) {
                      x, dragPosition, _ in

                     // Update the drag offset
                     dragPosition = x.translation
                  }.onEnded { x in

                     // Update the position when the drag is finished
                     currentPosition.width += x.translation.width
                     currentPosition.height += x.translation.height
                  }
            )
         ).animation(.easeInOut, value: isTap)
   }
}
#Preview {
   ContentView()
}
Output