- SAP Webi - Home
- SAP Webi - Overview
- SAP Webi - BI Launchpad
- SAP Webi - BI Preferences
- SAP Webi - Application Modes
- SAP Webi - Creating Documents
- Editing & Opening Documents
- Web Intelligence Sending Documents
- SAP Webi - Managing Reports
- SAP Webi - Using Queries
- SAP Webi - Queries Using Universe
- SAP Webi - Queries Using Bex
- Queries Using Analysis View
- SAP Webi - Query Filters
- SAP Webi - Query Filter Types
- SAP Webi - Ranking Data
- SAP Webi - Working With Reports
- SAP Webi - Breaks
- SAP Webi - Sorts
- SAP Webi - Charts
- SAP Webi - Conditional Formatting
- SAP Webi - Filtering Report Data
- SAP Webi - Input Controls
- SAP Webi - Formulas and Variables
- SAP Webi - Drill Options in Reports
- SAP Webi - Sharing Reports
- SAP Webi - Merge Dimension
- SAP Webi - Questions Answers
- SAP Webi - Quick Guide
- SAP Webi - Useful Resources
- SAP Webi - Discussion
SAP Webi - Input Controls
Input controls are used to filter and analyze the report data. You define input controls using text boxes and radio buttons. Input controls are associated with report elements, like tables and section headers, and use control to apply filter on report elements.
When you select a value for input control, it filters the values in the report element that is associated with input control by selected value.
Input controls can also be used on hierarchical data.
Defining Input Controls in Webi
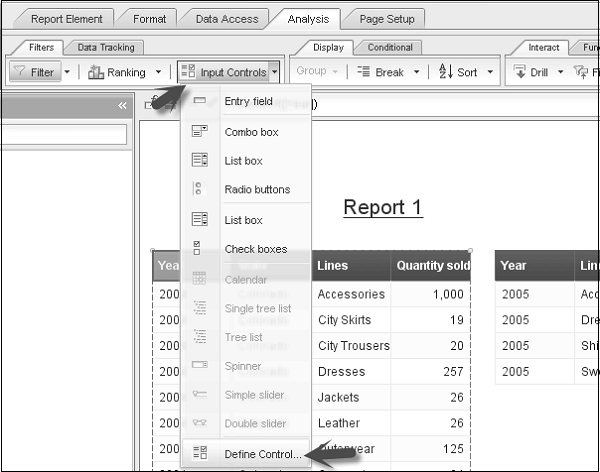
You should be in Design mode to use input controls. Go to Analysis → Filters → Input Controls → Define Control.
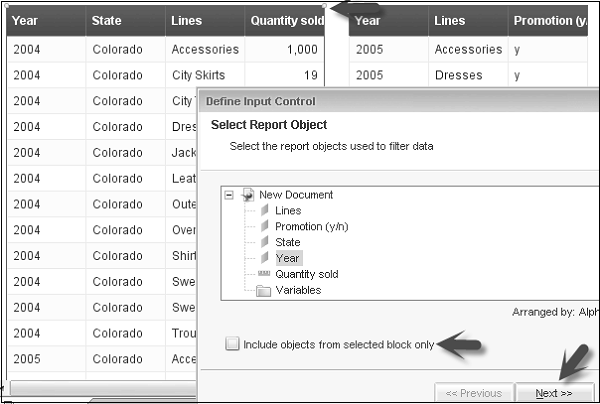
It will open Define Input Control dialog. Select the report object used to filter data and click Next.
Note that if you select a Report element and then you select Define Control, you will get an option to include objects from selected block only. If you select this checkbox, it will show you objects only from the selected report element.
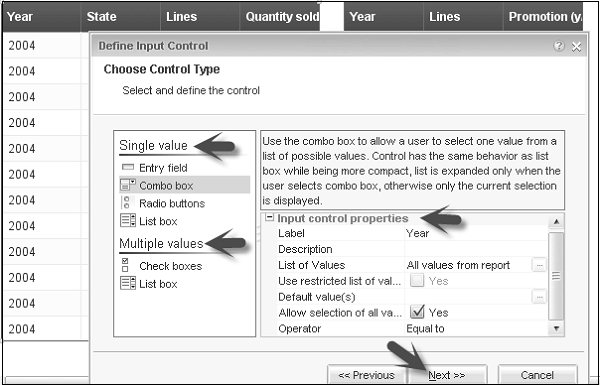
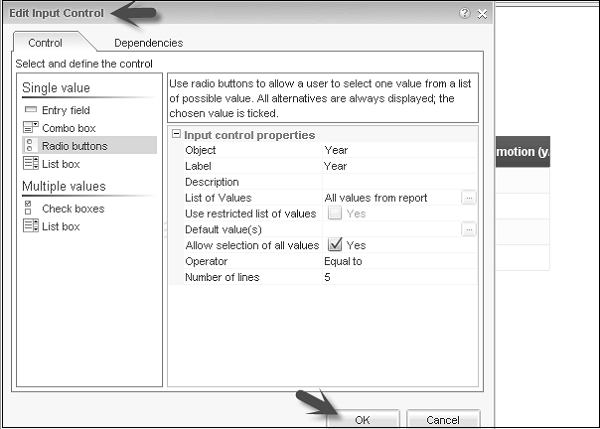
You will get an option to choose and define control. Choose control allows you to select different control types like single value or multiple values. Define control allows you to select the name of control, description, values in control to select, operator and number of lines displayed in input control, etc.
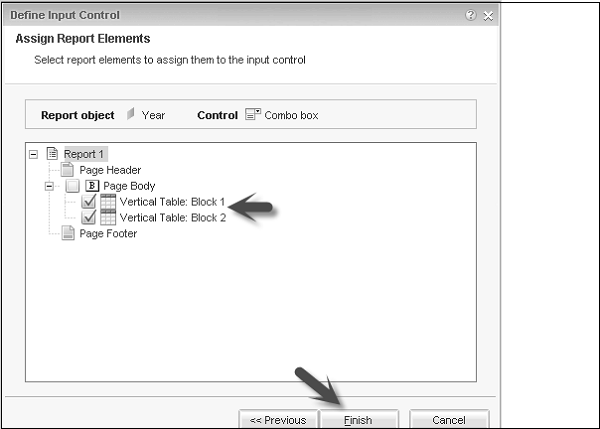
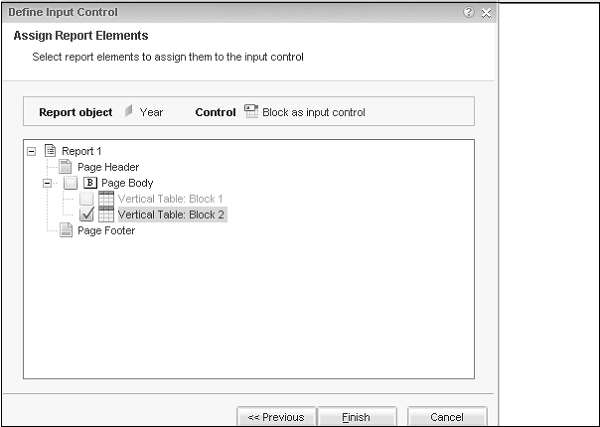
In the next window, you have to assign Report Elements. It will allow you to choose from report elements. You can assign report elements to input controls. (Example − I have selected as input control from both the blocks as shown below).
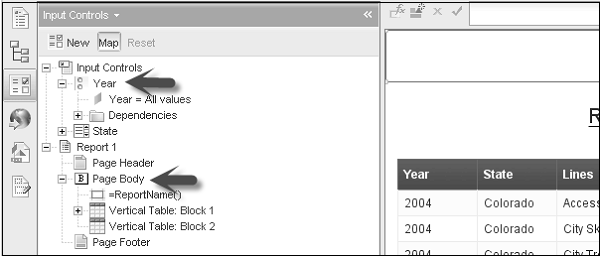
Click Finish and input controls will be added to the left pane under Input Control tab.
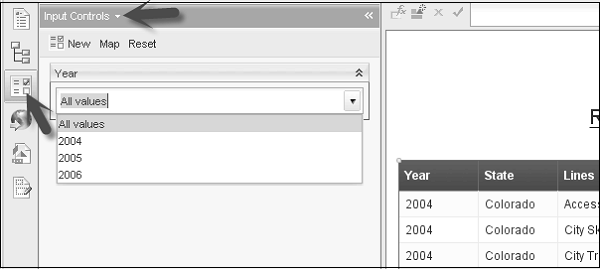
Now as per your selection of input control and type of input control, data will be reflected in the report.
Edit an Input Control
To edit an input control → Select Input control from the left pane → Click Edit icon.
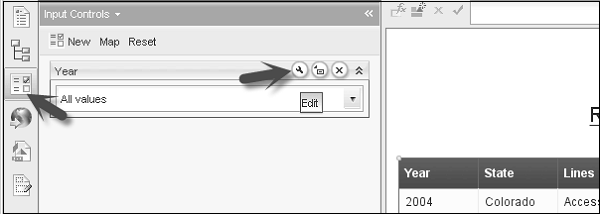
It will open Edit Input Control dialog box. Make changes to Input Control and click Ok.
Organize Input Controls
To organize input controls, go to Input control tab on the left pane.
Drag and drop input controls to move them up/down on input controls pane. Just hold the input control dialog box and move it up and down.
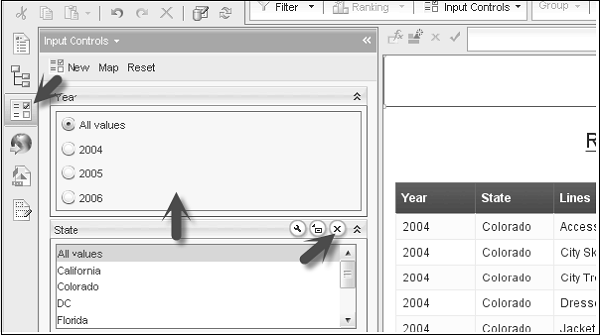
Use the x mark to remove the input control.
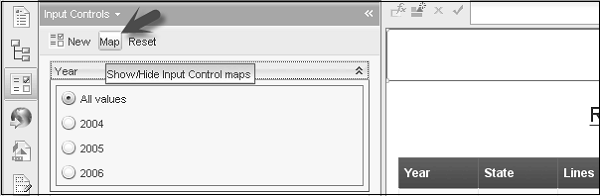
View Input Controls Map
To view map of input control, select the input control → Click Map at the top.
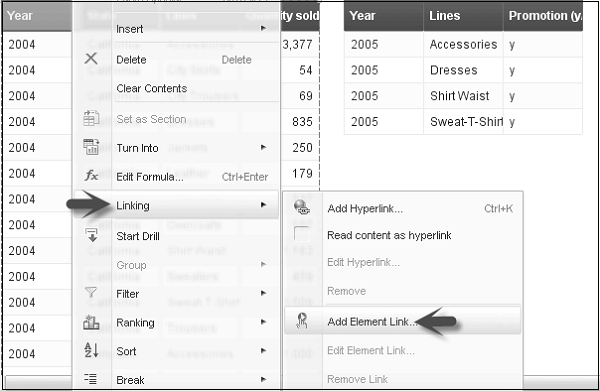
Define Table and Charts as Input Controls
You can also use a table or chart to define input control. Select the table → Right-click and select linking → Add Element Linking.
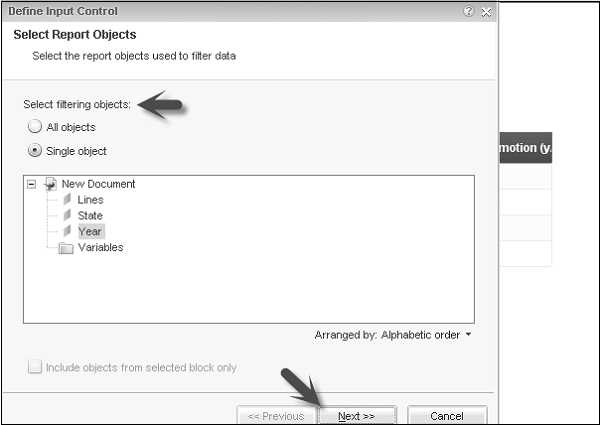
You can select a single object or all objects to define as filtering objects. Click Next.
You can enter the name and description of input control. Click Next. Once you click Next, you can select any other block to use this object as input control. Click Finish.
Similarly, you can use charts as input control for other Report elements.
