- SAP NetWeaver - Home
- SAP NetWeaver - Introduction
- SAP NetWeaver - Architecture
- SAP NetWeaver - Components
- SAP NetWeaver - Release Details
- SAP NW - NW Version in ECC System
- SAP NetWeaver - Setting Up NW
- SAP NW - Installation Options
- Passing Parameters for Installation
- SAP NW - Transport Management
- Managing Background Jobs
- SAP NW - NW Business Client
- SAP NW - Service Configuration
- Business Client Installation
- NWBC Transaction & Navigation
- SAP Application based on NW
- SAP NetWeaver - Portal
- SAP NetWeaver - Create a System
- Enterprise Portal Roles & Group
- SAP NW - Knowledge Management
- SAP NW - KM Administration
- SAP NetWeaver - Developer Studio
- SAP NetWeaver - Web Content
- Process Integration Options
- SAP NetWeaver - Gateway
- SAP NetWeaver - Security
- SAP NetWeaver - PFCG Roles
- SAP NW - Authentication Methods
- SAP NW - Communication Security
- SAP NW - Questions and Answers
- SAP NetWeaver - Quick Guide
- SAP NetWeaver - Useful Resources
- SAP NetWeaver - Discussion
SAP NetWeaver - Business Client Installation
NetWeaver Business Client is available for Windows operating system and ensures the smooth running of Business client.
Hardware requirement includes at least 1 GB memory and the requirement of memory depends on the number of open session tabs and the number of windows.
SAP recommends minimum screen size of 1024*768 and VGA monitoring. All the hardware requirements are same as of SAP GUI front-end installation.
To install NWBC desktop application, you need the setup of the tool.
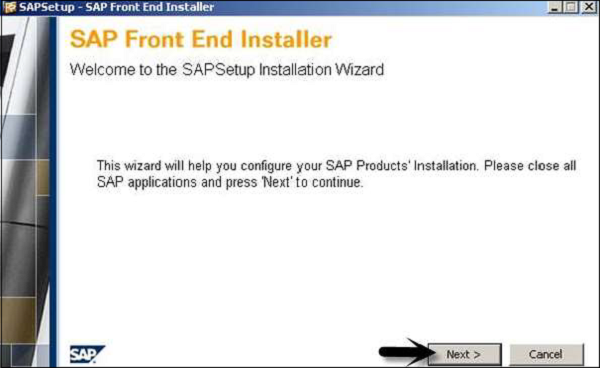
Step 1 − Run the setup file by double-clicking on it and the installation wizard will open. The wizard will help you configure SAP Product installation → Next.
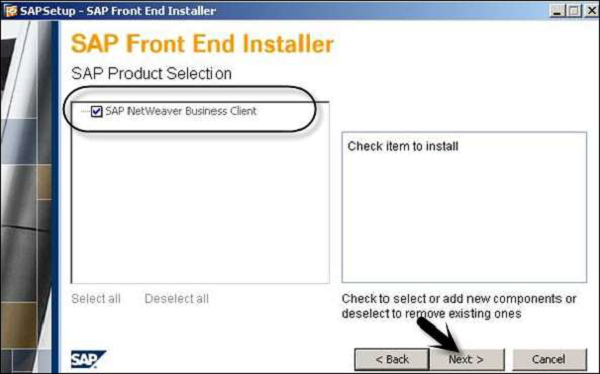
Step 2 − In the next window as shown in the following screenshot, you have to make the product selection. Select SAP NetWeaver Business Client and click the Next button. You should have enough memory on your disk drive to meet the Memory Space Requirements for the installation.
Step 3 − Select the Next button and the installation process will start. During the installation process, you will be informed about the installation progress.
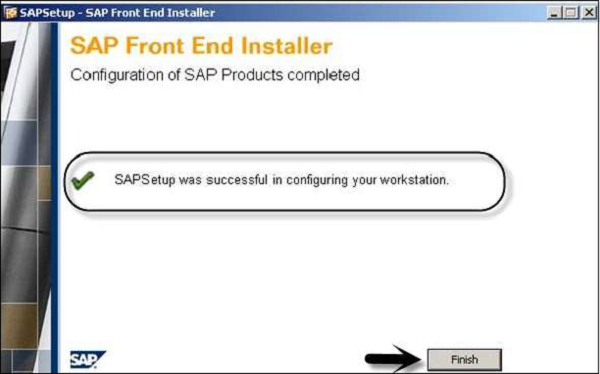
Step 4 − To complete the setup, click the Finish button as shown in the following screenshot.