- SAP BO Data Services
- SAP BODS - Overview
- SAP BODS - Architecture
- SAP BODS - Data Services Designer
- SAP BODS Repository
- SAP BODS - Repository Overview
- Repository Creating & Updating
- Data Services Management Console
- SAP BODS - DSMC Modules
- SAP BODS - DS Designer Introduction
- SAP BODS - ETL Flow in DS Designer
- SAP BODS Datastores & Formats
- SAP BODS - Datastore Overview
- SAP BODS - Changing a Datastore
- SAP BODS - Memory Datastore
- SAP BODS - Linked Datastore
- SAP BODS - Adapter Datastore
- SAP BODS - File Formats
- COBOL Copybook File Format
- Extracting Data from DB Tables
- Data Extraction from Excel Workbook
- Data Flow & Work Flow
- SAP BODS - Dataflow Introduction
- BODS - Dataflow Changing Properties
- SAP BODS - Workflow Introduction
- SAP BODS - Creating Workflows
- SAP BODS Transforms
- SAP BODS - Transforms Types
- Adding Transform to a Dataflow
- SAP BODS - Query Transform
- SAP BODS Administration
- SAP BODS - Data Services Overview
- Creating Embedded Dataflow
- Debugging & Recovery Mechanism
- Data Assessment & Data Profiling
- SAP BODS - Tuning Techniques
- Multi-user Development
- BODS - Central vs Local Repository
- BODS - Central Repository Security
- Creating a Multi-user Environment
- SAP BODS Useful Resources
- SAP BODS - Questions Answers
- SAP BODS - Quick Guide
- SAP BODS - Useful Resources
- SAP BODS - Discussion
SAP BODS - ETL Flow in DS Designer
To develop an ETL flow, you first need to create data stores for the source and the target system. Follow the steps given to develop an ETL flow −
Step 1 − Click Create Data Stores.
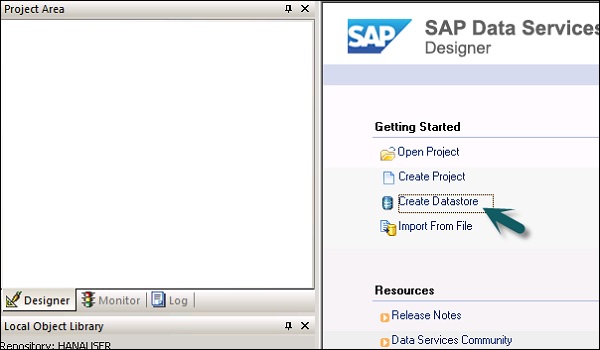
A new window will open.
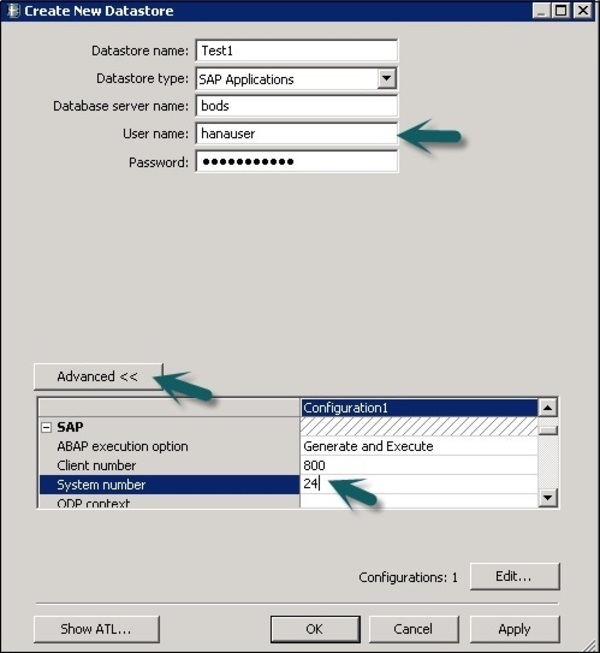
Step 2 − Enter the Datastore name, Datastore type and database type as shown below. You can select different database as source system as shown in the screenshot below.
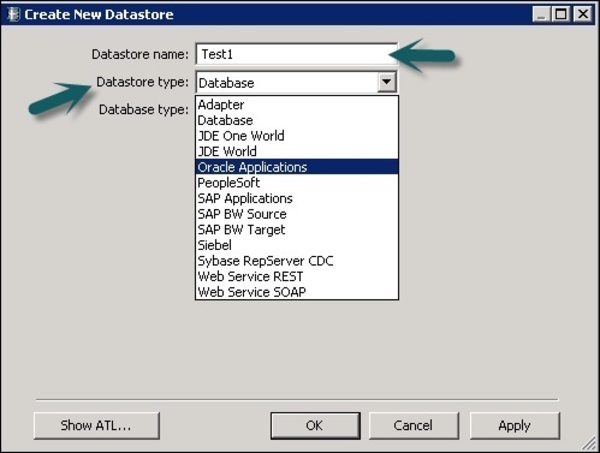
Step 3 − To use ECC system as the data source, select SAP Applications as Datastore type. Enter user name and password and on the Advance tab, enter the system number and client number.
Step 4 − Click OK and the Datastore will be added to the Local object library list. If you expand Datastore, it does not show any table.
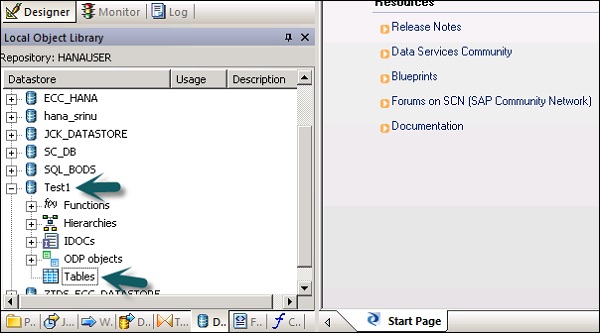
Step 5 − To extract any table from ECC system to load on the target system, Right-click on Tables → Import by Names.
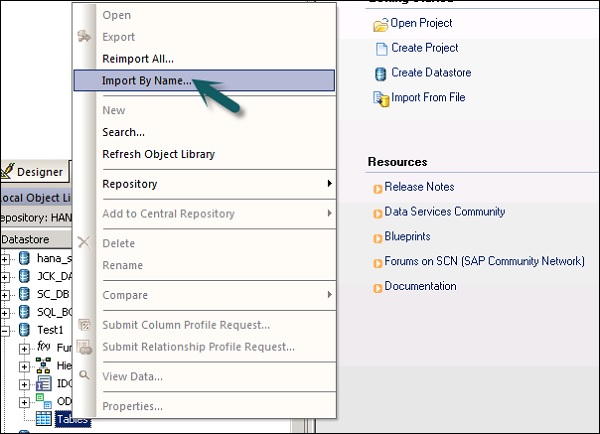
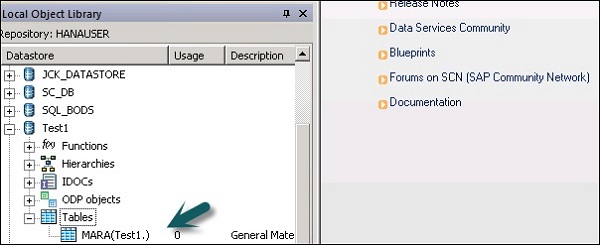
Step 6 − Enter the table name and click Import. Here, TableMara is used, which is a default table in the ECC system.
Step 7 − In a similar way, create a Datastore for the target system. In this example, HANA is used as a target system.
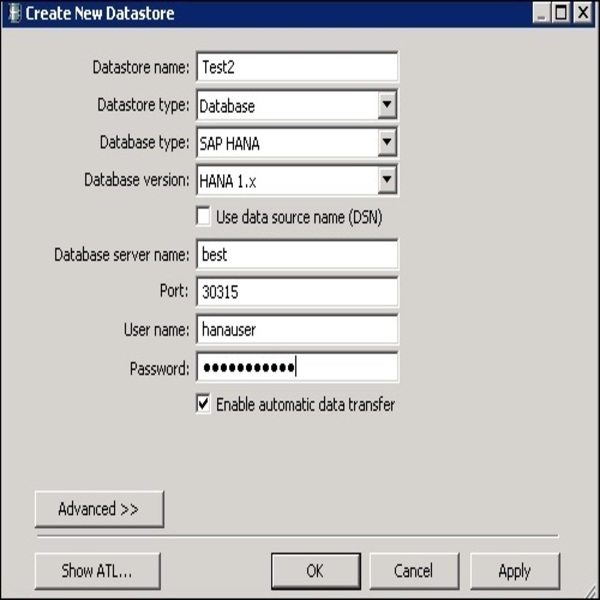
Once you click OK, this Datastore will be added to the local object library and there will be no table inside it.
Create an ETL Flow
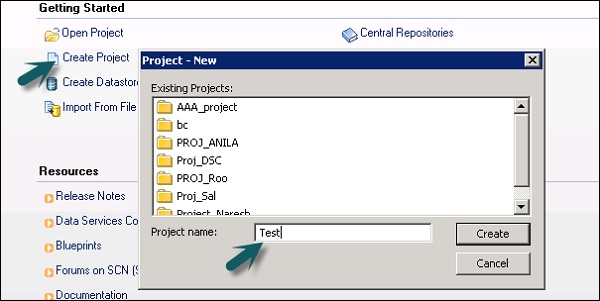
To create an ETL flow, create a new project.
Step 1 − Click the option, Create Project. Enter the Project Name and click Create. It will be added to the Project Area.
Step 2 − Right click on the Project name and create a new batch job/real time job.
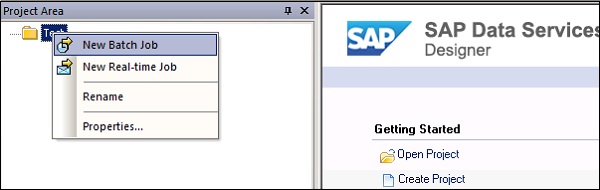
Step 3 − Enter the name of the job and press Enter. You have to add Work flow and Data flow to this. Select a workflow and click the work area to add to the job. Enter the name of the workflow and double-click it to add to the Project area.
Step 4 − In a similar way, select the Data flow and bring it to the Project area. Enter the name of the data flow and double-click to add it under the new project.

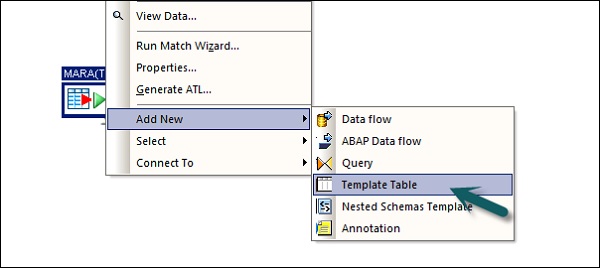
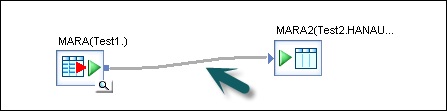
Step 5 − Now drag the source table under datastore to the Work area. Now you can drag the target table with similar data-type to the work area or you can create a new template table.
To create a new template table right click the source table, Add New → Template Table.
Step 6 − Enter the table name and select the Datastore from the list as target Datastore. The Owner name represents the Schema name where the table has to be created.
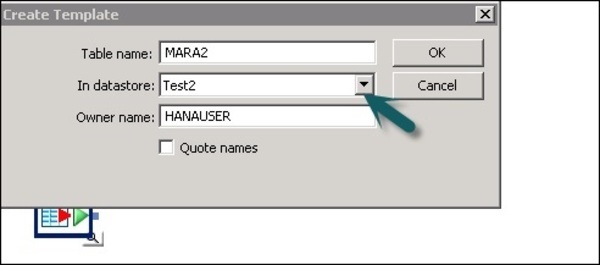
The table will be added to the work area with this table name.
Step 7 − Drag the line from the source table to the target table. Click the Save All option at the top.
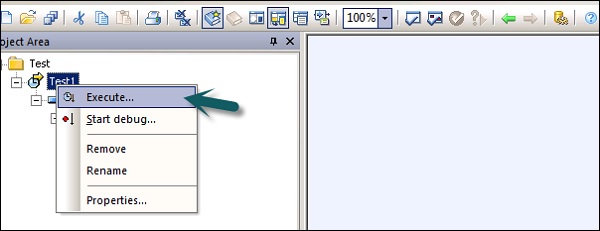
Now you can schedule the job using Data Service Management Console or you can manually execute it by right clicking on the Job name and Execute.