- BabylonJS - Home
- BabylonJS - Introduction
- BabylonJS - Environment Setup
- BabylonJS - Overview
- BabylonJS - Basic Elements
- BabylonJS - Materials
- BabylonJS - Animations
- BabylonJS - Cameras
- BabylonJS - Lights
- BabylonJS - Parametric Shapes
- BabylonJS - Mesh
- VectorPosition and Rotation
- BabylonJS - Decals
- BabylonJS - Curve3
- BabylonJS - Dynamic Texture
- BabylonJS - Parallax Mapping
- BabylonJS - Lens Flares
- BabylonJS - Create ScreenShot
- BabylonJS - Reflection Probes
- Standard Rendering Pipeline
- BabylonJS - ShaderMaterial
- BabylonJS - Bones and Skeletons
- BabylonJS - Physics Engine
- BabylonJS - Playing Sounds & Music
BabylonJS - Quick Guide
BabylonJS - Introduction
Babylon.js is a javascript open-source framework which is used to develop 3D applications/ video games for the web. The official website of BabylonJS is www.babylonjs.com.
Using Babylon.js framework is easy for the users. It contains all the required tools to create and manage 3D objects, special effects, and sounds, etc.
Babylon.jsis one of the most popular 3D game engines and is widely used by developers. Being a 3D library, it provides built-in functions. These functions help you implement common 3D functionality with efficient and accurate ways.
It is developed using TypeScript language based on WebGL and javascript.
What is WebGL?
WebGL (Web Graphics Library) is the new standard for 3D graphics on the Web. It is designed for the purpose of rendering 2D graphics and interactive 3D graphics. It is derived from OpenGL's ES 2.0 library which is a low-level 3D API for phones and other mobile devices. WebGL provides similar functionality of ES 2.0 (Embedded Systems) and performs well on modern 3D graphics hardware.
The TypeScript
By definition, TypeScript is JavaScript for application-scale development.
TypeScript is a strongly typed, object oriented, compiled language. TypeScript is both a language and a set of tools. TypeScript is a typed superset of JavaScript compiled to JavaScript. In other words, TypeScript is JavaScript plus some additional features.
The goal of TypeScript language is to improve and secure the production of JavaScript code.Since BabylonJS is developed using TypScript, it is robust and secure.
BabylonJS - Environment Setup
In this chapter, we will learn how to set up the environment for BabylonJS.
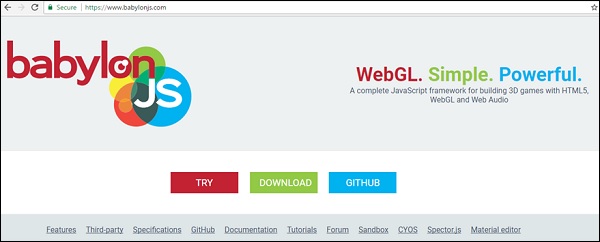
To start with the setup, visit the official website of Babylon.js − www.babylonjs.com. Go to the download section and choose the latest version of Babylon.js and store in your folder.
The screenshot for the same is as follows −
You can also go to GITHUB and clone the babylonjs project −
In your command line type −
git clone https://github.com/BabylonJS/Babylon.js.git
go to cd BabylonJS/
npm install
The required files will be available in the BabylonJS folder.
You can use the VSCode (Microsoft Visual Studio Code) for editing.The code comes with builtin functionalities like highlighting if any error, hightlighting the syntax, etc. You can use the editor of your choice and it is not mandatory to use only VSCode.
BabylonJS - Overview
BabylonJS is an open sourceJavascript framework for building 3D games with HTML5 and WEBGL.It is hosted on github.The official web site of BabylonJS is www.babylonjs.com.
In the world of 3D Animation,the shapes are drawn with triangles.With WebGL, the complexity increases with the deluge of coding that is involved in the process. BabylonJS is the easy solution that pitches in to mitigate the increased complexity. Here, the API for lights, cameras, engine are easy to handle and to create 3D objects.
The source code of babylonJS is coded in typescript.It is compiled to Javascript and made available tothe end user.
To start working with Babylonjs, download the babylonjs file, host it at your end and you are ready to get started to write your 3D code.
BabylonJS is developed by Microsoft employees in the year 2016.David Catuhe, a Principal Program Manager for the Window & Devices Group at Microsoft is the main person behind developing BabylonJs and making it a big success.
To run BabylonJS, we need modern browsers with WEBGL support. Latest browsers i.e Internet Explorer 11+, Firefox 4+, Google Chrome 9+, Opera 15+, etc. does have WEBGL support and the demos can be executed on same to see the output.
BabylonJs offers following features which help to create different types of 3D-scenes −
- Shapes like box, sphere, scylinder, cone, height ground
- Cameras, Lights
- Meshes, textures, Materials
- Sprites
- Morphing
- Mesh Intersection and collision detection
- Physics engine plug-in
- Action Manager
- SolidParticles
- Instances and Particles
- Support for Bones and Skeletons
- Adding music and sound to the scene
In addition to its own meshes, BabylonJS also allows the use of meshes created from third party 3D softwares like Blender, FBX and 3DS Max.
Blender
Blender is an open-source 3D computer graphics software product used to create animated scenes, 3D printed models, video games, etc. Blender gives. bablyon files which are to be used with Babylon to render meshes. How to convert files from blender to babylon is explained in subsequent chapters of this tutorial.
FBX
Also called the filmbox, it helps with 3D animation and texture painting software. The FBX files are saved with the.fbx extension.
MAX
The MAX software helps you in creating massive world in games, stunning scenes for designs and engaging virtual reality experiences.
BabylonJS - Basic Elements
Babylon.js is a popular framework to help build 3D games for developers. It has built-in functions to implement 3D functionalities. Let us build a simple demo using Babylon.js and understand the basic functionalities required to get started.
We will first create a demo which contains the basic elements of Babylon.js. In addition, we will also learn the various functionalities of Babylon.js.
Sample Demo 1
In this section, we will learn how to create a demo containing the basic elements of BabylonJS.
<!doctype html>
<html>
   <head>
      <meta charset = "utf-8">
      <title> Babylon.JS : Demo2</title>
      <script src = "babylon.js"></script>
      <style>
         canvas { width: 100%; height: 100%;}
      </style>
   </head>

   <body>
      <canvas id = "renderCanvas"></canvas>
      <script type = "text/javascript">
         var canvas = document.getElementById("renderCanvas");
         var engine = new BABYLON.Engine(canvas, true);
         var createScene  = function() {
            var scene = new BABYLON.Scene(engine);
            scene.clearColor = new BABYLON.Color3(1, 0.8, 0.8);

            var camera = new BABYLON.ArcRotateCamera("Camera", 1, 0.8, 10, new BABYLON.Vector3(0, 0, 0), scene);
            scene.activeCamera.attachControl(canvas);

            var light0 = new BABYLON.PointLight("Omni", new BABYLON.Vector3(0, 0, 10), scene);

            var origin = BABYLON.Mesh.CreateSphere("origin", 10, 1.0, scene);

            var torus = BABYLON.Mesh.CreateTorus("torus", 5, 1, 10, scene, false);

            var box = BABYLON.Mesh.CreateBox("box", 3.0, scene);
            box.position = new BABYLON.Vector3(-5, 0, 0);

            var cylinder = BABYLON.Mesh.CreateCylinder("cylinder", 3, 3, 3, 6, 1, scene, false);

            cylinder.position = new BABYLON.Vector3(5, 0, 0);
            return scene;
         };
         var scene = createScene();
         engine.runRenderLoop(function() {
            scene.render();
         });
      </script>
   </body>
</html>
To run BabylonJS, we need modern browsers with WEBGL support. The latest browsers -Internet Explorer 11+, Firefox 4+, Google Chrome 9+, Opera 15+, etc. does have WEBGL support and the demos can be executed on the same platforms to see the output. Create a directory to store the files for babylonjs. Fetch the latest BabylonJSscripts file from BabylonJS site. All the demo links in this tutorial are tested with babylonjs version 3.3.
Step 1
Create a simple html page and include the Babylon.js file.
Create a canvas tag which is used to render contents by BabylonJSinside the body tag as shown below.
Add css to the canvas to occupy the full width and height of the screen.
<!doctype html>
<html>
   <head>
      <meta charset = "utf-8">
      <title>MDN Games: Babylon.js demo - shapes</title>
      <script src = "babylon.js"></script>

      <style>
         canvas {width: 100%; height: 100%;}
      </style>
   </head>
   <body>
      <canvas id = "renderCanvas"></canvas>
   </body>
</html>
Step 2
Let us now start with the BabylonJScode for rendering contents on the canvas.
<!doctype html>
<html>
   <head>
      <meta charset = "utf-8">
      <title>MDN Games: Babylon.js demo - shapes</title>
      <script src = "babylon.js"></script>
      <style>
         canvas {width: 100%; height: 100%;}
      </style>
   </head>
   <body>
      <canvas id = "renderCanvas"></canvas>
      <script type = "text/javascript">
         var canvas = document.getElementById("renderCanvas");
         var engine = new BABYLON.Engine(canvas, true);
      </script>
   </body>
</html>
Now, add the script tag to the html structure and store the canvas reference in variable canvas.
To get started with Babylon.js, create an engine instance and pass the canvas reference to render on it.
<script type = "text/javascript">
   var canvas = document.getElementById("renderCanvas");
   var engine = new BABYLON.Engine(canvas, true);
</script>
The BABYLON global object contains all the Babylon.js functions available in the engine.
Step 3
In this step, we will first create a scene.
A scene is where all the contents will be displayed. We will create the different types of objects and add the same to the scene to make it visible on the screen. To create scene, add the following code to the already created html structure. At present, we will append to the already created code as a continuation to the above html structure.
var createScene  = function() {
   var scene = new BABYLON.Scene(engine);
   scene.clearColor = new BABYLON.Color3(1, 0.8, 0.8);
};
var scene = createScene();
The final html file will look as follows −
<!doctype html>
<html>
   <head>
      <meta charset = "utf-8">
      <title>MDN Games: Babylon.js demo - shapes</title>
      <script src = "babylon.js"></script>
      <style>
         canvas {width: 100%; height: 100%;}
      </style>
   </head>

   <body>
      <canvas id = "renderCanvas"></canvas>
      <script type = "text/javascript">
         var canvas = document.getElementById("renderCanvas");
         var engine = new BABYLON.Engine(canvas, true);

         var createScene  = function() {
            var scene = new BABYLON.Scene(engine);
            scene.clearColor = new BABYLON.Color3(0, 1, 0);
            return scene;
         };
         var scene = createScene();
      </script>
   </body>
</html>
In the above example, the CreateScene function is defined and the var scene = createScene () is calling the function.
The CreateScene function has the scene created inside it and the next line adds color to the scene, which is done using BABYLON.Color3(1, 0.8, 0.8) and the color over here is pink.
var scene = new BABYLON.Scene(engine);
scene.clearColor = new BABYLON.Color3(1, 0.8, 0.8);
Executing the above demo link in the browser will not display anything right now on the browser screen. There is one more step to be added to the code which is called the engine.runRenderLoop as in step 4.
Step 4
To make the scene actually visible on the screen, we need to render it using engine.runRenderLoop call. Let us now see how this is done.
Rendering Loop
engine.runRenderLoop(function() {
   scene.render();
});
The Engine.runRenderLoop function calls scene.render, which will render the scene and make it visible to the user. The final .html will look as follows −
<!doctype html>
<html>
   <head>
      <meta charset = "utf-8">
      <title>BabylonJs - Basic Element-Creating Scene</title>
      <script src = "babylon.js"></script>
      <style>
         canvas {width: 100%; height: 100%;}
      </style>
   </head>

   <body>
      <canvas id = "renderCanvas"></canvas>
      <script type = "text/javascript">
         var canvas = document.getElementById("renderCanvas");
         var engine = new BABYLON.Engine(canvas, true);
         var createScene  = function() {
            var scene = new BABYLON.Scene(engine);
            scene.clearColor = new BABYLON.Color3(1, 0.8, 0.8);
            return scene;
         };
         var scene = createScene();
         engine.runRenderLoop(function() {
            scene.render();
         });
      </script>
   </body>
</html>
Save the above file as basicscene.html and check the output in the browser. The screen that is shown is in pink color as shown below −

Step 5
Now that we have the scene, we have to add camera to it.
Adding Camera and Light
The code given below adds camera to the scene. There are many types of camera that can be used on Babylon.
ArcRotateCamera is a camera that rotates around the target. It can be controlled with mouse, cursor or touch events. The parameters required are name, alpha, beta, radius, target, and scene. Let us discuss the details of the camera in a subsequent section.
var camera = new BABYLON.ArcRotateCamera("Camera", 1, 0.8, 10, new BABYLON.Vector3(0, 0, 0), scene);
Now, we need to understand how to add light.
Lights are used to produce the diffuse and specular color received by each pixel. There are many types of lights. We will learn about the different types of lights in the lights section.
Here I am using the PointLight on the scene. The PointLight is emitted in every direction like theSun. The parameters are name, position and the scene to be used on.
To add light, execute the following code −
var light0 = new BABYLON.PointLight("Omni", new BABYLON.Vector3(0, 0, 10), scene);
Step 6
Let us now see how to add shapes.
Adding of shapes
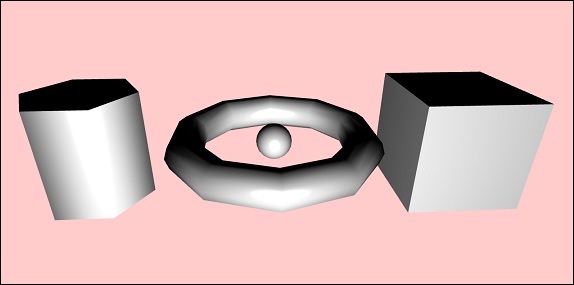
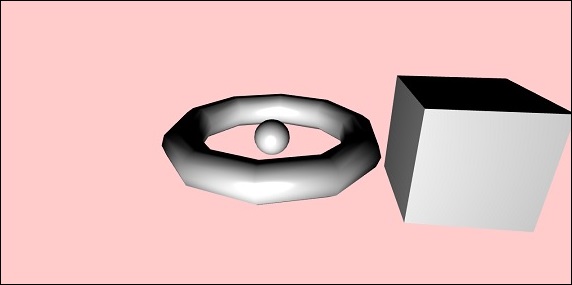
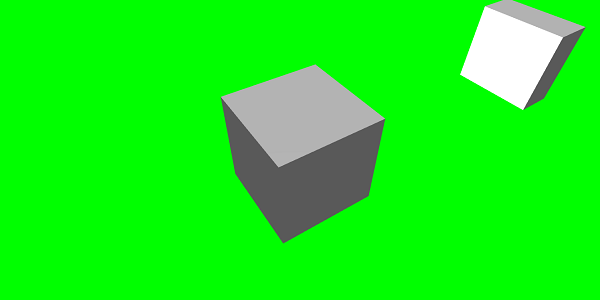
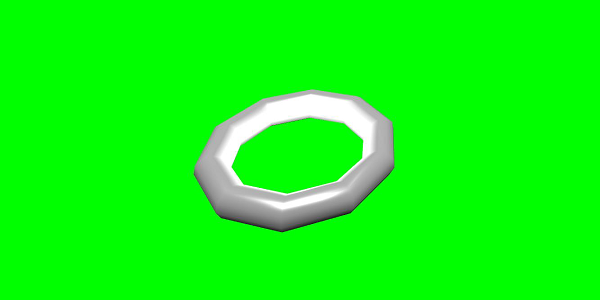
The demo shared above has 4 shapes added to it.
- Sphere
- Torus
- Box
- Cylinder
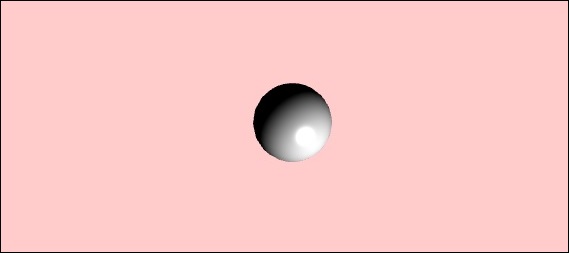
To add sphere, execute the following code −
var origin = BABYLON.Mesh.CreateSphere("origin", 10, 1.0, scene);
Once the sphere is added, the code looks as follows −
<!doctype html>
<html>
   <head>
      <meta charset="utf-8">
      <title>MDN Games: Babylon.js demo - shapes</title>
      <script src = "babylon.js"></script>
      <style>
         html,body,canvas { margin: 0; padding: 0; width: 100%; height: 100%; font-size: 0; }
      </style>
   </head>

   <body>
      <canvas id = "renderCanvas"></canvas>
      <script type = "text/javascript">
         var canvas = document.getElementById("renderCanvas");
         var engine = new BABYLON.Engine(canvas, true);

         var createScene  = function() {
            var scene = new BABYLON.Scene(engine);
            scene.clearColor = new BABYLON.Color3(1, 0.8, 0.8);
            var camera = new BABYLON.ArcRotateCamera("Camera", 1, 0.8, 10, new BABYLON.Vector3(0, 0, 0), scene);
            var light0 = new BABYLON.PointLight("Omni", new BABYLON.Vector3(0, 0, 10), scene);
            var origin = BABYLON.Mesh.CreateSphere("origin", 10, 1.0, scene);
            scene.activeCamera.attachControl(canvas);
            return scene;
         };
         var scene = createScene();
         engine.runRenderLoop(function() {
            scene.render();
         });
      </script>
   </body>
</html>
Output
The above code generates the following output −
Let us now add the other shapes the Torus and the Box. Execute the following code to add the Torus shape.
var torus = BABYLON.Mesh.CreateTorus("torus", 5, 1, 10, scene, false);
var box = BABYLON.Mesh.CreateBox("box", 3.0, scene);
box.position = new BABYLON.Vector3(-5, 0, 0);
We will add a position to the box. BABYLON.Vector3(-5, 0, 0) takes the x,y and z direction.
Upon execution, the above code generates the following output −
Let us now add the final shape which is shown in the screenshot above - the cylinder.
var cylinder = BABYLON.Mesh.CreateCylinder("cylinder", 3, 3, 3, 6, 1, scene, false);
cylinder.position = new BABYLON.Vector3(5, 0, 0);
The position is added to the cylinder which is x direction 5. The final code is as shown below −
<!doctype html>
<html>
   <head>
      <meta charset = "utf-8">
      <title> Babylon.JS : Demo2</title>
      <script src = "babylon.js"></script>
      <style>
         canvas { width: 100%; height: 100%;}
      </style>
   </head>

   <body>
      <canvas id = "renderCanvas"></canvas>
      <script type = "text/javascript">
         var canvas = document.getElementById("renderCanvas");
         var engine = new BABYLON.Engine(canvas, true);
         var createScene  = function() {
            var scene = new BABYLON.Scene(engine);
            scene.clearColor = new BABYLON.Color3(1, 0.8, 0.8);

            var camera = new BABYLON.ArcRotateCamera("Camera", 1, 0.8, 10, new BABYLON.Vector3(0, 0, 0), scene);
            scene.activeCamera.attachControl(canvas);

            var light0 = new BABYLON.PointLight("Omni", new BABYLON.Vector3(0, 0, 10), scene);

            var origin = BABYLON.Mesh.CreateSphere("origin", 10, 1.0, scene);

            var torus = BABYLON.Mesh.CreateTorus("torus", 5, 1, 10, scene, false);

            var box = BABYLON.Mesh.CreateBox("box", 3.0, scene);
            box.position = new BABYLON.Vector3(-5, 0, 0);

            var cylinder = BABYLON.Mesh.CreateCylinder("cylinder", 3, 3, 3, 6, 1, scene, false);
            cylinder.position = new BABYLON.Vector3(5, 0, 0);
            return scene;
         };
         var scene = createScene();
         engine.runRenderLoop(function() {
            scene.render();
         });
      </script>
   </body>
</html>
Output
Upon execution, the above code will generate the following output −
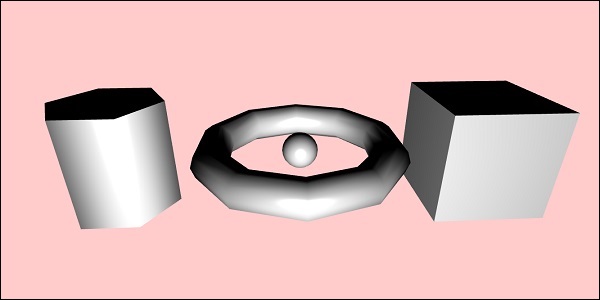
The shapes will move as per the direction you move the cursor; the same is done using the attach control of the camera to the scene.
scene.activeCamera.attachControl(canvas);
Let us now discuss each shape in detail.
Here is the summary of all the shapes and the syntax −
| Sr.No | Shape | Syntax |
|---|---|---|
| 1 | Box | var box = BABYLON.Mesh.CreateBox( "box", 6.0, scene, false, BABYLON.Mesh.DEFAULTSIDE); |
| 2 | Sphere | var sphere = BABYLON.Mesh.CreateSphere( "sphere", 10.0, 10.0, scene, false, BABYLON.Mesh.DEFAULTSIDE); |
| 3 | Plane | var plane = BABYLON.Mesh.CreatePlane( "plane", 10.0, scene, false, BABYLON.Mesh.DEFAULTSIDE); |
| 4 | Disc | var disc = BABYLON.Mesh.CreateDisc( "disc", 5, 30, scene, false, BABYLON.Mesh.DEFAULTSIDE); |
| 5 | Cylinder | var cylinder = BABYLON.Mesh.CreateCylinder( "cylinder", 3, 3, 3, 6, 1, scene, false, BABYLON.Mesh.DEFAULTSIDE); |
| 6 | Torus | var torus = BABYLON.Mesh.CreateTorus( "torus", 5, 1, 10, scene, false, BABYLON.Mesh.DEFAULTSIDE); |
| 7 | Knot | var knot = BABYLON.Mesh.CreateTorusKnot( "knot", 2, 0.5, 128, 64, 2, 3, scene, false, BABYLON.Mesh.DEFAULTSIDE); |
| 8 | Line Mesh |
var lines = BABYLON.Mesh.CreateLines("lines", [
   new BABYLON.Vector3(-10, 0, 0),
   new BABYLON.Vector3(10, 0, 0),
   new BABYLON.Vector3(0, 0, -10),
   new BABYLON.Vector3(0, 0, 10)
], scene);
|
| 9 | Dashes Lines | var dashedlines = BABYLON.Mesh.CreateDashedLines( "dashedLines", [v1, v2, ... vn], dashSize, gapSize, dashNb, scene); |
| 10 | Ribbon | var ribbon = BABYLON.Mesh.CreateRibbon( "ribbon", [path1, path2, ..., pathn], false, false, 0, scene, false, BABYLON.Mesh.DEFAULTSIDE); |
| 11 | Tube | var tube = BABYLON.Mesh.CreateTube( "tube", [V1, V2, ..., Vn], radius, tesselation, radiusFunction, cap, scene, false, BABYLON.Mesh.DEFAULTSIDE); |
| 12 | Ground | var ground = BABYLON.Mesh.CreateGround( "ground", 6, 6, 2, scene); |
| 13 | Ground From HeightMap | var ground = BABYLON.Mesh.CreateGroundFromHeightMap( "ground", "heightmap.jpg", 200, 200, 250, 0, 10, scene, false, successCallback); |
| 14 | Tiled Ground | var precision = {"w" : 2, "h" : 2};
var subdivisions = {'h' : 8, 'w' : 8};
var tiledGround = BABYLON.Mesh.CreateTiledGround(
"Tiled Ground", -3, -3, 3, 3,
subdivisions, precision, scene, false);
|
Basic Element - Position, Rotation and Scaling
In this section, we will learn how to position, rotate or scale the elements which we added so far.
We have created box, sphere, cylinder, knot, etc. Now, we will see how to position, scale and rotate the shapes.
| Sr.No. | Element & Description |
|---|---|
| 1 | Position
With position change, the mesh will be changed from one position to another. |
| 2 | Rotation
With rotation, the mesh will be rotated around the mesh. |
| 3 | Scaling
The scaling of mesh can be done with respect to x, y or z axis. |
Basic Element - Parenting
With Parenting, we will create a parent-child relationship between the meshes and see how they behave. So whatever transformations you apply to the parent, the same will also be applied to the child. Let us now understand the same with the demo shown below.
Demo
<!doctype html>
<html>
<head>
<meta charset = "utf-8">
<title>BabylonJs - Basic Element-Creating Scene</title>
<script src = "babylon.js"></script>
<style>
canvas {width: 100%; height: 100%;}
</style>
</head>
<body>
<canvas id = "renderCanvas"></canvas>
<script type = "text/javascript">
var canvas = document.getElementById("renderCanvas");
var engine = new BABYLON.Engine(canvas, true);
var createScene = function() {
var scene = new BABYLON.Scene(engine);
scene.clearColor = new BABYLON.Color3(0, 1, 0);
var camera = new BABYLON.ArcRotateCamera("Camera", 1, 0.8, 10, new BABYLON.Vector3(0, 0, 0), scene);
scene.activeCamera.attachControl(canvas);
var light = new BABYLON.PointLight("Omni", new BABYLON.Vector3(0, 100, 100), scene);
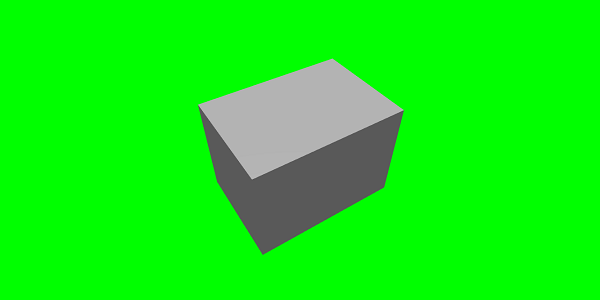
var boxa = BABYLON.Mesh.CreateBox("BoxA", 1.0, scene);
boxa.position = new BABYLON.Vector3(0,0.5,0);
var boxb = BABYLON.Mesh.CreateBox("BoxB", 1.0, scene);
boxb.position = new BABYLON.Vector3(3,0.5,0);
boxb.scaling = new BABYLON.Vector3(2,1,2);
var boxc = BABYLON.Mesh.CreateBox("BoxC", 1.0, scene);
boxc.parent = boxb;
boxc.position.z = -3;
var ground = BABYLON.Mesh.CreateGround("ground1", 10, 6, 2, scene);
ground.position = new BABYLON.Vector3(0,0,0);
return scene;
};
var scene = createScene();
engine.runRenderLoop(function() {
scene.render();
});
</script>
</body>
</html>
Output

Explanation
We have created 3 boxes in the above mesh. In the demo, boxb scaling is applied and it is assigned as a parent to boxc which also scales since its parent boxb and the same is scaled. You can play around with the demo to see how the parent-child link works.
To make a mesh, you have to use the parent of another mesh −
child.parent = parentmesh;
Basic Element - Environment
Let us now discuss the scene environment in this section. We will talk about the scene background color, ambientcolor, skyboxes, fog mode, etc. on a scene.
We have seen the scene background color is demos which we have created so far.
Scene background-color
Let us now see how the scene background color works.
Syntax
Following is the syntax for the scene background color −
scene.clearColor = new BABYLON.Color3(0.5, 0.8, 0.5);
or
scene.clearColor = BABYLON.Color3.Blue();
The above property will change the background color of the scene.
Scene Ambient color
Let us now see how the scene ambient color works.
Syntax
Following is the syntax for the scene ambient color −
scene.ambientColor = new BABYLON.Color3(0.3, 0.3, 0.3);
AmbientColor is used along with the StandardMaterial ambient color and texture. If there is no ambientColor for the scene the StandardMaterial.ambientColor and StandardMaterial.ambientTexture has no effect. The StandardMaterial ambientColor/ambientTexture will become active once the ambientColor for scene is applied. By default, scene is given scene.ambientColor and set to Color3 (0, 0, 0), which means no ambientColor.
Scene Fog mode
We will now understand how the Scene Fog Mode works.
Syntax
Following is the syntax for the Scene Fog Mode.
scene.fogMode = BABYLON.Scene.FOGMODE_EXP;
The following list of the available fog modes −
BABYLON.Scene.FOGMODE_NONE − default one, fog is deactivated.
BABYLON.Scene.FOGMODE_EXP − the fog density follows an exponential function.
BABYLON.Scene.FOGMODE_EXP2 − same as above but faster.
BABYLON.Scene.FOGMODE_LINEAR − the fog density follows a linear function.
If the fog mode EXP or EXP2 is defined, then you can define the density on it as follows −
scene.fogDensity = 0.01;
If the fog mode is LINEAR, then you can define where the fog starts and ends as follows −
scene.fogStart = 20.0;
scene.fogEnd = 60.0;
To give color to the fog, execute the following code −
scene.fogColor = new BABYLON.Color3(0.9, 0.9, 0.85);
Skybox
Skybox is a way of creating background in games which makes the scene looks realistic. It is more of a wrapper around your screen which covers with the texture being used for the material. Choose your images properly to make it look realistic for the scene that you want to create. To create skybox, you have to create a box and apply material to it. We will discuss the different material in detail in a subsequent chapter.
Now, we will see how to create a skybox using box and material.
var skybox = BABYLON.Mesh.CreateBox("skyBox", 100.0, scene);
We will create a box of size 100 so that it covers the entire scene. We will start by giving material to the box which is done as follows −
var skyboxMaterial = new BABYLON.StandardMaterial("skyBox", scene);
To this material, we will assign the properties.
skyboxMaterial.reflectionTexture = new BABYLON.CubeTexture("images/cubetexture/skybox", scene);
We have to use reflection texture which is basically used to create a mirror like material. The reflection texture property uses CubeTexture which takes image as an input. Since the cube has 6 faces, the image required for skybox has to be 6, i.e., internally it has to be stored as skybox_nx, skybox_ny, skybox_nz, skybox_px, skybox_py, skybox_pz. The images used for skybox are pasted below; they are faces of the cube on all six sides. When you apply a texture to the shape, it gives the details of the image used and makes the scene look realistic. We made use of the co-ordinates mode as SKYBOX_MODE as shown below −
skyboxMaterial.reflectionTexture.coordinatesMode = BABYLON.Texture.SKYBOX_MODE;
There are other properties used for material like backfaceCulling, diffuseColor, specularColor, disableLighting, etc. The properties are explained in detail in the material section.
In the demo, we will show an environment scene created using skybox, a sphere rotating in the scene and a plane moving around. Fog is applied to the scene, which you will notice when you rotate.
Demo Showing Environment Scene
<!doctype html>
<html>
   <head>
      <meta charset = "utf-8">
      <title> Babylon.JS : Demo</title>
      <script src = "babylon.js"></script>
      <style>
         canvas { width: 100%; height: 100%;}
      </style>
   </head>

   <body>
      <canvas id = "renderCanvas"></canvas>
      <script type = "text/javascript">
         var canvas = document.getElementById("renderCanvas");
         var engine = new BABYLON.Engine(canvas, true);
         var createScene  = function() {
            var scene = new BABYLON.Scene(engine);
            var light = new BABYLON.PointLight("Omni",
            new BABYLON.Vector3(10, 50, 50), scene);

            var camera = new BABYLON.ArcRotateCamera("Camera", 0.4, 1.2, 20, new BABYLON.Vector3(-10, 0, 0), scene);
            camera.attachControl(canvas, true);

            var material1 = new BABYLON.StandardMaterial("mat1", scene);
            material1.diffuseTexture = new BABYLON.Texture("images/tsphere.jpg", scene);

            var sphere = BABYLON.Mesh.CreateSphere("red", 32, 2, scene);
            sphere.setPivotMatrix(BABYLON.Matrix.Translation(2, 0, 0));
            sphere.material = material1;

            // Fog
            scene.fogMode = BABYLON.Scene.FOGMODE_EXP;
            scene.fogColor = new BABYLON.Color3(0.9, 0.9, 0.85);
            scene.fogDensity = 0.01;

            //skybox
            var skybox = BABYLON.Mesh.CreateBox("skyBox", 100.0, scene);

            var skyboxMaterial = new BABYLON.StandardMaterial("skyBox", scene);
            skyboxMaterial.backFaceCulling = false;

            skyboxMaterial.reflectionTexture = new BABYLON.CubeTexture("images/cubetexture/skybox", scene);
            skyboxMaterial.reflectionTexture.coordinatesMode = BABYLON.Texture.SKYBOX_MODE;

            skyboxMaterial.diffuseColor = new BABYLON.Color3(0, 0, 0);

            skyboxMaterial.specularColor = new BABYLON.Color3(0, 0, 0);

            skyboxMaterial.disableLighting = true;
            skybox.material = skyboxMaterial;


            var spriteManagerPlayer = new BABYLON.SpriteManager("playerManager", "images/plane.png", 8, 1000, scene);

            var plane = new BABYLON.Sprite("plane", spriteManagerPlayer);
            plane.position.x = -2;
            plane.position.y = 2;
            plane.position.z = 0;


            var alpha = 0;
            var x = 2;
            var y = 0;
            scene.registerBeforeRender(function () {
               scene.fogDensity = Math.cos(alpha) / 10;
               alpha += 0.02;
               sphere.rotation.y += 0.01;
               y += 0.05;
               if (x > 50) {
                  x = -2;
               }
               plane.position.x = -x;
               x += 0.02;
            });
            return scene;
         };
         var scene = createScene();
         engine.runRenderLoop(function() {
            scene.render();
         });
      </script>
   </body>
</html>
Output

Explanation
In the above example, we used the following code for fog −
scene.fogMode = BABYLON.Scene.FOGMODE_EXP;
scene.fogColor = new BABYLON.Color3(0.9, 0.9, 0.85);
scene.fogDensity = 0.01;
scene.fogMode = BABYLON.Scene.FOGMODE_EXP − Here, the fog density follows an exponential function.
scene.registerBeforeRender = With this, the fog density changes as follows −
var alpha = 0;
scene.registerBeforeRender(function () {
   scene.fogDensity = Math.cos(alpha) / 10;
   alpha += 0.02;
});
The value of alpha keeps incrementing by 0.02 as it goes in a loop as in the above function.
Here, we have added a plane sprite image and changed its position with the scene.registerBeforeRender function as follows −
var alpha = 0;
var x = 2;
var y = 0;
scene.registerBeforeRender(function () {
   scene.fogDensity = Math.cos(alpha) / 10;
   alpha += 0.02;
   sphere.rotation.y += 0.01;
   y += 0.05;
   if (x > 50) {
      x = -2;
   }
   plane.position.x = -x;
   x += 0.02;
});
return scene;
};s
We will change the x axis of the plane and reset it when it reaches more than 50.
Also, the sphere is rotated along the y axis. This is shown in the above example.The value is changed using sphere.rotation.y.
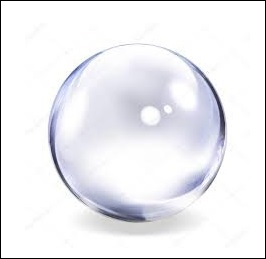
The texture used for sphere is − images/tshphere.jpg. The images are stored in images/ folder locally and also pasted below for reference. You can download any image of your choice and use in the demo link.
We need six images for a cube. The images are stored locally in images/cubetexture/ folder. You can download any image of your choice, but when you save it save them as nameoftheimage_nx, nameoftheimage_ny, nameoftheimage_nz,nameoftheimage_px, nameoftheimage_py, nameoftheimage_pz. Please note the images chosen should be in a sequence so that the background looks realistic like the one shown for skybox.
The images used for making a skybox are as follows − images/cubetexture/skybox
skybox_nx
skybox_ny

skybox_nz

skybox_px
skybox_py
skybox_pz
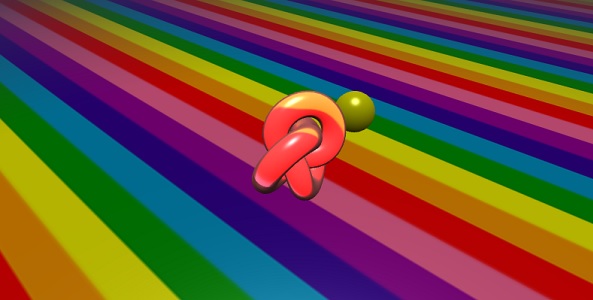
BabylonJS - Materials
Materials are like clothes for the objects. You can add color, texture and wrap your meshes with it. You can use the same material to cover many meshes. Meshes can be the scene which we just saw in the example in the previous for chapter - the plane passing through the sky.
In this chapter, we will learn how to add color, texture, reflection for the meshes in this chapter.
We will add material to the already created scene. We will progress by adding material to all the shapes we created.
Let us consider a few examples to see how the addition of material works.
Syntax
var materialforshapes = new BABYLON.StandardMaterial("texture1", scene);
The above material will not change anything since it is the default one. We will use the available properties to make the objects look more appealing.
The available properties are as follows −
Take a look how these properties applied on the material changes the look and feel of the mesh.
Basic Material Property - FresnelParameters
Fresnel is the new thing added by BabylonJS on standardmaterial. It allows to change the color applied on the shapes. You can get glass like reflection by using the simple Fresnel. The Fresnel will let you have more reflection on edges and not all on the center.
Following properties are available for Fresnel
StandardMaterial.diffuseFresnelParameters
StandardMaterial.opacityFresnelParameters
StandardMaterial.reflectionFresnelParameters
StandardMaterial.emissiveFresnelParameters
StandardMaterial.refractionFresnelParameters
Demo
<!doctype html>
<html>
   <head>
      <meta charset = "utf-8">
      <title>BabylonJs - Basic Element-Creating Scene</title>
      <script src = "babylon.js"></script>
      <style>
         canvas {width: 100%; height: 100%;}
      </style>
   </head>

   <body>
      <canvas id = "renderCanvas"></canvas>
      <script type = "text/javascript">
         var canvas = document.getElementById("renderCanvas");
         var engine = new BABYLON.Engine(canvas, true);
         var createScene  = function() {
            var scene = new BABYLON.Scene(engine);

            var camera = new BABYLON.ArcRotateCamera("camera1", 0, 0, 10, BABYLON.Vector3.Zero(), scene);

            camera.setPosition(new BABYLON.Vector3(0, 5, -10));

            camera.attachControl(canvas);
            camera.upperBetaLimit = Math.PI / 2;
            camera.lowerRadiusLimit = 4;

            var light = new BABYLON.HemisphericLight("light1", new BABYLON.Vector3(0, 1, 0), scene);
            light.intensity = 0.7;

            var knot = BABYLON.Mesh.CreateTorusKnot("knot", 1, 0.4, 128, 64, 2, 3, scene);
            var yellowSphere = BABYLON.Mesh.CreateSphere("yellowSphere", 16, 1.5, scene);
            yellowSphere.setPivotMatrix(BABYLON.Matrix.Translation(3, 0, 0));
            var yellowMaterial = new BABYLON.StandardMaterial("yellowMaterial", scene);
            yellowMaterial.diffuseColor = BABYLON.Color3.Yellow();
            yellowSphere.material = yellowMaterial;

            // Ground
            var ground = BABYLON.Mesh.CreateBox("Mirror", 1.0, scene);
            ground.scaling = new BABYLON.Vector3(100.0, 0.01, 100.0);
            ground.material = new BABYLON.StandardMaterial("ground", scene);
            ground.material.diffuseTexture = new BABYLON.Texture("images/rainbow.png", scene);
            ground.material.diffuseTexture.uScale = 10;
            ground.material.diffuseTexture.vScale = 10;
            ground.position = new BABYLON.Vector3(0, -2, 0);

            // Main material
            var mainMaterial = new BABYLON.StandardMaterial("main", scene);
            knot.material = mainMaterial;

            var probe = new BABYLON.ReflectionProbe("main", 512, scene);
            probe.renderList.push(yellowSphere);
            probe.renderList.push(ground);
            mainMaterial.diffuseColor = new BABYLON.Color3(1, 0.5, 0.5);
            mainMaterial.refractionTexture = probe.cubeTexture;
            mainMaterial.refractionFresnel<h3>Parameters</h3> = new BABYLON.Fresnel<h3>Parameters</h3>();
            mainMaterial.refractionFresnel<h3>Parameters</h3>.bias = 0.5;
            mainMaterial.refractionFresnel<h3>Parameters</h3>.power = 16;
            mainMaterial.refractionFresnel<h3>Parameters</h3>.leftColor = BABYLON.Color3.Black();
            mainMaterial.refractionFresnel<h3>Parameters</h3>.rightColor = BABYLON.Color3.White();
            mainMaterial.indexOfRefraction = 1.05;

            // Fog
            scene.fogMode = BABYLON.Scene.FOGMODE_LINEAR;
            scene.fogColor = scene.clearColor;
            scene.fogStart = 20.0;
            scene.fogEnd = 50.0;

            // Animations
            scene.registerBeforeRender(function () {
               yellowSphere.rotation.y += 0.01;
               //  greenSphere.rotation.y += 0.01;
            });
            return scene;
         };
         var scene = createScene();
         engine.runRenderLoop(function() {
            scene.render();
         });
      </script>
   </body>
</html>
Output
The above line of code generates the following output −
Explanation
Following code applies the Fresnel effect. The colors left and right are applied to the edges of the meshes.
mainMaterial.refractionFresnelParameters = new BABYLON.FresnelParameters();
mainMaterial.refractionFresnelParameters.bias = 0.5;
mainMaterial.refractionFresnelParameters.power = 16;
mainMaterial.refractionFresnelParameters.leftColor = BABYLON.Color3.Black();
mainMaterial.refractionFresnelParameters.rightColor = BABYLON.Color3.White();
Bias and power property control the Fresnel effect on the surface.
In this demo, we have used an image called rainbow.png. The images are stored in images/ folder locally. You can download any image of your choice and use in the demo link.
BabylonJS - Animations
Animation makes a scene more interactive and also makes it impressive giving realistic look to it. Let us now understand animation in detail. We will apply animation on shapes to move it from one position to another. To use animation, you need to create an object on animation with the required parameters.
Let us now see the syntax for the same −
var animationBox = new BABYLON.Animation(
   "myAnimation",
   "scaling.x",
   30,
   BABYLON.Animation.ANIMATIONTYPE_FLOAT,
   BABYLON.Animation.ANIMATIONLOOPMODE_CYCLE
);
Parameters
Consider the following parameters related to Animations with BabylonJS −
Name of the animation.
Property of the shape for example, scaling, changing position, etc. Scaling is what is shown in the syntax; here, it will scale the box along the x-axis.
Frames per second requested: highest FPS possible in this animation.
Here you decide and enter what kind of value will be modified: is it a float (e.g. a translation), a vector (e.g. a direction), or a quaternion.
Exact values are −
BABYLON.Animation.ANIMATIONTYPE_FLOAT
BABYLON.Animation.ANIMATIONTYPE_VECTOR2
BABYLON.Animation.ANIMATIONTYPE_VECTOR3
BABYLON.Animation.ANIMATIONTYPE_QUATERNION
BABYLON.Animation.ANIMATIONTYPE_COLOR3
Behaviour for animation - to stop or to start the animation again.
Use previous values and increment it −
BABYLON.Animation.ANIMATIONLOOPMODE_RELATIVE
Restart from initial value −
BABYLON.Animation.ANIMATIONLOOPMODE_CYCLE
Keep their final value
BABYLON.Animation.ANIMATIONLOOPMODE_CONSTANT
Let us now create the animation object −
var animationBox = new BABYLON.Animation(
   "myAnimation",
   "scaling.x",
   30,
   BABYLON.Animation.ANIMATIONTYPE_FLOAT,
   BABYLON.Animation.ANIMATIONLOOPMODE_CYCLE
);
Demo for Animation
<!doctype html>
<html>
   <head>
      <meta charset = "utf-8">
      <title>BabylonJs - Basic Element-Creating Scene</title>
      <script src = "babylon.js"></script>
      <style>
         canvas {width: 100%; height: 100%;}
      </style>
   </head>

   <body>
      <canvas id = "renderCanvas"></canvas>
      <script type = "text/javascript">
         var canvas = document.getElementById("renderCanvas");
         var engine = new BABYLON.Engine(canvas, true);

         var createScene  = function() {
            var scene = new BABYLON.Scene(engine);
            scene.clearColor = new BABYLON.Color3(0, 1, 0);

            var camera = new BABYLON.ArcRotateCamera("Camera", 1, 0.8, 10, new BABYLON.Vector3(0, 0, 0), scene);
            camera.attachControl(canvas, true);

            var light = new BABYLON.HemisphericLight("light1", new BABYLON.Vector3(0, 1, 0), scene);
            light.intensity = 0.7;

            var pl = new BABYLON.PointLight("pl", BABYLON.Vector3.Zero(), scene);
            pl.diffuse = new BABYLON.Color3(1, 1, 1);
            pl.specular = new BABYLON.Color3(1, 1, 1);
            pl.intensity = 0.8;

            var box = BABYLON.Mesh.CreateBox("box", '3', scene);
            box.position = new BABYLON.Vector3(-10,0,0);

            var box1 = BABYLON.Mesh.CreateBox("box1", '3', scene);
            box1.position = new BABYLON.Vector3(0,0,0);

            var animationBox = new BABYLON.Animation("myAnimation", "scaling.x", 30, BABYLON.Animation.ANIMATIONTYPE_FLOAT, BABYLON.Animation.ANIMATIONLOOPMODE_CYCLE);

            var animationBox1 = new BABYLON.Animation("myAnimation1", "scaling.z", 10, BABYLON.Animation.ANIMATIONTYPE_FLOAT, BABYLON.Animation.ANIMATIONLOOPMODE_CYCLE);

            // An array with all animation keys
            var keys = [];

            //At the animation key 0, the value of scaling is "1"
            keys.push({
               frame: 0,
               value: 1
            });

            //At the animation key 20, the value of scaling is "0.2"
            keys.push({
               frame: 20,
               value: 0.2
            });

            keys.push({
               frame: 60,
               value: 0.4
            });

            //At the animation key 100, the value of scaling is "1"
            keys.push({
               frame: 100,
               value: 1
            });

            animationBox.setKeys(keys);
            box.animations = [];
            box.animations.push(animationBox);
            scene.beginAnimation(box, 0, 100, true);

            // An array with all animation keys
            var keys = [];

            //At the animation key 0, the value of scaling is "1"
            keys.push({
               frame: 0,
               value: 1
            });

            //At the animation key 20, the value of scaling is "0.2"
            keys.push({
               frame: 60,
               value: 0.2
            });

            //At the animation key 100, the value of scaling is "1"
            keys.push({
               frame: 100,
               value: 1
            });
            animationBox1.setKeys(keys);
            box1.animations = [];
            box1.animations.push(animationBox1);
            scene.beginAnimation(box1, 0, 100, true);
            return scene;
         };
         var scene = createScene();
         engine.runRenderLoop(function() {
            scene.render();
         });
      </script>
   </body>
</html>
Output
// An array with all animation keys
var keys = [];

//At the animation key 0, the value of scaling is "1"
keys.push({
   frame: 0,
   value: 1
});

//At the animation key 20, the value of scaling is "0.2"
keys.push({
   frame: 20,
   value: 0.2
});

//At the animation key 100, the value of scaling is "1"
keys.push({
   frame: 100,
   value: 1
});

animationBox.setKeys(keys);

box.animations = [];

box.animations.push(animationBox);

scene.beginAnimation(box, 0, 100, true); //defines the start and the end on the target shape box.
Following are the other functions available on animation object −
- pause()
- restart()
- stop()
- reset()
We can store the beginAnimation reference in a variable and use the reference to stop, pause or reset animation.
var newAnimation = scene.beginAnimation(box1, 0, 100, true);
For example,
newAnimation.pause();
There are functions available on animation object to control the keyframes.
BABYLON.Animation.prototype.floatInterpolateFunction = function (startValue, endValue, gradient) {
   return startValue + (endValue - startValue) * gradient;
};

BABYLON.Animation.prototype.quaternionInterpolateFunction = function (startValue, endValue, gradient) {
   return BABYLON.Quaternion.Slerp(startValue, endValue, gradient);
};

BABYLON.Animation.prototype.vector3InterpolateFunction = function (startValue, endValue, gradient) {
   return BABYLON.Vector3.Lerp(startValue, endValue, gradient);
};
Here is the list of functions that you can change −
- floatInterpolateFunction
- quaternionInterpolateFunction
- quaternionInterpolateFunctionWithTangents
- vector3InterpolateFunction
- vector3InterpolateFunctionWithTangents
- vector2InterpolateFunction
- vector2InterpolateFunctionWithTangents
- sizeInterpolateFunction
- color3InterpolateFunction
- matrixInterpolateFunction
To create a quick animation, there is a function available which can be used directly.
For example,
Animation.CreateAndStartAnimation = function(name, mesh, tartgetProperty, framePerSecond, totalFrame, from, to, loopMode);
Here you can use only 2 keyframes - start and end.
Demo
<!doctype html>
<html>
   <head>
      <meta charset = "utf-8">
      <title>BabylonJs - Basic Element-Creating Scene</title>
      <script src = "babylon.js"></script>
      <style>
         canvas {width: 100%; height: 100%;}
      </style>
   </head>

   <body>
      <canvas id = "renderCanvas"></canvas>
      <script type = "text/javascript">
         var canvas = document.getElementById("renderCanvas");
         var engine = new BABYLON.Engine(canvas, true);

         var createScene  = function() {
            var scene = new BABYLON.Scene(engine);
            scene.clearColor = new BABYLON.Color3(0, 1, 0);

            var camera = new BABYLON.ArcRotateCamera("Camera", 1, 0.8, 10, new BABYLON.Vector3(0, 0, 0), scene);
            camera.attachControl(canvas, true);

            var light = new BABYLON.HemisphericLight("light1", new BABYLON.Vector3(0, 1, 0), scene);
            light.intensity = 0.7;

            var pl = new BABYLON.PointLight("pl", BABYLON.Vector3.Zero(), scene);
            pl.diffuse = new BABYLON.Color3(1, 1, 1);
            pl.specular = new BABYLON.Color3(1, 1, 1);
            pl.intensity = 0.8;

            var box = BABYLON.Mesh.CreateBox("box", '3', scene);
            box.position = new BABYLON.Vector3(0,0,0);
            BABYLON.Animation.CreateAndStartAnimation('boxscale', box, 'scaling.x', 30, 120, 1.0, 1.5);
            return scene;
         };
         var scene = createScene();
         engine.runRenderLoop(function() {
            scene.render();
         });
      </script>
   </body>
</html>
Output
Animation Blending
You can achieve animation blending with the help of enableBlending = true;
This blended animation will change from the current object state.
Easing Functions
To make the animation more impressive, there are some easing functions which we have already used with css earlier.
Following is a list of easing functions −
BABYLON.CircleEase ()
BABYLON.BackEase (amplitude)
BABYLON.BounceEase (bounces, bounciness)
BABYLON.CubicEase ()
BABYLON.ElasticEase (oscillations, springiness)
BABYLON.ExponentialEase (exponent)
BABYLON.PowerEase (power)
BABYLON.QuadraticEase ()
BABYLON.QuarticEase ()
BABYLON.QuinticEase ()
BABYLON.SineEase ()
Demo
<!doctype html>
<html>
   <head>
      <meta charset = "utf-8">
      <title>BabylonJs - Basic Element-Creating Scene</title>
      <script src = "babylon.js"></script>
      <style>
         canvas {width: 100%; height: 100%;}
      </style>
   </head>

   <body>
      <canvas id = "renderCanvas"></canvas>
      <script type = "text/javascript">
         var canvas = document.getElementById("renderCanvas");
         var engine = new BABYLON.Engine(canvas, true);
         var createScene  = function() {
            var scene = new BABYLON.Scene(engine);
            scene.clearColor = new BABYLON.Color3(0, 1, 0);

            var camera = new BABYLON.ArcRotateCamera("Camera", 1, 0.8, 10, new BABYLON.Vector3(0, 0, 0), scene);
            camera.attachControl(canvas, true);

            var light = new BABYLON.HemisphericLight("light1", new BABYLON.Vector3(0, 1, 0), scene);
            light.intensity = 0.7;

            var pl = new BABYLON.PointLight("pl", BABYLON.Vector3.Zero(), scene);
            pl.diffuse = new BABYLON.Color3(1, 1, 1);
            pl.specular = new BABYLON.Color3(1, 1, 1);
            pl.intensity = 0.8;

            var box1 = BABYLON.Mesh.CreateTorus("torus", 5, 1, 10, scene, false);
            box1.position = new BABYLON.Vector3(0,0,0);

            var animationBox1 = new BABYLON.Animation("myAnimation1", "scaling.z", 10, BABYLON.Animation.ANIMATIONTYPE_FLOAT, BABYLON.Animation.ANIMATIONLOOPMODE_CYCLE);

            // An array with all animation keys
            var keys = [];

            //At the animation key 0, the value of scaling is "1"
            keys.push({
               frame: 0,
               value: 1
            });

            //At the animation key 20, the value of scaling is "0.2"
            keys.push({
               frame: 60,
               value: 0.2
            });

            //At the animation key 100, the value of scaling is "1"
            keys.push({
               frame: 100,
               value: 1
            });

            animationBox1.setKeys(keys);
            box1.animations = [];
            // box1.animations.push(animationBox1);

            var easingFunction = new BABYLON.QuarticEase();
            easingFunction.setEasingMode(BABYLON.EasingFunction.EASINGMODE_EASEINOUT);

            animationBox1.setEasingFunction(easingFunction);
            box1.animations.push(animationBox1);
            scene.beginAnimation(box1, 0, 100, true);
            return scene;
         };
         var scene = createScene();
         engine.runRenderLoop(function() {
            scene.render();
         });
      </script>
   </body>
</html>
Output
Animation Event
You can carry out anything necessary on animation event. If you want to change anything when the frame is changed or when the animation is complete, it can be achieved by adding events to the animation.
var event1 = new BABYLON.AnimationEvent(50, function() { console.log("Yeah!"); }, true);
// You will get hte console.log when the frame is changed to 50 using animation.

animation.addEvent(event1); //attaching event to the animation.
BabylonJS - Sprites
What does sprites refer to in computer graphics? It is basically a 2-dimensional bitmap that is integrated into a larger scene. When multiple smaller images are combined into a single bitmap to save memory, the resulting image is called a sprite sheet. Let us get started with sprites and how to use them.
The first step to start working with sprites is to create a sprite manager.
var spriteManagerTrees = new BABYLON.SpriteManager("treesManagr", "Assets/Palm-arecaceae.png", 2000, 800, scene);
Consider the following parameters to create sprite manager −
Name − The name of this manager.
URL − The image url to be used.
Capacity of manager − The maximum number of instances in this manager.For example, the above insteance will create 2000 trees.
Cell size − The size taken by the image.
Scene − The scene to which the manager will be added.
var spriteManagerPlayer = new BABYLON.SpriteManager("playerManagr","Assets/Player.png", 2, 64, scene);
Take a look at the above object.We have given a player image and are now creating 2 instances of it. The size of the image is 64. Each image of a sprite must be contained in a64 pixel square, no more no less.
Let us now create instance of the same linked to the sprite manager.
var player = new BABYLON.Sprite("player", spriteManagerPlayer);
You can play around with this player object just like any other shapes or meshes. You can assign position, size, angle, etc.
player.size = 0.3;
player.angle = Math.PI/4;
player.invertU = -1;
player.width = 0.3;
player.height = 0.4;
Demo
<!doctype html>
<html>
<head>
<meta charset = "utf-8">
<title>BabylonJs - Basic Element-Creating Scene</title>
<script src = "babylon.js"></script>
<style>
canvas {width: 100%; height: 100%;}
</style>
</head>
<body>
<canvas id = "renderCanvas"></canvas>
<script type = "text/javascript">
var canvas = document.getElementById("renderCanvas");
var engine = new BABYLON.Engine(canvas, true);
var createScene = function() {
var scene = new BABYLON.Scene(engine);
//scene.clearColor = new BABYLON.Color3(0, 1, 0);
// Create camera and light
var light = new BABYLON.PointLight("Point", new BABYLON.Vector3(5, 10, 5), scene);
var camera = new BABYLON.ArcRotateCamera("Camera", 1, 0.8, 8, new BABYLON.Vector3(0, 0, 0), scene);
camera.attachControl(canvas, true);
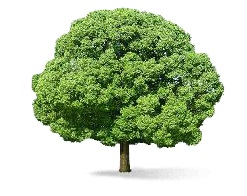
var spriteManagerTrees = new BABYLON.SpriteManager("trees", "images/tree.png", 1000, 400, scene);
for (var i = 0; i < 1000; i++) {
var tree = new BABYLON.Sprite("tree", spriteManagerTrees);
tree.position.x = Math.random() * 100 - 50;
tree.position.z = Math.random() * 100 - 50;
tree.isPickable = true;
//Some "dead" trees
if (Math.round(Math.random() * 5) === 0) {
tree.angle = Math.PI * 90 / 180;
tree.position.y = -0.3;
}
}
var spriteManagerTrees1 = new BABYLON.SpriteManager("trees1", "images/tree1.png", 1000,400, scene);
for (var i = 0; i < 1000; i++) {
var tree1 = new BABYLON.Sprite("tree1", spriteManagerTrees1);
if (i %2 == 0) {
tree1.position.x = Math.random() * 100 - 50;
} else {
tree1.position.z = Math.random() * 100 - 50;
}
tree1.isPickable = true;
}
spriteManagerTrees.isPickable = true;
spriteManagerTrees1.isPickable = true;
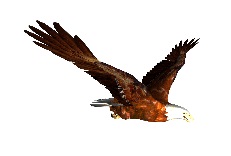
var spriteManagerPlayer = new BABYLON.SpriteManager("playerManager", "images/bird.png", 2, 200, scene);
var player = new BABYLON.Sprite("player", spriteManagerPlayer);
player.position.x = 2;
player.position.y = 2;
player.position.z = 0;
var spriteManagerPlayer1 = new BABYLON.SpriteManager("playerManager1", "images/bird.png", 2, 200, scene);
var player1 = new BABYLON.Sprite("player", spriteManagerPlayer1);
player1.position.x = 1;
player1.position.y = 2;
player1.position.z = 0;
var spriteManagerPlayer2 = new BABYLON.SpriteManager("playerManager2", "images/bird.png", 2, 200, scene);
var player2 = new BABYLON.Sprite("player", spriteManagerPlayer2);
player2.position.x = 0;
player2.position.y = 1;
player2.position.z = 0;
scene.onPointerDown = function (evt) {
var pickResult = scene.pickSprite(this.pointerX, this.pointerY);
if (pickResult.hit) {
pickResult.pickedSprite.angle += 1;
}
};
return scene;
};
var scene = createScene();
engine.runRenderLoop(function() {
scene.render();
});
</script>
</body>
</html>
Output
In this demo, we have used an image called tree.png, tree1.png to show trees, bird.png to show bird in the scene. These images are stored in images/ folder locally and are also pasted below for reference. You can download any image of your choice and use in the demo link.
The images used for Tree are shown below.
images/tree.png
images/tree1.png
images/bird.png
Let us now see one more demo with sprites-balloons.
Demo with sprites-balloons
<!doctype html>
<html>
   <head>
      <meta charset = "utf-8">
      <title>BabylonJs - Basic Element-Creating Scene</title>
      <script src = "babylon.js"></script>
      <style>
         canvas {width: 100%; height:100%;}
      </style>
   </head>

   <body>
      <canvas id = "renderCanvas"></canvas>
      <script type = "text/javascript">
         var canvas = document.getElementById("renderCanvas");
         var engine = new BABYLON.Engine(canvas, true);

         var createScene  = function() {
            var scene = new BABYLON.Scene(engine);

            var light = new BABYLON.PointLight("Point", new BABYLON.Vector3(5, 10, 5), scene);

            var camera = new BABYLON.ArcRotateCamera("Camera", -3.4, 1.0, 82, new BABYLON.Vector3(0, -15, 0), scene);
            camera.setPosition(new BABYLON.Vector3(30, 0,100));
            camera.attachControl(canvas, true);

            var spriteManagerTrees = new BABYLON.SpriteManager("trees", "images/balloon.png", 50, 450, scene);

            var treearray = [];
            for (var i = 0; i < 50; i++) {
               var tree = new BABYLON.Sprite("tree", spriteManagerTrees);
               tree.position.x = Math.random() * 100 - 10;
               tree.position.z = Math.random() * 100 - 10;
               tree.position.y = -35;
               tree.isPickable = true;
               treearray.push(tree);
            }

            spriteManagerTrees.isPickable = true;
            scene.onPointerDown = function (evt) {
               var pickResult = scene.pickSprite(this.pointerX, this.pointerY);
               if (pickResult.hit) {
                  pickResult.pickedSprite.position.y = -3000;
               }
            };

            k = -35;
            var animate = function() {
               if (k > 3) return;
               k += 0.05;
               for (var i = 0; i < treearray.length; i++) {
                  treearray[i].position.y = k;
               }
            };
            scene.registerBeforeRender(animate);
            return scene;
         };
         var scene = createScene();
         engine.runRenderLoop(function() {
            scene.render();
         });
      </script>
   </body>
</html>
Output
In this demo, we have used image called ballon.png. The images are stored in images/ folder locally and are also pasted below for reference. You can download any image of your choice and use in the demo link.
images/balloon.png
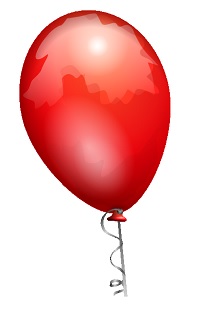
Balloons will rise in the sky and once they stop, you can click on them and they will disappear. This is done using the pickSprite function which gives details when clicked on the created sprite.
The onPointerDown function is called when the mouse action takes place and the position of sprite is changed.
var animate = function() {
   if (k > 3) return;
   k += 0.05;
   for (var i = 0; i < treearray.length; i++) {
      treearray[i].position.y = k;
   }
};
scene.registerBeforeRender(animate);
The function animate is called in registerBeforeRender, which takes care of moving the ballons from initial -35 to +3. It is moved slowly by incrementing it by .05.
BabylonJS - Particles
A particle system is a technique in computer graphics which makes use of a large number of very small sprites, 3D models, or other graphic objects to simulate certain kinds of "fuzzy" phenomena, which are otherwise very hard to reproduce with conventional rendering techniques.
To create particle system, you have to call the class as follows −
var particleSystem = new BABYLON.ParticleSystem("particles", 2000, scene);//2000 refers to the total number of particles to be produced.
The following properties need to be considered for the particle system −
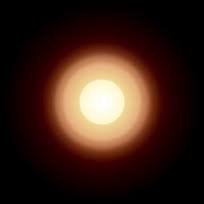
particleSystem.particleTexture = new BABYLON.Texture("Flare.png", scene);
particleSystem.textureMask = new BABYLON.Color4(0.1, 0.8, 0.8, 1.0);
particleSystem.emitter = fountain
particleSystem.color1 = new BABYLON.Color4(0.7, 0.8, 1.0, 1.0);
particleSystem.color2 = new BABYLON.Color4(0.2, 0.5, 1.0, 1.0);
particleSystem.colorDead = new BABYLON.Color4(0, 0, 0.2, 0.0);
The emitter property takes the mesh from which the particle has to be emitted. The color1 and color2 are the colors for the particles.
ColorDead is the color applied to the particle just before it disappears from the scene hence called colorDead.
particleSystem.minSize = 0.1;
particleSystem.maxSize = 0.5;
particleSystem.minLifeTime = 0.3;
particleSystem.maxLifeTime = 1.5;
MinSize and maxSize is the size given to the particles. MinlifeTime and maxLifeTime is the lifetime given to the particles.
particleSystem.emitRate = 1500;
The emitRate is the rate at which particles will be emitted.
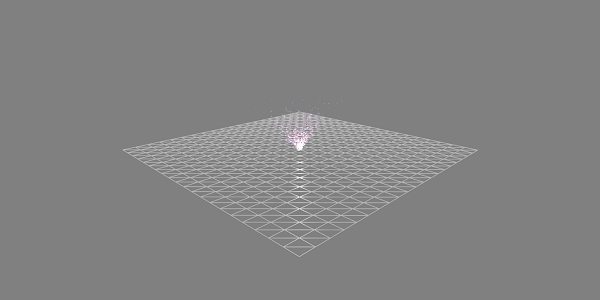
We have used torus in the demo shown below. We have used the particle system and its properties to get all particles around the torus.
Demo 1
<!doctype html>
<html>
   <head>
      <meta charset = "utf-8">
      <title>BabylonJs - Basic Element-Creating Scene</title>
      <script src = "babylon.js"></script>
      <style>
         canvas {width: 100%; height: 100%;}
      </style>
   </head>

   <body>
      <canvas id = "renderCanvas"></canvas>
      <script type = "text/javascript">
         var canvas = document.getElementById("renderCanvas");
         var engine = new BABYLON.Engine(canvas, true);
         var createScene  = function() {
            var scene = new BABYLON.Scene(engine);
            // Setup environment

            var light0 = new BABYLON.PointLight("Omni", new BABYLON.Vector3(0, 2, 8), scene);

            var camera = new BABYLON.ArcRotateCamera("ArcRotateCamera", 1, 0.8, 20, new BABYLON.Vector3(0, 0, 0), scene);
            camera.attachControl(canvas, true);

            var fountain = BABYLON.Mesh.CreateTorus("torus", 2, 1, 8, scene, false);

            var particleSystem = new BABYLON.ParticleSystem("particles", 2000, scene);
            particleSystem.particleTexture = new BABYLON.Texture("images/dot.jpg", scene);

            particleSystem.textureMask = new BABYLON.Color4(0.1, 0.8, 0.8, 1.0);
            particleSystem.emitter = fountain;


            particleSystem.minEmitBox = new BABYLON.Vector3(-1, 0, 0); // Starting all from
            particleSystem.maxEmitBox = new BABYLON.Vector3(1, 0, 0); // To...

            particleSystem.color1 = new BABYLON.Color4(0.7, 0.8, 1.0, 1.0);
            particleSystem.color2 = new BABYLON.Color4(0.2, 0.5, 1.0, 1.0);
            particleSystem.colorDead = new BABYLON.Color4(0, 0, 0.2, 0.0);

            particleSystem.minSize = 0.1;
            particleSystem.maxSize = 0.5;

            particleSystem.minLifeTime = 0.3;
            particleSystem.maxLifeTime = 1.5;

            particleSystem.emitRate = 1500;

            particleSystem.blendMode = BABYLON.ParticleSystem.BLENDMODE_ONEONE;

            particleSystem.gravity = new BABYLON.Vector3(0, -9.81, 0);

            particleSystem.direction1 = new BABYLON.Vector3(-7, 8, 3);
            particleSystem.direction2 = new BABYLON.Vector3(7, 8, -3);


            particleSystem.minAngularSpeed = 0;
            particleSystem.maxAngularSpeed = Math.PI;

            particleSystem.minEmitPower = 1;
            particleSystem.maxEmitPower = 3;
            particleSystem.updateSpeed = 0.005;

            particleSystem.start();
            var keys = [];
            var animation = new BABYLON.Animation("animation", "rotation.x", 30, BABYLON.Animation.ANIMATIONTYPE_FLOAT,
                                   BABYLON.Animation.ANIMATIONLOOPMODE_CYCLE);

            // At the animation key 0, the value of scaling is "1"
            keys.push({
               frame: 0,
               value: 0
            });

            // At the animation key 50, the value of scaling is "0.2"
            keys.push({
               frame: 50,
               value: Math.PI
            });

            // At the animation key 100, the value of scaling is "1"
            keys.push({
               frame: 100,
               value: 0
            });

            // Launch animation
            animation.setKeys(keys);
            fountain.animations.push(animation);
            scene.beginAnimation(fountain, 0, 100, true);
            return scene;
         }
         var scene = createScene();
         engine.runRenderLoop(function() {
            scene.render();
         });
      </script>
   </body>
</html>
Output
The above line of code generates the following output −
In this demo, we have used image called dot.jpg. The images are stored in images/ folder locally and are also pasted below for reference. You can download any image of your choice and use in the demo link.
Following is the imageused for particle texture: images/dot.jpg
Demo 2
<!doctype html>
<html>
   <head>
      <meta charset = "utf-8">
      <title>BabylonJs - Ball/Ground Demo</title>
      <script src = "babylon.js"></script>
      <style>
         canvas {width: 100%; height: 100%;}
      </style>
   </head>

   <body>
      <canvas id = "renderCanvas"></canvas>
      <script type = "text/javascript">
         var canvas = document.getElementById("renderCanvas");
         var engine = new BABYLON.Engine(canvas, true);

         var createScene  = function() {
            var scene = new BABYLON.Scene(engine);
            scene.clearColor = new BABYLON.Color3( .5, .5, .5);

            var camera = new BABYLON.ArcRotateCamera("camera1",  0, 0, 0, new BABYLON.Vector3(0, 0, -0), scene);
            camera.setPosition(new BABYLON.Vector3(-100, 0,-100));
            camera.attachControl(canvas, true);

            var light = new BABYLON.HemisphericLight("light1", new BABYLON.Vector3(1, 0.5, 0), scene);
            var pl = new BABYLON.PointLight("pl", new BABYLON.Vector3(0, 0, 0), scene);

            var gmat = new BABYLON.StandardMaterial("mat1", scene);
            gmat.alpha = 1.0;

            var ground =  BABYLON.Mesh.CreateGround("ground", 100, 100, 20, scene);
            ground.material = gmat;
            gmat.wireframe = true;

            var particleSystem = new BABYLON.ParticleSystem("particles", 2000, scene);
            particleSystem.particleTexture = new BABYLON.Texture("images/dot.jpg", scene);

            particleSystem.textureMask = new BABYLON.Color4(0.1, 0.8, 0.8, 1.0);
            particleSystem.emitter = ground;

            particleSystem.minEmitBox = new BABYLON.Vector3(-1, 0, 0); // Starting all from
            particleSystem.maxEmitBox = new BABYLON.Vector3(1, 0, 0); // To...

            particleSystem.color1 = new BABYLON.Color4(0.7, 0.8, 1.0, 1.0);
            particleSystem.color2 = new BABYLON.Color4(0.2, 0.5, 1.0, 1.0);
            particleSystem.colorDead = new BABYLON.Color4(0, 0, 0.2, 0.0);

            particleSystem.minSize = 0.1;
            particleSystem.maxSize = 0.5;

            particleSystem.minLifeTime = 0.3;
            particleSystem.maxLifeTime = 1.5;

            particleSystem.emitRate = 1500;

            particleSystem.blendMode = BABYLON.ParticleSystem.BLENDMODE_ONEONE;

            particleSystem.gravity = new BABYLON.Vector3(0, -9.81, 0);

            particleSystem.direction1 = new BABYLON.Vector3(-7, 8, 3);
            particleSystem.direction2 = new BABYLON.Vector3(7, 8, -3);

            particleSystem.minAngularSpeed = 0;
            particleSystem.maxAngularSpeed = Math.PI;

            particleSystem.minEmitPower = 1;
            particleSystem.maxEmitPower = 3;
            particleSystem.updateSpeed = 0.005;

            particleSystem.start();


            var keys = [];
            var animation = new BABYLON.Animation("animation", "rotation.x", 30, BABYLON.Animation.ANIMATIONTYPE_FLOAT,
                           BABYLON.Animation.ANIMATIONLOOPMODE_CYCLE);

            // At the animation key 0, the value of scaling is "1"
            keys.push({
               frame: 0,
               value: 0
            });

            // At the animation key 50, the value of scaling is "0.2"
            keys.push({
               frame: 50,
               value: Math.PI
            });

            // At the animation key 100, the value of scaling is "1"
            keys.push({
               frame: 100,
               value: 0
            });

            // Launch animation
            animation.setKeys(keys);
            ground.animations.push(animation);

            //scene.beginAnimation(ground, 0, 100, true);
            return scene;
         };
         var scene = createScene();
         engine.runRenderLoop(function() {
            scene.render();
         });
      </script>
   </body>
</html>
Output
Demo with Animation
<!doctype html>
<html>
   <head>
      <meta charset = "utf-8">
      <title>BabylonJs - Ball/Ground Demo</title>
      <script src = "babylon.js"></script>
      <style>
         canvas {width: 100%; height: 100%;}
      </style>
   </head>

   <body>
      <canvas id = "renderCanvas"></canvas>
      <script type = "text/javascript">
         var canvas = document.getElementById("renderCanvas");
         var engine = new BABYLON.Engine(canvas, true);

         var createScene  = function() {
            var scene = new BABYLON.Scene(engine);
            scene.clearColor = new BABYLON.Color3( .5, .5, .5);

            var camera = new BABYLON.ArcRotateCamera("camera1",  0, 0, 0, new BABYLON.Vector3(0, 0, -0), scene);
            camera.setPosition(new BABYLON.Vector3(-100, 0, -100));
            camera.attachControl(canvas, true);

            var light = new BABYLON.HemisphericLight("light1", new BABYLON.Vector3(1, 0.5, 0), scene);
            var pl = new BABYLON.PointLight("pl", new BABYLON.Vector3(0, 0, 0), scene);

            var gmat = new BABYLON.StandardMaterial("mat1", scene);
            gmat.alpha = 1.0;

            var ground =  BABYLON.Mesh.CreateGround("ground", 100, 100, 20, scene);
            ground.material = gmat;
            gmat.wireframe = true;

            var particleSystem = new BABYLON.ParticleSystem("particles", 2000, scene);
            particleSystem.particleTexture = new BABYLON.Texture("images/dot.jpg", scene);

            particleSystem.textureMask = new BABYLON.Color4(0.1, 0.8, 0.8, 1.0);
            particleSystem.emitter = ground;

            particleSystem.minEmitBox = new BABYLON.Vector3(-1, 0, 0); // Starting all from
            particleSystem.maxEmitBox = new BABYLON.Vector3(1, 0, 0); // To...

            particleSystem.color1 = new BABYLON.Color4(0.7, 0.8, 1.0, 1.0);
            particleSystem.color2 = new BABYLON.Color4(0.2, 0.5, 1.0, 1.0);
            particleSystem.colorDead = new BABYLON.Color4(0, 0, 0.2, 0.0);

            particleSystem.minSize = 0.1;
            particleSystem.maxSize = 0.5;

            particleSystem.minLifeTime = 0.3;
            particleSystem.maxLifeTime = 1.5;

            particleSystem.emitRate = 1500;

            particleSystem.blendMode = BABYLON.ParticleSystem.BLENDMODE_ONEONE;

            particleSystem.gravity = new BABYLON.Vector3(0, -9.81, 0);//gravity for the particle.

            particleSystem.direction1 = new BABYLON.Vector3(-7, 8, 3);
            particleSystem.direction2 = new BABYLON.Vector3(7, 8, -3);

            //random direction for the particles on the scene
            particleSystem.minAngularSpeed = 0;
            particleSystem.maxAngularSpeed = Math.PI;
            particleSystem.minEmitPower = 1;
            particleSystem.maxEmitPower = 3;
            particleSystem.updateSpeed = 0.005;

            particleSystem.start();

            var keys = [];
            var animation = new BABYLON.Animation("animation", "rotation.x", 30, BABYLON.Animation.ANIMATIONTYPE_FLOAT,
                           BABYLON.Animation.ANIMATIONLOOPMODE_CYCLE);

            // At the animation key 0, the value of scaling is "1"
            keys.push({
               frame: 0,
               value: 0
            });

            // At the animation key 50, the value of scaling is "0.2"
            keys.push({
               frame: 50,
               value: Math.PI
            });

            // At the animation key 100, the value of scaling is "1"
            keys.push({
               frame: 100,
               value: 0
            });

            // Launch animation
            animation.setKeys(keys);
            ground.animations.push(animation);
            scene.beginAnimation(ground, 0, 100, true);
            return scene;
         };
         var scene = createScene();
         engine.runRenderLoop(function() {
            scene.render();
         });
      </script>
   </body>
</html>
Output
The above line of code generates the following output −
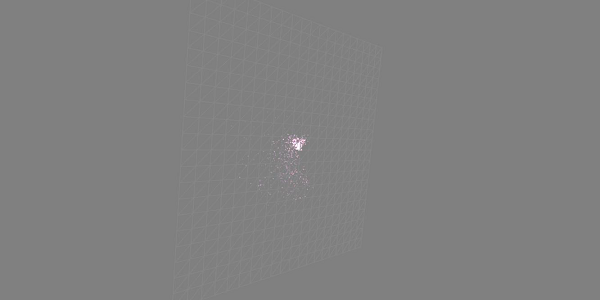
Explanation
The above demo shows a ground with wireframe material and the particle system is produced from the center.
BabylonJS - Cameras
BabylonJS has many cameras that can be used. At a time, only one camera will be active for a scene.
In this chapter, we will learn how to go about using cameras in BabylonJS.
FreeCamera
Let us now see how the FreeCamera works.
Syntax
Following is the syntax for the FreeCamera −
var camera = new BABYLON.FreeCamera("FreeCamera", new BABYLON.Vector3(0, 1, -15), scene);
This is the position in which the camera is placed - new BABYLON.Vector3(0, 1, -15).
Changing the direction will change the direction. You can change the values and see how the camera behaves on the scene.
Following are the parameters used by the FreeCamera −
- Name
- Position
- Scene
ArcRotateCamera
This camera rotates around a given target pivot. It can be controlled with cursors and mouse, or with touch events. Parameters are name, alpha, beta, radius and target.
Syntax
var camera = new BABYLON.ArcRotateCamera("ArcRotateCamera", 1, 0.8, 10, new BABYLON.Vector3(0, 0, 0), scene);
ArcRotateCamera points in the +x direction. To change the position of the camera, use the setPosition property.
camera.setPosition(new BABYLON.Vector3(0, 0, -100));
The ArcRotateCamera is an excellent camera to animate. The following command will help you rotate the camera around the target −
scene.activeCamera.alpha += .01;
TouchCamera
Touch is a type of a'gesture'. It can be on a pad or screen, with finger(s), stylus, glove, feet, or laser pointer. Any movement that can be sensed... can be considered a gesture.
Syntax
Following is the syntax for TouchCamera −
var camera = new BABYLON.TouchCamera("TouchCamera", new BABYLON.Vector3(0, 1, -15), scene);
GamepadCamera
This camera is specially designed to be used with gamepad.
Syntax
Following is the syntax for the Gamepad Camera −
var camera = new BABYLON.GamepadCamera("Camera", new BABYLON.Vector3(0, 15, -45), scene);
DeviceOrientationCamera
This camera is specially designed to react to device orientation events cases like when you tilt your device forward or backward, left or right, etc.
Syntax
var camera = new BABYLON.DeviceOrientationCamera("DevOr_camera", new BABYLON.Vector3(0, 1, -15), scene);
FollowCamera
FollowCamera is designed to follow any scene item with a position. It can follow from rear, front or from any angle.
Syntax
Following is the syntax for the FollowCamera −
var camera = new BABYLON.FollowCamera("FollowCam", new BABYLON.Vector3(0, 15, -45), scene);
VirtualJoysticksCamera
This camera is designed to react to Virtual Joystick events. The Virtual Joysticks are on-screen 2D graphics that are used to control cameras or other scene items.
Syntax
Following is the syntax for the VirtualJoysticksCamera −
var camera = new BABYLON.VirtualJoysticksCamera("VJ_camera", new BABYLON.Vector3(0, 1, -15), scene);
AnaglyphCamera
The AnaglyphCamera is for use with red and cyan 3D glasses. It uses post-processing filtering techniques.
AnaglyphArcRotateCamera
Following is the syntax for the AnaglyphArcRotateCamera −
var camera = new BABYLON.AnaglyphArcRotateCamera("aar_cam", -Math.PI/2, Math.PI/4, 20, new BABYLON.Vector3.Zero(), 0.033, scene);
AnaglyphFreeCamera
Following is the syntax for the AnaglyphFreeCamera −
var camera = new BABYLON.AnaglyphFreeCamera("af_cam", new BABYLON.Vector3(0, 1, -15), 0.033, scene);
VRDeviceOrientationFreeCamera
The VRDeviceOrientationFreeCamera uses FreeCamera as its basis, so the properties and methods of FreeCamera are also found on our VRDeviceOrientationFreeCamera.
Syntax
Following is the syntax for the VRDeviceOrientationFreeCamera −
var camera = new BABYLON.VRDeviceOrientationFreeCamera ("Camera", new BABYLON.Vector3 (-6.7, 1.2, -1.3), scene, 0);
WebVRFreeCamera
The WebVRFreeCamera uses FreeCamera as its basis, so the properties and methods of FreeCamera are also found on our WebVRFreeCamera.
Syntax
Following is the syntax for the WebVRFreeCamera −
var camera = new BABYLON.WebVRFreeCamera("WVR", new BABYLON.Vector3(0, 1, -15), scene);
In most of the demos, you will see attachControl where the camera is attached to the canvas.
Example
camera.attachControl(canvas, true);
BabylonJS - Lights
In this chapter, we will learn about the lights used for BabylonJS. We will start by taking a look at the different types of lights available with babylonjs.
Lights are meant to produce the diffuse and specular color received by each pixel. Later, it is used on material to get the final color of each pixel.
There are 4 types of lights available with babylonjs.
- Point Light
- Directional Light
- Spot Light
- Hemispheric Light
BabylonJS - Point Light
A classic example of point light is the Sun, the rays of which are spread in all direction. Point light has a unique point in space from where it spreads the light in every direction. The color of light can be controlled using the specular and diffuse property.
Syntax
Following is the syntax for Point Light −
var light0 = new BABYLON.PointLight("Omni0", new BABYLON.Vector3(1, 10, 1), scene);
There are three different params for point light −
The 1st param is the name of the light.
The 2nd param is the position where the point light is placed.
The 3rd param is the scene to which the light needs to be attached.
Following properties are used to add color on the object created above −
light0.diffuse = new BABYLON.Color3(1, 0, 0);
light0.specular = new BABYLON.Color3(1, 1, 1);
Demo
<!doctype html>
<html>
   <head>
      <meta charset = "utf-8">
      <title>BabylonJs - Basic Element-Creating Scene</title>
      <script src = "babylon.js"></script>
      <style>
         canvas {width: 100%; height: 100%;}
      </style>
   </head>

   <body>
      <canvas id = "renderCanvas"></canvas>
      <script type = "text/javascript">
         var canvas = document.getElementById("renderCanvas");
         var engine = new BABYLON.Engine(canvas, true);
         var createScene  = function() {
            var scene = new BABYLON.Scene(engine);
            scene.clearColor = new BABYLON.Color3( .5, .5, .5);

            var camera = new BABYLON.ArcRotateCamera("camera1",  0, 0, 0, new BABYLON.Vector3(0, 0, -0), scene);
            camera.setPosition(new BABYLON.Vector3(0, 0, -100));
            camera.attachControl(canvas, true);

            var pl = new BABYLON.PointLight("pl", new BABYLON.Vector3(1, 20, 1), scene);
            pl.diffuse = new BABYLON.Color3(0, 1, 0);
            pl.specular = new BABYLON.Color3(1, 0, 0);

            var ground = BABYLON.Mesh.CreateGround("ground", 150, 6, 2, scene);
            return scene;
         };
         var scene = createScene();
         engine.runRenderLoop(function() {
            scene.render();
         });
      </script>
   </body>
</html>
Output
BabylonJS - The Directional Light
In directional light, the light is defined by the direction and is emitted in every direction based on where you place it.
var light0 = new BABYLON.DirectionalLight("Dir0", new BABYLON.Vector3(0, -1, 0), scene);
There are three different params for point light −
The 1st param is the name of the light.
The 2nd param is the position. Right now, it isplaced with negative -1 in the Y axis.
The 3rd param is the scene to be attached.
Here, you can add color with the specular and diffuse property.
light0.diffuse = new BABYLON.Color3(0, 1, 0);
light0.specular = new BABYLON.Color3(1,0, 0);
Demo
<!doctype html>
<html>
   <head>
      <meta charset = "utf-8">
      <title>BabylonJs - Basic Element-Creating Scene</title>
      <script src = "babylon.js"></script>
      <style>
         canvas {width: 100%; height: 100%;}
      </style>
   </head>

   <body>
      <canvas id = "renderCanvas"></canvas>
      <script type = "text/javascript">
         var canvas = document.getElementById("renderCanvas");
         var engine = new BABYLON.Engine(canvas, true);
         var createScene  = function() {
            var scene = new BABYLON.Scene(engine);
            scene.clearColor = new BABYLON.Color3( .5, .5, .5);

            var camera = new BABYLON.ArcRotateCamera("camera1",  0, 0, 0, new BABYLON.Vector3(0, 0, -0), scene);
            camera.setPosition(new BABYLON.Vector3(0, 0, -100));
            camera.attachControl(canvas, true);

            var pl = new BABYLON.DirectionalLight("Dir0", new BABYLON.Vector3(0, -10, 0), scene);
            pl.diffuse = new BABYLON.Color3(0, 1, 0);
            pl.specular = new BABYLON.Color3(1, 0, 0);

            var ground = BABYLON.Mesh.CreateGround("ground", 150, 6, 2, scene);
            return scene;
         };
         var scene = createScene();
         engine.runRenderLoop(function() {
            scene.render();
         });
      </script>
   </body>
</html>
Output
The above line of code generates the following output −
BabylonJS - The Spot Light
Spot light is just like light falling in cone shape.
Syntax
Following is the syntax for the Spot Light −
var light0 = new BABYLON.SpotLight("Spot0", new BABYLON.Vector3(0, 30, -10), new BABYLON.Vector3(0, -1, 0), 0.8, 2, scene);
There are five different params for point light −
- 1st Param is the name of the light.
- 2nd param is the position.
- 3rd param is the direction.
- 4th param is the angle.
- 5th param is the exponent.
These values define a cone of light starting from the position, emitting towards the direction. Specular and diffuse are used to control the color of the light.
light0.diffuse = new BABYLON.Color3(1, 0, 0);
light0.specular = new BABYLON.Color3(1, 1, 1);
Demo
<!doctype html>
<html>
   <head>
      <meta charset = "utf-8">
      <title>BabylonJs - Basic Element-Creating Scene</title>
      <script src = "babylon.js"></script>
      <style>
         canvas {width: 100%; height: 100%;}
      </style>
   </head>

   <body>
      <canvas id = "renderCanvas"></canvas>
      <script type = "text/javascript">
         var canvas = document.getElementById("renderCanvas");
         var engine = new BABYLON.Engine(canvas, true);
         var createScene  = function() {
            var scene = new BABYLON.Scene(engine);
            scene.clearColor = new BABYLON.Color3( .5, .5, .5);

            var camera = new BABYLON.ArcRotateCamera("camera1",  0, 0, 0, new BABYLON.Vector3(0, 0, -0), scene);
            camera.setPosition(new BABYLON.Vector3(0, 0, -100));
            camera.attachControl(canvas, true);

            var light0 = new BABYLON.SpotLight("Spot0", new BABYLON.Vector3(0, 30, -10), new BABYLON.Vector3(0, -1, 0), 0.8, 2, scene);
            light0.diffuse = new BABYLON.Color3(0, 1, 0);
            light0.specular = new BABYLON.Color3(1, 0, 0);

            var ground = BABYLON.Mesh.CreateGround("ground", 80,80, 2, scene);
            return scene;
         };
         var scene = createScene();
         engine.runRenderLoop(function() {
            scene.render();
         });
      </script>
   </body>
</html>
Output
The above line of code generates the following output −
BabylonJS - The Hemispheric Light
A hemispheric light is more of getting the environment light. The direction of the light is towards the sky. 3 colors are given to the light; one for the sky, one for the ground and the last one for the specular.
Syntax
Following is the syntax for the Hemispheric Light −
var light0 = new BABYLON.HemisphericLight("Hemi0", new BABYLON.Vector3(0, 1, 0), scene);
For colors
light0.diffuse = new BABYLON.Color3(1, 0, 0);
light0.specular = new BABYLON.Color3(0, 1, 0);
light0.groundColor = new BABYLON.Color3(0, 0, 0);
Demo
<!doctype html>
<html>
   <head>
      <meta charset = "utf-8">
      <title>BabylonJs - Basic Element-Creating Scene</title>
      <script src = "babylon.js"></script>
      <style>
         canvas {width: 100%; height: 100%;}
      </style>
   </head>

   <body>
      <canvas id = "renderCanvas"></canvas>
      <script type = "text/javascript">
         var canvas = document.getElementById("renderCanvas");
         var engine = new BABYLON.Engine(canvas, true);
         var createScene  = function() {
            var scene = new BABYLON.Scene(engine);
            scene.clearColor = new BABYLON.Color3( .5, .5, .5);

            var camera = new BABYLON.ArcRotateCamera("camera1",  0, 0, 0, new BABYLON.Vector3(0, 0, -0), scene);
            camera.setPosition(new BABYLON.Vector3(0, 0, -100));
            camera.attachControl(canvas, true);

            var light0 = new BABYLON.HemisphericLight("Hemi0", new BABYLON.Vector3(0, 1, 0), scene);
            light0.diffuse = new BABYLON.Color3(1, 0, 0);
            light0.specular = new BABYLON.Color3(0, 1, 0);
            light0.groundColor = new BABYLON.Color3(0, 0, 0);

            var ground = BABYLON.Mesh.CreateGround("ground", 100,100, 2, scene);
            return scene;
         };
         var scene = createScene();
         engine.runRenderLoop(function() {
            scene.render();
         });
      </script>
   </body>
</html>
Output
The above line of code generates the following output −
BabylonJS - Parametric Shapes
Parametric shapes refer to different shapes that can be achieved using the lines drawn with bends, twists, etc. It is a 2D form generated with mathematical equation like parabola, sine curve, cos curve, Bezier curve, etc. With the equation, we can find the coordinates (x, y) and draw the line for the same. We will see shapes like ribbon, lines, dashlines,tube, extrusion in this chapter. A free hand drawing of lines on the board can be achieved with the parametric shapes described below.
| Sr.No. | Parametric Shape & Description |
|---|---|
| 1 | Ribbon
Ribbon takes an array of paths as input and draws lines along those paths. It uses complex logic to get the co-ordinates. In the example given below, we have used Bezier curve equation to draw the ribbon. Bezier curves are mostly used in 3D games to model the smooth curves. The curve needs control points and the curve is drawn along the control points. |
| 2 | Line
Line is a basic element in 3D games. To draw a line, you need two points between which you can draw a line. |
| 3 | Tube
Tube is a curved cylinder shape. It can give different parametric shapes based on the equation (maths function) applied to it to get the co-ordinates. |
| 4 | Extrusion
Extrusion helps in transforming a 2D shape into a volumic shape.Suppose you want to create a star with 2D you will have x,y co-ordinates and z will be 0.Taking the 2D co-ordinates extrusion will convert the same to a 3D shape.So, the start of 2D with extrusion will turn out to be a 3D.You can try different 2D shapes and convert those into 3D. |
BabylonJS - Mesh
In this chapter, we will learn to create different shapes using the mesh builder. We have already learnt how to create shapes in one of our previous chapters.
The difference is that with meshbuilder gives you the flexibility to add color, images to the shapes.
CreateBox using MeshBuilder
Let us now see how to create box using MeshBuilder.
Demo
<!doctype html>
<html>
   <head>
      <meta charset = "utf-8">
      <title>BabylonJs - Basic Element-Creating Scene</title>
      <script src = "babylon.js"></script>
      <style>
         canvas {width: 100%; height: 100%;}
      </style>
   </head>

   <body>
      <canvas id = "renderCanvas"></canvas>
      <script type = "text/javascript">
         var canvas = document.getElementById("renderCanvas");
         var engine = new BABYLON.Engine(canvas, true);

         var createScene  = function() {
            var scene = new BABYLON.Scene(engine);
            scene.clearColor = new BABYLON.Color3(0, 0, 1);

            var camera = new BABYLON.ArcRotateCamera("Camera", 1, 0.8, 10, new BABYLON.Vector3(0, 0, 0), scene);
            camera.attachControl(canvas, true);

            var light = new BABYLON.HemisphericLight("light1", new BABYLON.Vector3(0, 1, 0), scene);
            light.intensity = 0.7;

            var pl = new BABYLON.PointLight("pl", BABYLON.Vector3.Zero(), scene);
            pl.diffuse = new BABYLON.Color3(1, 1, 1);
            pl.specular = new BABYLON.Color3(1, 1, 1);
            pl.intensity = 0.8;

            var mat = new BABYLON.StandardMaterial("mat1", scene);
            mat.alpha = 1.0;
            mat.diffuseColor = new BABYLON.Color3(0, 1, 0);

            var texture = new BABYLON.Texture("images/cube.png", scene);
            mat.diffuseTexture = texture;

            var hSpriteNb =  3;  // 3 sprites per raw
            var vSpriteNb =  2;  // 2 sprite raws

            var faceUV = new Array(6);
            for (var i = 0; i < 6; i++) {
               faceUV[i] = new BABYLON.Vector4(i/hSpriteNb, i/vSpriteNb, (i+1)/hSpriteNb, (i+1)/vSpriteNb);
            }

            var options = {
               width: 1.5,
               height: 1.5,
               depth: 1.5,
               faceUV: faceUV
            };

            var box = BABYLON.MeshBuilder.CreateBox("box", options, scene);
            box.material = mat;

            scene.registerBeforeRender(function() {
               pl.position = camera.position;
            });
            return scene;
         };
         var scene = createScene();
         engine.runRenderLoop(function() {
            scene.render();
         });
      </script>
   </body>
</html>
Output
The above line of code generates the following output −
For the above example, we have used a sprite image as shown below. It has horizontally 3 Colums and vertically 2 rows.
In this demo, we have used an image called cube.png. The images are stored in images/ folder locally and are also pasted below for reference. Please note cube.png is a sprite image, a sprite image is a collection of images. We wanted to show the image on a cube so wanted all the sides of the cube together. You can also download similar sprite images of your choice and use in the demo link.
The createBox builder gives you options for the sizes.
For example,
var box = BABYLON.MeshBuilder.CreateBox("box", options, scene);
Demo
var hSpriteNb =  3;  // 3 sprites per raw ie colums horizontally as shown in the image

var vSpriteNb =  2;  // 2 sprite raws as shown in the image above.

var faceUV = new Array(6); // the cube has 6 sides so creating array for same.
for (var i = 0; i < 6; i++) {
   faceUV[i] = new BABYLON.Vector4(i/hSpriteNb, i/vSpriteNb, (i+1)/hSpriteNb, (i+1)/vSpriteNb);
}

var options = {
   width: 1.5,
   height: 1.5,
   depth: 1.5,
   faceUV: faceUV
};
This is called applying textures to the meshbuilder using the createBox method.We have used the image cube.png which has horizontally 3 colums and vertically 2 rows.The cube or box has 6 sides.
To apply textures we are using the options parameter.For example,
Var box = BABYLON.MeshBuilder.CreateBox ('box', options, scene);
We have defined an array called faceUV with size as 6 which are the sides of the cube. This array will always have Vector4 elements. Each Vector4(x, y, z, w) will be defined as follows −
- x = Ubottom
- y = Vbottom
- z = Utop
- w = Vtop
The vectorsare in the range [0, 1]. Ubottom and Vbottom are the 2D coordinates of the bottom left point of where the texture crop starts. Utop, Vtop are the top right points where the texture crop ends.
var hSpriteNb =  3;  // 3 sprites per raw
var vSpriteNb =  2;  // 2 sprite raws

var faceUV = new Array(6);
for (var i = 0; i < 6; i++) {
   faceUV[i] = new BABYLON.Vector4(i/hSpriteNb, i/vSpriteNb, (i+1)/hSpriteNb, (i+1)/vSpriteNb);
}
Suppose the default texture, i.e., the image given is applied to all the faces of the box. If you want to change only 1 face or 1 side of the box, you can directly assign the values as shown below −
var hSpriteNb =  3;  // 3 sprites per raw
var vSpriteNb =  2;  // 2 sprite raws

var faceUV = new Array(6);
faceUV[4] = new BABYLON.Vector4(0, 0, 1/hSpriteNb, 1/vSpriteNb);
Example
<!doctype html>
<html>
   <head>
      <meta charset = "utf-8">
      <title>BabylonJs - Basic Element-Creating Scene</title>
      <script src = "babylon.js"></script>
      <style>
         canvas {width: 100%; height: 100%;}
      </style>
   </head>

   <body>
      <canvas id = "renderCanvas"></canvas>
      <script type = "text/javascript">
         var canvas = document.getElementById("renderCanvas");
         var engine = new BABYLON.Engine(canvas, true);

         var createScene  = function() {
            var scene = new BABYLON.Scene(engine);
            scene.clearColor = new BABYLON.Color3(0, 0, 1);

            var camera = new BABYLON.ArcRotateCamera("Camera", 1, 0.8, 10, new BABYLON.Vector3(0, 0, 0), scene);
            camera.attachControl(canvas, true);

            var light = new BABYLON.HemisphericLight("light1", new BABYLON.Vector3(0, 1, 0), scene);
            light.intensity = 0.7;

            var pl = new BABYLON.PointLight("pl", BABYLON.Vector3.Zero(), scene);
            pl.diffuse = new BABYLON.Color3(1, 1, 1);
            pl.specular = new BABYLON.Color3(1, 1, 1);
            pl.intensity = 0.8;

            var mat = new BABYLON.StandardMaterial("mat1", scene);
            mat.alpha = 1.0;
            mat.diffuseColor = new BABYLON.Color3(0.8, 0.8, 0.8);

            var texture = new BABYLON.Texture("images/3d.png", scene);
            mat.diffuseTexture = texture;

            var hSpriteNb =  3;  // 3 sprites per raw
            var vSpriteNb =  2;  // 2 sprite raws

            var faceUV = new Array(6);
            faceUV[4] = new BABYLON.Vector4(0, 0, 1/hSpriteNb, 1/vSpriteNb);

            var options = {
               width:3,
               height:3,
               depth: 3,
               faceUV:faceUV
            };

            var box = BABYLON.MeshBuilder.CreateBox("box", options, scene);
            box.material = mat;

            scene.registerBeforeRender(function() {
               pl.position = camera.position;
            });
            return scene;
         };
         var scene = createScene();
         engine.runRenderLoop(function() {
            scene.render();
         });
      </script>
   </body>
</html>
Output
The above line of code generates the following output −
In this demo, we have used an image called 3d.png. The images are stored in images/ folder locally and are also pasted below for reference. Please note 3d.png is a sprite image; a sprite image is a collection of images. We wanted to show the image on a cube with all the sides of the cube together. You can also download similar sprite images of your choice and use in the demo link.
Texture used for box − images/3d.png
MeshCylinder
In this section, we will see how to create MeshCylinder.
To create MeshCylinder, you need to use the class BABYLON.MeshBuilder.CreateCylinder.
The parameters for the class are as follows −
var meshcylinder = BABYLON.MeshBuilder.CreateCylinder("meshcylinder", {
   height: 3,
   diameter: 35,
   tessellation: 52
}, scene);
The difference between CreateCylinder using mesh and meshbuilder is - you can use options in meshbuilder. Right now we are using height, diameter and tessellation as the options to be passed to the cylinder. We are using standard material with wireframe as the material for this mesh. Check the output in the browser and see the cylinder. You can use similar structure in your game as a wheel rotating in the scene.
Demo
<!doctype html>
<html>
   <head>
      <meta charset = "utf-8">
      <title>Babylon.js demo - Mesh Builder</title>
      <script src = "babylon.js"></script>
      <style>
         html,body,canvas { margin: 0; padding: 0; width: 100%; height: 100%; font-size: 0; }
      </style>
   </head>

   <body>
      <canvas id = "renderCanvas"></canvas>
      <script type = "text/javascript">
         var canvas = document.getElementById("renderCanvas");
         var engine = new BABYLON.Engine(canvas, true);
         var createScene  = function() {
            var scene = new BABYLON.Scene(engine);
            scene.clearColor = new BABYLON.Color3(0.8, 0.8, 0.8);

            var camera = new BABYLON.ArcRotateCamera("Camera", -Math.PI / 6, 1.3, 40, new BABYLON.Vector3(0, -3, 0), scene);

            var light = new BABYLON.HemisphericLight("hemi", new BABYLON.Vector3(0, 1, 0), scene);

            var mat = new BABYLON.StandardMaterial("mat", scene);
            mat.diffuseColor = new BABYLON.Color3(0.1, .5, 0);
            mat.specularColor = new BABYLON.Color3(0, 0, 0);
            mat.wireframe = true;

            var meshcylinder = BABYLON.MeshBuilder.CreateCylinder("meshcylinder", {
               height: 3,
               diameter: 35,
               tessellation: 52
            }, scene);

            meshcylinder.material = mat;
            meshcylinder.position = new BABYLON.Vector3(0, 0, 0);

            scene.activeCamera.attachControl(canvas);
            return scene;
         };

         var scene = createScene();
         engine.runRenderLoop(function() {
            scene.render();
         });
      </script>
   </body>
</html>
Output
The above line of code generates the following output −
A number of shapes created with mesh builder will now be used together in one demo. The shapes covered in the demo link below are listed in subsequent sections.
BabylonJS Mesh Intersection and Point
Mesh Intersection in games is important as you know what needs to be done when 2 objects intersect in a game. The same concept is explained in demo below on the event that needs to be captured when the meshes intersect.
In the demo given below, we have covered the following two concepts −
- Intersect Mesh
- Intersect Point
<!doctype html>
<html>
   <head>
   <meta charset = "utf-8">
   <title>BabylonJs - Basic Element-Creating Scene</title>
   <script src = "babylon.js"></script>
   <style>
      canvas {width: 100%; height: 100%;}
   </style>
   </head>

   <body>
      <canvas id = "renderCanvas"></canvas>
      <script type = "text/javascript">
         var canvas = document.getElementById("renderCanvas");
         var engine = new BABYLON.Engine(canvas, true);

         var createScene  = function() {
            var scene = new BABYLON.Scene(engine);
            scene.clearColor = new BABYLON.Color3(1, 1, 1);

            var camera = new BABYLON.ArcRotateCamera("ArcRotateCamera", 1, 0.8, 20, new BABYLON.Vector3(0, 0, 0), scene);
            camera.attachControl(canvas, true);

            var matcone = new BABYLON.StandardMaterial("mat1", scene);
            matcone.alpha = 1.0;
            matcone.diffuseColor = new BABYLON.Color3(0, 0, 0);
            matcone.wireframe = true;

            var cone = BABYLON.MeshBuilder.CreateCylinder("cone", {height : 10, diameterTop: 10,diameterBottom:10, tessellation: 5}, scene);
            cone.position= new BABYLON.Vector3(12,1,0);
            cone.material = matcone;

            var balloon1 = BABYLON.Mesh.CreateSphere("balloon1",5, 1.0, scene);
            var balloon2 = BABYLON.Mesh.CreateSphere("balloon2", 5, 1.0, scene);
            var balloon3 = BABYLON.Mesh.CreateSphere("balloon3", 5, 1.0, scene);

            balloon1.material = new BABYLON.StandardMaterial("matBallon", scene);
            balloon2.material = new BABYLON.StandardMaterial("matBallon", scene);
            balloon3.material = new BABYLON.StandardMaterial("matBallon", scene);

            balloon1.position = new BABYLON.Vector3(4, 2, 0);
            balloon2.position = new BABYLON.Vector3(5, 1, 0);
            balloon3.position = new BABYLON.Vector3(7, 0, 0);

            var pointToIntersect = new BABYLON.Vector3(10, 0, 0);
            var a = 0.01;

            scene.registerBeforeRender(function () {
               if (balloon1.intersectsMesh(cone, false)) {
                  balloon1.material.emissiveColor = new BABYLON.Color3(1, 0, 0);
               }
               else {
                  balloon1.material.emissiveColor = new BABYLON.Color3(0, 1, 0);
               }

               if (balloon2.intersectsMesh(cone, false)) {
                  balloon2.material.emissiveColor = new BABYLON.Color3(1, 0, 0);
               }
               else {
                  balloon2.material.emissiveColor = new BABYLON.Color3(0, 1, 0);
               }

               if (balloon3.intersectsMesh(cone, false)) {
                  balloon3.material.emissiveColor = new BABYLON.Color3(1, 0, 0);
               }
               else {
                  balloon3.material.emissiveColor = new BABYLON.Color3(0, 1, 0);
               }

               if (balloon3.intersectsPoint(pointToIntersect)) {
                  balloon3.material.emissiveColor = new BABYLON.Color3(0, 0, 0);
               }

               a += 0.01;
               balloon1.position.x += Math.cos(a) / 10;
               balloon2.position.x += Math.cos(a) / 10;
               balloon3.position.x += Math.cos(a) / 10;
            });
            return scene;
         };
         var scene = createScene();
         engine.runRenderLoop(function() {
            scene.render();
         });
      </script>
   </body>
</html>
Output
The above code generates the following output −

Explanation
With the above code, we created a cylinder with wireframe as true. We created 3 spheres. The original color of the sphere is green.
In the scene.registerBeforeRender function, we will change the color of the sphere based on intersection with the mesh which is the cylinder here.
Consider the following code in registerBeforeRender −
if (balloon1.intersectsMesh(cone, false)) {
   balloon1.material.emissiveColor = new BABYLON.Color3(1, 0, 0);
} else {
   balloon1.material.emissiveColor = new BABYLON.Color3(0, 1, 0);
}
intersectsMesh gives true or false if it intersects with the mesh given in the parameter passed to it.
For example,
balloon1.intersectsMesh(cone, false); //cone refers to the cylinder mesh here.
The color of the sphere is changed to red it intersects with the cylinder; otherwise, it is green.
Following code is used for the point to intersect −
var pointToIntersect = new BABYLON.Vector3(10, 0, 0);
if (balloon3.intersectsPoint(pointToIntersect)) {
   balloon3.material.emissiveColor = new BABYLON.Color3(0, 0, 0);
}
Here, pointtoIntersect variable is the position vector which is 10 on x-axis. If the sphere crosses the point of intersect, the color of the sphere is changed to black.
BabylonJS MeshPicking Collision
Picking collision actually gives you the coordinates and you can position your mesh in that place. The object is picked by the mouse and you can just place where you click with your mouse.Consider you need to place a mesh (object) at a place where the user clicks the mouse; so, with the help of picking collision it helps you with the co-ordinates at the position of the place clicked.
Demo
<!doctype html>
<html>
   <head>
      <meta charset = "utf-8">
      <title>BabylonJs - Basic Element-Creating Scene</title>
      <script src = "babylon.js"></script>
      <style>
      canvas {width: 100%; height: 100%;}
      </style>
   </head>

   <body>
      <canvas id = "renderCanvas"></canvas>
      <script type = "text/javascript">
         var canvas = document.getElementById("renderCanvas");
         var engine = new BABYLON.Engine(canvas, true);
         var createScene  = function() {
            var scene = new BABYLON.Scene(engine);
            scene.clearColor = new BABYLON.Color3(1, 1, 1);

            // setup environment
            var light0 = new BABYLON.PointLight("Omni", new BABYLON.Vector3(0, 10, 20), scene);
            var freeCamera = new BABYLON.FreeCamera("FreeCamera", new BABYLON.Vector3(0, 0, -30), scene);

            var balloon1 = BABYLON.Mesh.CreateSphere("balloon1",5, 1.0, scene);
            var balloon2 = BABYLON.Mesh.CreateSphere("balloon2", 5, 1.0, scene);
            balloon1.material = new BABYLON.StandardMaterial("matBallon", scene);
            balloon2.material = new BABYLON.StandardMaterial("matBallon", scene);

            balloon1.position = new BABYLON.Vector3(0, 0, -0.1);
            balloon2.position = new BABYLON.Vector3(0, 0, -0.1);
            balloon1.material.emissiveColor = new BABYLON.Color3(1, 0, 0);
            balloon2.material.emissiveColor = new BABYLON.Color3(0, 0, 1);

            //Wall
            var wall = BABYLON.Mesh.CreatePlane("wall", 30.0, scene);
            wall.material = new BABYLON.StandardMaterial("wallMat", scene);
            wall.material.emissiveColor = new BABYLON.Color3(0.5, 1, 0.5);

            //When pointer down event is raised

            scene.onPointerDown = function (evt, pickResult) {
               // if the click hits the ground object, we change the impact position
               if (pickResult.hit) {
                  var dateValue = new Date();
                  var secondNumber = dateValue.getSeconds();
                  if (secondNumber % 2 == 0) {
                  balloon1.position.x = pickResult.pickedPoint.x;
                  balloon1.position.y = pickResult.pickedPoint.y;
                  } else {
                     balloon2.position.x = pickResult.pickedPoint.x;
                     balloon2.position.y = pickResult.pickedPoint.y;
                  }
               }
            };
            return scene;
         };
         var scene = createScene();
         engine.runRenderLoop(function() {
            scene.render();
         });
      </script>
   </body>
</html>
Output
Explanation
In the above example, we have used a plane and 2 spheres. To generate this output, use the following code −
scene.onPointerDown = function (evt, pickResult) {

   // if the click hits the ground object, we change the impact position
   if (pickResult.hit) {
      var dateValue = new Date();
      var secondNumber = dateValue.getSeconds();
      if (secondNumber % 2 == 0) {
      balloon1.position.x = pickResult.pickedPoint.x;
      balloon1.position.y = pickResult.pickedPoint.y;
      }
      else {
         balloon2.position.x = pickResult.pickedPoint.x;
         balloon2.position.y = pickResult.pickedPoint.y;
      }
   }
};
The event scene.onPointerDown gives you the coordinated -x,y and z which in our example is pickResult.
It gives pickResult.hit as true if you click on the ground mesh. We consider odd/even seconds and change the position of the sphere to pick result z and y co-ordinates as shown above. Once the position is changed, the sphere is placed where you click and position your mouse. You can try the above demo for the same.
BabylonJS Raycasts
Raycasts are like rays of sun and are used to check collision and intersection in the scene.
Syntax
var ray = new BABYLON.Ray(origin, direction, length);
Parameters
Consider the following parameters for raycasts −
Origin − Place where the ray will start.
Direction − Direction to the ray is calculated as follows −
var forward = new BABYLON.Vector3(0,0,1);
forward = vecToLocal(forward, box);
var direction = forward.subtract(origin);
Then, to get the direction, we subtract it from the origin, the box position −
Length − Length of the ray.
Demo
<!doctype html>
<html>
   <head>
      <meta charset = "utf-8">
      <title>BabylonJs - Basic Element-Creating Scene</title>
      <script src = "babylon.js"></script>
      <style>
         canvas {width: 100%; height: 100%;}
      </style>
   </head>

   <body>
      <canvas id = "renderCanvas"></canvas>
      <script type = "text/javascript">
         var canvas = document.getElementById("renderCanvas");
         var engine = new BABYLON.Engine(canvas, true);

         var createScene  = function() {
            var scene = new BABYLON.Scene(engine);

            var light = new BABYLON.PointLight("Omni", new BABYLON.Vector3(0, 100, 100), scene);

            var camera = new BABYLON.ArcRotateCamera("Camera", 0, 0.8, 100, new BABYLON.Vector3.Zero(), scene);
            camera.attachControl(canvas, true);

            var ground = BABYLON.Mesh.CreateGround("ground", 500, 500, 10, scene);

            var box = BABYLON.Mesh.CreateBox("box", 4.0, scene);
            box.position.y = 2;
            box.scaling.z = 2;

            var matBox = new BABYLON.StandardMaterial("matBox", scene);
            matBox.diffuseColor = new BABYLON.Color3(0.8, 0.1, 0.5);
            box.material = matBox;
            box.isPickable = false;

            var box2 = BABYLON.Mesh.CreateBox("box2", 8.0, scene);
            box2.position = new BABYLON.Vector3(-20, 4, 0);

            var matBox2 = new BABYLON.StandardMaterial("matBox2", scene);
            matBox2.diffuseColor = new BABYLON.Color3(1, 0, 0);
            box2.material = matBox2;

            var box3 = BABYLON.Mesh.CreateBox("box3", 8.0, scene);
            box3.position = new BABYLON.Vector3(20, 4, 0);

            var matBox3 = new BABYLON.StandardMaterial("matBox3", scene);
            matBox3.diffuseColor = new BABYLON.Color3(1, 0, 0);
            box3.material = matBox3;

            var box4 = BABYLON.Mesh.CreateBox("box4", 8.0, scene);
            box4.position = new BABYLON.Vector3(0, 0, 20);

            var matBox4 = new BABYLON.StandardMaterial("matBox4", scene);
            matBox4.diffuseColor = new BABYLON.Color3(0, 1, 0);
            box4.material = matBox4;

            var box5 = BABYLON.Mesh.CreateBox("box5", 8.0, scene);
            box5.position = new BABYLON.Vector3(0, 0, -20);

            var matBox5 = new BABYLON.StandardMaterial("matBox5", scene);
            matBox5.diffuseColor = new BABYLON.Color3(0, 1, 0);
            box5.material = matBox5;

            function mousemovef() {
               var pickResult = scene.pick(scene.pointerX, scene.pointerY);

               if (pickResult.hit) {
                  var diffX = pickResult.pickedPoint.x - box.position.x;
                  var diffY = pickResult.pickedPoint.z - box.position.z;
                  box.rotation.y = Math.atan2(diffX,diffY);
               }
            }

            scene.onPointerMove = function () {
               mousemovef();
            };

            function vecToLocal(vector, mesh) {
               var m = mesh.getWorldMatrix();
               var v = BABYLON.Vector3.TransformCoordinates(vector, m);
               return v;
            }

            scene.registerBeforeRender(function () {
               var origin = box.position;

               var forward = new BABYLON.Vector3(0,0,1);
               forward = vecToLocal(forward, box);

               var direction = forward.subtract(origin);
               direction = BABYLON.Vector3.Normalize(direction);

               var length = 100;

               var ray = new BABYLON.Ray(origin, direction, length);
               // ray.show(scene, new BABYLON.Color3(1, 1, 0.1));

               var hit = scene.pickWithRay(ray);

               if (hit.pickedMesh) {
                  hit.pickedMesh.scaling.y  += 0.01;
               }
            });
            return scene;
         };
         var scene = createScene();
         engine.runRenderLoop(function() {
            scene.render();
         });
      </script>
   </body>
</html>
Output
The above line of code generates the following output −

Explanation
There is a main box at the center which acts as a raycast. The moment it points to any of the boxes, the size of the box will increase. This concept proves useful while playing games to know which other object is coming into contact and necessary action can be taken.
Adding box.isPickable = false; so that the main box at the center is not considered. If you do not want any object to be included in the rays to come into contact, add box.isPickable = false; to it.
The following code adds scaling ofhe box which is picked by the ray.
scene.registerBeforeRender(function () {
   var origin = box.position;
   var forward = new BABYLON.Vector3(0,0,1);
   forward = vecToLocal(forward, box);

   var direction = forward.subtract(origin);
   direction = BABYLON.Vector3.Normalize(direction);

   var length = 100;

   var ray = new BABYLON.Ray(origin, direction, length);

   var hit = scene.pickWithRay(ray);

   if (hit.pickedMesh) {
      hit.pickedMesh.scaling.y  += 0.01;
   }
});
var ray = new BABYLON.Ray(origin, direction, length); creates a ray and it takes the main box position as the origin.
Direction to the ray is calculated as follows −
var forward = new BABYLON.Vector3(0,0,1);
forward = vecToLocal(forward, box);
var direction = forward.subtract(origin);
Then, to get the direction, we subtract it from the origin, the box position. The function vecToLocal is designed to transform a position from a mesh point of view by multiplicating a vector by the mesh matrix.
We get the hit point from the ray using var hit = scene.pickWithRay(ray);
It gives the position where the ray coincides with the mesh.
The scaling is applied to the mesh which is picked by executing the following line of code −
if (hit.pickedMesh) {
   hit.pickedMesh.scaling.y  += 0.01;
}
Try the above example in the browser to see the output.
Raycast with predicate function
Let us now see how the raycast with predicate function works and the direction shown with rayhelper.
Demo
<!doctype html>
<html>
   <head>
      <meta charset = "utf-8">
      <title>BabylonJs - Basic Element-Creating Scene</title>
      <script src = "babylon.js"></script>
      <style>
         canvas {width: 100%; height: 100%;}
      </style>
   </head>

   <body>
      <canvas id = "renderCanvas"></canvas>
      <script type = "text/javascript">
         var canvas = document.getElementById("renderCanvas");
         var engine = new BABYLON.Engine(canvas, true);
         var createScene  = function() {
            var scene = new BABYLON.Scene(engine);

            var light = new BABYLON.PointLight("Omni", new BABYLON.Vector3(0, 100, 100), scene);
            var camera = new BABYLON.ArcRotateCamera("Camera", 0, 0.8, 100, new BABYLON.Vector3.Zero(), scene);
            camera.attachControl(canvas, true);

            var ground = BABYLON.Mesh.CreateGround("ground", 500, 500, 10, scene);

            var box = BABYLON.Mesh.CreateBox("box", 4.0, scene);
            box.position.y = 2;
            box.scaling.z = 2;
            var matBox = new BABYLON.StandardMaterial("matBox", scene);
            matBox.diffuseColor = new BABYLON.Color3(0.8, 0.1, 0.5);
            box.material = matBox;
            box.isPickable = false;

            var box2 = BABYLON.Mesh.CreateBox("box2", 8.0, scene);
            box2.position = new BABYLON.Vector3(-20, 4, 0);
            var matBox2 = new BABYLON.StandardMaterial("matBox2", scene);
            matBox2.diffuseColor = new BABYLON.Color3(1, 0, 0);
            box2.material = matBox2;

            var box3 = BABYLON.Mesh.CreateBox("box3", 8.0, scene);
            box3.position = new BABYLON.Vector3(20, 4, 0);
            var matBox3 = new BABYLON.StandardMaterial("matBox3", scene);
            matBox3.diffuseColor = new BABYLON.Color3(1, 0, 0);
            box3.material = matBox3;

            var box4 = BABYLON.Mesh.CreateBox("box4", 8.0, scene);
            box4.position = new BABYLON.Vector3(0, 0, 20);
            var matBox4 = new BABYLON.StandardMaterial("matBox4", scene);
            matBox4.diffuseColor = new BABYLON.Color3(0, 1, 0);
            box4.material = matBox4;

            var box5 = BABYLON.Mesh.CreateBox("box5", 8.0, scene);
            box5.position = new BABYLON.Vector3(0, 0, -20);
            var matBox5 = new BABYLON.StandardMaterial("matBox5", scene);
            matBox5.diffuseColor = new BABYLON.Color3(0, 1, 0);
            box5.material = matBox5;

            //ray showing the direction
            var ray = new BABYLON.Ray();
            var rayHelper = new BABYLON.RayHelper(ray);

            var localMeshDirection = new BABYLON.Vector3(0, 0, -1);
            var localMeshOrigin = new BABYLON.Vector3(0, 0, -.4);
            var length = 10;

            rayHelper.attachToMesh(box, localMeshDirection, localMeshOrigin, length);
            rayHelper.show(scene);

            function mousemovef() {
               var pickResult = scene.pick(scene.pointerX, scene.pointerY);

               if (pickResult.hit) {
                  var diffX = pickResult.pickedPoint.x - box.position.x;
                  var diffY = pickResult.pickedPoint.z - box.position.z;
                  box.rotation.y = Math.atan2(diffX,diffY);
               }
            }

            scene.onPointerMove = function () {
               mousemovef();
            };

            function vecToLocal(vector, mesh) {
               var m = mesh.getWorldMatrix();
               var v = BABYLON.Vector3.TransformCoordinates(vector, m);
               return v;
            }

            scene.registerBeforeRender(function () {
               var origin = box.position;
               function predicate(mesh) {
                  if (mesh == box2 || mesh == box || mesh == box5) {
                     return false;
                  }
                  return true;
               }

               var forward = new BABYLON.Vector3(0,0,1);
               forward = vecToLocal(forward, box);

               var direction = forward.subtract(origin);
               direction = BABYLON.Vector3.Normalize(direction);

               var length = 100;

               var ray = new BABYLON.Ray(origin, direction, length);
               // ray.show(scene, new BABYLON.Color3(1, 1, 0.1));

               var hit = scene.pickWithRay(ray, predicate);
               if (hit.pickedMesh) {
                  hit.pickedMesh.scaling.y  += 0.01;
               }
            });
            return scene;
         };
         var scene = createScene();
         engine.runRenderLoop(function() {
            scene.render();
         });
      </script>
   </body>
</html>
Output
The above line of code generates the following output −
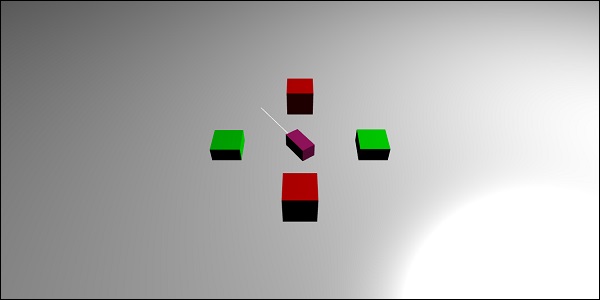
Explanation
Raycast with predicate function helps to choose which mesh we want. If we do not want a mesh to be picked, we can ignore the same.
function predicate(mesh) {
   if (mesh == box2 || mesh == box || mesh == box5) {
      return false;
   }
   return true;
}
The above function gives the mesh which is selected by the ray. If the mesh selected is box2, box, or box5, it will return false; otherwise, true.
You can try the above example for the same.
BabylonJS Mesh Shadows
Shadows are rendered based on the way light falls on the mesh created. They play an important role towards making the output look realistic in the 3D world.
Let us now learn how to create shadows using babylonjs.
Syntax
var shadowGenerator00 = new BABYLON.ShadowGenerator(shadowsize, light);
Parameters
Consider the following parameters related to mesh shadows −
Shadowsize − Size of the shadow.
Light − Light used in the scene.
Demo
<!doctype html>
<html>
   <head>
      <meta charset = "utf-8">
      <title>BabylonJs - Basic Element-Creating Scene</title>
      <script src = "babylon.js"></script>
      <style>
         canvas {width: 100%; height: 100%;}
      </style>
   </head>

   <body>
      <canvas id = "renderCanvas"></canvas>
      <script type = "text/javascript">
         var canvas = document.getElementById("renderCanvas");
         var engine = new BABYLON.Engine(canvas, true);

         var createScene  = function() {
            var scene = new BABYLON.Scene(engine);
            scene.clearColor = new BABYLON.Color3(1, 1, 1);
            var camera = new BABYLON.ArcRotateCamera("ArcRotateCamera", 1, 0.8, 20, new BABYLON.Vector3(0, 0, 0), scene);
            camera.attachControl(canvas, true);
            // light1
            var light = new BABYLON.DirectionalLight("dir01", new BABYLON.Vector3(-1, -2, -1), scene);
            light.position = new BABYLON.Vector3(20, 40, 20);

            var ground01 = BABYLON.Mesh.CreateGround("Spotlight Hard Shadows", 24, 60, 1, scene, false);
            var groundMaterial = new BABYLON.StandardMaterial("ground", scene);
            groundMaterial.diffuseTexture = new BABYLON.Texture("images/gr1.jpg", scene);
            groundMaterial.specularColor = new BABYLON.Color3(0, 0, 0);
            groundMaterial.emissiveColor = new BABYLON.Color3(0.2, 0.2, 0.2);

            ground01.material = groundMaterial;
            ground01.receiveShadows = true;
            ground01.position.x = -5;

            var box = BABYLON.Mesh.CreateBox("box", 3.0, scene);
            box.position.x = -5;
            box.position.y = 5;
            var shadowGenerator00 = new BABYLON.ShadowGenerator(512, light);
            shadowGenerator00.getShadowMap().renderList.push(box);
            //shadowGenerator00.usePoissonSampling = true;
            //shadowGenerator00.useExponentialShadowMap = true;
            shadowGenerator00.useBlurExponentialShadowMap = true;
            shadowGenerator00.bias = 0.01;
            scene.registerBeforeRender(function() {
               box.rotation.x += 0.01;
               box.rotation.x += 0.01;
            });
            return scene;
         };
         var scene = createScene();
         engine.runRenderLoop(function() {
            scene.render();
         });
      </script>
   </body>
</html>
Output
The above line of code generates the following output −

Explanation
To create shadows, you need to create the shadowgenerator. Consider an example shown below.
var shadowGenerator00 = new BABYLON.ShadowGenerator(512, light);
To define the mesh for which the shadow is required, you need to add the same to above generator.
shadowGenerator00.getShadowMap().renderList.push(box);
Now, we have created a ground and a box on top of it. We want the shadow of the box to fall on the ground. To do that, we need to make sure the ground is marked to receive shadow which is done as follows −
ground01.receiveShadows = true;
There are some filters available for shadows which are as follows −
shadowGenerator.usePoissonSampling = true; - Called Poisson sampling
shadowGenerator.useExponentialShadowMap = true; - Exponential Shadow Map
shadowGenerator.useBlurExponentialShadowMap= true;  - Blur Exponential Shadow Map
In our demo, we have used shadowGenerator00.useBlurExponentialShadowMap = true; You can try the others and see how the output looks like.
Here, we have used image called gr1.jpg. The images are stored in the images/ folder locally. You can download any image of your choice and use in the demo link.
BabylonJS Advanced Textures on Meshes
In this section, we will learn about the advanced textures on meshes. The different textures are shown below −
Let us apply some complex texture to the mesh mirror, bump, video and refraction.
| Sr.No. | Mesh & Description |
|---|---|
| 1 | MeshHightlight Layer
Highlight layer is used to highlight the mesh in the scene. You can give color to it and the color is applied to the borders of the mesh. In case in a game you want to hightlight, the mesh hightlight layer can be used for the same. |
| 2 | Morph a Mesh
Morphing changes the shape of an object to another by some means of transition. We have seen the updatable parameter for the shapes; the parameter is set to false otherwise. For morphing, it is set to true and the mesh is updated to change the shape. |
| 3 | Actions to Mesh
Actions are used to add interaction to the mesh. Events are activated when you click on the mesh, or when mesh intersects or collides. |
| 4 | Mesh AssetsManager
With assestsmanager class, you can load meshes, images and binaryfiles in the scene. |
| 5 | Import Mesh
Using Import Mesh we will learn. |
| 6 | Mesh Morph Targets
We have already seen morhphing of lines, ribbon, polygon, etc. Now, we will see morphing of sphere and box in this demo.With morph targets, the shape of the sphere is changed which is seen in the demo below. |
| 7 | Mesh Instances
If you want to draw identical meshes in your scene , make use of the instances. |
| 8 | Mesh LOD & Instances
LOD stands for line of distance. This feature allows you to specify meshes based on the distance of the viewer. As the distance from the viewer to the object increases, the level of detail for the mesh is shown clearly using LOD. |
| 9 | Mesh VolumemetricLightScatteringPost-process
This process scatters the light as shown in the output given below. Test the same in browser and you will see how the light scatters through the mesh. |
| 10 | Mesh EdgesRenderer
EdgesRendering is used to draw egdes around the mesh as shown in the output above. |
| 11 | Mesh BlendModes
You can create a blend mode by modifying the alphamode of the materials. |
| 12 | Mesh SolidParticles
SolidParticle System is updated on a mesh. All the properties that we have seen on a mesh can be used on the solid partilcle. |
| 13 | Mesh FacetData
Facet data takes up a lot of memory and this feature is not enabled by default. To enable it, we need to create a mesh as required and update facet data to it. |
BabylonJS - VectorPosition and Rotation
Run the demo links given below in your browser. In the demos given below, we have drawn the x,y and z-axis. There are numbers plotted on the x,y and z-axis in the positive and negative direction. Run the same in browser, change the values in case you need and draw your shapes, meshes, position them and see how they render in the x, y and z axis.With the numbers mentioned on the x,y and z axis, it will be helpful to see how the positioning of the mesh is done.
Demo
<!doctype html>
<html>
   <head>
      <meta charset = "utf-8">
      <title>BabylonJs - Basic Element-Creating Scene</title>
      <script src = "babylon.js"></script>
      <style>
         canvas {width: 100%; height: 100%;}
      </style>
   </head>

   <body>
      <canvas id = "renderCanvas"></canvas>
      <script type = "text/javascript">
         var canvas = document.getElementById("renderCanvas");
         var engine = new BABYLON.Engine(canvas, true);
         var createScene  = function() {
            var scene = new BABYLON.Scene(engine);
            scene.clearColor = new BABYLON.Color3( .5, .5, .5);

            // camera
            var camera = new BABYLON.ArcRotateCamera("camera1",  0, 0, 0, new BABYLON.Vector3(5, 3, 0), scene);
            camera.setPosition(new BABYLON.Vector3(5, 10, -10));
            camera.attachControl(canvas, true);

            // lights
            var light = new BABYLON.HemisphericLight("light1", new BABYLON.Vector3(1, 0.5, 0), scene);
            light.intensity = 0.8;
            var spot = new BABYLON.SpotLight(
               "spot",
               new BABYLON.Vector3(25, 15, -10),
               new BABYLON.Vector3(-1, -0.8, 1), 15, 1, scene);
            spot.diffuse = new BABYLON.Color3(1, 1, 1);
            spot.specular = new BABYLON.Color3(0, 0, 0);
            spot.intensity = 0.2;

            // material
            var mat = new BABYLON.StandardMaterial("mat1", scene);
            mat.alpha = 1.0;
            mat.diffuseColor = new BABYLON.Color3(0.5, 0.5, 1.0);
            mat.backFaceCulling = false;
            //mat.wireframe = true;

            // show axis
            var showAxis = function(size) {
               var makeTextPlane = function(text, color, size) {
                  var dynamicTexture = new BABYLON.DynamicTexture("DynamicTexture", 50, scene, true);
                  dynamicTexture.hasAlpha = true;
                  dynamicTexture.drawText(text, 5, 40, "bold 36px Arial", color , "transparent", true);

                  var plane = new BABYLON.Mesh.CreatePlane("TextPlane", size, scene, true);
                  plane.material = new BABYLON.StandardMaterial("TextPlaneMaterial", scene);
                  plane.material.backFaceCulling = false;

                  plane.material.specularColor = new BABYLON.Color3(0, 0, 0);
                  plane.material.diffuseTexture = dynamicTexture;
                  return plane;
               };

               var axisX = BABYLON.Mesh.CreateLines("axisX", [
                  new BABYLON.Vector3(-size * 0.95, 0.05 * size, 0),
                  new BABYLON.Vector3(-size, 0, 0),
                  new BABYLON.Vector3(-size * 0.95, -0.05 * size, 0),
                  new BABYLON.Vector3(-size, 0, 0),
                  new BABYLON.Vector3.Zero(),
                  new BABYLON.Vector3(size, 0, 0),
                  new BABYLON.Vector3(size * 0.95, 0.05 * size, 0),
                  new BABYLON.Vector3(size, 0, 0),
                  new BABYLON.Vector3(size * 0.95, -0.05 * size, 0)
               ], scene);

               axisX.color = new BABYLON.Color3(1, 0, 0);
               var xChar = makeTextPlane("X", "red", size / 10);
               xChar.position = new BABYLON.Vector3(0.9 * size, -0.05 * size, 0);

               var xChar1 = makeTextPlane("-X", "red", size / 10);
               xChar1.position = new BABYLON.Vector3(-0.9 * size, 0.05 * size, 0);

               var axisY = BABYLON.Mesh.CreateLines("axisY", [
                  new BABYLON.Vector3( -0.05 * size, -size * 0.95, 0),
                  new BABYLON.Vector3(0, -size, 0),
                  new BABYLON.Vector3(0.05 * size, -size * 0.95, 0),
                  new BABYLON.Vector3(0, -size, 0),
                  new BABYLON.Vector3.Zero(),
                  new BABYLON.Vector3(0, size, 0),
                  new BABYLON.Vector3( -0.05 * size, size * 0.95, 0),
                  new BABYLON.Vector3(0, size, 0),
                  new BABYLON.Vector3( 0.05 * size, size * 0.95, 0)
               ], scene);

               axisY.color = new BABYLON.Color3(0, 1, 0);
               var yChar = makeTextPlane("Y", "green", size / 10);
               yChar.position = new BABYLON.Vector3(0, 0.9 * size, -0.05 * size);
               var yChar1 = makeTextPlane("-Y", "green", size / 10);
               yChar1.position = new BABYLON.Vector3(0, -0.9 * size, 0.05 * size);

               var axisZ = BABYLON.Mesh.CreateLines("axisZ", [
                  new BABYLON.Vector3( 0 , -0.05 * size, -size * 0.95),
                  new BABYLON.Vector3(0, 0, -size),
                  new BABYLON.Vector3( 0 , 0.05 * size, -size * 0.95),
                  new BABYLON.Vector3(0, 0, -size),
                  new BABYLON.Vector3.Zero(),
                  new BABYLON.Vector3(0, 0, size),
                  new BABYLON.Vector3( 0 , -0.05 * size, size * 0.95),
                  new BABYLON.Vector3(0, 0, size),
                  new BABYLON.Vector3( 0, 0.05 * size, size * 0.95)
               ], scene);

               axisZ.color = new BABYLON.Color3(0, 0, 1);
               var zChar = makeTextPlane("Z", "blue", size / 10);
               zChar.position = new BABYLON.Vector3(0, 0.05 * size, 0.9 * size);
               var zChar1 = makeTextPlane("-Z", "blue", size / 10);
               zChar1.position = new BABYLON.Vector3(0, 0.05 * size, -0.9 * size);
            };
            showAxis(10);
            return scene;
         };
         var scene = createScene();
         engine.runRenderLoop(function() {
            scene.render();
         });
      </script>
   </body>
</html>
Output
Let us have the co-ordinates defined along the x, y and z axis.
Demo
<!doctype html>
<html>
   <head>
      <meta charset = "utf-8">
      <title>BabylonJs - Basic Element-Creating Scene</title>
      <script src = "babylon.js"></script>
      <style>
         canvas {width: 100%; height: 100%;}
      </style>
   </head>

   <body>
      <canvas id = "renderCanvas"></canvas>
      <script type = "text/javascript">
         var canvas = document.getElementById("renderCanvas");
         var engine = new BABYLON.Engine(canvas, true);
         var createScene  = function() {
            var scene = new BABYLON.Scene(engine);
            scene.clearColor = new BABYLON.Color3( .5, .5, .5);

            // camera
            var camera = new BABYLON.ArcRotateCamera("camera1",  0, 0, 0, new BABYLON.Vector3(5, 3, 0), scene);
            camera.setPosition(new BABYLON.Vector3(5, 10, -10));
            camera.attachControl(canvas, true);

            // lights
            var light = new BABYLON.HemisphericLight("light1", new BABYLON.Vector3(1, 0.5, 0), scene);
            light.intensity = 0.8;
            var spot = new BABYLON.SpotLight(
               "spot", new BABYLON.Vector3(25, 15, -10),
               new BABYLON.Vector3(-1, -0.8, 1), 15, 1, scene);
            spot.diffuse = new BABYLON.Color3(1, 1, 1);
            spot.specular = new BABYLON.Color3(0, 0, 0);
            spot.intensity = 0.2;

            // material
            var mat = new BABYLON.StandardMaterial("mat1", scene);
            mat.alpha = 1.0;
            mat.diffuseColor = new BABYLON.Color3(0.5, 0.5, 1.0);
            mat.backFaceCulling = false;

            //mat.wireframe = true;
            var makeTextPlane = function(text, color, size) {
               var dynamicTexture = new BABYLON.DynamicTexture("DynamicTexture", 50, scene, true);
               dynamicTexture.hasAlpha = true;
               dynamicTexture.drawText(text, 5, 40, "bold 36px Arial", color , "transparent", true);

               var plane = new BABYLON.Mesh.CreatePlane("TextPlane", size, scene, true);
               plane.material = new BABYLON.StandardMaterial("TextPlaneMaterial", scene);
               plane.material.backFaceCulling = false;
               plane.material.specularColor = new BABYLON.Color3(0, 0, 0);
               plane.material.diffuseTexture = dynamicTexture;
               return plane;
            };

            // show axis
            var showAxis = function(size) {
               var axisX = BABYLON.Mesh.CreateLines("axisX", [
                  new BABYLON.Vector3(-size * 0.95, 0.05 * size, 0),
                  new BABYLON.Vector3(-size, 0, 0),
                  new BABYLON.Vector3(-size * 0.95, -0.05 * size, 0),
                  new BABYLON.Vector3(-size, 0, 0),
                  new BABYLON.Vector3.Zero(),
                  new BABYLON.Vector3(size, 0, 0),
                  new BABYLON.Vector3(size * 0.95, 0.05 * size, 0),
                  new BABYLON.Vector3(size, 0, 0),
                  new BABYLON.Vector3(size * 0.95, -0.05 * size, 0)
               ], scene);
               axisX.color = new BABYLON.Color3(1, 0, 0);
               var xChar = makeTextPlane("X", "red", size / 10);
               xChar.position = new BABYLON.Vector3(0.9 * size, -0.05 * size, 0);

               var xChar1 = makeTextPlane("-X", "red", size / 10);
               xChar1.position = new BABYLON.Vector3(-0.9 * size, 0.05 * size, 0);
               var xcor = [];
               for (i =- 10; i <= 10; i++) {
                  xcor[i] = makeTextPlane(i, "red", size / 10);
                  xcor[i].position = new BABYLON.Vector3(i, 0, 0);
               }

               var axisY = BABYLON.Mesh.CreateLines("axisY", [
                  new BABYLON.Vector3( -0.05 * size, -size * 0.95, 0),
                  new BABYLON.Vector3(0, -size, 0),
                  new BABYLON.Vector3(0.05 * size, -size * 0.95, 0),
                  new BABYLON.Vector3(0, -size, 0),
                  new BABYLON.Vector3.Zero(),
                  new BABYLON.Vector3(0, size, 0),
                  new BABYLON.Vector3( -0.05 * size, size * 0.95, 0),
                  new BABYLON.Vector3(0, size, 0),
                  new BABYLON.Vector3( 0.05 * size, size * 0.95, 0)
               ], scene);

               axisY.color = new BABYLON.Color3(0, 1, 0);
               var yChar = makeTextPlane("Y", "green", size / 10);
               yChar.position = new BABYLON.Vector3(0, 0.9 * size, -0.05 * size);
               var yChar1 = makeTextPlane("-Y", "green", size / 10);
               yChar1.position = new BABYLON.Vector3(0, -0.9 * size, 0.05 * size);

               var ycor = [];
               for (y=-10;y<=10;y++) {
                  xcor[y] = makeTextPlane(y, "green", size / 10);
                  xcor[y].position = new BABYLON.Vector3(0, y, 0);
               }

               var axisZ = BABYLON.Mesh.CreateLines("axisZ", [
                  new BABYLON.Vector3( 0 , -0.05 * size, -size * 0.95),
                  new BABYLON.Vector3(0, 0, -size),
                  new BABYLON.Vector3( 0 , 0.05 * size, -size * 0.95),
                  new BABYLON.Vector3(0, 0, -size),
                  new BABYLON.Vector3.Zero(),
                  new BABYLON.Vector3(0, 0, size),
                  new BABYLON.Vector3( 0 , -0.05 * size, size * 0.95),
                  new BABYLON.Vector3(0, 0, size),
                  new BABYLON.Vector3( 0, 0.05 * size, size * 0.95)
               ], scene);

               axisZ.color = new BABYLON.Color3(0, 0, 1);
               var zChar = makeTextPlane("Z", "blue", size / 10);
               zChar.position = new BABYLON.Vector3(0, 0.05 * size, 0.9 * size);
               var zChar1 = makeTextPlane("-Z", "blue", size / 10);
               zChar1.position = new BABYLON.Vector3(0, 0.05 * size, -0.9 * size);

               var zcor = [];
               for (z =- 10; z <= 10; z++) {
                  xcor[z] = makeTextPlane(z, "green", size / 10);
                  xcor[z].position = new BABYLON.Vector3(0, 0, z);
               }
            };

            //Lets draw a mesh along the axis.

            var spriteManagerPlayer = new BABYLON.SpriteManager("playerManager", "images/bird.png", 1, 200, scene);
            var player = new BABYLON.Sprite("player", spriteManagerPlayer);
            player.position.x = 2;
            player.position.y = 2;
            player.position.z = 0;

            var zChardot = makeTextPlane(".", "red", 1);
            zChardot.position = new BABYLON.Vector3(1.8, 1.8,0);

            var box = BABYLON.Mesh.CreateBox("box", '2', scene);
            box.position = new BABYLON.Vector3(-5,3,0); // center point of box x-axis is -5 and y axis is 3.

            var box = BABYLON.Mesh.CreateBox("box", '2', scene);
            box.position = new BABYLON.Vector3(0,3,-3); // center point of box x-axis is -5 and y axis is 3.

            var redSphere = BABYLON.Mesh.CreateSphere("red", 32, 1, scene); //no position for sphere so by default it takes 0,0,0
            showAxis(10);
            returnscene;
         };
         var scene = createScene();
         engine.runRenderLoop(function() {
            scene.render();
         });
      </script>
   </body>
</html>
Output
The above line of code generates the following output −
In this demo, we have used image bird.png. The images are stored in the images/ folder locally and are also pasted below for reference. You can download any image of your choice and use in the demo link.
Images/bird.png
Demo
<!doctype html>
<html>
   <head>
   <meta charset = "utf-8">
   <title>BabylonJs - Basic Element-Creating Scene</title>
   <script src = "babylon.js"></script>
   <style>
   canvas {width: 100%; height: 100%;}
   </style>
   </head>

   <body>
      <canvas id = "renderCanvas"></canvas>
      <script type = "text/javascript">
         var canvas = document.getElementById("renderCanvas");
         var engine = new BABYLON.Engine(canvas, true);
         var createScene  = function() {
            var scene = new BABYLON.Scene(engine);
            scene.clearColor = new BABYLON.Color3( .5, .5, .5);

            // camera
            var camera = new BABYLON.ArcRotateCamera("camera1",  0, 0, 0, new BABYLON.Vector3(5, 3, 0), scene);
            camera.setPosition(new BABYLON.Vector3(5, 10, -10));
            camera.attachControl(canvas, true);

            // lights
            var light = new BABYLON.HemisphericLight("light1", new BABYLON.Vector3(1, 0.5, 0), scene);
            light.intensity = 0.8;

            var spot = new BABYLON.SpotLight(
               "spot",
               new BABYLON.Vector3(25, 15, -10),
               new BABYLON.Vector3(-1, -0.8, 1), 15, 1, scene);
            spot.diffuse = new BABYLON.Color3(1, 1, 1);
            spot.specular = new BABYLON.Color3(0, 0, 0);
            spot.intensity = 0.2;

            // material
            var mat = new BABYLON.StandardMaterial("mat1", scene);
            mat.alpha = 1.0;
            mat.diffuseColor = new BABYLON.Color3(0.5, 0.5, 1.0);
            mat.backFaceCulling = false;

            //mat.wireframe = true;
            var makeTextPlane = function(text, color, size) {
               var dynamicTexture = new BABYLON.DynamicTexture("DynamicTexture", 50, scene, true);
               dynamicTexture.hasAlpha = true;
               dynamicTexture.drawText(text, 5, 40, "bold 36px Arial", color , "transparent", true);
               var plane = new BABYLON.Mesh.CreatePlane("TextPlane", size, scene, true);
               plane.material = new BABYLON.StandardMaterial("TextPlaneMaterial", scene);
               plane.material.backFaceCulling = false;
               plane.material.specularColor = new BABYLON.Color3(0, 0, 0);
               plane.material.diffuseTexture = dynamicTexture;
               return plane;
            };

            // show axis
            var showAxis = function(size) {
               var axisX = BABYLON.Mesh.CreateLines("axisX", [
                  new BABYLON.Vector3(-size * 0.95, 0.05 * size, 0),
                  new BABYLON.Vector3(-size, 0, 0),
                  new BABYLON.Vector3(-size * 0.95, -0.05 * size, 0),
                  new BABYLON.Vector3(-size, 0, 0),
                  new BABYLON.Vector3.Zero(),
                  new BABYLON.Vector3(size, 0, 0),
                  new BABYLON.Vector3(size * 0.95, 0.05 * size, 0),
                  new BABYLON.Vector3(size, 0, 0),
                  new BABYLON.Vector3(size * 0.95, -0.05 * size, 0)], scene);
               axisX.color = new BABYLON.Color3(1, 0, 0);
               var xChar = makeTextPlane("X", "red", size / 10);
               xChar.position = new BABYLON.Vector3(0.9 * size, -0.05 * size, 0);

               var xChar1 = makeTextPlane("-X", "red", size / 10);
               xChar1.position = new BABYLON.Vector3(-0.9 * size, 0.05 * size, 0);
               var xcor = [];
               for (i =- 10; i <= 10; i++) {
                  xcor[i] = makeTextPlane(i, "red", size / 10);
                  xcor[i].position = new BABYLON.Vector3(i, 0, 0);
               }

               var axisY = BABYLON.Mesh.CreateLines("axisY", [
                  new BABYLON.Vector3( -0.05 * size, -size * 0.95, 0),
                  new BABYLON.Vector3(0, -size, 0),
                  new BABYLON.Vector3(0.05 * size, -size * 0.95, 0),
                  new BABYLON.Vector3(0, -size, 0),
                  new BABYLON.Vector3.Zero(),
                  new BABYLON.Vector3(0, size, 0),
                  new BABYLON.Vector3( -0.05 * size, size * 0.95, 0),
                  new BABYLON.Vector3(0, size, 0),
                  new BABYLON.Vector3( 0.05 * size, size * 0.95, 0)
               ], scene);

               axisY.color = new BABYLON.Color3(0, 1, 0);
               var yChar = makeTextPlane("Y", "green", size / 10);
               yChar.position = new BABYLON.Vector3(0, 0.9 * size, -0.05 * size);
               var yChar1 = makeTextPlane("-Y", "green", size / 10);
               yChar1.position = new BABYLON.Vector3(0, -0.9 * size, 0.05 * size);

               var ycor = [];
               for (y =- 10; y <= 10; y++) {
                  xcor[y] = makeTextPlane(y, "green", size / 10);
                  xcor[y].position = new BABYLON.Vector3(0, y, 0);
               }

               var axisZ = BABYLON.Mesh.CreateLines("axisZ", [
                  new BABYLON.Vector3( 0 , -0.05 * size, -size * 0.95),
                  new BABYLON.Vector3(0, 0, -size),
                  new BABYLON.Vector3( 0 , 0.05 * size, -size * 0.95),
                  new BABYLON.Vector3(0, 0, -size),
                  new BABYLON.Vector3.Zero(),
                  new BABYLON.Vector3(0, 0, size),
                  new BABYLON.Vector3( 0 , -0.05 * size, size * 0.95),
                  new BABYLON.Vector3(0, 0, size),
                  new BABYLON.Vector3( 0, 0.05 * size, size * 0.95)
               ], scene);
               axisZ.color = new BABYLON.Color3(0, 0, 1);
               var zChar = makeTextPlane("Z", "blue", size / 10);
               zChar.position = new BABYLON.Vector3(0, 0.05 * size, 0.9 * size);
               var zChar1 = makeTextPlane("-Z", "blue", size / 10);
               zChar1.position = new BABYLON.Vector3(0, 0.05 * size, -0.9 * size);

               var zcor = [];
               for (z =- 10; z <= 10; z++) {
                  xcor[z] = makeTextPlane(z, "green", size / 10);
                  xcor[z].position = new BABYLON.Vector3(0, 0, z);
               }
            };

            var kite = BABYLON.Mesh.CreateLines("kite", [
               new BABYLON.Vector3(-4,0,0),
               new BABYLON.Vector3(0,4,0),
               new BABYLON.Vector3(4,0,0),
               new BABYLON.Vector3(0,-4,0),
               new BABYLON.Vector3(-4,0,0)
            ], scene);
            kite.color = new BABYLON.Color3(1, 1, 1);

            var path = [];
            path.push(new BABYLON.Vector3(-4, 0, 0));
            path.push(new BABYLON.Vector3(0, 0, 0));
            path.push(new BABYLON.Vector3(4, 0, 0));

            var lines1 = BABYLON.Mesh.CreateLines("lines",path, scene, true);
            lines1.color = new BABYLON.Color3(1, 1, 1);
            showAxis(10);
            return scene;
         };
         var scene = createScene();
         engine.runRenderLoop(function() {
            scene.render();
         });
      </script>
   </body>
</html>
Output
The above line of code will generate the following output:
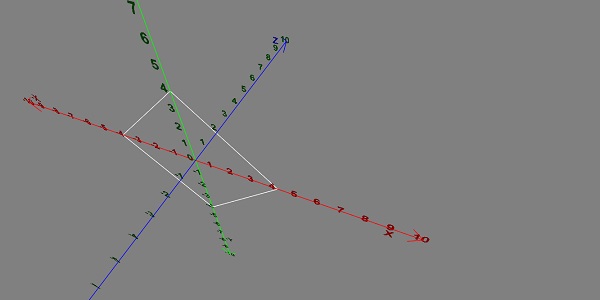
Vector Rotate
Let us now see how the vector rotate works.
Demo
<!doctype html>
<html>
   <head>
      <meta charset = "utf-8">
      <title>BabylonJs - Basic Element-Creating Scene</title>
      <script src = "babylon.js"></script>
      <style>
         canvas {width: 100%; height: 100%;}
      </style>
   </head>

   <body>
      <canvas id = "renderCanvas"></canvas>
      <script type = "text/javascript">
         var canvas = document.getElementById("renderCanvas");
         var engine = new BABYLON.Engine(canvas, true);
         var createScene  = function() {
            var scene = new BABYLON.Scene(engine);
            scene.clearColor = new BABYLON.Color3( .5, .5, .5);

            // camera
            var camera = new BABYLON.ArcRotateCamera("camera1",  0, 0, 0, new BABYLON.Vector3(5, 3, 0), scene);
            camera.setPosition(new BABYLON.Vector3(0, 0, 0));
            camera.attachControl(canvas, true);

            // lights
            var light = new BABYLON.HemisphericLight("light1", new BABYLON.Vector3(1, 0.5, 0), scene);
            light.intensity = 0.8;
            var spot = new BABYLON.SpotLight(
               "spot",
               new BABYLON.Vector3(25, 15, -10),
               new BABYLON.Vector3(-1, -0.8, 1), 15, 1, scene);
            spot.diffuse = new BABYLON.Color3(1, 1, 1);
            spot.specular = new BABYLON.Color3(0, 0, 0);
            spot.intensity = 0.2;

            // material
            var mat = new BABYLON.StandardMaterial("mat1", scene);
            mat.alpha = 1.0;
            mat.diffuseColor = new BABYLON.Color3(0.5, 0.5, 1.0);
            mat.backFaceCulling = false;

            //mat.wireframe = true;
            var makeTextPlane = function(text, color, size) {
               var dynamicTexture = new BABYLON.DynamicTexture("DynamicTexture", 50, scene, true);
               dynamicTexture.hasAlpha = true;
               dynamicTexture.drawText(text, 5, 40, "bold 36px Arial", color , "transparent", true);
               var plane = new BABYLON.Mesh.CreatePlane("TextPlane", size, scene, true);
               plane.material = new BABYLON.StandardMaterial("TextPlaneMaterial", scene);
               plane.material.backFaceCulling = false;
               plane.material.specularColor = new BABYLON.Color3(0, 0, 0);
               plane.material.diffuseTexture = dynamicTexture;
               return plane;
            };
            // show axis
            var showAxis = function(size) {
               var axisX = BABYLON.Mesh.CreateLines("axisX", [
                  new BABYLON.Vector3(-size * 0.95, 0.05 * size, 0),
                  new BABYLON.Vector3(-size, 0, 0),
                  new BABYLON.Vector3(-size * 0.95, -0.05 * size, 0),
                  new BABYLON.Vector3(-size, 0, 0),
                  new BABYLON.Vector3.Zero(),
                  new BABYLON.Vector3(size, 0, 0),
                  new BABYLON.Vector3(size * 0.95, 0.05 * size, 0),
                  new BABYLON.Vector3(size, 0, 0),
                  new BABYLON.Vector3(size * 0.95, -0.05 * size, 0)
               ], scene);

               axisX.color = new BABYLON.Color3(1, 0, 0);
               var xChar = makeTextPlane("X", "red", size / 10);
               xChar.position = new BABYLON.Vector3(0.9 * size, -0.05 * size, 0);

               var xChar1 = makeTextPlane("-X", "red", size / 10);
               xChar1.position = new BABYLON.Vector3(-0.9 * size, 0.05 * size, 0);
               var xcor = [];
               for (i =- 10; i <= 10; i++) {
                  xcor[i] = makeTextPlane(i, "red", size / 10);
                  xcor[i].position = new BABYLON.Vector3(i, 0, 0);
               }

               var axisY = BABYLON.Mesh.CreateLines("axisY", [
                  new BABYLON.Vector3( -0.05 * size, -size * 0.95, 0),
                  new BABYLON.Vector3(0, -size, 0),
                  new BABYLON.Vector3(0.05 * size, -size * 0.95, 0),
                  new BABYLON.Vector3(0, -size, 0),
                  new BABYLON.Vector3.Zero(),
                  new BABYLON.Vector3(0, size, 0),
                  new BABYLON.Vector3( -0.05 * size, size * 0.95, 0),
                  new BABYLON.Vector3(0, size, 0),
                  new BABYLON.Vector3( 0.05 * size, size * 0.95, 0)
               ], scene);

               axisY.color = new BABYLON.Color3(0, 1, 0);
               var yChar = makeTextPlane("Y", "green", size / 10);
               yChar.position = new BABYLON.Vector3(0, 0.9 * size, -0.05 * size);
               var yChar1 = makeTextPlane("-Y", "green", size / 10);
               yChar1.position = new BABYLON.Vector3(0, -0.9 * size, 0.05 * size);

               var ycor = [];
               for (y =- 10; y <= 10; y++) {
                  xcor[y] = makeTextPlane(y, "green", size / 10);
                  xcor[y].position = new BABYLON.Vector3(0, y, 0);
               }

               var axisZ = BABYLON.Mesh.CreateLines("axisZ", [
                  new BABYLON.Vector3( 0 , -0.05 * size, -size * 0.95),
                  new BABYLON.Vector3(0, 0, -size),
                  new BABYLON.Vector3( 0 , 0.05 * size, -size * 0.95),
                  new BABYLON.Vector3(0, 0, -size),
                  new BABYLON.Vector3.Zero(),
                  new BABYLON.Vector3(0, 0, size),
                  new BABYLON.Vector3( 0 , -0.05 * size, size * 0.95),
                  new BABYLON.Vector3(0, 0, size),
                  new BABYLON.Vector3( 0, 0.05 * size, size * 0.95)
               ], scene);

               axisZ.color = new BABYLON.Color3(0, 0, 1);
               var zChar = makeTextPlane("Z", "blue", size / 10);
               zChar.position = new BABYLON.Vector3(0, 0.05 * size, 0.9 * size);
               var zChar1 = makeTextPlane("-Z", "blue", size / 10);
               zChar1.position = new BABYLON.Vector3(0, 0.05 * size, -0.9 * size);

               var zcor = [];
               for (z =- 10; z <= 10; z++) {
                  xcor[z] = makeTextPlane(z, "green", size / 10);
                  xcor[z].position = new BABYLON.Vector3(0, 0, z);
               }
            };

            var yellowSphere = BABYLON.Mesh.CreateSphere("yellowSphere",32, 1, scene);
            yellowSphere.setPivotMatrix(BABYLON.Matrix.Translation(2, 0, 0));
            var yellowMaterial = new BABYLON.StandardMaterial("yellowMaterial", scene);
            yellowMaterial.diffuseColor = BABYLON.Color3.Yellow();
            yellowSphere.material = yellowMaterial;

            var wheel1 = BABYLON.MeshBuilder.CreateTorus('t1', {diameter: 2.0}, scene);
            wheel1.position.x = -2.0
            wheel1.position.z = -2.0;

            showAxis(10);
            var k = 0.0;
            var y = 0.0;
            var x = 0.0;
            scene.registerBeforeRender(function () {
               wheel1.rotation.copyFromFloats(0.0, 0.0, Math.PI / 2);
               wheel1.addRotation(0.0, y, 0.0);
               wheel1.addRotation(x, 0.0, 0.0);
               yellowSphere.rotation.y += 0.01;
               y += 0.05;
            });
            return scene;
         };
         var scene = createScene();
         engine.runRenderLoop(function() {
            scene.render();
         });
      </script>
   </body>
</html>
Output
The above line of code generates the following output −
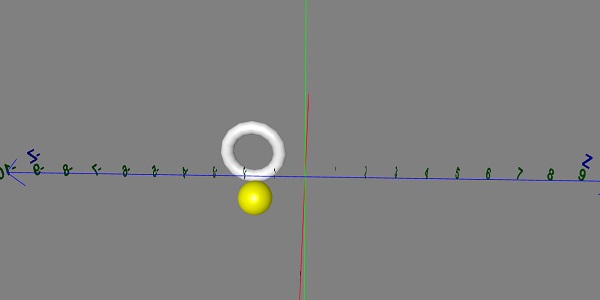
BabylonJS - Decals
Decals are likes stickers pasted on anobject. The sticker drawing is done with the help of 2d image which is drawn on the mesh (for example, object in the game). In games, consider you have an army firing bullets, the bullet impression needs to be seen on the object. So in Babylonjs, it is done using decals wherein, when you click on any object you will draw a 2D image on the place where you clicked it.
Decals are used to add details on the created mesh details like bullets, holes, etc. In the demo link given below, we are using an image and adding the same to the imported mesh.
To add decal, you can use the following code −
var newDecal = BABYLON.Mesh.CreateDecal("decal", mesh, decalPosition, normal, decalSize, angle);
Following code is executed to add decals on the mesh −
BABYLON.SceneLoader.ImportMesh("Shcroendiger'scat", "scenes/", "SSAOcat.babylon", scene, function (newMeshes) {
   var cat = newMeshes[0]; / /this is mesh shown on the screen.

   // Set the target of the camera to the first imported mesh
   camera.target = cat;

   var decalMaterial = new BABYLON.StandardMaterial("decalMat", scene);
   decalMaterial.diffuseTexture = new BABYLON.Texture("images/impact1.jpg", scene);
   decalMaterial.diffuseTexture.hasAlpha = true;
   decalMaterial.zOffset = -2;

   var onPointerDown = function (evt) {
      if (evt.button !== 0) {
         return;
      }

      // check if we are under a mesh
      var pickInfo = scene.pick(scene.pointerX, scene.pointerY, function (mesh) { return mesh === cat;
      // this will give all the meshes , but it will pick the mesh whch is same as cat and return true if it is found });
      if (pickInfo.hit) { // if true
         var decalSize = new BABYLON.Vector3(5, 5, 5); //size of decal is defined

         var newDecal = BABYLON.Mesh.CreateDecal("decal", cat, pickInfo.pickedPoint, pickInfo.getNormal(true), decalSize); //decal is created
         newDecal.material = decalMaterial; //decal material is added.
      }
   }
   var canvas = engine.getRenderingCanvas();
   canvas.addEventListener("pointerdown", onPointerDown, false);

   scene.onDispose = function () {
      canvas.removeEventListener("pointerdown", onPointerDown);
   }
});
Demo
<!doctype html>
<html>
   <head>
      <meta charset = "utf-8">
      <title>BabylonJs - Basic Element-Creating Scene</title>
      <script src = "babylon.js"></script>
      <style>
         canvas {width: 100%; height: 100%;}
      </style>
   </head>

   <body>
      <canvas id = "renderCanvas"></canvas>
      <script type = "text/javascript">
         var canvas = document.getElementById("renderCanvas");
         var engine = new BABYLON.Engine(canvas, true);

         var createScene  = function() {
            var scene = new BABYLON.Scene(engine);

            //Adding a light
            var light = new BABYLON.HemisphericLight("Hemi", new BABYLON.Vector3(0, 1, 0), scene);

            //Adding an Arc Rotate Camera
            var camera = new BABYLON.ArcRotateCamera("Camera", -1.85, 1.2, 200, BABYLON.Vector3.Zero(), scene);

            camera.attachControl(canvas, true);

            // The first parameter can be used to specify which mesh to import. Here we import all meshes
            BABYLON.SceneLoader.ImportMesh("Shcroendiger'scat", "scenes/", "SSAOcat.babylon", scene, function (newMeshes) {
               var cat = newMeshes[0];

               // Set the target of the camera to the first imported mesh
               camera.target = cat;

               var decalMaterial = new BABYLON.StandardMaterial("decalMat", scene);
               decalMaterial.diffuseTexture = new BABYLON.Texture("images/impact1.jpg", scene);
               decalMaterial.diffuseTexture.hasAlpha = true;
               decalMaterial.zOffset = -2;

               var onPointerDown = function (evt) {
                  if (evt.button !== 0) {
                     return;
                  }

                  // check if we are under a mesh
                  var pickInfo = scene.pick(scene.pointerX, scene.pointerY, function (mesh) { return mesh === cat; });
                  if (pickInfo.hit) {
                     var decalSize = new BABYLON.Vector3(5, 5, 5);

                     var newDecal = BABYLON.Mesh.CreateDecal("decal", cat, pickInfo.pickedPoint, pickInfo.getNormal(true), decalSize);
                     newDecal.material = decalMaterial;
                  }
               }
               var canvas = engine.getRenderingCanvas();
               canvas.addEventListener("pointerdown", onPointerDown, false);

               scene.onDispose = function () {
                  canvas.removeEventListener("pointerdown", onPointerDown);
               }
            });
            return scene;
         };
         var scene = createScene();
         engine.runRenderLoop(function() {
            scene.render();
         });
      </script>
   </body>
</html>
In the above demo link, we have used SSAOcat.babylon mesh. You can download the json file for SSAOcat.babylon from here −
Save the file in scenes/ folder. This will help you get the output as shown below.
Output
The above line of code generates the following output −
In this demo, we have used image impact1.jpg. The images are stored in the images/ folder locally and are also pasted below for reference. You can download any image of your choice and use in the demo link.
images/impact1.jpg
BabylonJS - Curve3
BabylonJS has built in api to create some of the complex mathematics curve. We have earlier seen ribbon, lines created using complex equation to draw the pattern and calculate the co-ordinates for the paths given to the mesh. We have a built-in API here to avoid doing complex calculation, just like in Curves API.
The curves which are explained are as follows −
- Quadratic Bezier curve
- Cubic Bezier curve
- Hermite spline
- Catmull-Rom spline
Quadratic Bezier Curve
In this section, we will learn about the Quadratic Bezier Curve.
Syntax
var bezier = BABYLON.Curve3.CreateQuadraticBezier(origin, control, destination, nb_of_points);
Parameters
Consider the following parameters related to the Quadratic Bezier Curve.
Origin − Origin point for the curve.
Control − Control points for the curve.
Destination − Destination point.
Noofpoints − Points in array.
Cubic Bezeir Curve
In this section, we will learn about the Cubic Bezier Curve.
Syntax
var bezier3 = BABYLON.Curve3.CreateCubicBezier(origin, control1, control2, destination, nb_of_points)
Parameters
Consider the following parameters related to the Cubic Bezier Curve.
Origin − Origin point.
control1 − First control point in vector form.
control2 − Second control point in vector form.
Destination − Destination point in vector form.
no_of_points − Numberof points in array form.
HermiteSpline Curve
In this section, we will learn about the Hermite Spline Curve.
Syntax
var hermite = BABYLON.Curve3.CreateHermiteSpline(p1, t1, p2, t2, nbPoints);
Parameters
Consider the following parameters related to the Hermite Spline Curve −
p1 − Origin point for the curve.
t1 − Origin tangent vector point.
p2 − Destination point.
t2 − Destination tangent vector.
NbPoints − Array of points for the final curve.
Catmull-Rom Spline Curve
In this section, we will learn about the Catmull-Rom Spline Curve.
Syntax
var nbPoints = 20;   // the number of points between each Vector3 control points
var points = [vec1, vec2, ..., vecN];  // an array of Vector3 the curve must pass through : the control points
var catmullRom = BABYLON.Curve3.CreateCatmullRomSpline(points, nbPoints);
Parameters
Consider the following parameters related to the Catmull-Rom Spline Curve −
Points − An array of Vector3, the curve must pass through the control points.
NbPoints − The number of points between each Vector3 control points.
var path = catmullRom.getPoints(); // getPoints() returns an array of successive Vector3.
var l = catmullRom.length(); // method returns the curve length.
Demo
<!doctype html>
<html>
   <head>
      <meta charset = "utf-8">
      <title>BabylonJs - Basic Element-Creating Scene</title>
      <script src = "babylon.js"></script>
      <style>
         canvas {width: 100%; height: 100%;}
      </style>
   </head>

   <body>
      <canvas id = "renderCanvas"></canvas>
      <script type = "text/javascript">
         var canvas = document.getElementById("renderCanvas");
         var engine = new BABYLON.Engine(canvas, true);

         var createScene  = function() {
            var scene = new BABYLON.Scene(engine);
            scene.clearColor = new BABYLON.Color3( .5, .5, .5);

            // camera
            var camera = new BABYLON.ArcRotateCamera("camera1",  0, 0, 0, new BABYLON.Vector3(5, 3, 0), scene);
            camera.setPosition(new BABYLON.Vector3(0, 0, -100));
            camera.attachControl(canvas, true);

            // lights
            var light = new BABYLON.HemisphericLight("light1", new BABYLON.Vector3(1, 0.5, 0), scene);
            light.intensity = 0.8;
            var spot = new BABYLON.SpotLight(
            "spot",
            new BABYLON.Vector3(25, 15, -10),
            new BABYLON.Vector3(-1, -0.8, 1), 15, 1, scene);
            spot.diffuse = new BABYLON.Color3(1, 1, 1);
            spot.specular = new BABYLON.Color3(0, 0, 0);
            spot.intensity = 0.2;

            // material
            var mat = new BABYLON.StandardMaterial("mat1", scene);
            mat.alpha = 1.0;
            mat.diffuseColor = new BABYLON.Color3(0.5, 0.5, 1.0);
            mat.backFaceCulling = false;

            //mat.wireframe = true;
            var makeTextPlane = function(text, color, size) {
               var dynamicTexture = new BABYLON.DynamicTexture("DynamicTexture", 50, scene, true);
               dynamicTexture.hasAlpha = true;
               dynamicTexture.drawText(text, 5, 40, "bold 36px Arial", color , "transparent", true);

               var plane = new BABYLON.Mesh.CreatePlane("TextPlane", size, scene, true);

               plane.material = new BABYLON.StandardMaterial("TextPlaneMaterial", scene);
               plane.material.backFaceCulling = false;
               plane.material.specularColor = new BABYLON.Color3(0, 0, 0);
               plane.material.diffuseTexture = dynamicTexture;
               return plane;
            };

            // show axis
            var showAxis = function(size) {
               var axisX = BABYLON.Mesh.CreateLines("axisX", [
                  new BABYLON.Vector3(-size * 0.95, 0.05 * size, 0),
                  new BABYLON.Vector3(-size, 0, 0),
                  new BABYLON.Vector3(-size * 0.95, -0.05 * size, 0),
                  new BABYLON.Vector3(-size, 0, 0),
                  new BABYLON.Vector3.Zero(),
                  new BABYLON.Vector3(size, 0, 0),
                  new BABYLON.Vector3(size * 0.95, 0.05 * size, 0),
                  new BABYLON.Vector3(size, 0, 0),
                  new BABYLON.Vector3(size * 0.95, -0.05 * size, 0)
               ], scene);

               axisX.color = new BABYLON.Color3(1, 0, 0);
               var xChar = makeTextPlane("X", "red", size / 10);
               xChar.position = new BABYLON.Vector3(0.9 * size, -0.05 * size, 0);

               var xChar1 = makeTextPlane("-X", "red", size / 10);
               xChar1.position = new BABYLON.Vector3(-0.9 * size, 0.05 * size, 0);

               var xcor = [];
               for (i =- 20; i <= 20; i++) {
                  xcor[i] = makeTextPlane(i, "red", size / 10);
                  xcor[i].position = new BABYLON.Vector3(i, 0, 0);
               }

               var axisY = BABYLON.Mesh.CreateLines("axisY", [
                  new BABYLON.Vector3( -0.05 * size, -size * 0.95, 0),
                  new BABYLON.Vector3(0, -size, 0),
                  new BABYLON.Vector3(0.05 * size, -size * 0.95, 0),
                  new BABYLON.Vector3(0, -size, 0),
                  new BABYLON.Vector3.Zero(),
                  new BABYLON.Vector3(0, size, 0),
                  new BABYLON.Vector3( -0.05 * size, size * 0.95, 0),
                  new BABYLON.Vector3(0, size, 0),
                  new BABYLON.Vector3( 0.05 * size, size * 0.95, 0)
               ], scene);

               axisY.color = new BABYLON.Color3(0, 1, 0);
               var yChar = makeTextPlane("Y", "green", size / 10);
               yChar.position = new BABYLON.Vector3(0, 0.9 * size, -0.05 * size);
               var yChar1 = makeTextPlane("-Y", "green", size / 10);
               yChar1.position = new BABYLON.Vector3(0, -0.9 * size, 0.05 * size);
               var ycor = [];
               for (y =- 20; y <= 20; y++) {
                  xcor[y] = makeTextPlane(y, "green", size / 10);
                  xcor[y].position = new BABYLON.Vector3(0, y, 0);
               }


               var axisZ = BABYLON.Mesh.CreateLines("axisZ", [
                  new BABYLON.Vector3( 0 , -0.05 * size, -size * 0.95),
                  new BABYLON.Vector3(0, 0, -size),
                  new BABYLON.Vector3( 0 , 0.05 * size, -size * 0.95),
                  new BABYLON.Vector3(0, 0, -size),
                  new BABYLON.Vector3.Zero(),
                  new BABYLON.Vector3(0, 0, size),
                  new BABYLON.Vector3( 0 , -0.05 * size, size * 0.95),
                  new BABYLON.Vector3(0, 0, size),
                  new BABYLON.Vector3( 0, 0.05 * size, size * 0.95)
               ], scene);
               axisZ.color = new BABYLON.Color3(0, 0, 1);
               var zChar = makeTextPlane("Z", "blue", size / 10);
               zChar.position = new BABYLON.Vector3(0, 0.05 * size, 0.9 * size);
               var zChar1 = makeTextPlane("-Z", "blue", size / 10);
               zChar1.position = new BABYLON.Vector3(0, 0.05 * size, -0.9 * size);

               var zcor = [];
               for (z =- 20; z <= 20; z++) {
                  xcor[z] = makeTextPlane(z, "green", size / 10);
                  xcor[z].position = new BABYLON.Vector3(0, 0, z);
               }
            };

            var quadraticBezierVectors = BABYLON.Curve3.CreateQuadraticBezier(
            BABYLON.Vector3.Zero(),
            new BABYLON.Vector3(10, 5, 5),
            new BABYLON.Vector3(5, 10, 0), 15);
            var quadraticBezierCurve = BABYLON.Mesh.CreateLines("qbezier", quadraticBezierVectors.getPoints(), scene);
            quadraticBezierCurve.color = new BABYLON.Color3(1, 1, 0.5);

            var cubicBezierVectors = BABYLON.Curve3.CreateCubicBezier(
            BABYLON.Vector3.Zero(),
            new BABYLON.Vector3(10, 5, 20),
            new BABYLON.Vector3(-50, 5, -20),
            new BABYLON.Vector3( -10, 20, 10), 60);
            var cubicBezierCurve = BABYLON.Mesh.CreateLines("cbezier", cubicBezierVectors.getPoints(), scene);
            cubicBezierCurve.color = new BABYLON.Color3(1, 0, 0);

            var continued = cubicBezierVectors.continue(cubicBezierVectors).continue(quadraticBezierVectors);

            var points = continued.getPoints();
            var nbPoints = 60;
            var l = continued.length() / 2;
            var p1 = points[points.length - 1];
            var t1 = (p1.subtract(points[points.length - 2])).scale(l);
            var p2 = points[0];
            var t2 = (points[1].subtract(p2)).scale(l);

            var hermite = BABYLON.Curve3.CreateHermiteSpline(p1, t1, p2, t2, nbPoints);

            continued = continued.continue(hermite);

            var points = continued.getPoints();
            var continuedCurve = BABYLON.Mesh.CreateLines("continued", points, scene);
            continuedCurve.position = new BABYLON.Vector3(20, -20, 20);
            continuedCurve.color = new BABYLON.Color3(0, 0, 0);

            var nbPoints = 20;                     // the number of points between each Vector3 control points
            var points = [new BABYLON.Vector3(10, 5, 20),
            new BABYLON.Vector3(-20, 5, -20),
            new BABYLON.Vector3(-25, 5, -20),
            new BABYLON.Vector3( -30, 20, 10),];  // an array of Vector3 the curve must pass through : the control points
            var catmullRom = BABYLON.Curve3.CreateCatmullRomSpline(points, nbPoints);

            var path = catmullRom.getPoints();
            var l = catmullRom.length();

            var finalcatmullCurve = BABYLON.Mesh.CreateLines("continued", path, scene);

            var mySinus = [];
            for (var i = 0; i < 30; i++) {
               mySinus.push( new BABYLON.Vector3(i, Math.sin(i / 10), 0) );
            }

            var mySinusCurve3 = new BABYLON.Curve3(mySinus);
            var myFullCurve = mySinusCurve3.continue(cubicBezierVectors).continue(quadraticBezierVectors);
            var points1 = myFullCurve.getPoints();
            var curve3d = BABYLON.Mesh.CreateLines("continued", points1, scene);
            curve3d.color = new BABYLON.Color3(0.9, 1, 0.2);
            showAxis(20);
            return scene;
         };
         var scene = createScene();
         engine.runRenderLoop(function() {
            scene.render();
         });
      </script>
   </body>
</html>
Output
The above line of code will generate the following output −
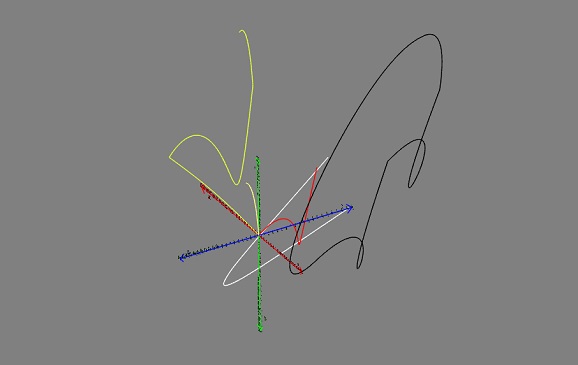
BabylonJS - Dynamic Texture
The Dynamic Texture of BabylonJS creates a canvas and you can easily write text on the texture. It also allows you to work with canvas and use all the features available with html5 canvas to be used with dynamic texture.
We will work on an example, which will show how to write text on the texture and will also draw a bezier Curve on the mesh we create.
Syntax
Following is the syntax to create Dynamic texture −
var myDynamicTexture = new BABYLON.DynamicTexture(name, option, scene);
Parameters
Following are the required parameters to create dynamic texture −
name − name of the dynamic texture
option − will have the width and height of the dynamic texture
scene − scene created
Syntax
Following is the syntax to write text on the texture −
myDynamicTexture.drawText(text, x, y, font, color, canvas color, invertY, update);
Parameters
Following are the required parameters to write text on the texture −
text − text to be written;
x − distance from the left-hand edge;
Y − distance from the top or bottom edge, depending on invertY;
font − font definition in the form font-style, font-size, font_name;
invertY − true by default in which case y is the distance from the top, when false, y is distance from the bottom and the letters reversed;
update − true by default, the dynamic texture will immediately be updated.
Demo
<!doctype html>
<html>
   <head>
      <meta charset = "utf-8">
      <title>MDN Games: Babylon.js demo - shapes</title>
      <script src = "https://end3r.github.io/MDN-Games-3D/Babylon.js/js/babylon.js"></script>
      <style>
         html,body,canvas { margin: 0; padding: 0; width: 100%; height: 100%; font-size: 0; }
      </style>
   </head>

   <body>
      <canvas id = "renderCanvas"></canvas>
      <script type = "text/javascript">
         var canvas = document.getElementById("renderCanvas");

         var engine = new BABYLON.Engine(canvas, true);
         var createScene  = function() {
            var scene = new BABYLON.Scene(engine);

            var camera = new BABYLON.ArcRotateCamera("Camera", -Math.PI/2, Math.PI / 3, 25, BABYLON.Vector3.Zero(), scene);
            camera.attachControl(canvas, true);

            var light = new BABYLON.HemisphericLight("light1", new BABYLON.Vector3(0, 1, 0), scene);
            light.intensity = 0.7;

            var box = BABYLON.Mesh.CreateBox("box", 3.0, scene);
            box.position = new BABYLON.Vector3(0, 0, -5);

            //Create dynamic texture
            var textureGround = new BABYLON.DynamicTexture("dynamic texture", {width:512, height:256}, scene);
            var textureContext = textureGround.getContext();

            var materialGround = new BABYLON.StandardMaterial("Mat", scene);
            materialGround.diffuseTexture = textureGround;
            box.material = materialGround;

            //Add text to dynamic texture
            var font = "bold 60px Arial";
            textureGround.drawText("Box", 200, 150, font, "green", "white", true, true);
            return scene;
         };
         var scene = createScene();
         engine.runRenderLoop(function() {
            scene.render();
         });
      </script>
   </body>
</html>
Output
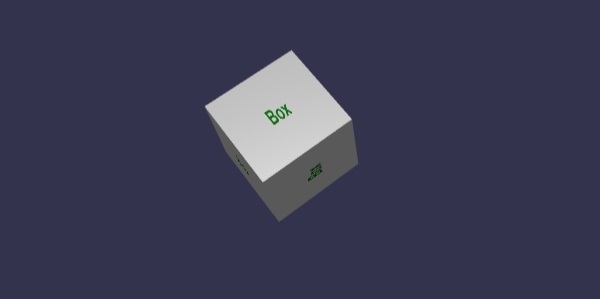
Dynamic texture also allows to work with html5 canvas methods and properties on dynamic texture as follows −
Syntax
var ctx = myDynamicTexture.getContext();
Demo
<!doctype html>
<html>
   <head>
      <meta charset = "utf-8">
      <title> Babylon.JS : Demo2</title>
      <script src = "babylon.js"></script>
      <style>
         canvas { width: 100%; height: 100%;}
      </style>
   </head>

   <body>
      <canvas id = "renderCanvas"></canvas>
      <script type = "text/javascript">
         var canvas = document.getElementById("renderCanvas");
         var engine = new BABYLON.Engine(canvas, true);
         var createScene = function () {
            var scene = new BABYLON.Scene(engine);

            var camera = new BABYLON.ArcRotateCamera("Camera", -Math.PI/2, Math.PI / 3, 25, BABYLON.Vector3.Zero(), scene);
            camera.attachControl(canvas, true);

            var light = new BABYLON.HemisphericLight("light1", new BABYLON.Vector3(0, 1, 0), scene);
            light.intensity = 0.7;

            var ground = BABYLON.MeshBuilder.CreateGround("ground1", {width: 20, height: 10, subdivisions: 25}, scene);

            //Create dynamic texture
            var textureGround = new BABYLON.DynamicTexture("dynamic texture", 512, scene);
            var textureContext = textureGround.getContext();

            var materialGround = new BABYLON.StandardMaterial("Mat", scene);
            materialGround.diffuseTexture = textureGround;
            ground.material = materialGround;

            //Draw on canvas
            textureContext.beginPath();
            textureContext.moveTo(75,40);
            textureContext.bezierCurveTo(75,37,70,25,50,25);
            textureContext.bezierCurveTo(20,25,20,62.5,20,62.5);
            textureContext.bezierCurveTo(20,80,40,102,75,120);
            textureContext.bezierCurveTo(110,102,130,80,130,62.5);
            textureContext.bezierCurveTo(130,62.5,130,25,100,25);
            textureContext.bezierCurveTo(85,25,75,37,75,40);
            textureContext.fillStyle = "red";
            textureContext.fill();
            textureGround.update();

            return scene;
         };
         var scene = createScene();
            engine.runRenderLoop(function() {
            scene.render();
         });
      </script>
   </body>
</html>
Output
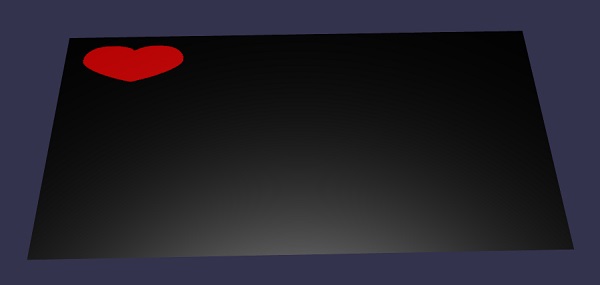
Explanation
We have created ground mesh and added dynamic texture to it.
//ground mesh
var ground = BABYLON.MeshBuilder.CreateGround("ground1", {width: 20, height: 10, subdivisions: 25}, scene);

//Create dynamic texture
var textureGround = new BABYLON.DynamicTexture("dynamic texture", 512, scene);

//adding dynamic texture to ground using standard material
var materialGround = new BABYLON.StandardMaterial("Mat", scene);
materialGround.diffuseTexture = textureGround;
ground.material = materialGround;
To work with canvas on dynamic texture, we need to call canvas method first −
var textureContext = textureGround.getContext()
To the canvas, we will add the bezierCurve as follows −
textureContext.beginPath();
textureContext.moveTo(75,40);

textureContext.bezierCurveTo(75,37,70,25,50,25);
textureContext.bezierCurveTo(20,25,20,62.5,20,62.5);
textureContext.bezierCurveTo(20,80,40,102,75,120);
textureContext.bezierCurveTo(110,102,130,80,130,62.5);
textureContext.bezierCurveTo(130,62.5,130,25,100,25);
textureContext.bezierCurveTo(85,25,75,37,75,40);

textureContext.fillStyle = "red";
textureContext.fill();
textureGround.update();
BabylonJS - Parallax Mapping
Parallax mapping is also called offset mapping. It uses a height map which is applied as an offset on the material's textures in order to accentuate the effect of relief in the geometry's surface. In the 3Dworld, stone walls with a depth applied to it will have more apparent looks and will look realistic to the end user. At steeper view-angles, the texture coordinates are displaced more, giving the illusion of depth due to parallax effects as the view changes.
Parallex mapping is used with standard material. We learnt about this in the standard material chapter.
There are 3 properties which are present with parallex mapping.
material.useParallax = true; − This enables the parallex mapping. To use this property you need assign bump texture to the material first.
material.useParallaxOcclusion = true; − To use this property, you have to set useParallax to true. It enables Parallax Occlusion.
material.parallaxScaleBias = 0.1; − Applies a scaling factor for the depth to be as singed to the mesh.A value between .05 and .1 is fine for Parallax. For occlusion, you can reach 0.2.
Demo
<!doctype html>
<html>
   <head>
      <meta charset = "utf-8">
      <title>BabylonJs - Basic Element-Creating Scene</title>
      <script src = "babylon.js"></script>
      <style>
         canvas {width: 100%; height: 100%;}
      </style>
   </head>

   <body>
      <canvas id = "renderCanvas"></canvas>
      <script type = "text/javascript">
         var canvas = document.getElementById("renderCanvas");
         var engine = new BABYLON.Engine(canvas, true);

         var createScene  = function() {
            // This creates a basic Babylon Scene object (non-mesh)
            var scene = new BABYLON.Scene(engine);

            // This creates and positions a free camera (non-mesh)
            var camera = new BABYLON.ArcRotateCamera("camera1", 0, Math.PI / 2, 100, new BABYLON.Vector3(0, 0, 0), scene);
            camera.attachControl(canvas, false);

            // This targets the camera to scene origin
            camera.setTarget(BABYLON.Vector3.Zero());

            // This creates a light, aiming 0,1,0 - to the sky (non-mesh)
            var light = new BABYLON.HemisphericLight("light1", new BABYLON.Vector3(0, 1, 0), scene);

            // Default intensity is 1. Let's dim the light a small amount
            light.intensity = 0.7;

            var mesh = BABYLON.Mesh.CreateBox("box01", 25, scene);
            mesh.position = new BABYLON.Vector3(0, 0, 0);

            var brickWallDiffURL = "images/a1.png";
            var brickWallNHURL = "images/a2.png";
            var stoneDiffURL = "images/pebble.jpg";
            var stoneNHURL = "images/a3.png";

            var stoneDiffuseTexture = new BABYLON.Texture(stoneDiffURL, scene);

            var stoneNormalsHeightTexture = new BABYLON.Texture(stoneNHURL, scene);

            var wallDiffuseTexture = new BABYLON.Texture(brickWallDiffURL, scene);

            var wallNormalsHeightTexture = new BABYLON.Texture(brickWallNHURL, scene);

            var normalsHeightTexture = stoneNormalsHeightTexture;

            var material = new BABYLON.StandardMaterial("mtl01", scene);
            material.diffuseTexture = stoneDiffuseTexture;
            material.bumpTexture = stoneNormalsHeightTexture;

            material.useParallax = true;
            material.useParallaxOcclusion = true;
            material.parallaxScaleBias = 0.1;
            material.specularPower = 1000.0;
            material.specularColor = new BABYLON.Color3(0.5, 0.5, 0.5);
            mesh.material = material;
            return scene;
         };
         var scene = createScene();
         engine.runRenderLoop(function() {
            scene.render();
         });
      </script>
   </body>
</html>
Output
The above line of code will generate the following output −
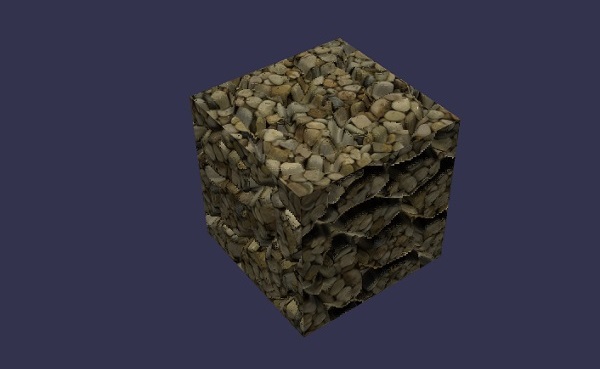
In this demo, we have used images a1.png, a2.png, pebble.jpg and a3.png. The images are stored in images/ folder locally and are also pasted below for reference. You can download any image of your choice and use in the demo link.
Images/a1.png
Images/a2.png
Images/pebble.jpg
images/a3.png
BabylonJS - Lens Flares
When light is scattered and falls on the image, you get to see a different image in terms of looks and the color changes too. When you develop a game to show a realistic occurrence of the light effect, lens flare is used. Consider sun rays falling on the mirror and the effect seen of it is mostly called Lens Flare.
Syntax
Following is the syntax to create lens flare −
var lensFlareSystem = new BABYLON.LensFlareSystem("lensFlareSystem", light0, scene);
Parameters
Consider the following parameters to create lens flare −
Name − Name given to the lensflaresystem.
Light − This can be light source or camera.
Scene − Scene to which the lens flare will be added.
To add flares to the scene, execute the following command −
var flare1 = new BABYLON.LensFlare(0.5, 0.15, new BABYLON.Color3(1, 1, 1), "images/sun1.png", lensFlareSystem);
Size − Floating value between 0 and 1.
Position − The source (the emitter) of the lens flares (it can be a camera, a light or a mesh).
Lensflaresystem − Object created using lensflaresystem class.
Demo
<!doctype html>
<html>
   <head>
      <meta charset = "utf-8">
      <title>BabylonJs - Basic Element-Creating Scene</title>
      <script src = "babylon.js"></script>
      <style>
         canvas {width: 100%; height: 100%;}
      </style>
   </head>

   <body>
      <canvas id = "renderCanvas"></canvas>
      <script type = "text/javascript">
         var canvas = document.getElementById("renderCanvas");
         var engine = new BABYLON.Engine(canvas, true);

         var createScene  = function() {
            var scene = new BABYLON.Scene(engine);
            scene.clearColor = BABYLON.Color3.Gray();
            var camera = new BABYLON.ArcRotateCamera(
               "Camera", -Math.PI / 2, 1.5, 15, BABYLON.Vector3.Zero(), scene);
            camera.attachControl(canvas, false);

            var light1 = new BABYLON.HemisphericLight("light1", new BABYLON.Vector3(0, -1, 0), scene);
            light1.groundColor = new BABYLON.Color3(0.2, 0.2, 0.2);
            light1.intensity = 0.5;

            var bigdiamond = BABYLON.Mesh.CreateSphere("sphere", 32,6, scene);
            bigdiamond.visibility = 0.6;
            var dmat = new BABYLON.StandardMaterial("dmat", scene);
            dmat.diffuseColor = BABYLON.Color3.Blue();

            var texture = new BABYLON.Texture("images/earth.jpg", scene);
            dmat.diffuseTexture = texture;
            dmat.specularColor = BABYLON.Color3.White();
            bigdiamond.material = dmat;

            var lensflare1 = new BABYLON.LensFlareSystem("lensFlareSystem", camera, scene);
            var flare1 = new BABYLON.LensFlare(
               Math.random(), 0.15, new BABYLON.Color3(1, 1, 1), "images/sun1.png", lensflare1);

            var lensflare2 = new BABYLON.LensFlareSystem("lensFlareSystem", camera, scene);
            var flare2 = new BABYLON.LensFlare(
               Math.random()/2, 0.1, new BABYLON.Color3(1, 0, 0), "images/sun1.png", lensflare2);

            var lensflare3 = new BABYLON.LensFlareSystem("lensFlareSystem", camera, scene);
            var flare3 = new BABYLON.LensFlare(
               Math.random()/8, 0.1, new BABYLON.Color3(1, 0, 1), "images/sun1.png", lensflare3);

            var lensflare4 = new BABYLON.LensFlareSystem("lensFlareSystem", camera, scene);
            var flare4 = new BABYLON.LensFlare(
               Math.random()/12, 0.1, new BABYLON.Color3(0, 1, 0), "images/sun1.png", lensflare4);

            scene.registerBeforeRender(function() {
               scene.getCameraByID("Camera").alpha += 0.01;
            });
            return scene;
         };
         var scene = createScene();
         engine.runRenderLoop(function() {
            scene.render();
         });
      </script>
   </body>
</html>
Output
The above line of code generates the following output −
earth.jpg
images/sun1.png
BabylonJS - Create ScreenShot
To capture the screen on which you are presently working, it is not possible to take screenshot with high resolution using the print screen keypress. BabylonJS provides createscreenshot APIwhich helps to do so. It saves the file as png format and the quality of the image is not sacrified.
Syntax
To take screenshot of the screen we need to provide engine, camera and the size as shown below.
BABYLON.Tools.CreateScreenshot(engine, camera, { width: 1024, height: 300 }, function (data) {
   var img = document.createElement("img");
   img.src = data;
   document.body.appendChild(img);
});
A button that calls the screenshot API, when a user clicks it, is put.
Changes are made to the engine which is passed to the screenshot api.
var engine = new BABYLON.Engine(canvas, true, {
   preserveDrawingBuffer: true, stencil: true
});
It requires options like preserveDrawingBuffer and stencil set to true.
Button is added as follows −
ssButton = document.createElement("input");
document.body.appendChild (ssButton);
Click event is added to the button above and the createscreenshot is called. It will update the screenshot at the end of the screen. The data used for image src has the screenshot url created.
Demo
<!doctype html>
<html>
   <head>
      <meta charset = "utf-8">
      <title>BabylonJs - Basic Element-Creating Scene</title>
      <script src = "babylon.js"></script>
      <style>
         canvas {width: 100%; height: 100%;}
      </style>
   </head>

   <body>
      <canvas id = "renderCanvas"></canvas>
      <script type = "text/javascript">
         var canvas = document.getElementById("renderCanvas");
         var engine = new BABYLON.Engine(canvas, true, { preserveDrawingBuffer: true, stencil: true });
         var createScene  = function() {
            var scene = new BABYLON.Scene(engine);

            // Setup environment
            var light = new BABYLON.HemisphericLight("light1", new BABYLON.Vector3(1, 0.5, 0), scene);

            var camera = new BABYLON.ArcRotateCamera("ArcRotateCamera", 1, 0.8, 20, new BABYLON.Vector3(0, 0, 0), scene);
            camera.attachControl(canvas, true);

            var gmat = new BABYLON.StandardMaterial("mat1", scene);
            gmat.alpha = 1.0;

            //gmat.diffuseColor = new BABYLON.Color3(1, 0, 0);
            var texture = new BABYLON.Texture("images/mat.jpg", scene);
            gmat.diffuseTexture = texture;

            var ground = BABYLON.MeshBuilder.CreateGround("ground", {width: 150, height:15}, scene);
            ground.material = gmat;

            var mat = new BABYLON.StandardMaterial("mat1", scene);
            mat.alpha = 1.0;
            mat.diffuseColor = new BABYLON.Color3(1, 0, 0);

            var texture = new BABYLON.Texture("images/rugby.jpg", scene);
            mat.diffuseTexture = texture;

            var sphere = BABYLON.MeshBuilder.CreateSphere("sphere", {diameter: 2, diameterX: 3}, scene);
            sphere.position= new BABYLON.Vector3(15,1,0);
            sphere.material = mat;

            var faceColors = new Array();
            faceColors[1] = new BABYLON.Color4(0,1,0,1);   // green front

            var matcone = new BABYLON.StandardMaterial("mat1", scene);
            matcone.alpha = 1.0;
            matcone.diffuseColor = new BABYLON.Color3(0.9, 0, 2);

            var texture = new BABYLON.Texture("images/cone.jpg", scene);
            matcone.diffuseTexture = texture;

            var cone = BABYLON.MeshBuilder.CreateCylinder("cone", {diameterTop: 0, tessellation: 4}, scene);
            cone.position= new BABYLON.Vector3(12,1,0);
            cone.material = matcone;

            var matplane = new BABYLON.StandardMaterial("matplane", scene);
            matplane.alpha = 1.0;
            matplane.diffuseColor = new BABYLON.Color3(0.9, 0, 2);

            var texture = new BABYLON.Texture("images/board.jpg", scene);
            matplane.diffuseTexture = texture;
            var plane = BABYLON.MeshBuilder.CreatePlane("plane", {width: 5, height : 5}, scene);
            plane.position= new BABYLON.Vector3(9,2.5,0);
            plane.material = matplane;

            var disc = BABYLON.MeshBuilder.CreateDisc("disc", {tessellation: 3}, scene);
            disc.position= new BABYLON.Vector3(5,1,0);

            var mattorus = new BABYLON.StandardMaterial("matoct", scene);
            mattorus.alpha = 1.0;

            var texture = new BABYLON.Texture("images/ring.jpg", scene);
            mattorus.diffuseTexture = texture;

            var torus = BABYLON.MeshBuilder.CreateTorus("torus", {thickness: 0.5}, scene);
            torus.position= new BABYLON.Vector3(3,1,0);
            torus.material = mattorus;

            var matoct = new BABYLON.StandardMaterial("matoct", scene);
            matoct.alpha = 1.0;

            var texture = new BABYLON.Texture("images/d1.png", scene);
            matoct.diffuseTexture = texture;
            var octahedron = BABYLON.MeshBuilder.CreatePolyhedron("oct", {type: 1, size: 3}, scene);

            octahedron.position= new BABYLON.Vector3(-2,5,0);
            octahedron.material = matoct;

            var matico = new BABYLON.StandardMaterial("matico", scene);
            matico.alpha = 1.0;

            var texture = new BABYLON.Texture("images/diamond.jpg", scene);
            matico.diffuseTexture = texture;

            var icosphere = BABYLON.MeshBuilder.CreateIcoSphere("ico", {radius: 5, radiusY: 3, subdivisions: 2}, scene);
            icosphere.position= new BABYLON.Vector3(-13,3,0);
            icosphere.material = matico;

            //add screenshot button
            var ssButton = document.getElementById("takescreenshot");
            if (ssButton == null) {
               ssButton = document.createElement("input");
               document.body.appendChild(ssButton);
            }

            ssButton.id = "takescreenshot";
            ssButton.type = "button";
            ssButton.style.position = "fixed";
            ssButton.style.right = "0px";
            ssButton.style.top = "100px";
            ssButton.value = "create screenshot";

            ssButton.onclick = function () {
               BABYLON.Tools.CreateScreenshot(engine, camera, { width: 1024, height: 300 },
               function (data) {
                  var img = document.createElement("img");
                  img.src = data;
                  document.body.appendChild(img);
               });
            };
            return scene;
         }
         var scene = createScene();
         engine.runRenderLoop(function() {
            scene.render();
         });
      </script>
   </body>
</html>
Output
The above line of code generates the following output −

In this demo, we have used images mat.jpg, rugby.jpg, cone.jpg, board.jpg, ring.jpg, d1.png, diamond.jpg. The images are stored in the images/ folder locally and are also pasted below for reference. You can download any image of your choice and use in the demo link.
Images/mat.jpg
Images/rugby.jpg
Images/cone.jpg
Images/board.jpg
Images/ring.jpg
Images/d1.png
Images/diamond.jpg
BabylonJS - Reflection Probes
Reflection probes are used to create a mirror like scene. This helps in seeing the reflection of the meshes in it. To create a mirror like scene, you need to call the class and the required meshes wherein you want to see reflection. Later, you need to add the meshes to the renderlist as shown below. Consider you have skybox with water surface and you need to show the clouds or tree reflection or the bird flying in the water, you can do so using reflection probe and the meshes created can be added to the renderlist as shown below.
Syntax
var probe = new BABYLON.ReflectionProbe("main", 512, scene);
probe.renderList.push(yellowSphere);
probe.renderList.push(greenSphere);
probe.renderList.push(blueSphere);
probe.renderList.push(mirror);
Demo
<!doctype html>
<html>
   <head>
      <meta charset = "utf-8">
      <title>BabylonJs - Basic Element-Creating Scene</title>
      <script src = "babylon.js"></script>
      <style>
         canvas {width: 100%; height: 100%;}
      </style>
   </head>

   <body>
      <canvas id = "renderCanvas"></canvas>
      <script type = "text/javascript">
         var canvas = document.getElementById("renderCanvas");
         var engine = new BABYLON.Engine(canvas, true);

         var createScene  = function() {
            var scene = new BABYLON.Scene(engine);

            var camera = new BABYLON.ArcRotateCamera("camera1", 0, 0, 10, BABYLON.Vector3.Zero(), scene);

            camera.setPosition(new BABYLON.Vector3(0, 5, -10));
            camera.attachControl(canvas, true);

            camera.upperBetaLimit = Math.PI / 2;
            camera.lowerRadiusLimit = 4;

            var light = new BABYLON.HemisphericLight("light1", new BABYLON.Vector3(0, 1, 0), scene);
            light.intensity = 0.7;

            var knot = BABYLON.Mesh.CreateTorusKnot("knot", 1, 0.4, 128, 64, 2, 3, scene);

            var yellowSphere = BABYLON.Mesh.CreateSphere("yellowSphere", 16, 1.5, scene);
            yellowSphere.setPivotMatrix(BABYLON.Matrix.Translation(3, 0, 0));

            var blueSphere = BABYLON.Mesh.CreateSphere("blueSphere", 16, 1.5, scene);
            blueSphere.setPivotMatrix(BABYLON.Matrix.Translation(-1, 3, 0));

            var greenSphere = BABYLON.Mesh.CreateSphere("greenSphere", 16, 1.5, scene);
            greenSphere.setPivotMatrix(BABYLON.Matrix.Translation(0, 0, 3));

            // Mirror
            var mirror = BABYLON.Mesh.CreateBox("Mirror", 1.0, scene);
            mirror.scaling = new BABYLON.Vector3(100.0, 0.01, 100.0);
            mirror.material = new BABYLON.StandardMaterial("mirror", scene);
            mirror.material.diffuseTexture = new BABYLON.Texture("images/square.jpg", scene);

            mirror.material.diffuseTexture.uScale = 10;
            mirror.material.diffuseTexture.vScale = 10;
            mirror.material.reflectionTexture = new BABYLON.MirrorTexture("mirror", 1024, scene, true);

            mirror.material.reflectionTexture.mirrorPlane = new BABYLON.Plane(0, -1.0, 0, -2.0);
            mirror.material.reflectionTexture.renderList = [greenSphere, yellowSphere, blueSphere, knot];
            mirror.material.reflectionTexture.level = 0.5;
            mirror.position = new BABYLON.Vector3(0, -2, 0);

            // Main material
            var mainMaterial = new BABYLON.StandardMaterial("main", scene);
            knot.material = mainMaterial;

            var probe = new BABYLON.ReflectionProbe("main", 512, scene);
            probe.renderList.push(yellowSphere);
            probe.renderList.push(greenSphere);
            probe.renderList.push(blueSphere);
            probe.renderList.push(mirror);

            mainMaterial.diffuseColor = new BABYLON.Color3(1, 0.5, 0.5);
            mainMaterial.reflectionTexture = probe.cubeTexture;
            mainMaterial.reflectionFresnel<h3>Parameters</h3> = new BABYLON.Fresnel<h3>Parameters</h3>();
            mainMaterial.reflectionFresnel<h3>Parameters</h3>.bias = 0.02;

            // Fog
            scene.fogMode = BABYLON.Scene.FOGMODE_LINEAR;
            scene.fogColor = scene.clearColor;
            scene.fogStart = 20.0;
            scene.fogEnd = 50.0;

            // Animations
            scene.registerBeforeRender(function () {
               yellowSphere.rotation.y += 0.01;
               greenSphere.rotation.y += 0.01;
               blueSphere.rotation.y += 0.01;
            });
            return scene;
         };
         var scene = createScene();
         engine.runRenderLoop(function() {
            scene.render();
         });
      </script>
   </body>
</html>
Output
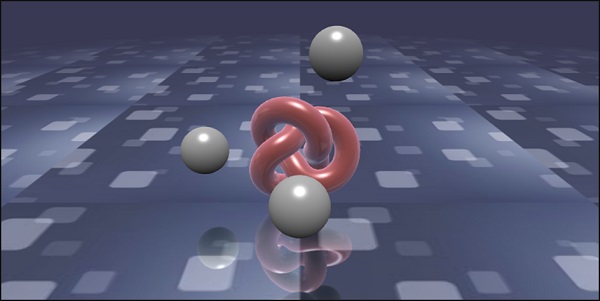
In this demo, we have used image square.jpg. The images are stored in the images/ folder locally and are also pasted below for reference. You can download any image of your choice and use in the demo link.
images/square.jpg

BabylonJS - Standard Rendering Pipeline
StandardRenderingPipeline comes up with a set of postprocess effects which relate to the real world. There are different post process effects such as light effect and illumination effect.
In the example given below, you will see various effects like lens effect, post process effect of lights, etc.
It uses an HDR cube texture and the texture has to be .hdr. This texture gives a panaromic effect which can be seen while you rotate the camera.
var hdrTexture = new BABYLON.HDRCubeTexture("images/GravelPlaza_REF.hdr", scene, 512);
Standard rendering pipeline class is called to get the effect with the following line of code −
// Create rendering pipeline
var pipeline = new BABYLON.StandardRenderingPipeline("standard", scene, 1.0 / devicePixelRatio, null, [camera]);
pipeline.lensTexture = new BABYLON.Texture("images/lensdirt.jpg", scene)
In the demo shown below, we will create the cubetexture environment. We will use ground mesh for the same and apply standard rendering pipeline to the whole scene.
The texture is given to it using lensTexture which is an image and you can see the same texture as you move the scene.
Demo
<!doctype html>
<html>
   <head>
      <meta charset = "utf-8">
      <title>BabylonJs - Basic Element-Creating Scene</title>
      <script src = "babylon.js"></script>
      <style>
         canvas {width: 100%; height: 100%;}
      </style>
   </head>

   <body>
      <canvas id = "renderCanvas"></canvas>
      <script type = "text/javascript">
         var canvas = document.getElementById("renderCanvas");
         var engine = new BABYLON.Engine(canvas, true);

         var createScene  = function() {
            var scene = new BABYLON.Scene(engine);
            var camera = new BABYLON.ArcRotateCamera("Camera", -Math.PI / 4, Math.PI / 2.5, 200, BABYLON.Vector3.Zero(), scene);
            camera.attachControl(canvas, true);
            camera.minZ = 0.1;

            // Light
            new BABYLON.PointLight("point", new BABYLON.Vector3(0, 40, 0), scene);

            // Environment Texture
            var hdrTexture = new BABYLON.HDRCubeTexture("images/GravelPlaza_REF.hdr", scene, 512);

            // Skybox
            var hdrSkybox = BABYLON.Mesh.CreateBox("hdrSkyBox", 1000.0, scene);
            var hdrSkyboxMaterial = new BABYLON.PBRMaterial("skyBox", scene);
            hdrSkyboxMaterial.backFaceCulling = false;
            hdrSkyboxMaterial.reflectionTexture = hdrTexture.clone();
            hdrSkyboxMaterial.reflectionTexture.coordinatesMode = BABYLON.Texture.SKYBOX_MODE;
            hdrSkyboxMaterial.microSurface = 1.0;
            hdrSkyboxMaterial.cameraExposure = 0.6;
            hdrSkyboxMaterial.cameraContrast = 1.6;
            hdrSkyboxMaterial.disableLighting = true;
            hdrSkybox.material = hdrSkyboxMaterial;
            hdrSkybox.infiniteDistance = true;

            // Create mesh
            var woodbox = BABYLON.MeshBuilder.CreateBox("plane", {
               width: 40,
               height: 50,
               depth: 65
            }, scene);

            var wood = new BABYLON.PBRMaterial("wood", scene);
            wood.reflectionTexture = hdrTexture;
            wood.directIntensity = 1.5;
            wood.environmentIntensity = 0.5;
            wood.specularIntensity = 0.3;
            wood.cameraExposure = 0.9;
            wood.cameraContrast = 1.6;

            wood.reflectivityTexture = new BABYLON.Texture("images/reflectivity.png", scene);
            wood.useMicroSurfaceFromReflectivityMapAlpha = true;

            wood.albedoColor = BABYLON.Color3.White();
            wood.albedoTexture = new BABYLON.Texture("images/albedo.png", scene);
            woodbox.material = wood;

            // Create rendering pipeline
            var pipeline = new BABYLON.StandardRenderingPipeline("standard", scene, 1.0 / devicePixelRatio, null, [camera]);
            pipeline.lensTexture = new BABYLON.Texture("images/lensdirt.jpg", scene);

            // Return scene
            return scene;
         };
         var scene = createScene();
         engine.runRenderLoop(function() {
            scene.render();
         });
      </script>
   </body>
</html>
Create images folder and store the .hdr file in it. We have used images/GravelPlaza_REF.hdr from www.hdrlabs.com.
You can downwload .hdr type files of your choice and use in the demo link.
Output
The above line of code will generate the following output −
In this demo, we have used images images/GravelPlaza_REF.hdr, images/reflectivity.png, images/albedo.png, images/lensdirt.jpg. The images are stored in images/ folder locally and are also pasted below for reference. You can download any images of your choice and use in the demo link. Please note it is difficult to paste the .hdr files here as the size of it is very large.
Images/reflectivity.png

Images/albedo.png
Images/lensdirt.png
BabylonJS - ShaderMaterial
Shader material gives you a material as an output. You can apply this material to any mesh. It basically passes the data from your scene to the vertex and fragment shaders.
To get the shader material, the following class is called −
var myShaderMaterial = new BABYLON.ShaderMaterial(name, scene, route, options);
Parameters
Consider the following parameters related to the shader material −
Name − A string, naming the shader.
Scene − The scene in which the shader is to be used.
Route − The route to the shader code in one of the three ways −
object - {
   vertex: "custom",
   fragment: "custom"
}, used with
BABYLON.Effect.ShadersStore["customVertexShader"] and
BABYLON.Effect.ShadersStore["customFragmentShader"]
object - {
   vertexElement: "vertexShaderCode",
   fragmentElement: "fragmentShaderCode"
},
used with shader code in <script> tags
string - "./COMMON_NAME",
The syntax mentioned in the end is used with external files COMMON_NAME.vertex.fx and COMMON_NAME.fragment.fx in the index.html folder.
Options − object containing attributes and uniforms arrays containing their names as strings.
The shader syntax with values look as shown below −
var shaderMaterial = new BABYLON.ShaderMaterial("shader", scene, {
   vertex: "custom",
   fragment: "custom",
},
{
   attributes: ["position", "normal", "uv"],
   uniforms: ["world", "worldView", "worldViewProjection", "view", "projection"]
});
Attributes have to be in array form. These contain position, normal and uv which are vector3 3D floating point vectors.
vec2 − A two-dimensional vector of floating-point numbers.
vec3 − A three-dimensional vector of floating-point numbers.
mat4 − A matrix with 4 columns and 4 rows floating-point numbers.
gl_Position − It provides positional data for screen coordinates.
gl_FragColor − It provides colour data for the representation of a facet on screen.
The above are built in variables in GLSL language.
Since vertex positions need to be as accurate as possible, all floating-point numbers should be set as having high precision. This is done at the start of the code for each shader using precision highp float. The precision highp float determines how much precision is used for a float.
The following demo is based on the first object method.
Demo
<!doctype html>
<html>
   <head>
      <meta charset = "utf-8">
      <title>BabylonJs - Basic Element-Creating Scene</title>
      <script src = "babylon.js"></script>
      <style>
         canvas {width: 100%; height: 100%;}
      </style>
   </head>

   <body>
      <canvas id = "renderCanvas"></canvas>
      <script type = "text/javascript">
         //downloaded HDR files from :http://www.hdrlabs.com/sibl/archive.html
         var canvas = document.getElementById("renderCanvas");
         var engine = new BABYLON.Engine(canvas, true);
         var createScene  = function() {
            var scene = new BABYLON.Scene(engine);

            var camera = new BABYLON.ArcRotateCamera(
               "Camera", Math.PI / 4, Math.PI / 4, 4, BABYLON.Vector3.Zero(), scene);

            camera.attachControl(canvas, true);

            var light = new BABYLON.HemisphericLight("light1", new BABYLON.Vector3(0, 1, 0), scene);

            BABYLON.Effect.ShadersStore["customVertexShader"] = "\r\n" +
               "precision highp float;\r\n" +
               "// Attributes\r\n" +
               "attribute vec3 position;\r\n" +
               "attribute vec2 uv;\r\n" +
               "// Uniforms\r\n" +
               "uniform mat4 worldViewProjection;\r\n" +

               "// Varying\r\n" +
               "varying vec2 vUV;\r\n" +
               "void main(void) {
                  \r\n" +
                  "gl_Position = worldViewProjection * vec4(position, 1.0);\r\n" +
                  "vUV = uv;\r\n"+"
               }
               \r\n";
               BABYLON.Effect.ShadersStore["customFragmentShader"] = "\r\n"+
                  "precision highp float;\r\n" +
                  "varying vec2 vUV;\r\n" +
                  "uniform sampler2D textureSampler;\r\n" +
               "void main(void) {
                  \r\n"+
                  "gl_FragColor = texture2D(textureSampler, vUV);\r\n"+"
               }
               \r\n";

            var shaderMaterial = new BABYLON.ShaderMaterial("shader", scene, {
               vertex: "custom",
               fragment: "custom",
            },

            {
               attributes: ["position", "normal", "uv"],
               uniforms: ["world", "worldView", "worldViewProjection", "view", "projection"]
            });

            var mainTexture = new BABYLON.Texture("images/mat.jpg", scene);

            shaderMaterial.setTexture("textureSampler", mainTexture);

            shaderMaterial.backFaceCulling = false;

            var box = BABYLON.MeshBuilder.CreateBox("box", {}, scene);
            box.material = shaderMaterial;
            return scene;
         };
         var scene = createScene();
         engine.runRenderLoop(function() {
            scene.render();
         });
      </script>
   </body>
</html>
Output
The above line of code will generate the following output −
In this demo, we have used image mat.jpg. The images are stored in the images/ folder locally and are also pasted below for reference. You can download any image of your choice and use in the demo link.
Images/mat.jpg
BabylonJS - Bones and Skeletons
Babylonjs offers APIs to create skeletons and bones.
Syntax
Let us now see the syntax for different functions.
For Skeleton
BABYLON.Skeleton = function (name, id, scene)
For Bone
BABYLON.Bone = function (name, skeleton, parentBone, matrix)
Skeletons and Bones can be created using blender and the same can be exported in .babylonjs.
Demo
<!doctype html>
<html>
   <head>
      <meta charset = "utf-8">
      <title>BabylonJs - Basic Element-Creating Scene</title>
      <script src = "babylon.js"></script>
      <style>
         canvas {width: 100%; height: 100%;}
      </style>
   </head>

   <body>
      <canvas id = "renderCanvas"></canvas>
      <script type = "text/javascript">
         var canvas = document.getElementById("renderCanvas");
         var engine = new BABYLON.Engine(canvas, true);
         var createScene  = function() {
            var scene = new BABYLON.Scene(engine);

            //Adding a light
            var light = new BABYLON.PointLight("Omni", new BABYLON.Vector3(20, 20, 100), scene);

            //Adding an Arc Rotate Camera
            var camera = new BABYLON.ArcRotateCamera("Camera", 0, 0.8, 100, BABYLON.Vector3.Zero(), scene);
            camera.attachControl(canvas, false);

            BABYLON.SceneLoader.ImportMesh(
               "him", "scenes/Dude/", "Dude.babylon", scene, function (newMeshes, particleSystems, skeletons) {
               var dude = newMeshes[0];
               console.log(dude);
               dude.rotation.y = Math.PI;
               dude.position = new BABYLON.Vector3(0, 0, -80);
               scene.beginAnimation(skeletons[0], 0, 100, true, 1.0);
            })
            return scene;
         };
         var scene = createScene();
         engine.runRenderLoop(function() {
            scene.render();
         });
      </script>
   </body>
</html>
In the above demo link, we have used Dude.babylon mesh. You can download the json file for Dude.babylon from here −
Save the file in scenes to get the output as shown below.
Output
The above line of code generates the following output −
Explanation
For the import mesh, we have used babylonjs dude mesh.
The mesh gives us skeletons. For example, skeleton = skeletons[0];
To get bones from the skeletons, execute the following command −
skeleton.bones; //it gives a array.
In the above demo, we created 2 spheres and passed on to the mesh. For this, we executed the following commands −
sphere.attachToBone(skeleton.bones[30], dude);
And,
sphere1.attachToBone(skeleton.bones[40], dude);
attachToBone is a function wherein, you can give any mesh to the bone.
Skeleton.bones[30] and skeleton.bones[40] refers to the hands of the skeleton.
BabylonJS - Physics Engine
Babylon.js has plugin system for Physics engine which helps to add interactions to the scene.It shows the collision and bouncing between 2 objects and makes it more like real life interaction.The demo will show the balls colliding with each other and moving around with the collision and later resting.We notice the same behavior with games like billiards,where the player hits the ball with the stick and the balls collide with the other balls and so on.Here, the Physics Engine tries to give a realistic view of balls colliding and bouncing when they hit the ground surface. The engine has classes and APIthat help in applying apply impulse, force, changing velocity, callback functions to be called whenever required and also when we need to perform certain actions if the meshes collide against other meshes.
There are 3 Physics plugins that can be used −
- Cannon.js
- Oimo.js
- Energy.js
Demo
<!doctype html>
<html>
   <head>
      <meta charset = "utf-8">
      <title>BabylonJs - Ball/Ground Demo</title>
      <script type = "text/javascript" src="https://cdn.babylonjs.com/Oimo.js"></script>
      <script src = "babylon.js"></script>
      <style>
         canvas {width: 100%; height: 100%;}
      </style>
   </head>

   <body>
      <canvas id = "renderCanvas"></canvas>
      <script type = "text/javascript">
         var canvas = document.getElementById("renderCanvas");
         var engine = new BABYLON.Engine(canvas, true);
         var v3 = BABYLON.Vector3;

         var createScene = function () {
            // This creates a basic Babylon Scene object (non-mesh)
            var scene = new BABYLON.Scene(engine);

            var camera = new BABYLON.ArcRotateCamera("Camera", 0.86, 1.37, 250, BABYLON.Vector3.Zero(), scene);

            camera.attachControl(canvas);
            camera.maxZ = 5000;
            camera.lowerRadiusLimit = 120;
            camera.upperRadiusLimit = 430;
            camera.lowerBetaLimit =0.75;
            camera.upperBetaLimit =1.58 ;

            new BABYLON.HemisphericLight("hemi", new BABYLON.Vector3(0, 1, 0), scene);

            var randomNumber = function (min, max) {
               if (min == max) {
                  return (min);
               }
               var random = Math.random();
               return ((random * (max - min)) + min);
            };

            var mat = new BABYLON.StandardMaterial("ground", scene);
            var t = new BABYLON.Texture("images/gr1.jpg", scene);
            t.uScale = t.vScale = 10;
            mat.diffuseTexture = t;
            mat.specularColor = BABYLON.Color3.Black();

            var g = BABYLON.Mesh.CreateBox("ground", 200, scene);

            g.position.y = -20;
            g.position.x = 0
            g.scaling.y = 0.01;
            g.material = mat;

            scene.enablePhysics(new BABYLON.Vector3(0, -10, 0), new BABYLON.OimoJSPlugin());

            g.physicsImpostor = new BABYLON.PhysicsImpostor(g, BABYLON.PhysicsImpostor.BoxImpostor, {
               mass: 0,
               restitution: 0.9
            }, scene);

            var getPosition = function(y) {
               return new v3(randomNumber(-100, 100), y, randomNumber(-100, 100));
            };

            var allspheres = [];
            var y = 50;
            var max = 50;

            for (var index = 0; index < max; index++) {
               var redSphere = BABYLON.Mesh.CreateSphere("s" + index, 32, 8, scene);
               redSphere.position = getPosition(y);
               redSphere.physicsImpostor = new BABYLON.PhysicsImpostor(redSphere, BABYLON.PhysicsImpostor.SphereImpostor,{
                  mass: 1, restitution:0.9
               }, scene);

               redSphere.physicsImpostor.applyImpulse(new BABYLON.Vector3(1, 2, -1), new BABYLON.Vector3(1, 2, 0));

               var redMat = new BABYLON.StandardMaterial("ground", scene);
               redMat.diffuseColor = new BABYLON.Color3(0.4, 0.4, 0.4);
               redMat.specularColor = new BABYLON.Color3(0.4, 0.4, 0.4);
               redMat.emissiveColor = BABYLON.Color3.Red();
               redSphere.material = redMat;

               // push all spheres in the allspheres variable
               allspheres.push(redSphere);
               y += 10; // increment height
            }
            scene.registerBeforeRender(function() {
               allspheres.forEach(function(obj) {
                  // if the sphers falls down its updated again over here
                  // If object falls
                  if (obj.position.y < -100) {
                     obj.position = getPosition(200);
                  }
               });
            })
            return scene;
         };
         var scene = createScene();
         engine.runRenderLoop(function() {
            scene.render();
         });
      </script>
   </body>
</html>
Output
The above line of code generates the following output −
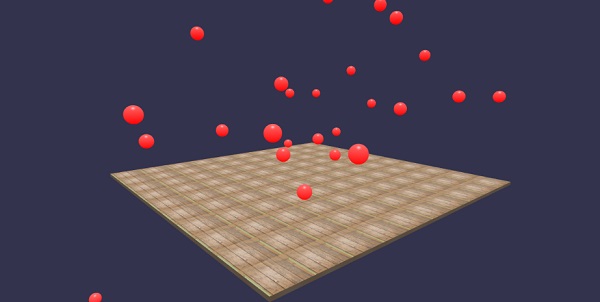
In this demo, we have used image images/gr1.jpg. The images are stored in images/ folder locally and are also pasted below for reference. You can download any image of your choice and use in the demo link.
images/gr1.jpg
Explanation
scene.enablePhysics(new BABYLON.Vector3(0,-10,0), new BABYLON.OimoJSPlugin());
The above line enables the Physics plugin. You can use the plugin of your choice. We have used OimoJsplugin().
g.physicsImpostor = newBABYLON.PhysicsImpostor(g, BABYLON.PhysicsImpostor.BoxImpostor, {
   mass: 0,
   restitution: 0.9
}, scene);
For interaction, Physics engine uses impostor. When applied to impostor, the shape of the object cannot be changed. If changed, a new impostor will have to be created.
For the sphere, we will set the imposter and also added impulse to it for a bounce effect as shown −
redSphere.physicsImpostor = new BABYLON.PhysicsImpostor(
   redSphere, BABYLON.PhysicsImpostor.SphereImpostor, {
      mass: 1,
      restitution:0.9
   }, scene
);

redSphere.physicsImpostor.applyImpulse(
   new BABYLON.Vector3(1, 2, -1),
   new BABYLON.Vector3(1, 2, 0)
);
Parameters for physicsImposter
Consider the following parameters for Physics effects −
Object
Here the object is on which you want to apply the interaction. For example, sphere, box, etc.
Type
Type can be one of the following −
- BABYLON.PhysicsImpostor.SphereImpostor;
- BABYLON.PhysicsImpostor.BoxImpostor;
- BABYLON.PhysicsImpostor.PlaneImpostor;
- BABYLON.PhysicsImpostor.MeshImpostor;
- BABYLON.PhysicsImpostor.CylinderImpostor;
- BABYLON.PhysicsImpostor.ParticleImpostor;
- BABYLON.PhysicsImpostor.HeightmapImpostor;
Mass
The only mandatory parameter is mass, which is the object's mass in kg. A 0 as a value will create a static impostor - good for floors.
Restitution
This is the amount of force the body will "give back" when colliding. A low value will create no bounce and a value of 1 will be a very bouncy interaction.
scene.registerBeforeRender(function() {
   allspheres.forEach(function(obj) {
      // if the sphers falls down its updated again over here
      // If object falls
      if (obj.position.y < -100) {
         obj.position = getPosition(200);
      }
   });
})
The above code brings back the fallen spheres on the ground. It keeps updating the ground for any fallen sphere. Try the above demo in the browser to see the Physics effect.
BabylonJS - Playing Sounds and Music
Without sound and music, a game is incomplete. BabylonJS sound engine comes with an API that helps to add sound effects to the game. When there is a fight seen in the game, you need to get the gunshot firing, the same can be achieved over here with babylonjs sound engine. You can get the sound effect based on the keyboard/mouse controls effect to the games. The sound engine offers ambient sound, specialized sound and directional sound. The engine supports .mp3 and .wav sound formats.
Syntax
var music = new BABYLON.Sound(
   "Music", "sound.wav", scene, null, {
      loop: true,
      autoplay: true
   }
);
Parameters
Consider the following parameters related to the sound engine −
Name − Name of the sound.
URL − url of the sound to be played.
Scene − Scene to which the sound has to be played.
Callbackfunction − The callbackfunction which is called when the sound is ready to be played.At present, it is null. We will go through a few examples and learn how to use it.
Json object − This object has basic details of what needs to be done.
sound.autoplay − With this, the sound plays automatically once the file is downloaded.
loop:true − This means the sound will continuously play in a loop.
Create sound folder in your project directory and download any sample audio file to test the output.
Let us now add sound to the scene that we have already created.
Demo
<!doctype html>
<html>
   <head>
      <meta charset = "utf-8">
      <title>BabylonJs - Basic Scene- Playing sounds and music</title>
      <script src = "babylon.js"></script>
      <style>
         canvas {width: 100%; height: 100%;}
      </style>
   </head>

   <body>
      <canvas id = "renderCanvas"></canvas>
      <script type = "text/javascript">
         var canvas = document.getElementById("renderCanvas");
         var engine = new BABYLON.Engine(canvas, true);
         var createScene  = function() {
            var scene = new BABYLON.Scene(engine);
            scene.clearColor = new BABYLON.Color3(0, 1, 0);

            var camera = new BABYLON.ArcRotateCamera("Camera", 1, 0.8, 10, new BABYLON.Vector3(0, 0, 0), scene);
            camera.attachControl(canvas, true);

            var music = new BABYLON.Sound("sound", "sounds/scooby.wav", scene, null, {
               loop: true,
               autoplay: true
            });
            return scene;
         };
         var scene = createScene();
         engine.runRenderLoop(function() {
            scene.render();
         });
      </script>
   </body>
</html>
Output
The above line of code generates the following output −
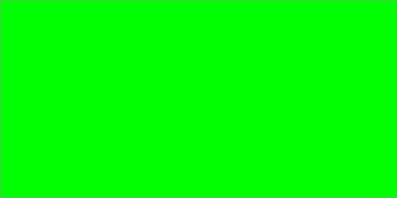
Let us now check how the callback function works. If you do not want the sound to autoplay or you want to play the sound only when you want, you can do so with the callback function.
For example,
Var music = new BABYLON.Sound ("Music", "music.wav", scene, function callback() {music.play();});
Demo
<!doctype html>
<html>
   <head>
      <meta charset = "utf-8">
      <title>BabylonJs - Basic Scene- Playing sounds and music</title>
      <script src = "babylon.js"></script>
      <style>
         canvas {width: 100%; height: 100%;}
      </style>
   </head>

   <body>
      <canvas id = "renderCanvas"></canvas>
      <script type = "text/javascript">
         var canvas = document.getElementById("renderCanvas");
         var engine = new BABYLON.Engine(canvas, true);
         var createScene  = function() {
            var scene = new BABYLON.Scene(engine);
            scene.clearColor = new BABYLON.Color3(0, 1, 0);

            var camera = new BABYLON.ArcRotateCamera("Camera", 1, 0.8, 10, new BABYLON.Vector3(0, 0, 0), scene);
            camera.attachControl(canvas, true)

            var music = new BABYLON.Sound(
               "sound", "sounds/scooby.wav", scene, function callback() { setTimeout(function() {music.play();}, 5000)});
            return scene;
         };
         var scene = createScene();
         engine.runRenderLoop(function() {
            scene.render();
         });
      </script>
   </body>
</html>
In the callback,we will use setTimeout. This means, we want the sound to be played only after a specific time. We have added 5s as a timer to it, so the sound will play when the files Scooby.wav is downloaded and 5s complete.
Play sounds with clicks and keys on the keyboard
Upon clicking anywhere on the scene, you will hear explosive sound effect and if you press any of the arrow keys -left, right, up or down, it will play the explosive sound effect.
For click, we are attaching the event onmousedown to the window and for keys, we will use the keydown event. Based on keycode, the sound is played.
Demo
<!doctype html>
<html>
   <head>
      <meta charset = "utf-8">
      <title>BabylonJs - Basic Scene- Playing sounds and music</title>
      <script src = "babylon.js"></script>
      <style>
         canvas {width: 100%; height: 100%;}
      </style>
   </head>

   <body>
      <canvas id = "renderCanvas"></canvas>
      <script type = "text/javascript">
         var canvas = document.getElementById("renderCanvas");
         var engine = new BABYLON.Engine(canvas, true);
         var createScene  = function() {
            var scene = new BABYLON.Scene(engine);
            scene.clearColor = new BABYLON.Color3(0, 1, 0);

            var camera = new BABYLON.ArcRotateCamera("Camera", 1, 0.8, 10, new BABYLON.Vector3(0, 0, 0), scene);
            camera.attachControl(canvas, true)

            var sound = new BABYLON.Sound("gunshot", "sounds/explosion.wav", scene);

            window.addEventListener("mousedown", function (evt) {
               if (evt.button === 0) { // onclick
                  sound.play();
               }
            });

            window.addEventListener("keydown", function (evt) { // arrow key left right up down
               if (evt.keyCode === 37 || evt.keyCode === 38 || evt.keyCode === 39 || evt.keyCode === 40) {
                  sound.play();
               }
            });
            return scene;
         };
         var scene = createScene();
         engine.runRenderLoop(function() {
            scene.render();
         });
      </script>
   </body>
</html>
Output
The above line of code will generate the following output −
You can control the volume of the sound in the json object, which we encountered in the beginning.
For example,
Var music = new BABYLON.Sound("sound", "sounds/scooby.wav", scene, null, {
   loop: true,
   autoplay: true,
   volume:0.5
});
To know when a sound file has finished, there is an event which can be used as follows −
music.onended = function () {
   console.log("sound ended");

   //you can do the required stuff here like play it again or play some other sound etc.
};
The SetVolume property is also available in case you want to control the sound besides the constructor.
For example,
music.setVolume(volume);
If you are playing more than one sound in your scene, you can set a global sound for all the sounds created.
For example,
BABYLON.Engine.audioEngine.setGlobalVolume(0.5);
Creating a Spatial 3D Sound
If you want to convert the sound to spatial sound (sound similar to space sound), you need to add options to your sound constructor.
For example,
var music = new BABYLON.Sound("music", "sounds/explosion.wav", scene, null, {
   loop: false,
   autoplay: true,
   spatialSound: true
});
Following are the different options for spatial sound −
DistanceModel − It is using a linear equation by default. Other options are inverse or exponential.
MaxDistance − It is set to 100. This means that once the listener is farther than 100 units from the sound, the volume will be 0. You cant hear the sound anymore
PanningModel − It is set to HRTF. The specification says it isa higher quality spatialization algorithm using a convolution with measured impulse responses from human subjects. It refers to the stereo output.
MaxDistance − It is used only when distanceModel is linear.It is not used with inverse or exponential.
Demo with spatial sound
<!doctype html>
<html>
   <head>
      <meta charset = "utf-8">
      <title>BabylonJs - Basic Scene- Playing sounds and music</title>
      <script src = "babylon.js"></script>
      <style>
         canvas {width: 100%; height: 100%;}
      </style>
   </head>

   <body>
      <canvas id = "renderCanvas"></canvas>
      <script type = "text/javascript">
         var canvas = document.getElementById("renderCanvas");
         var engine = new BABYLON.Engine(canvas, true);
         var createScene  = function() {
            var scene = new BABYLON.Scene(engine);
            scene.clearColor = new BABYLON.Color3(0, 1, 0);

            var camera = new BABYLON.ArcRotateCamera("Camera", 1, 0.8, 10, new BABYLON.Vector3(0, 0, 0), scene);
            camera.attachControl(canvas, true);

            var music = new BABYLON.Sound(
               "music", "sounds/explosion.wav", scene, null, {
                  loop: false, autoplay: true, spatialSound: true, distanceModel: "exponential"
               }
            );
            return scene;
         };
         var scene = createScene();
         engine.runRenderLoop(function() {
            scene.render();
         });
      </script>
   </body>
</html>
Attaching sound to a mesh
Using BABYLON.Sound, you can attach sound to your mesh. If the mesh is moving, the sound will move along with it. AttachtoMesh (mesh) is the method to be used.
Demo
<!doctype html>
<html>
   <head>
      <meta charset = "utf-8">
      <title>BabylonJs - Basic Scene- Playing sounds and music</title>
      <script src = "babylon.js"></script>
      <style>
         canvas {width: 100%; height: 100%;}
      </style>
   </head>

   <body>
      <canvas id = "renderCanvas"></canvas>
      <script type = "text/javascript">
         var canvas = document.getElementById("renderCanvas");
         var engine = new BABYLON.Engine(canvas, true);
         var createScene  = function() {
            var scene = new BABYLON.Scene(engine);
            scene.clearColor = new BABYLON.Color3(0, 1, 0);

            var camera = new BABYLON.ArcRotateCamera("Camera", 1, 0.8, 10, new BABYLON.Vector3(0, 0, 0), scene);
            camera.attachControl(canvas, true);

            var materialforbox = new BABYLON.StandardMaterial("texture1", scene);
            var box = BABYLON.Mesh.CreateBox("box", '2', scene);
            box.material  = materialforbox;
            materialforbox.ambientColor = new BABYLON.Color3(1, 0, 0.2);

            var music = new BABYLON.Sound("music", "sounds/explosion.wav", scene, null, {
               loop: false,
               autoplay: true,
               spatialSound: true,
               distanceModel: "exponential"
            });
            music.attachToMesh(box);
            return scene;
         };
         var scene = createScene();
         engine.runRenderLoop(function() {
            scene.render();
         });
      </script>
   </body>
</html>
Output
The above line of code generates the following output −