- SAP C4C - Home
- SAP C4C - Introduction
- SAP C4C - Architecture
- SAP C4C - Public vs Private
- SAP C4C - User Interface
- SAP C4C - Work Centers
- Project Implementation & Scoping
- SAP C4C - Fine-Tuning
- Organizational Management
- SAP C4C - Personalization
- SAP C4C - Adaptation
- SAP C4C - Reporting
- SAP C4C - Creating a Custom Report
- SAP C4C - Data Sources
- SAP C4C - Service Level
- SAP C4C - Service Category
- SAP C4C - User Management
- SAP C4C - Business Roles
- SAP C4C - Work Distribution
- SAP C4C - Social
- Data Migration & Workflow
- SAP C4C - Pricing
- SAP C4C - Sales Cycle
- SAP C4C - Retail
- Integration with CRM & ERP
- SAP C4C - Integration with Outlook
- SAP C4C - Mobile
- SAP C4C - Mashups
- SAP C4C - Questions and Answers
- SAP C4C - Quick Guide
- SAP C4C - Useful Resources
- SAP C4C - Discussion
SAP C4C - Service Level
In SAP Cloud for Customer, service level defines the time when a ticket for a customer must be responded and completed. Service levels help the organizations define objectives for handling customer messages. Using these, you can measure the performance and the quality of your customer service.
Service levels also help to define new rules as per the ticket category and description whenever a new customer message comes in the C4C system. Using service levels, a system can determine the service level based on those rules, and then based on that service level, the initial response and completion due time points are calculated.
Create a Service Level
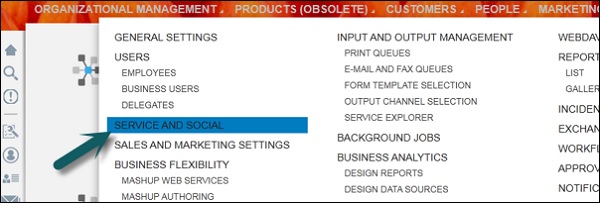
Step 1
To define Service Levels, go to Administrator → Service and Social.
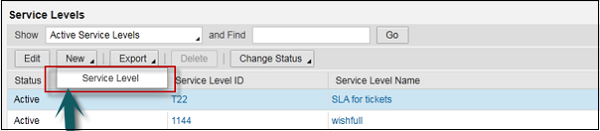
Step 2
Click Service Level in the next window that opens.

Step 3
Click New and select Service Level.
A new window will open.
Step 4
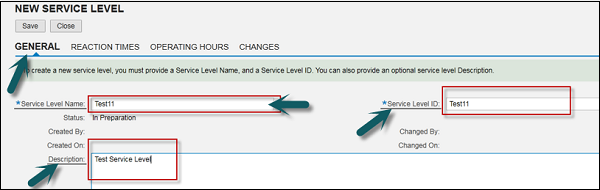
Click the General tab. Enter the Service level Name, Service Level ID and Description.
To create a new service level, you must provide a Service Level Name, and a Service Level ID. You can also provide an optional service level Description.
Step 5
Navigate to the next tab Reaction Times. In this section, you define the time when service agent responds to the ticket.
This time depends on SLAs (Service Level Agreement) signed with the customer and also with ticket priority and type of customer.
Example − High priority ticket will have low response time or high-end customers have low response time. It means, ticket related to these customers will respond fast as compared to other ticket.
To create a milestone, click Add Row and choose the type of milestone. Select Alert When Overdue if you want the system to send an automatic alert to the responsible person when the target milestone-time point is exceeded.
Click Add Row. Select the milestone as per business requirement and click Alert When Overdue.
When you select this option, the system will send an alert to the service agent. Select the required milestones.
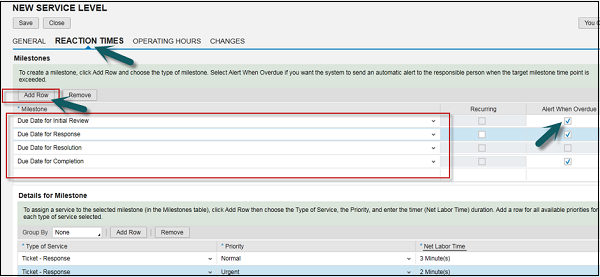
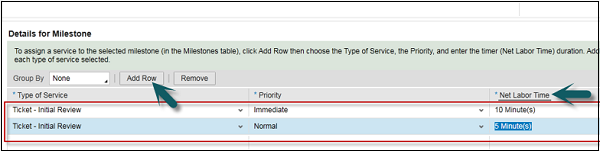
To enter the reaction time for all milestones, go to Details for milestone → Add Row. Repeat this process for all the above milestones. Select the milestones one by one and then enter the reaction time for these milestones.
To assign a service to the selected milestone (in the Milestones table) click Add Row. Choose the Type of Service, the Priority, and enter the timer (Net Labor Time) duration. Add a row for all the available priorities for each type of service selected.
Step 6
Navigate to Operating Hours tab. Operation hour is the working hour of the service agent, i.e., from what time to what time an agent is available.
Select the working day calendar. Enter the days of week of working of a service agent. Click Add Row and then select the checkboxes for the required days of week. Enter the time ranges.
Click Add Row and enter the start time and the end time of the working hours of the service agent.

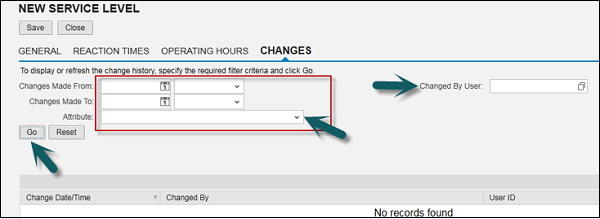
Step 7
Navigate to the Changes tab. You can see all the changes that you made in the SLA over the time. Select different available criteria and click Go.
To display or refresh the change history, specify the required filter criteria and click Go.