- AJAX Tutorial
- AJAX - Home
- AJAX - What is AJAX?
- AJAX - History
- AJAX - Dynamic Versus Static Sites
- AJAX - Technologies
- AJAX - Action
- AJAX - XMLHttpRequest
- AJAX - Sending Request
- AJAX - Types of requests
- AJAX - Handling Responses
- AJAX - Handling Binary Data
- AJAX - Submitting Forms
- AJAX - File Uploading
- AJAX - FormData Object
- AJAX - Send POST Requests
- AJAX - Send PUT Requests
- AJAX - Send JSON Data
- AJAX - Send Data Objects
- AJAX - Monitoring Progress
- AJAX - Status Codes
- AJAX - Applications
- AJAX - Browser Compatibility
- AJAX - Examples
- AJAX - Browser Support
- AJAX - XMLHttpRequest
- AJAX - Database Operations
- AJAX - Security
- AJAX - Issues
- Fetch API Basics
- Fetch API - Basics
- Fetch API Vs XMLHttpRequest
- Fetch API - Browser Compatibility
- Fetch API - Headers
- Fetch API - Request
- Fetch API - Response
- Fetch API - Body Data
- Fetch API - Credentials
- Fetch API - Send GET Requests
- Fetch API - Send POST Requests
- Fetch API - Send PUT Requests
- Fetch API - Send JSON Data
- Fetch API - Send Data Objects
- Fetch API - Custom Request Object
- Fetch API - Uploading Files
- Fetch API - Handling Binary Data
- Fetch API - Status Codes
- Stream API Basics
- Stream API - Basics
- Stream API - Readable Streams
- Stream API - Writeable Streams
- Stream API - Transform Streams
- Stream API - Request Object
- Stream API - Response Body
- Stream API - Error Handling
- AJAX Useful Resources
- AJAX - Quick Guide
- AJAX - Useful Resources
- AJAX - Discussion
Fetch API - Custom Request Object
In Fetch API, we can also create a custom Request object with the help Request() constructor of the Request interface. The Request interface provides us with more control and flexibility over the HTTP request. It provides various options like URL, method, body, headers, etc. which help us to create the customized HTTP request. Before creating a custom request object we first understand the Request() constructor using which we can able to create a Request object.
Request() Constructor
To create a request object we can use Request() constructor along with a new keyword. This constructor contains one mandatory parameter which is the URL of the resource and the other parameter is optional.
Syntax
const newRequest = New Request(resourceURL)
Or
const newRequest = New Request(resourceURL, optional)
The Request() constructor has the following parameters −
resourceURL − It represents the resource which we want to fetch. It can be a URL of the resource or the Request object.
Options − It is an object which is used to provide customized settings which we want to apply on the request and the options are −
method − It represents the request method such as GET, POST, PUT and DELETE.
headers − It is used to add a header to your request.
body − It is used to add data to your request. It is not used by GET or HEAD methods.
mode − It represents the mode which you want to use for the request. The value of this parameter can be cors, same-origin, no-cors or navigate. By default the value of the mode parameter is cors.
credentials − It represents the credentials which you want to use for the request. The default value of this parameter is same-origin but you can also use values like omit, same-origin, or include according to your need.
cache − It represents the cache mode you want for your request.
redirect − It is used for redirect mode. The value of this parameter can be: follow, error, or manual. By default is parameter is set for follow value.
referrer − It represents a string which specifies the referrer of the request. The possible values of this parameter are client, URL, or no-referrer. The default value of this parameter is about the client.
referrerPolicy − It is used to specify the referrer policy.
integrity − It is used to represent the subresource integrity value of the given request.
keepalive − It contains a boolean value to determine whether to create a persistent connection for the multiple requests/response or not.
signal − It contains an AbortSignal object which is used to communicate with or abort a request.
priority − It is used to specify the priority of the request as compared to other requests. This parameter can have any one of the following values −
high − If we want to set the priority of the current fetch request to high as compared to others.
low − If we want to set the priority of the current fetch request to low as compared to others.
auto − To automatically find the priority of the current fetch request as compared to others.
Custom Request object
To create a custom request object we need to follow the following steps −
Step 1 − Customize the Request option
optional ={
   method: "POST",
   headers: {"Content-Type": "application/json"},
   body = {
      Name: "Tom",
   Age: 23}
};
Step 2 − Create a custom request object using the Request() constructor.
const newRequest = new Request(resourceURL, optional
Step 3 − Fetch the request object using the fetch() function.
fetch(newRequest)
.then(response =>{
   // Handling the response
}).catch(err => {
   // Handle error
})
Example
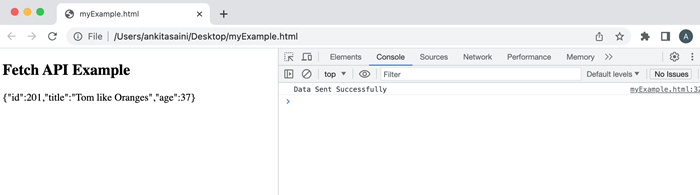
In the following program, we create a script to send data using the custom Request object. So for that, we create a custom request object using the Request() constructor which takes two parameters: the URL(resource URL) and optional. Where the optional parameter contains the customized setting for the request and they are −
method − Here we use the POST method which represents that we are sending data to the server.
body − Contains the data which we want to send.
headers − It tells that the data is JSON data.
Now we pass the request object in the fetch() function to send the request and handle the response returned by the server and handle the error if it occurs.
<!DOCTYPE html>
<html>
<body>
<script>
   // Customize setting of the request
   const optional = {
      // Setting POST request
      method: "POST",

      // Add body which contains data
      body: JSON.stringify({
         id: 311,
         title: "Tom like Oranges",
         age: 37
      }),
      // Setting header
      headers:{"Content-type": "application/json; charset=UTF-8"}
   };
   // Creating request object
   const newRequest = new Request("https://jsonplaceholder.typicode.com/todos", optional);

   fetch(newRequest)

   // Handling response
   .then(response => response.json())
   .then(returnData => {
      console.log("Data Sent Successfully");

      // Display output
      document.getElementById("sendData").innerHTML = JSON.stringify(returnData);
   })
   // Handling error
   .catch(err=>{
      console.error("We get an error:", err);
   });
</script>
   <h2>Fetch API Example</h2>
   <div>
      <!-- Displaying retrieved data-->
      <p id="sendData"></p>
   </div>
</body>
</html>
Output
Conclusion
So this is how we can create a custom request object with the help of the Request interface. This interface provides various properties and methods to modify the request body according to our needs. Now in the next article, we will learn how to upload files using fetch API.